Colaboración
ARTE
BELLEZA Y BIENESTAR
ARTESANÍA
CULTURA E HISTORIA
ENTRETENIMIENTO
MEDIO AMBIENTE
COMIDA Y BEBIDAS
INGENIERÍA INVERSA
CIENCIAS
DEPORTES
TECNOLOGÍA
TECNOLOGÍA VESTIBLE
Interlocked-Blade Dasher Churn: Each Blade's Round Shank Is Bored Through by the Next, So They Key Each Other in the Hub
Buttercup

Creado por

Buttercup

11. noviembre 2026IE
0
0
0
0
0

Interlocked-Blade Dasher Churn: Each Blade's Round Shank Is Bored Through by the Next, So They Key Each Other in the Hub

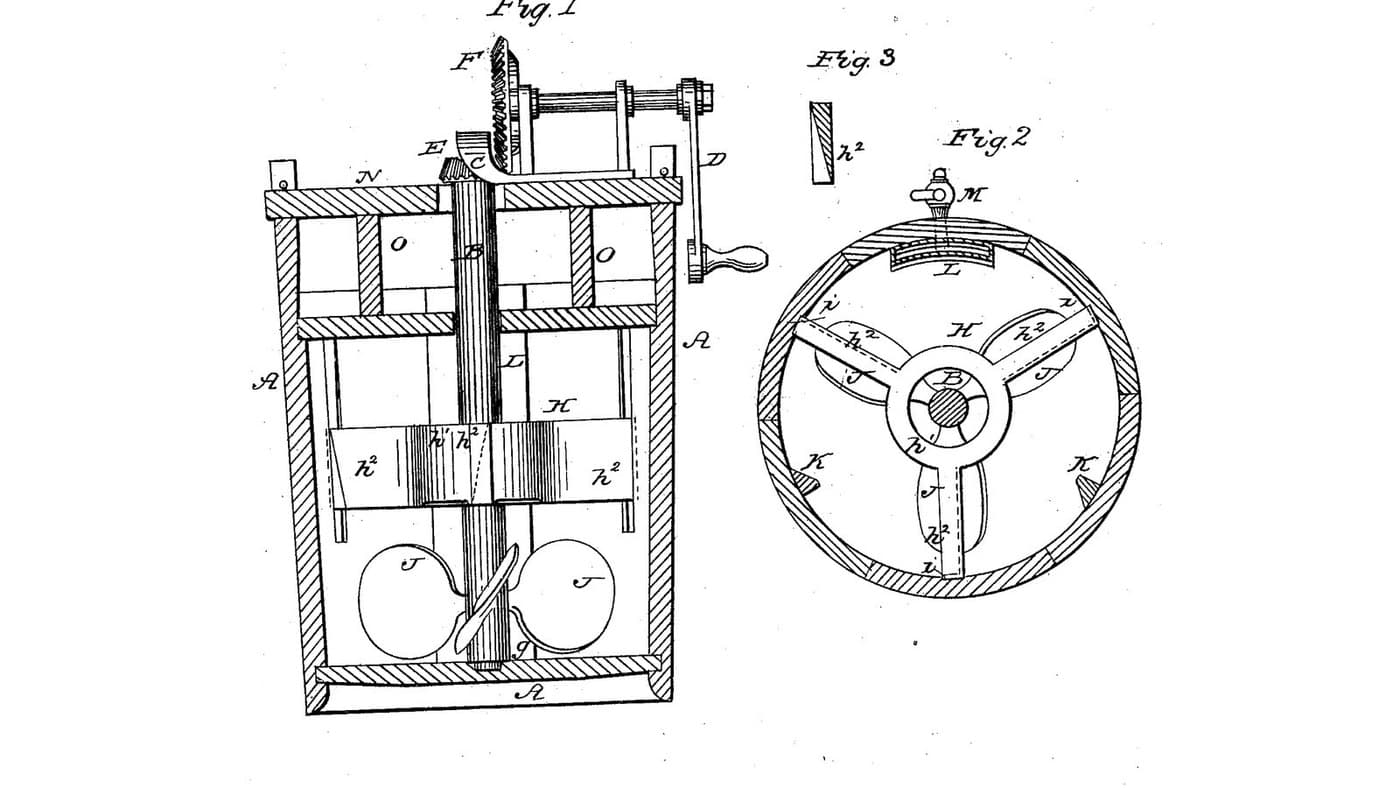
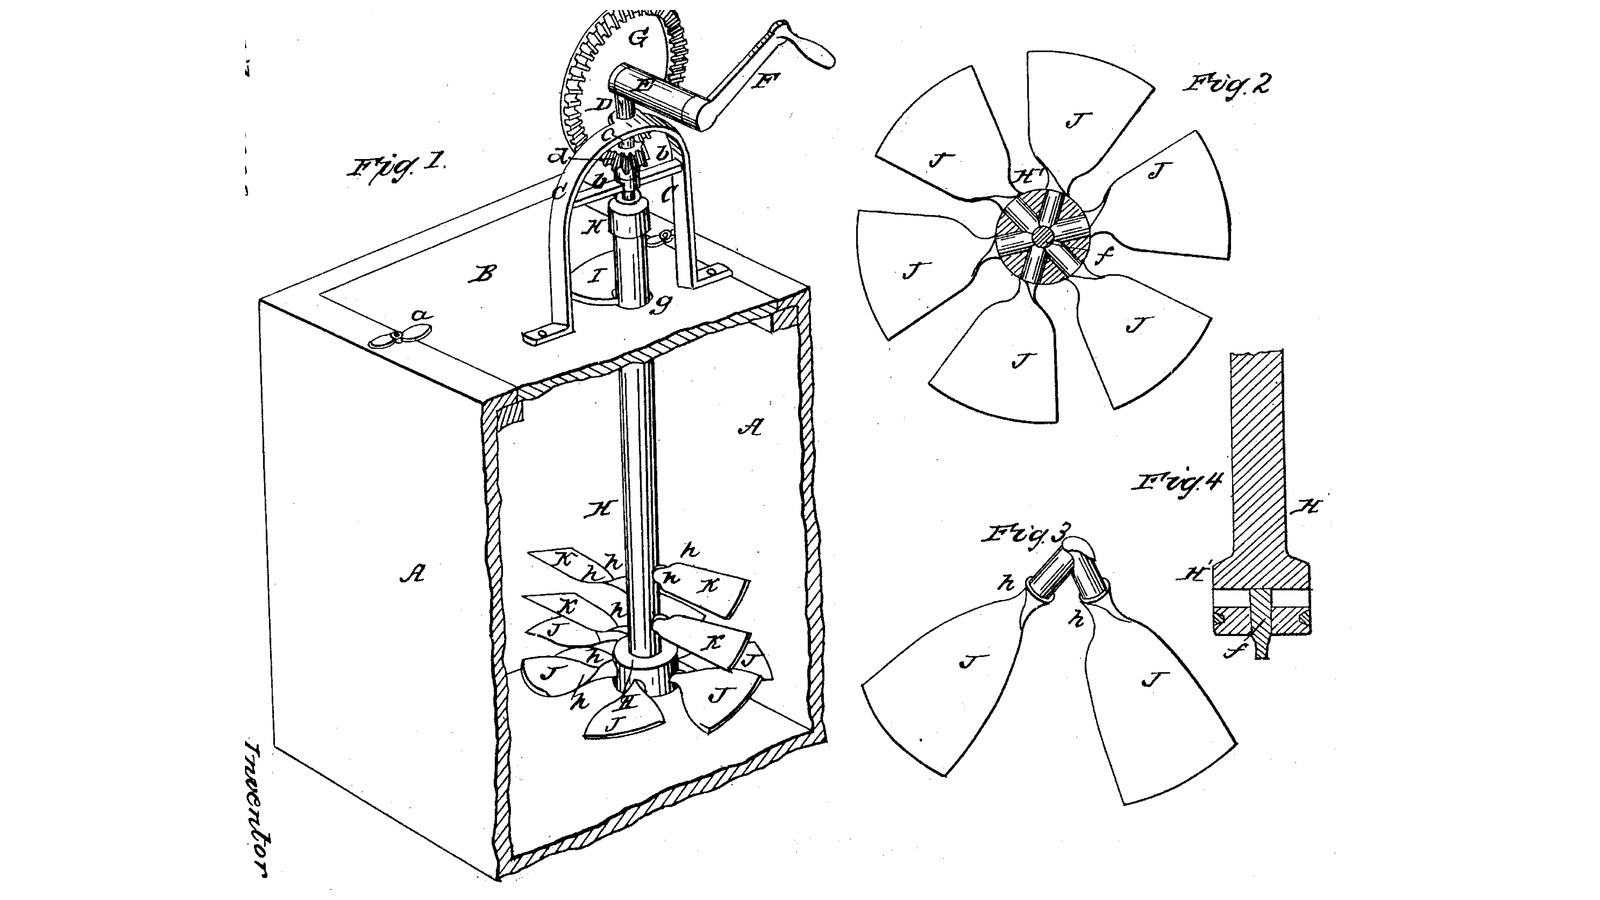
Salem T. Lamb of New Washington, Indiana, received US 30,411, dated 16 October 1860, for fastening the blades of a churn dasher so they never work loose. Each lower blade has a round shank driven into a hole bored to the middle of the hub; boring the next hole cuts the end of the last shank, so every shank keys the one before, and a spindle up the middle locks the set. The dasher turns by a crank and bevel gear on a bracket on the lid, its sloping blades pressing the cream down, and it lifts out through a large opening for cleaning. The patent gives no sizes; every size here is ours.
Intermedio
About 3 days

Instrucciones

1

Where the shanks lock

Cargando el cuaderno de Jupyter…
2

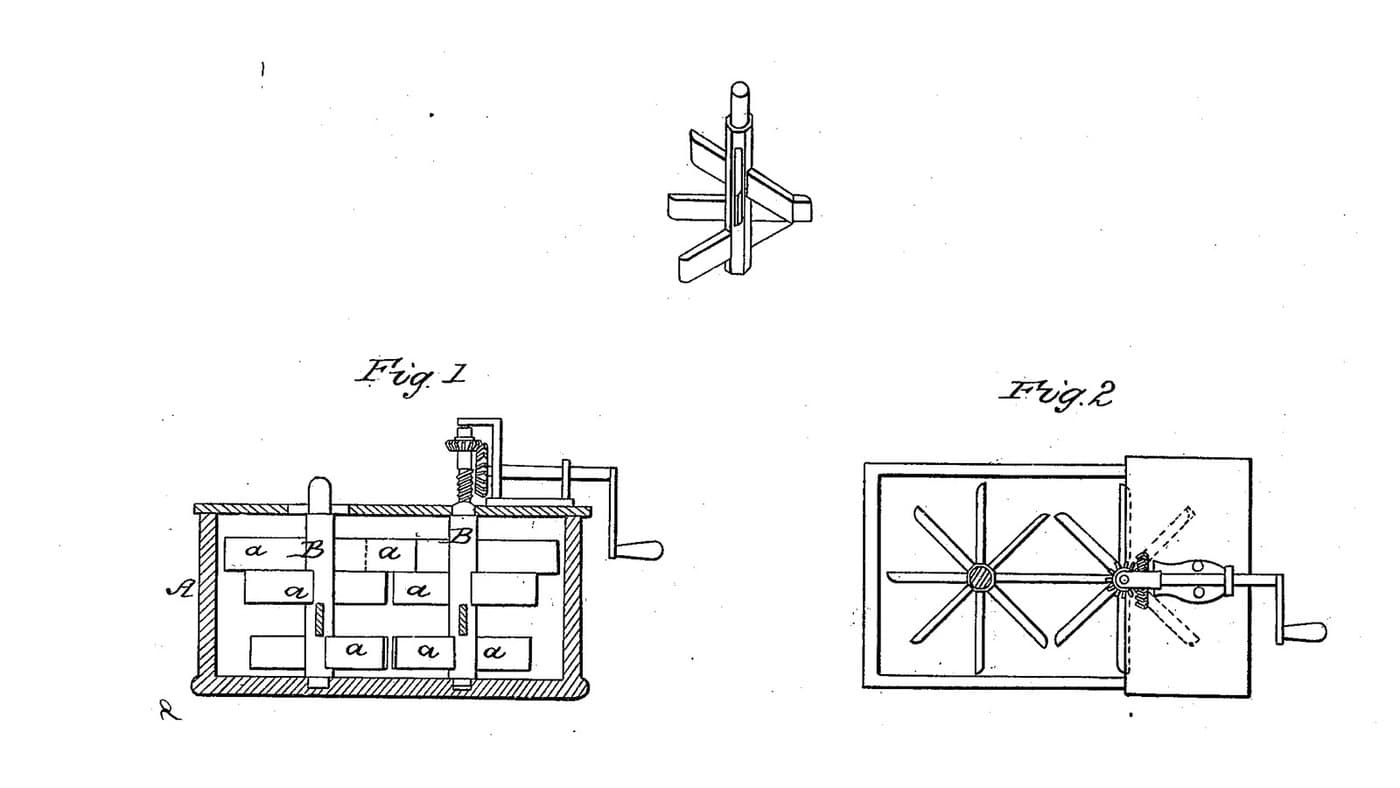
Sloping blades that drive the cream down, six months before

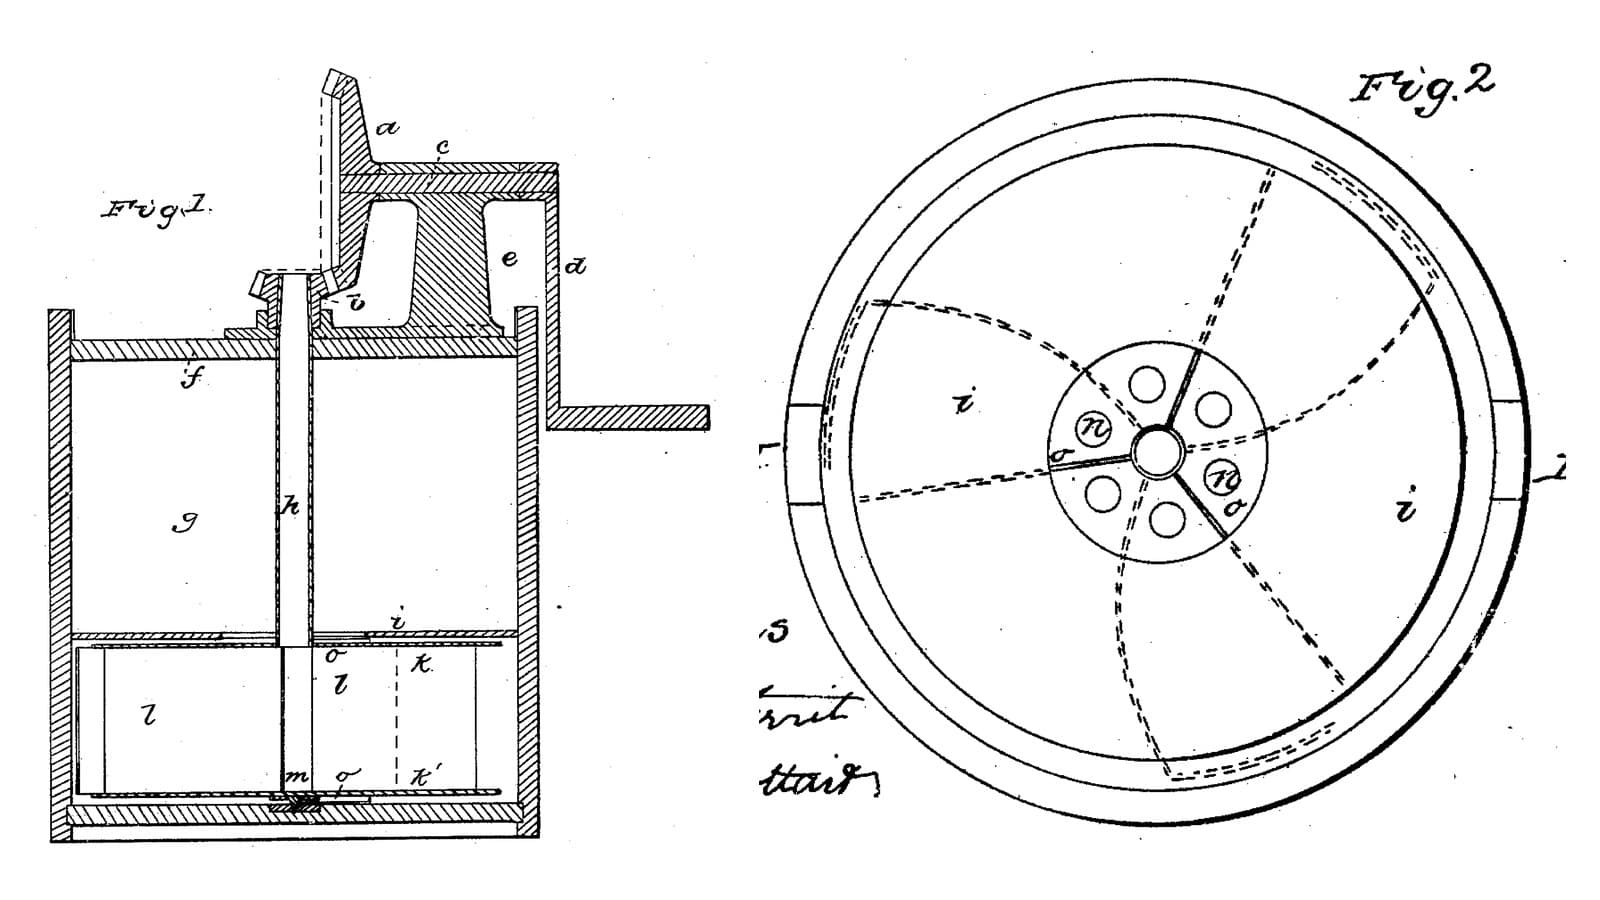
Lynch's propeller dasher also drives the cream down. Lamb's answer is how to keep such blades tight.
3

Read US 30,411

"Another radial hole is then bored for the next adjacent blade, the boring tool passing through or cutting off the end of the first shank. The second blade with the same preparation as the first one is then driven in or united, its shank fitting against and overlapping the first driven one, so as to answer as a key to it, to prevent it from turning or becoming loose."
4

Box A, lid B, cover I and buttons a

Glue up hardwood for a box A 300 x 300 mm inside and 420 deep, sides 22 mm, joints sealed with silicone sealant. Rout a seat round the top for a 22 mm lid B. Cut an opening in the lid 120 mm wide running from 30 mm behind its centre to 140 mm in front; fit a cover I to it with a 22 mm hole at the centre for the shaft c and a slot from that hole to the cover's back edge, so it can be lifted off past the shaft. Turn two hardwood buttons a on screws at the lid's edge to hold it down.

Materiales para este paso:

Tabla de madera duraTabla de madera dura4 piezas
Cola de carpinteroCola de carpintero1 pieza
Sellador de siliconaSellador de silicona1 pieza
Tornillos para maderaTornillos para madera24 piezas

Herramientas necesarias:

Sierra de mesaSierra de mesa
Sierra de calarSierra de calar
Fresadora de manoFresadora de mano
Juego de formones para maderaJuego de formones para madera
Juego de brocas de palaJuego de brocas de pala
Taladro inalámbricoTaladro inalámbrico
Juego de brocasJuego de brocas
SargentoSargento
Juego de destornilladoresJuego de destornilladores
Cinta métricaCinta métrica
5

Staff H, hub and band

Turn a hardwood staff 40 mm across and 375 mm long, with a hub H 76 mm across for its bottom 80 mm, and the top 15 mm turned to 28 mm for the cap. Turn a groove near the hub's foot and press on a ring cut from a stainless tube as the band, so the hub cannot split when it dries. Bore a 10.2 mm hole up the middle of the hub from below, 50 mm deep, for the spindle f.

Materiales para este paso:

Tabla de madera duraTabla de madera dura2 piezas
Cola de carpinteroCola de carpintero1 pieza
Tubo de acero inoxidableTubo de acero inoxidable1 pieza

Herramientas necesarias:

Torno de maderaTorno de madera
Taladro inalámbricoTaladro inalámbrico
Juego de brocasJuego de brocas
Sierra para metalesSierra para metales
Limas (lima de mano)Limas (lima de mano)
6

Blades J and K

Carve six lower blades J from hardwood 8 mm thick: 26 mm wide at the neck widening to 100 mm at the tip, reaching 135 mm from the staff's centre, slightly hollowed on top, each on a round shank 20 mm across and 52 mm long, so it reaches the centre, with a small shoulder i, the blade's twist running out along the neck into the shank as the spiral lines h. Carve six upper blades K the same way, 16 to 60 mm wide, reaching 125 mm, on 14 mm shanks 34 mm long.

Materiales para este paso:

Tabla de madera duraTabla de madera dura1 pieza

Herramientas necesarias:

Sierra de mesaSierra de mesa
Sierra de calarSierra de calar
Juego de gubias de tallaJuego de gubias de talla
Juego de formones para maderaJuego de formones para madera
Torno de maderaTorno de madera
Limas (lima de mano)Limas (lima de mano)
7

Lock the lower shanks

Bore a 20 mm radial hole level into the hub, 40 mm above its foot, to just past the centre. Coat the first J shank near its shoulder with food-safe silicone sealant (the patent used white lead or other cement) and drive it in with the blade sloped 30 degrees. Bore the next hole 60 degrees round, cutting off the end of the first shank, and drive the next blade so its shank overlaps the first. Go on round all six, each keying the last, every blade sloped the same way. Drive a 10 mm stainless rod 60 mm long up the centre hole through the shanks as the spindle f, leaving 14 mm below the hub.

Materiales para este paso:

Sellador de siliconaSellador de silicona1 pieza
Varilla de acero inoxidableVarilla de acero inoxidable1 pieza

Herramientas necesarias:

Taladro inalámbricoTaladro inalámbrico
Juego de brocas de palaJuego de brocas de pala
Juego de brocasJuego de brocas
Sierra para metalesSierra para metales
8

Set the upper blades

Bore three 14 mm radial holes 120 degrees apart into the staff 180 mm above the hub's foot and three more 210 mm up, turned 60 degrees, so the upper blades break spaces with each other and with the lower. Set the K blades in them with sealant, sloped the same way as the J blades.

Materiales para este paso:

Sellador de siliconaSellador de silicona1 pieza

Herramientas necesarias:

Taladro inalámbricoTaladro inalámbrico
Juego de brocas de palaJuego de brocas de pala
9

Print the step

The step on the box's bottom: 60 mm across, 15 high, with a 10.6 mm hole 9 deep for the spindle f. PETG, 0.2 mm layers, 30 % infill, 4 walls.
Archivo de DisenoSTLCC0 - Free
10

Print the staff cap

The cap glued on the staff's top: 40 mm across, 30 high, a 28 mm socket 15 deep below and a 12.2 mm square socket above for the foot of shaft c. PETG, 0.2 mm layers, 30 % infill, 4 walls.
Archivo de DisenoSTLCC0 - Free
11

Print the crown wheel G

The driving wheel G on the crank shaft: a crown wheel of 42 teeth, module 2.5, 16.2 mm bore. PETG, 0.2 mm layers, 30 % infill, 4 walls.
Archivo de DisenoSTLCC0 - Free
12

Print the pinion d

The pinion d on shaft c: 14 teeth, module 2.5, 16.2 mm bore. PETG, 0.2 mm layers, 30 % infill, 4 walls.
Archivo de DisenoSTLCC0 - Free
13

Bracket C, shaft c, gears and crank F

Screw two hardwood posts 40 x 40 mm, 200 mm tall, to the lid either side of the opening, 160 mm apart over their inside faces; join them with a cross brace b 60 mm up and a top bar at the top, both bored 16.6 mm over the staff. Cut a 16 mm stainless shaft c 283 mm long, file its foot 12 mm square for 14 mm, and run it down through the bar and brace with the pinion d pinned on it above the bar. Screw two hardwood blocks 50 x 25 x 100 mm on the bar either side of the pinion as the sleeve E, bored 16.6 mm across 75 mm above the bar; run a 16 mm stainless crank shaft 180 mm long through them with the crown wheel G pinned on it meshing d, a shaft collar, and a crank F of mild steel flat bar, 100 mm throw, with a hardwood handle.

Materiales para este paso:

Tabla de madera duraTabla de madera dura1 pieza
Varilla de acero inoxidableVarilla de acero inoxidable1 pieza
Shaft CollarShaft Collar1 pieza
Pasador de aletasPasador de aletas3 piezas
Pletina de acero dulcePletina de acero dulce1 pieza
Espigas de madera duraEspigas de madera dura1 pieza
Cola de carpinteroCola de carpintero1 pieza
Tornillos para maderaTornillos para madera12 piezas
Filamento PETGFilamento PETG1 pieza

Herramientas necesarias:

Impresora 3D de filamento (FDM)Impresora 3D de filamento (FDM)
Sierra de mesaSierra de mesa
Taladro inalámbricoTaladro inalámbrico
Juego de brocasJuego de brocas
Sierra para metalesSierra para metales
Limas (lima de mano)Limas (lima de mano)
Tornillo de bancoTornillo de banco
SargentoSargento
Juego de destornilladoresJuego de destornilladores
14

The build in 3D

FreeCAD model of this build, the box cut open: the step, the staff with its banded hub, the six lower blades on interlocked shanks and the six upper blades, the lid with its opening and cover, and the bracket with shaft c, pinion, crown wheel and crank.
Archivo de DisenoBLENDCC0 - Free
15

Churn, gather and lift out

Pour about 20 litres of heavy cream at about 15 °C, checked with the thermometer, into the box. Tilt the dasher in through the opening, set its spindle in the step, swing the staff upright under shaft c so the square enters the cap, and put on the cover and lid. Turn the crank briskly so the blades press the cream down, timing it. When the butter comes, turn on the same way but much slower, so the blades roll it into masses. Take off the cover, lift the dasher slowly while turning it backwards by hand so it slips out through the butter. Gather the butter, pour the buttermilk into a bowl, wash the butter in cold water until it runs clear, salt and weigh it. Scald, wash and air-dry the dasher.

Materiales para este paso:

Crema de leche espesaCrema de leche espesa20 l
Sal marina gruesaSal marina gruesa1 pieza
AguaAgua1 pieza

Herramientas necesarias:

Termómetro de sonda permanenteTermómetro de sonda permanente
CronómetroCronómetro
Báscula digital de cocinaBáscula digital de cocina
Bol grande de acero inoxidableBol grande de acero inoxidable
16

Troubleshooting

Interlocked-blade churn troubleshooting.

Flow

Loading...
17

History and honest limits

**Salem T. Lamb** of New Washington, Clark County, Indiana, US 30,411, 16 October 1860, "Fastening Blades of Churn-Dashers". He claimed the "interlocking or overlapping of the shanks of the blades J, so that they shall serve to hold each other firmly in the staff". He set the shanks in white lead or other cement; we use food-safe silicone, as white lead is a lead compound. His hub band was molten metal run into a groove and his gears a cast bracket with bevel wheels; ours are a pressed stainless ring, wooden posts and printed crown gears. The patent gives no sizes; every size here is ours.

Materiales

14

Herramientas requeridas

20

Archivos de diseño

5

CC0 Dominio público

Este Blueprint se publica bajo CC0. Eres libre de copiar, modificar, distribuir y usar este trabajo para cualquier propósito, sin pedir permiso.

Apoya al Maker comprando productos a través de su Blueprint, donde gana una Comisión del Maker establecida por los vendedores, o crea una nueva iteración de este Blueprint e inclúyela como conexión en tu propio Blueprint para compartir ingresos.

Discusión

(0)

Iniciar sesión para unirte a la discusión

Cargando comentarios...