Colaboración
ARTE
BELLEZA Y BIENESTAR
ARTESANÍA
CULTURA E HISTORIA
ENTRETENIMIENTO
MEDIO AMBIENTE
COMIDA Y BEBIDAS
INGENIERÍA INVERSA
CIENCIAS
DEPORTES
TECNOLOGÍA
TECNOLOGÍA VESTIBLE
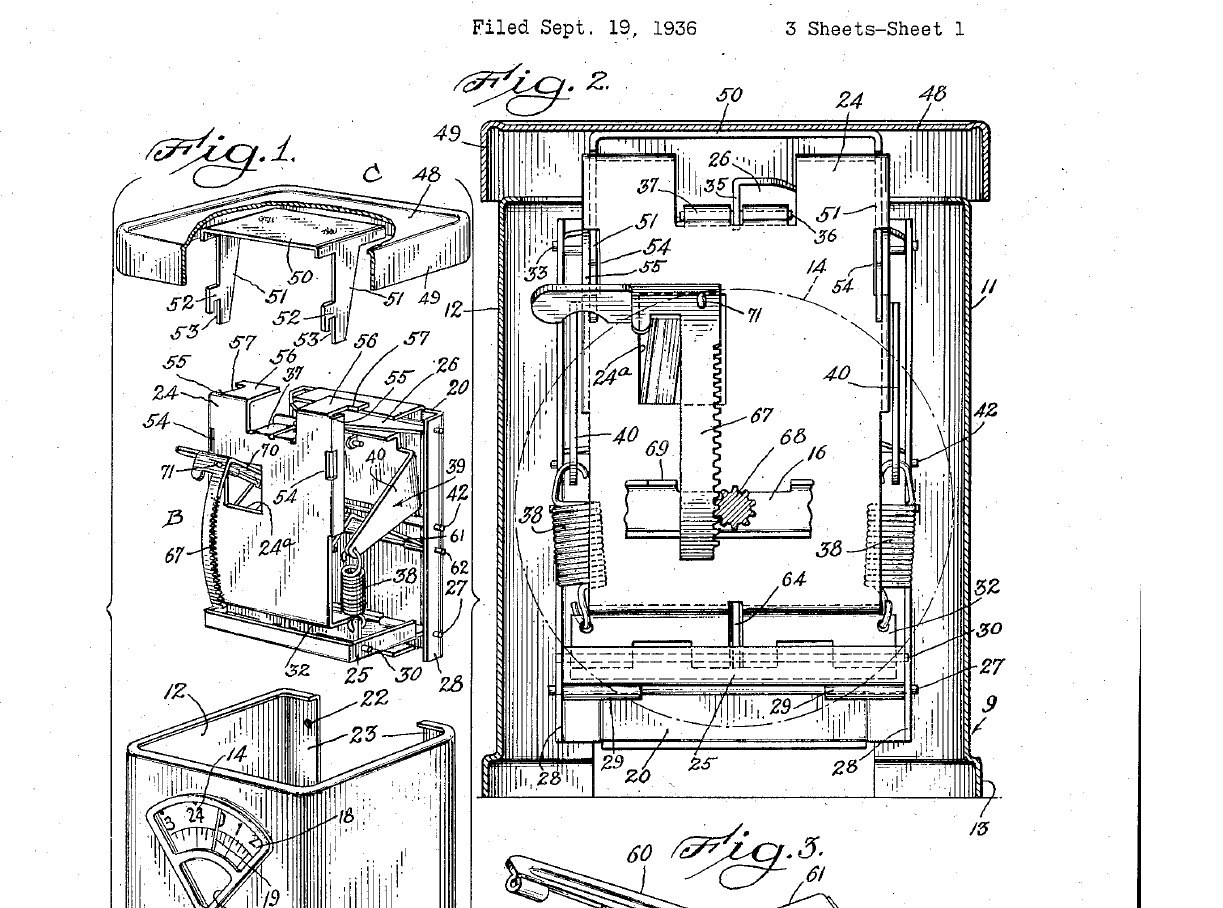


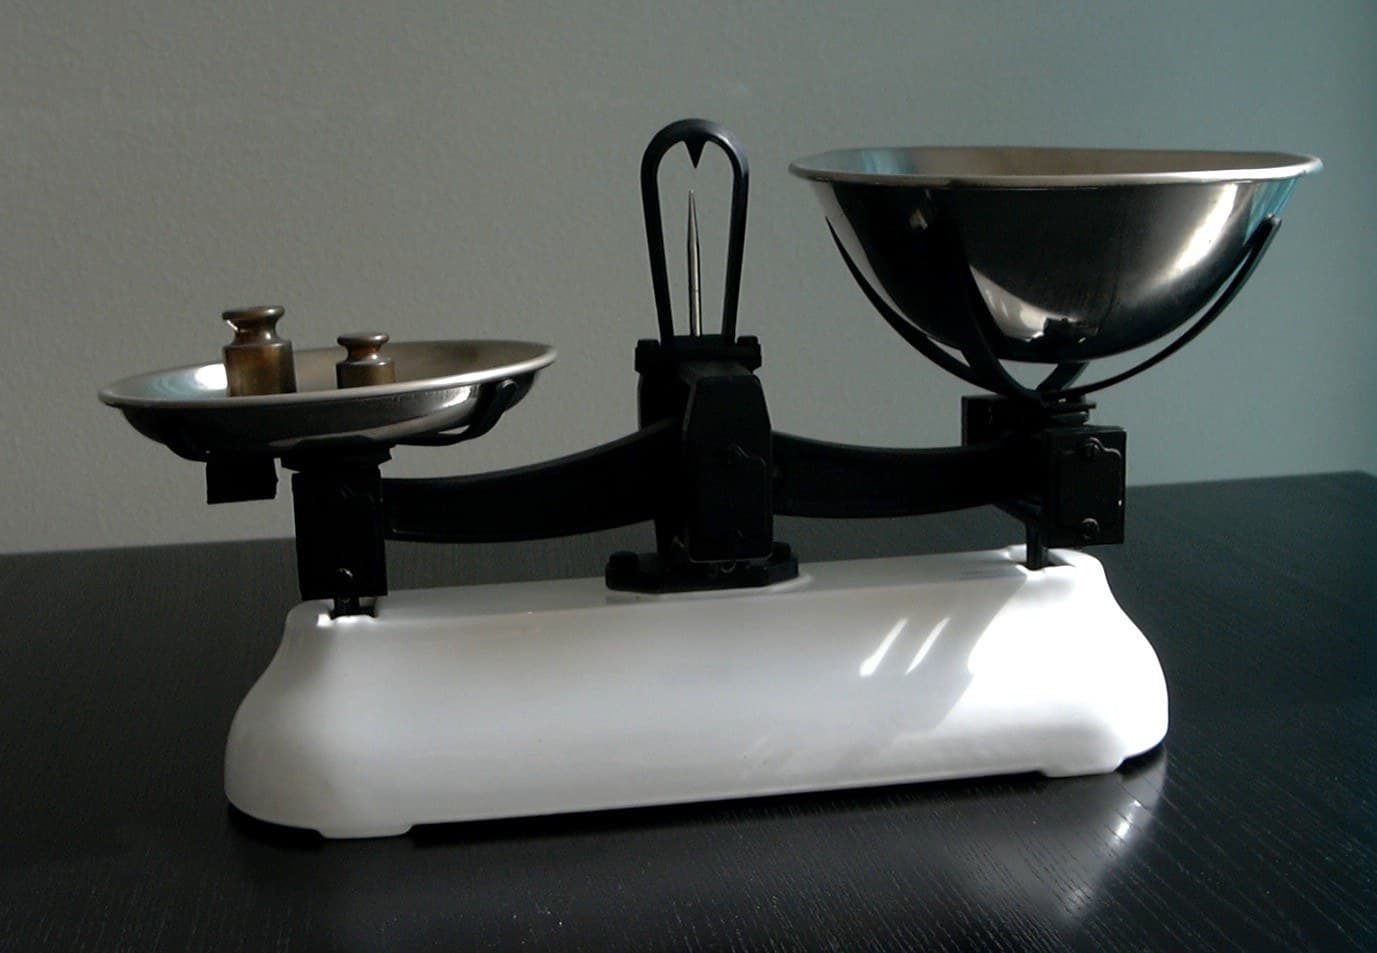
Mechanical Kitchen Scale: Sheet-Metal Case, Guided Plate and Two Springs to a Dial (Hansen, 1939)
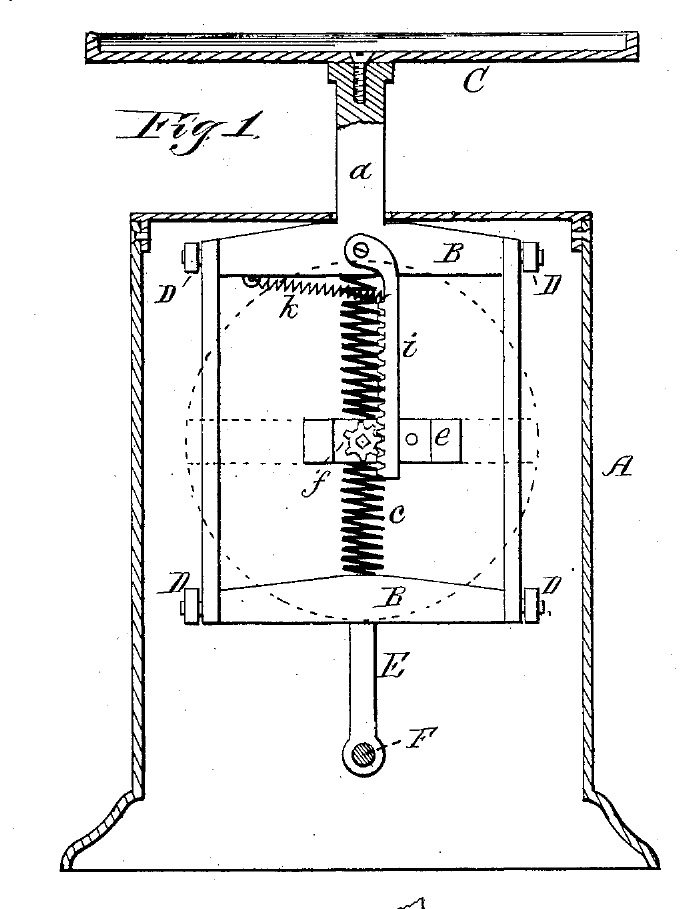
The everyday kitchen spring scale, built almost entirely from sheet metal. The platform hangs from a plate that two pivoted links keep moving straight up and down, the way Roberval's frame keeps a pan level. Two springs carry the load, and a rack turns the numbered dial behind a small window.
Result: a household scale that reads the true weight even when the food is put on one edge of the platform, because the dial is driven from the point midway between the two springs. It goes together from three units: case, weighing works and platform.
Source: M. H. Hansen (Hanson Scale Co.), US Patent 2,145,480 (1939). Unknown: the sheet metal and its sizes, the springs, the capacity and how the dial is marked. Picture: patent drawing.
Avanzado
3 days
Instrucciones
1
1
Make the case and fit the dial
Make the case and fit the dial
Bend sheet metal into a U: a front wall and two side walls, the lower edges flared outward to stand steady, open at the top and back, with inturned flanges on the back edges. Cut a sector-shaped window in the front and glaze it. Fix a bracket across the side walls, and run the dial shaft from the front wall to the bracket. On the shaft goes the round dial, numbered on its face, and a pinion behind it. Fit a fixed pointer at the window. Not given: the metal, gauge and sizes, and how the dial is numbered.
Materiales para este paso:
 Metal desconocido1 hoja
 Panel de vidrio1 window
 Esfera y aguja de báscula1 pieza
 Piñón de engranaje1 pieza
Herramientas necesarias:
 Tijeras de chapa
 Juego de alicates
 Dimensiones desconocidas
2
2
Build the guided plate on two springs
Build the guided plate on two springs
On a flat rear plate, pin two horizontal links: a lower rectangular one and an upper triangular one. Pin their front ends to an upright plate, which can now only move straight up and down. Hang the upright plate from two tension springs at its lower corners. Hook their tops to the arms of a U-shaped bracket pivoted on the rear plate. A bolt through the rear plate, with a compression spring and a nut, swings the bracket to set the zero.
Materiales para este paso:
Metal desconocido1 hoja Alfileres1 juego
 Muelle de tracción2 piezas
 Juego de muelles de compresión1 one spring
 Tornillos de máquina1 zero bolt
 Tuerca hexagonal1 pieza
Herramientas necesarias:
Tijeras de chapaJuego de alicatesDimensiones desconocidas3
3
Drive the dial from the middle
Drive the dial from the middle
Pivot an arm on the rear plate and join it by a short link to the upright plate at the pin midway between the two springs. If food sits off-centre, the platform tips and one spring stretches more, but the middle point moves by the average, so the arm gives the true weight. Pass the arm through a hole in the upright plate. Pin it to a curved rack cut in one piece with its extension, so a loose arm cannot skew the rack. The rack will mesh with the dial pinion.
Materiales para este paso:
Metal desconocido1 hojaAlfileres1 juegoHerramientas necesarias:
Tijeras de chapaJuego de alicates4
4
Make the platform
Make the platform
Cut a rectangular sheet-metal platform with a flange turned down all round. Make the flange clear the case walls, so a tipped platform cannot rub and dirt stays out. Rivet a U-shaped bracket under it. Its two arms end in slotted hooks that drop into openings in the upright plate, held by its flanges so the platform cannot tilt on it.
Materiales para este paso:
Metal desconocido1 hoja Remaches de acero1 a few
Herramientas necesarias:
Tijeras de chapaJuego de alicates5
5
Assemble and set the zero
Assemble and set the zero
Lower the weighing works into the case through the open top: the rack drops into mesh with the dial pinion. Screw the rear plate to the case flanges. Hook the platform on. With the platform empty, turn the zero nut until the zero on the dial stands at the pointer. Turn it again later if the springs stretch. Ours: check the reading with a known weight.
Materiales para este paso:
Tornillos de máquina1 rear plate screwsHerramientas necesarias:
 Juego de destornilladores
 Peso
Materiales
10- 1 hojaMarcador de posición
- 1 windowMarcador de posición
- 1 piezaMarcador de posición
- 1 piezaMarcador de posición
- 2 juegosMarcador de posición
- 2 piezasMarcador de posición
- 1 one springMarcador de posición
- 1 rear plate screwsMarcador de posición
- 1 piezaMarcador de posición
- 1 a fewMarcador de posición
Materiales de Blueprints conectados
Este plano hace
Blueprints relacionados
Estos blueprints comparten conocimiento — técnicas, materiales o principios
CC0 Dominio público
Este Blueprint se publica bajo CC0. Eres libre de copiar, modificar, distribuir y usar este trabajo para cualquier propósito, sin pedir permiso.
Apoya al Maker comprando productos a través de su Blueprint, donde gana una Comisión del Maker establecida por los vendedores, o crea una nueva iteración de este Blueprint e inclúyela como conexión en tu propio Blueprint para compartir ingresos.