ARTE
BELLEZA Y BIENESTAR
ARTESANÍA
CULTURA E HISTORIA
ENTRETENIMIENTO
MEDIO AMBIENTE
COMIDA Y BEBIDAS
INGENIERÍA INVERSA
CIENCIAS
DEPORTES
TECNOLOGÍA
TECNOLOGÍA VESTIBLE
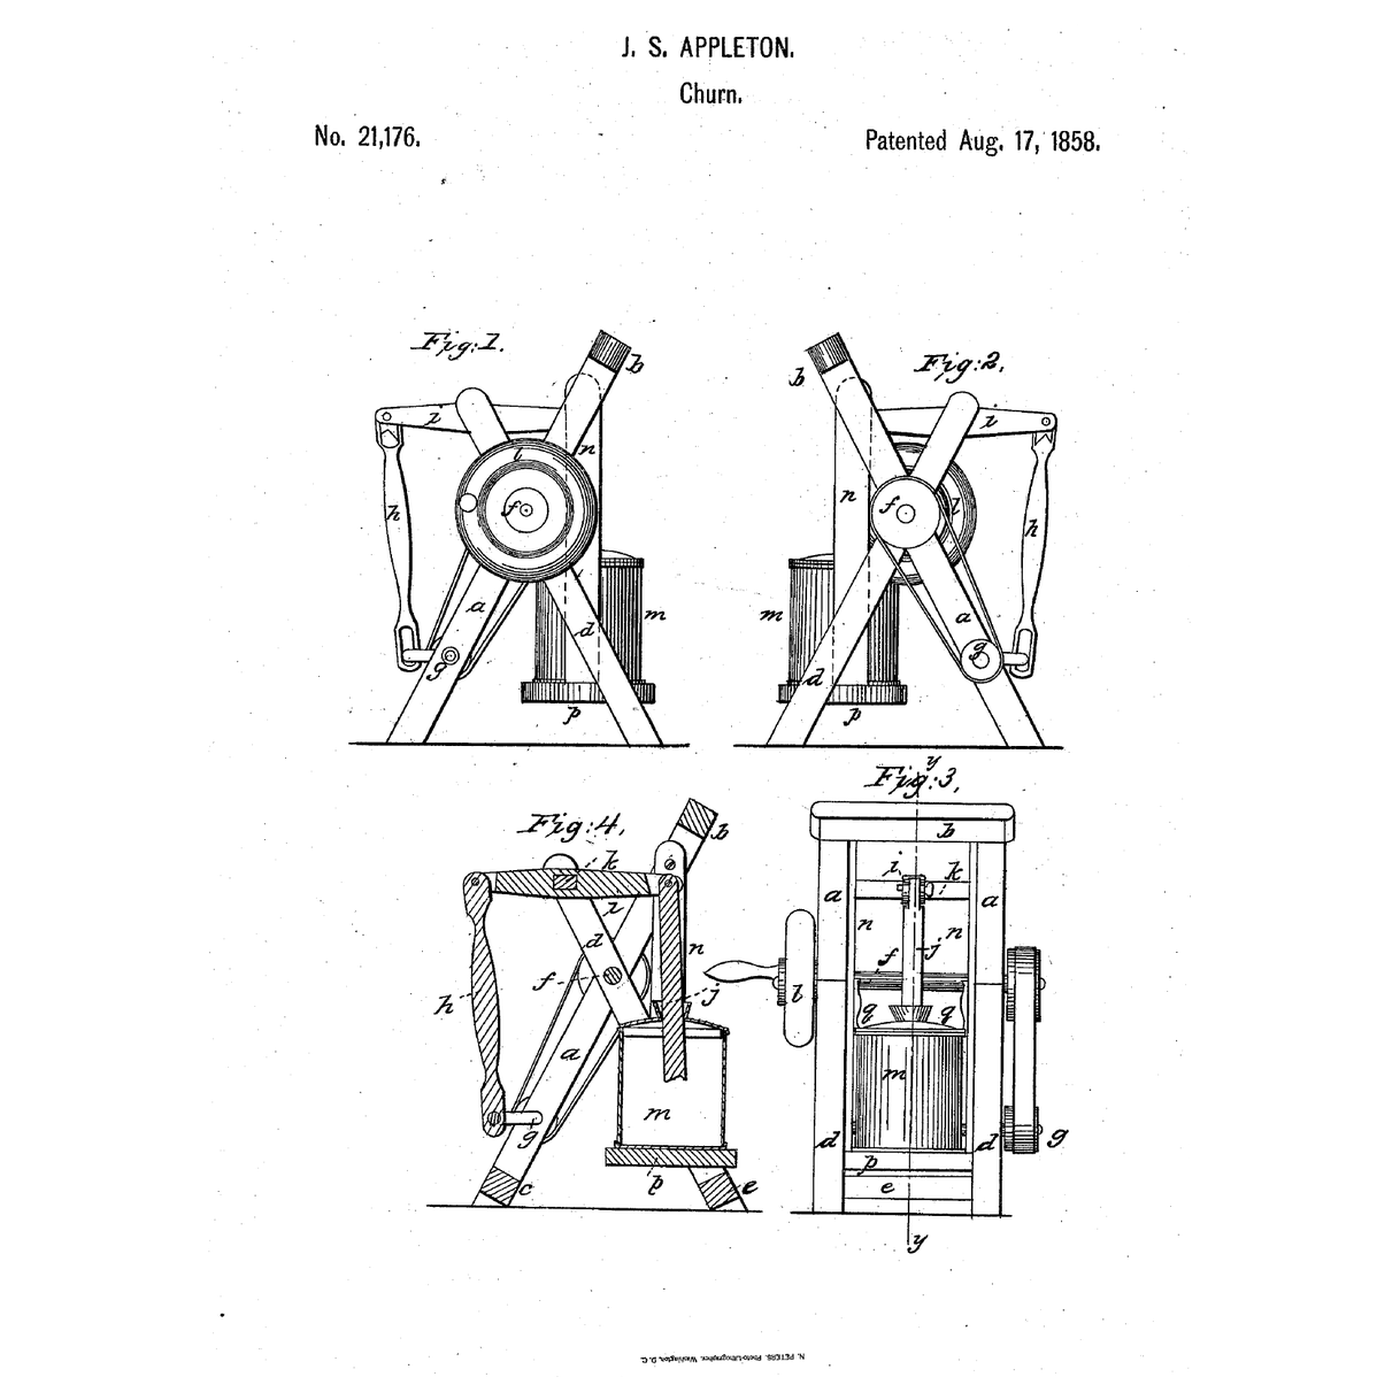


Swinging-Vessel Crank Churn: The Churn Hangs Free and Follows Its Crank-Driven Dasher
James S. Appleton of White River Junction, Vermont, received US 21,176, dated 17 August 1858, for a churn hung in a freely swinging frame while a crank, pitman and vibrating beam work its dasher, so the vessel follows the dasher's swing and the dasher can run fast without binding in the vessel or its cover.
This rung builds the crossed frame in pine and prints the vessel, beam, crank and band pulleys at tabletop scale.
Avanzado
About 8 hours, plus printing
Instrucciones
1
1
Band, crank and beam
Band, crank and beam
Cargando el cuaderno de Jupyter…
2
2
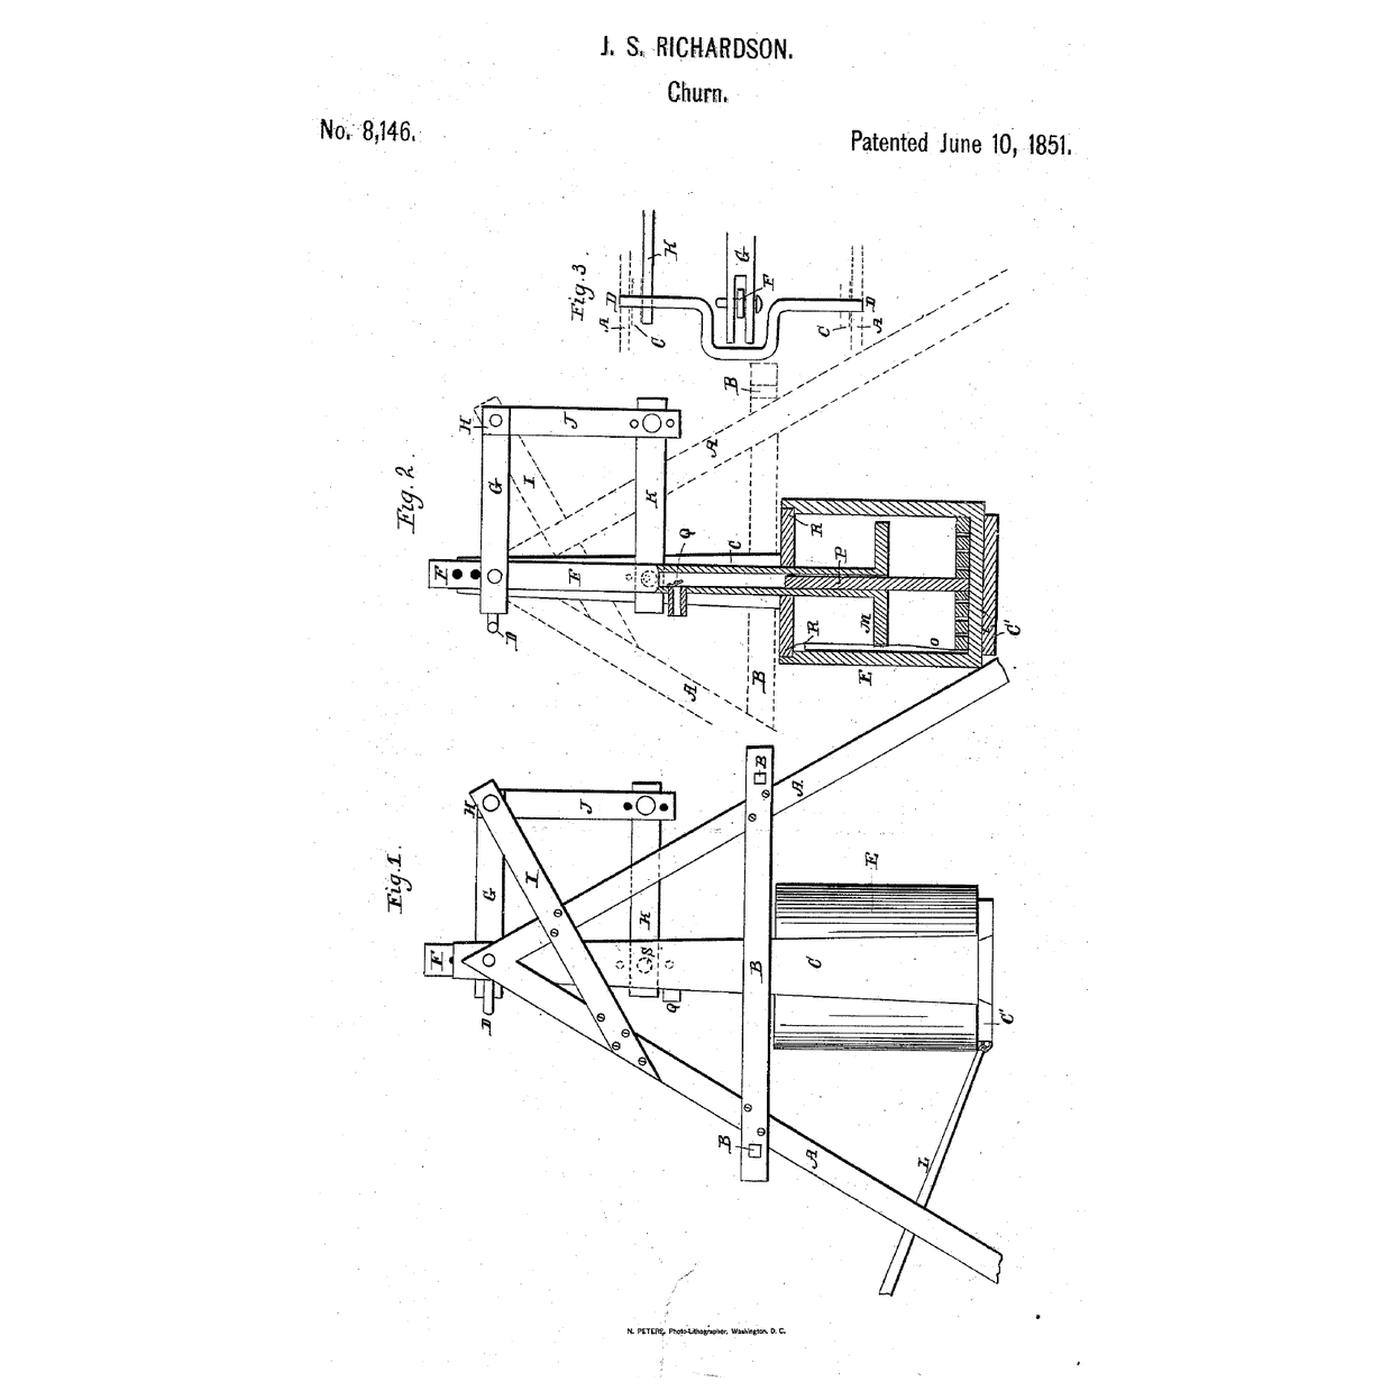
Hanging churns, before it
Hanging churns, before it
There the hanging tank was rocked by hand; here it swings free while a crank works the dasher.
3
3
Read US 21,176
Read US 21,176
"The churning vessel m, being allowed to swing freely back and forth during the operation of its dasher, will prevent any binding or grinding friction between the sides of said dasher and the sides of the churning vessel…"
4
4
Print the parts
Print the parts
Print the vessel, its cover, the disk, two bridles, two buttons, the dash, the dasher head, the beam, the pitman, two crank webs, the large and small pulleys, the balance wheel and the handle. Lay the bridles, beam and pitman across the bed's diagonal. Print in PETG at 0.2 mm layers, 30 % infill, 4 walls; wash before first use.
Materiales para este paso:
 Filamento PETG1 pieza
Herramientas necesarias:
 Impresora 3D de filamento (FDM)
5
5
Print the vessel
Print the vessel
The vessel, printed as step 4 describes.
6
6
Print the cover
Print the cover
The cover, printed as step 4 describes.
7
7
Print the disk
8
8
Print the bridle
Print the bridle
The bridle, printed as step 4 describes.
9
9
Print the button
Print the button
The button, printed as step 4 describes.
10
10
Print the dash
11
11
Print the dasher head
Print the dasher head
The dasher head, printed as step 4 describes.
12
12
Print the beam
13
13
Print the pitman
Print the pitman
The pitman, printed as step 4 describes.
14
14
Print the crank web
Print the crank web
The crank web, printed as step 4 describes.
15
15
Print the large pulley
Print the large pulley
The large pulley, printed as step 4 describes.
16
16
Print the small pulley
Print the small pulley
The small pulley, printed as step 4 describes.
17
17
Print the balance wheel
Print the balance wheel
The balance wheel, printed as step 4 describes.
18
18
Print the handle
Print the handle
The handle, printed as step 4 describes.
19
19
The crossed frame
The crossed frame
Rip 18 mm pine into 30 mm strips. For each side cut a timber a 406 mm long and a timber d 367 mm long, and halve them where they cross, 227 mm along a and 205 mm along d from their lower ends; glue and screw. Join the two sides 170 mm apart inside with cross pieces 206 mm long at the top of a and the feet of a and d. Drill 10.5 mm holes through both sides where the timbers cross, through a 81 mm from its foot, and through d 15 mm from its top; and a 4.5 mm hole through a 363 mm from its foot for the bridles.
Materiales para este paso:
 Tabla de pino1 pieza
 Cola de carpintero1 pieza
 Tornillos para madera1 pieza
Herramientas necesarias:
 Serrucho
 Taladro inalámbrico
 Papel de lija
 Juego de destornilladores
 Cinta métrica
20
20
Shafts, band and beam
Shafts, band and beam
Cut 10 mm dowels: the driving shaft 276 mm, the beam's shaft 216 mm, and the crank shaft in two pieces of 102 and 142 mm. Pass the driving shaft through the crossing holes and fix the large pulley and the balance wheel on its front end with M3 screws drilled through. Fix a crank web on the inner end of each crank-shaft piece, an M6 screw through both webs as the crankpin, and the small pulley on the front end. Tie a loop of cotton twine tightly over both pulleys as the band. Put the beam on its shaft between the d timbers, the pitman from the crankpin to the beam's fork on an M6 screw, and screw the handle into the balance wheel.
Materiales para este paso:
 Espigas de madera dura1 pieza
 Tornillos de máquina1 pieza
 Tuerca autoblocante con inserto de nailon1 pieza
 Arandela plana1 pieza
 Cordel de algodón1 pieza
Herramientas necesarias:
SerruchoTaladro inalámbricoJuego de destornilladores21
21
Swinging vessel and dasher
Swinging vessel and dasher
Hang a bridle from each a on an M4 screw through the 4.5 mm hole, free to swing, and bolt the disk between their feet. Stand the vessel on the disk. Cut a 10 mm dowel 194 mm long as the dasher shaft, fix the dash on its foot and the head on its top, pass it through the cover, and pin the head into the beam's other fork with an M6 screw and lock nut, your removable pin. Turn the buttons over the cover.
Materiales para este paso:
Espigas de madera dura1 piezaTornillos de máquina1 piezaTuerca autoblocante con inserto de nailon1 piezaHerramientas necesarias:
SerruchoJuego de destornilladores22
22
The build in 3D
The build in 3D
FreeCAD model of this build: the crossed pine frame, the vessel hung on its bridles and disk, the cover and buttons, the dasher on the vibrating beam, the pitman from the crank between its webs, the band pulleys on the driving and crank shafts, and the balance wheel with its handle.
23
23
Churn
Churn
Pour in 1.2 litres of heavy cream at about 15 °C, checked with the thermometer, set the cover on and turn the buttons. Turn the handle steadily and time it with the stopwatch: the vessel swings a little with each stroke. When the butter comes, pull the pin, lift the dasher and the vessel out, pour off the buttermilk, wash the butter in cold water until it runs clear, work in a pinch of salt and weigh it.
Materiales para este paso:
 Crema de leche espesa1.2 l
 Sal marina gruesa1 pieza
 Agua1 pieza
Herramientas necesarias:
 Termómetro de sonda permanente
 Cronómetro
 Báscula digital de cocina
 Bol grande de acero inoxidable
24
24
Troubleshooting
Troubleshooting
Swinging-vessel churn troubleshooting.
Flow
Loading...
25
25
History and honest limits
History and honest limits
**James S. Appleton** of White River Junction, Windsor County, Vermont, US 21,176, 17 August 1858, signed 17 June 1858. Any form of dasher, he wrote, may be used, and the shafts may be geared instead of banded. He held that the swinging, pulsing vessel makes the dasher act with unusual energy, and claimed securing the vessel in a freely swinging frame while a crank shaft, pitman and vibrating beam work the dasher. Our frame sizes, printed parts, cord band and dash are ours. FDM prints hold food in their layer lines, so wash well and replace when worn.
Materiales
12- 1 piezaMarcador de posición
- 1 piezaMarcador de posición
- 1 piezaMarcador de posición
- 1 piezaMarcador de posición
- 1 piezaMarcador de posición
- 2 piezasMarcador de posición
- Marcador de posición
- 1 piezaMarcador de posición
- 1 piezaMarcador de posición
- Marcador de posición
- 1 piezaMarcador de posición
- 1 piezaMarcador de posición
Herramientas requeridas
10- Marcador de posición
- Marcador de posición
- 1 vendor sell this, none ship to you yetMarcador de posición
- Marcador de posición
- Marcador de posición
- 1 vendor sell this, none ship to you yetMarcador de posición
- Marcador de posición
- Marcador de posición
- Marcador de posición
- Marcador de posición
Archivos de diseño
15Este plano hace

Blueprints relacionados
Estos blueprints comparten conocimiento — técnicas, materiales o principios


CC0 Dominio público
Este Blueprint se publica bajo CC0. Eres libre de copiar, modificar, distribuir y usar este trabajo para cualquier propósito, sin pedir permiso.
Apoya al Maker comprando productos a través de su Blueprint, donde gana una Comisión del Maker establecida por los vendedores, o crea una nueva iteración de este Blueprint e inclúyela como conexión en tu propio Blueprint para compartir ingresos.