
Collaboration
ART
BEAUTÉ ET BIEN-ÊTRE
ARTISANAT
CULTURE ET HISTOIRE
DIVERTISSEMENT
ENVIRONNEMENT
NOURRITURE ET BOISSONS
INGÉNIERIE INVERSE
SCIENCES
SPORTS
TECHNOLOGIE
TECHNOLOGIE PORTABLE
Cart Crupper, Breeching, Belly-Band and Straps (Hasluck, Harness Making, 1904)
Tex

Créé par

Tex

13. novembre 2026FO
7
0
0
0
0

Cart Crupper, Breeching, Belly-Band and Straps (Hasluck, Harness Making, 1904)

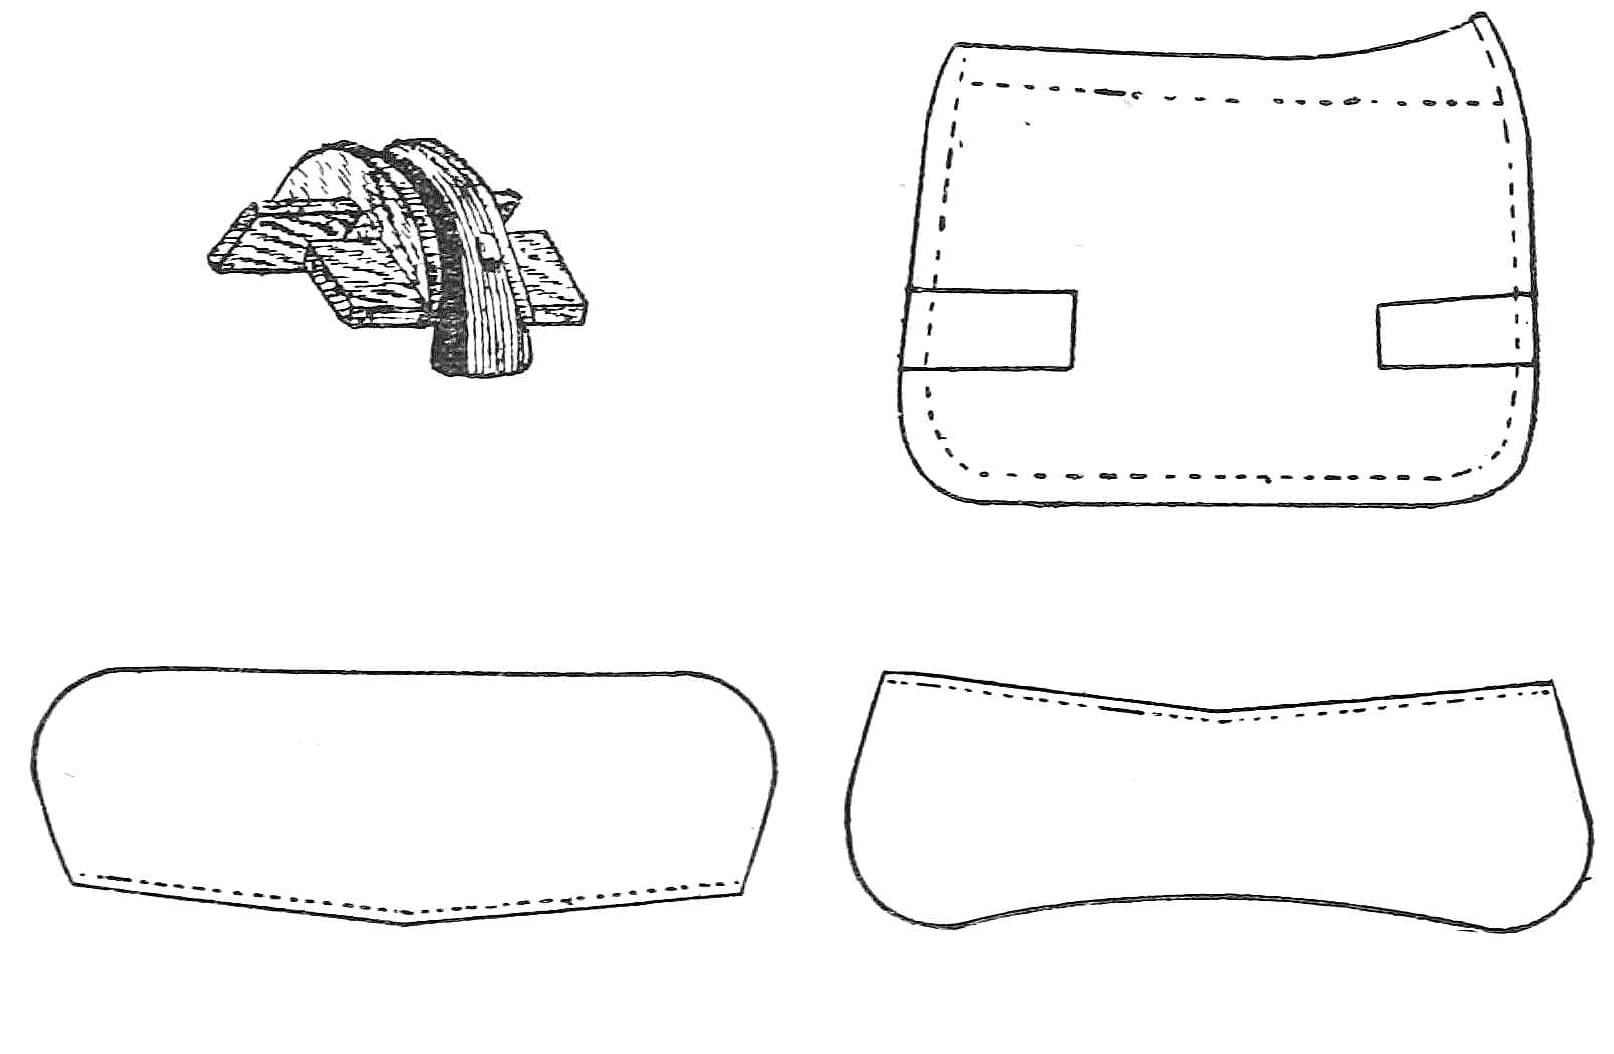
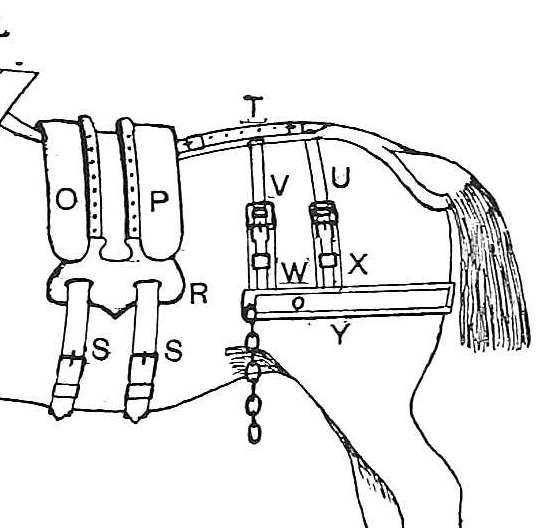
The rest of a cart harness, from Paul N. Hasluck's Harness Making (1904): the crupper that runs from the saddle under the tail, the breeching round the hindquarters with its tugs and loin straps, the belly-band, hame straps and a leading rein. All sizes are his. With the bridle, collar and cart saddle it completes the set.
Avancé
About 3 days

Consignes

1

Cutting list

Chargement du notebook Jupyter…
2

Read Harness Making, ch. VII

"To make the breeching, cut the body, if possible, 7 ft. 4 in. long and about 4 in. wide. Turn it down to 4 ft. 10 in. long, the strong end less than the weak."
3

Cut the crupper body and dock

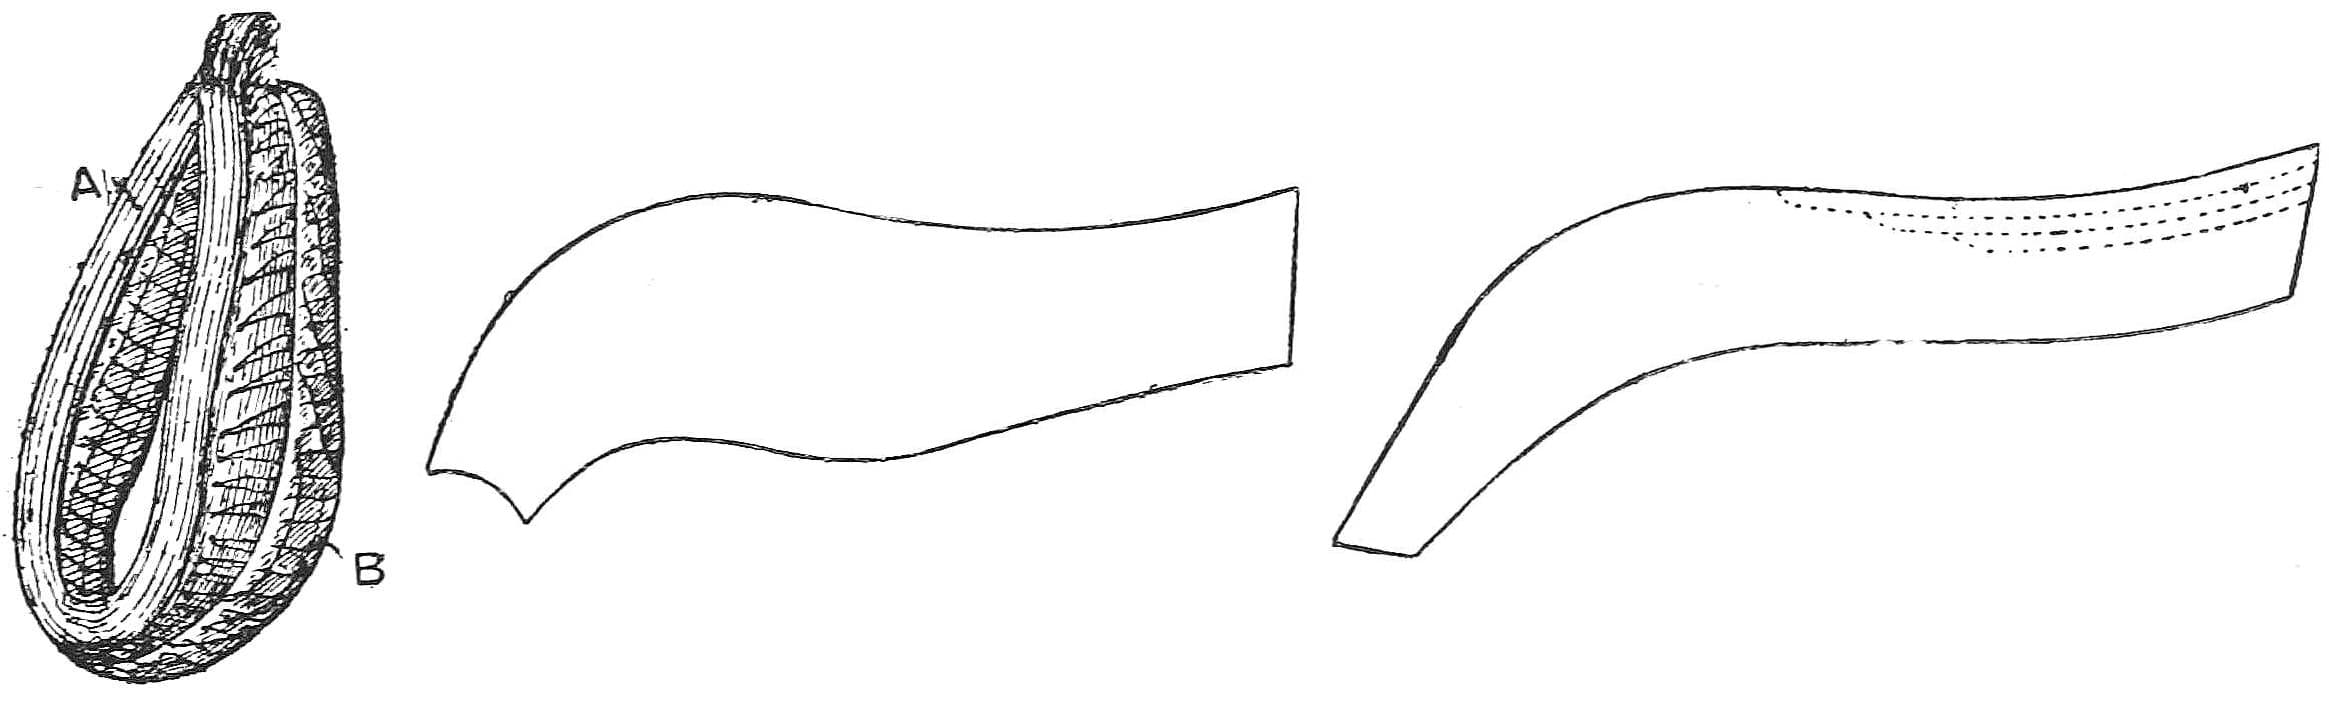
Cut the body 2 ft 6 in or 2 ft 8 in long and 3½ to 4 in wide; cut a semicircle in the centre from the weak end, leaving a point about ¾ in wide each side, and cut an 8 in piece to line this end. Cut a piece ⅞ in wide and 8½ in long, shave its ends, and stitch it edge to edge into a round to within 1½ in of each end, with a cord or strip of leather inside; rub it round, blacken it and flatten both ends with a hammer.

Matériaux pour cette étape :

Cuir de harnaisCuir de harnais1 pièce
Ficelle de chanvreFicelle de chanvre1 pièce
Fil de cuirFil de cuir1 pièce
Teinture pour cuirTeinture pour cuir1 pièce

Outils nécessaires :

Couteau à cuirCouteau à cuir
Deux aiguilles de sellierDeux aiguilles de sellier
AlêneAlêne
Marteau à panne fendueMarteau à panne fendue
4

Finish the crupper body

Point the square end, reducing it to about 2 in. Race it along the sides and ends, edge and black it, and run a hot iron over the creases. Prick it about nine per inch as far as the lining reaches from the semicircle. Put the ends of the round piece under the points, one each side, the lining under them, and stitch all round and across the points with three-cord black-wax thread; trim, black and rub the edges.

Matériaux pour cette étape :

Fil de cuirFil de cuir1 pièce
Teinture pour cuirTeinture pour cuir1 pièce

Outils nécessaires :

Couteau à cuirCouteau à cuir
Compas à rainer de sellierCompas à rainer de sellier
Abat-carreAbat-carre
Fileteuse de sellierFileteuse de sellier
Chalumeau à propaneChalumeau à propane
Griffe à frapperGriffe à frapper
AlêneAlêne
Deux aiguilles de sellierDeux aiguilles de sellier
Pince de sellierPince de sellier
5

Make the crupper lay

Cut the lay 1 in narrower than the body and 3 ft long; turn in 10 in at the strong end and beat it flat. Turn the other end down 2 in and cut it slanting to 1½ in for a buckle, with a buckle hole. Mark cross lines 2 in from the broad point, ¼ in from the end of the bend underneath, and 2½ in from that toward the buckle. Edge the top only, crease two lines and hot-iron them, with inner lines about ¼ in in. Leave two openings for the hip straps, one in the bend and one in the middle; black and prick the stitched parts. Fix the buckle, lay it on the centre of the body with the broad end reaching the edge of the semicircle, tack and stitch, spotting the three cross lines.

Matériaux pour cette étape :

Cuir de harnaisCuir de harnais1 pièce
Boucle en fer à ardillonBoucle en fer à ardillon1 pièce
Fil de cuirFil de cuir1 pièce
Teinture pour cuirTeinture pour cuir1 pièce

Outils nécessaires :

Couteau à cuirCouteau à cuir
Abat-carreAbat-carre
PlioirPlioir
Fileteuse de sellierFileteuse de sellier
Emporte-pièce pour cuirEmporte-pièce pour cuir
Griffe à frapperGriffe à frapper
AlêneAlêne
Deux aiguilles de sellierDeux aiguilles de sellier
6

Pad the crupper and fit its strap

Cut thick felt as wide as the body, from the point of the semicircle to 2 in beyond the cross line near the buckle; cover it with basil, coarse-stitch it along the centre, turn the ends over and fasten them, and stitch it in place next the body with four or five stitches here and there, well secured at each corner. Cut a hole through the body opposite the buckle, 1½ in wide. Make a strap 9 in long, pointed one end and shaved the other, crease, black and stitch its shaved end to the narrow end of the body; it goes round the saddle's dock and up through the hole to the buckle on the lay.

Matériaux pour cette étape :

Feutre de laineFeutre de laine1 pièce
BasaneBasane1 pièce
Cuir de harnaisCuir de harnais1 pièce
Fil de cuirFil de cuir1 pièce
Teinture pour cuirTeinture pour cuir1 pièce

Outils nécessaires :

Couteau à cuirCouteau à cuir
Emporte-pièce pour cuirEmporte-pièce pour cuir
AlêneAlêne
Deux aiguilles de sellierDeux aiguilles de sellier
7

Make the breeching body

Cut the body 7 ft 4 in x about 4 in and turn it down to 4 ft 10 in, the strong end less than the weak; edge, black and crease two rows along the edges. Mark a cross line about 1½ in from the centre of the bend each side, and at each end. Line the bend with 1 ft pieces bent flesh outward, one end about 1 in shorter; prick, tack and stitch row to row to make the eye for the bridgeband pin. Trim, blacken and rub the bend with tallow and bone; beat it with a wooden mallet if hard, and stitch the double part along ends and sides.

Matériaux pour cette étape :

Cuir de harnaisCuir de harnais1 pièce
Fil de cuirFil de cuir1 pièce
Teinture pour cuirTeinture pour cuir1 pièce
SuifSuif1 pièce

Outils nécessaires :

Couteau à cuirCouteau à cuir
Abat-carreAbat-carre
PlioirPlioir
Griffe à frapperGriffe à frapper
AlêneAlêne
Deux aiguilles de sellierDeux aiguilles de sellier
Plioir en osPlioir en os
Maillet en boisMaillet en bois
8

Put on the breeching lay

Cut the lay the same length and 1 in narrower; edge, crease and black it, run another line ¼ in inside the crease, prick the two inner lines nine to the inch and turn it down at both ends as the body. Tack it on the centre of the body, light end against heavy end, and stitch end to end to the cross lines, bulging the cross stitching inward about 1 in at the middle. Punch a large hole where the stitches bulge and cut straight out each side for the chain to catch the pin. Cut a slot for the 1½ in tug 1 ft 4 in from each end.

Matériaux pour cette étape :

Cuir de harnaisCuir de harnais1 pièce
Fil de cuirFil de cuir1 pièce
Teinture pour cuirTeinture pour cuir1 pièce

Outils nécessaires :

Couteau à cuirCouteau à cuir
Abat-carreAbat-carre
PlioirPlioir
Griffe à frapperGriffe à frapper
Emporte-pièce pour cuirEmporte-pièce pour cuir
AlêneAlêne
Deux aiguilles de sellierDeux aiguilles de sellier
9

Make the tugs and safes

Two hind tugs 1 ft 8 in long, 6 in turned down each end to meet; buckle hole in the weak end; black, crease, rub and prick them. Put the strong end up through the slot from underneath, joint in front under the loop, buckle on the other end; make a loop about 2½ in long round both thicknesses and pull it over the joint. Cut a safe for each from the breeching to an inch beyond the buckle and ½ in wider each side, narrowed and shaved at the bottom, rounded at the top with a loop; finish it on the 1½ in loop-stick, beat it flat and square, nail it from underneath with about five nails each side clinched on the loop-stick, and crease it again with a hot iron. Stitch the safes along the tugs. Make the front tugs for the bridgeband pins the same but shorter, so their length from the breeching equals the hind tugs; fit the pins with their nut and washer.

Matériaux pour cette étape :

Cuir de harnaisCuir de harnais1 pièce
Boucle en fer à ardillonBoucle en fer à ardillon4 pièces
Broche d'avaloireBroche d'avaloire2 pièces
ClousClous1 pièce
Fil de cuirFil de cuir1 pièce
Teinture pour cuirTeinture pour cuir1 pièce

Outils nécessaires :

Couteau à cuirCouteau à cuir
Emporte-pièce pour cuirEmporte-pièce pour cuir
Mandrin à passantsMandrin à passants
Marteau à panne fendueMarteau à panne fendue
Fileteuse de sellierFileteuse de sellier
Chalumeau à propaneChalumeau à propane
PlioirPlioir
Griffe à frapperGriffe à frapper
AlêneAlêne
Deux aiguilles de sellierDeux aiguilles de sellier
Clé à moletteClé à molette
10

Make the loin straps

Cut two loin straps 3 ft 8 in x 1½ in to fasten to the tugs and pass through the openings in the crupper; point each end, crease double each side, edge, black, hot-iron the creases and make six or seven holes in each end.

Matériaux pour cette étape :

Cuir de harnaisCuir de harnais1 pièce
Teinture pour cuirTeinture pour cuir1 pièce

Outils nécessaires :

Couteau à cuirCouteau à cuir
Abat-carreAbat-carre
PlioirPlioir
Fileteuse de sellierFileteuse de sellier
Chalumeau à propaneChalumeau à propane
Emporte-pièce pour cuirEmporte-pièce pour cuir
11

Make the leading rein and hame straps

Leading rein: a 1 in strap about 8 ft 6 in long in all, with a buckle and a billet 1 ft long at one end and a chain with a spring hook at the other; black and crease it and stitch on buckle, billet and chain. The chain goes through the near bit ring and hooks to the other ring; the billet fastens to the crupper. Hame straps: 1¼ in, about 1 ft 8 in long, buckle and loop at one end, the other pointed with holes.

Matériaux pour cette étape :

Cuir de harnaisCuir de harnais1 pièce
Boucle en fer à ardillonBoucle en fer à ardillon3 pièces
Chaîne en ferChaîne en fer1 pièce
MousquetonMousqueton1 pièce
Fil de cuirFil de cuir1 pièce
Teinture pour cuirTeinture pour cuir1 pièce

Outils nécessaires :

Couteau à cuirCouteau à cuir
PlioirPlioir
Emporte-pièce pour cuirEmporte-pièce pour cuir
AlêneAlêne
Deux aiguilles de sellierDeux aiguilles de sellier
12

Make the belly-band

Cut it 3 in wide and 3 ft 8 in long, narrowed to 2 in for 6 in at both ends, with a buckle hole about 3 in from the point. Make two billets 2 ft 2 in x 2 in and two loops about 1¾ in wide; edge, crease and black everything. Prick the billets six per inch for about 6 in from the shaved end, set the buckle with the billet lapping 3 in over it and the loop about 1 in from the buckle, tack and stitch with six-cord black-wax thread, twice waxed, with two or three stitches in the centre of each end. Open and crease the loops and make four holes in the billets.

Matériaux pour cette étape :

Cuir de harnaisCuir de harnais1 pièce
Boucle en fer à ardillonBoucle en fer à ardillon2 pièces
Fil de cuirFil de cuir1 pièce
Teinture pour cuirTeinture pour cuir1 pièce

Outils nécessaires :

Couteau à cuirCouteau à cuir
Abat-carreAbat-carre
PlioirPlioir
Griffe à frapperGriffe à frapper
Emporte-pièce pour cuirEmporte-pièce pour cuir
AlêneAlêne
Deux aiguilles de sellierDeux aiguilles de sellier
Pince de sellierPince de sellier
13

Troubleshooting

Crupper and breeching troubleshooting.

Flow

Loading...
14

History and honest limits

From **Harness Making**, edited by Paul N. Hasluck, Cassell and Company, 1904, chapter VII, "Cart Saddles, Reins, etc." (Project Gutenberg #70169). All sizes are his. Not made here: the iron-dee crupper he gives as a matter of taste, the ornamental breast-plate, the maker's-name stamp, and the final coat of "Harris's liquid or composition", a trade dressing. The heat source for the iron and the metric figures are ours.

Matériaux

12

Outils requis

16

CC0 Domaine public

Ce blueprint est publié sous CC0. Vous êtes libre de copier, modifier, distribuer et utiliser ce travail pour tout usage, sans demander la permission.

Soutenez le Maker en achetant des produits via son Blueprint où il perçoit une Commission Maker définie par les Vendeurs, ou créez une nouvelle itération de ce Blueprint et incluez-le comme connexion dans votre propre Blueprint pour partager les revenus.

Commentaires

(0)

Se connecter pour participer à la discussion

Chargement des commentaires...