Collaboration
ART
BEAUTÉ ET BIEN-ÊTRE
ARTISANAT
CULTURE ET HISTOIRE
DIVERTISSEMENT
ENVIRONNEMENT
NOURRITURE ET BOISSONS
INGÉNIERIE INVERSE
SCIENCES
SPORTS
TECHNOLOGIE
TECHNOLOGIE PORTABLE
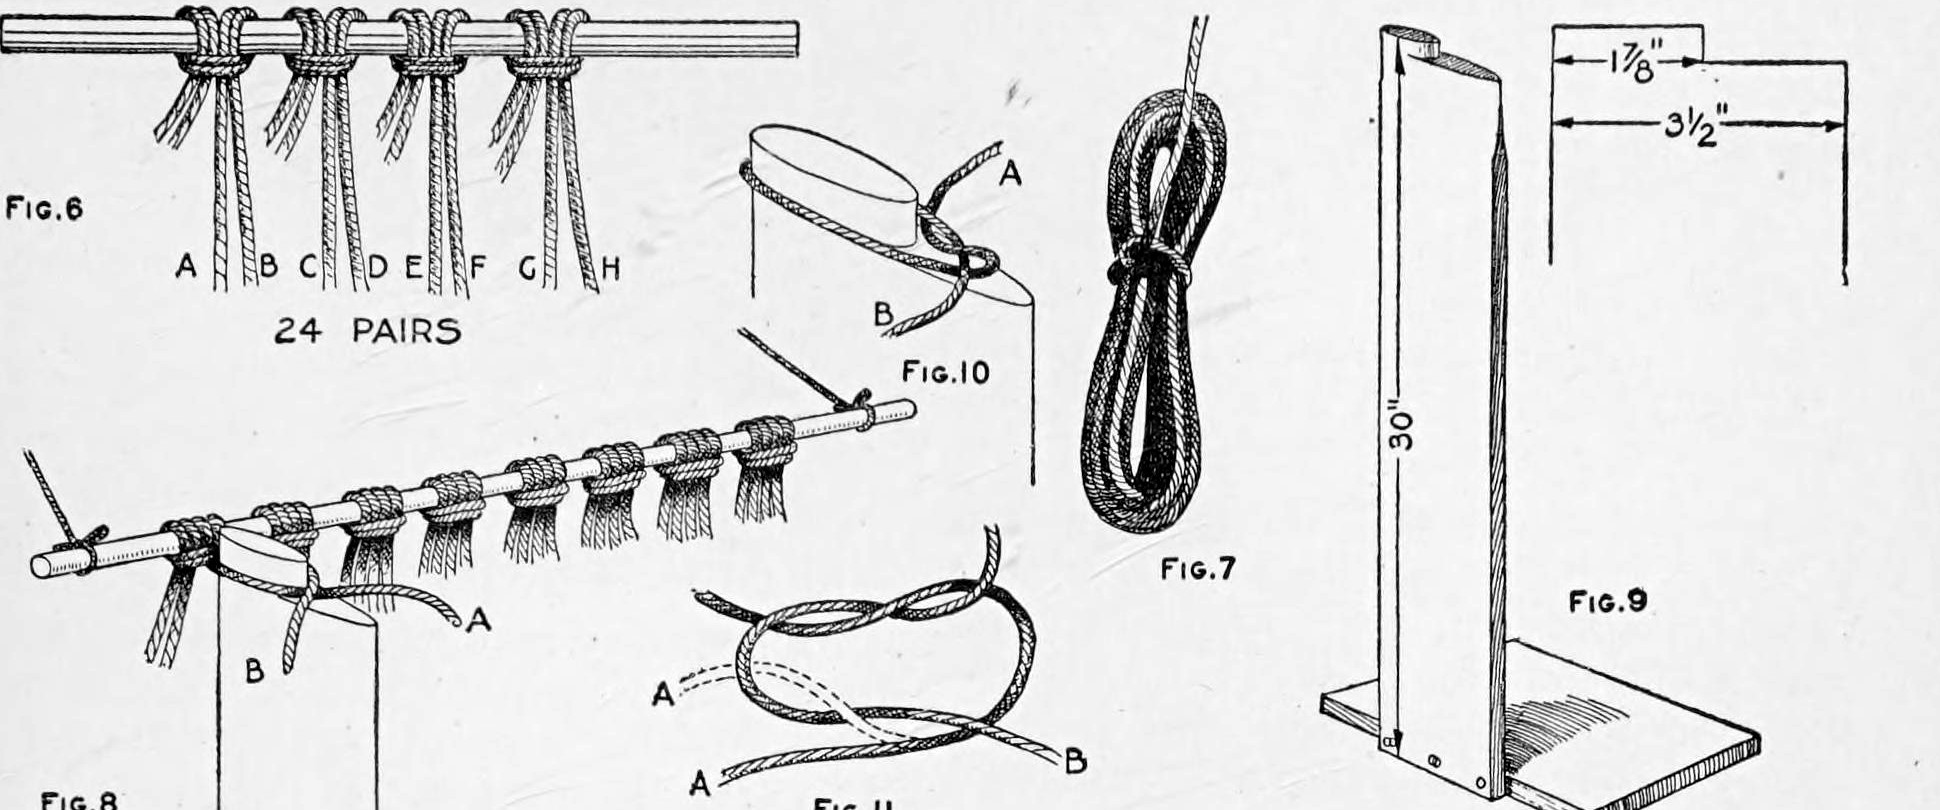


Knotted Twine Hammock: 48 Seine-Twine Cords Tied From a Centre Rod Over a Two-Size Mesh Post (Boy Mechanic, 1919)
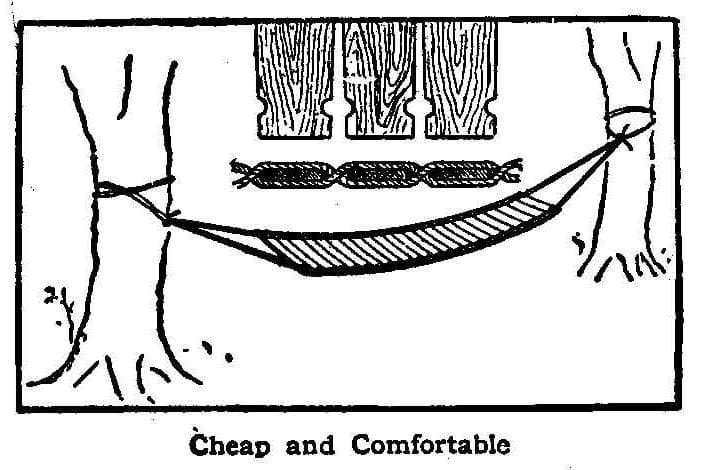
Charles M. Miller's knotted hammock from The Boy Mechanic, Book 3 (1919): 24 pairs of 18 ft seine-twine cords looped over a centre rod and knotted toward each end with flat reef (or overhand, or Solomon's) knots over a 30 in mesh post, then gathered into a 2-1/2 in galvanized ring at each end and bound.
Intermédiaire
Several days
Consignes
1
1
Cord budget
Cord budget
Chargement du notebook Jupyter…
2
2
Read The Boy Mechanic, Book 3
Read The Boy Mechanic, Book 3
"The flat reef knot is small, is easily tied and will not slip."
3
3
Make the mesh post and ring board
Make the mesh post and ring board
Make a mesh post 30 in high on a base you can rest a foot on, its top cut to two sizes: 1-7/8 in across for the first row of meshes and 3-1/2 in for all others (Fig. 9). Make a ring board 30 in long, 3 in or more wide and 1 in thick, with three nails driven slanting (Fig. 14).
Matériaux pour cette étape :
 Planche de bois dur1 pièce
 Planche de pin1 pièce
 Clous4 pièces
Outils nécessaires :
 Scie égoïne
 Rabot
 Marteau
 Mètre ruban
4
4
Cut and hang the cords
Cut and hang the cords
Cut 48 cords of medium-hard 24-ply seine twine, each 18 ft long, and loop them in 24 pairs over a centre rod (an old broom handle) anchored to a wall (Figs. 6, 8). Loop the opposite halves up out of the way. Wind each working cord into a small bundle secured with a half hitch, leaving about 3 ft free (Fig. 7).
Matériaux pour cette étape :
 Fil à filets48 cord
 Balai1 pièce
Outils nécessaires :
Mètre ruban Ciseaux
5
5
Knot the body
Knot the body
Set the post's small top between the first pair, A and B, and tie them with a flat reef knot: B over A, A tucked behind; B over again and A tucked under, drawn very hard (Figs. 8, 10, 11). Move along tying each pair, to the 24th (Y, Z). On the way back use the large top and tie neighbouring pairs together (Y with X, W with V ...). Alternate the rows to within 2-1/2 ft of the end. Then move the rod into the second row and knot the other half the same way. An overhand or Solomon's knot may be used instead (Figs. 1, 3, 12).
Matériaux pour cette étape :
Fil à filets1 pièceOutils nécessaires :
 Baguette calibreuse de maille
6
6
Fit the rings and bind
Fit the rings and bind
Put the centre rod in the last row of meshes and set it on the ring board with a 2-1/2 in galvanized ring tied by a string to the end nail, 2 ft from the rod. Tie the cords to the ring in pairs with flat reef knots, one cord under and one over its side. Turn the ends back along the cords and wind them about 1-1/2 in with an extra cord, starting with a loop and a flat reef knot and looping each turn through its own winding; finish with a double loop and draw the end back under the turns with an awl (Fig. 15). Do the other end the same way.
Matériaux pour cette étape :
 Anneau métallique2 piècesFil à filets1 pièce
Outils nécessaires :
 AlêneCiseaux
7
7
Finishing and troubleshooting
Finishing and troubleshooting
Hammock troubleshooting.
Flow
Loading...
8
8
History and honest limits
History and honest limits
From "How to Make Hammocks, Part I: A Twine Hammock" by Charles M. Miller, in **The Boy Mechanic, Book 3**, Popular Mechanics, 1919 (Project Gutenberg 71856; checked on the archive.org scan boymechanic0003unse, pp. 277-280). He gives no size for the mesh post's base or the winding cord. The tools and metric figures are ours.
Matériaux
6- 1 pièceEspace réservé
- 1 pièceEspace réservé
- 4 piècesEspace réservé
- 2 piècesEspace réservé
- 1 pièceEspace réservé
- 2 piècesEspace réservé
Ce plan fabrique
Blueprints liés
Ces blueprints partagent des connaissances — techniques, matériaux ou principes

CC0 Domaine public
Ce blueprint est publié sous CC0. Vous êtes libre de copier, modifier, distribuer et utiliser ce travail pour tout usage, sans demander la permission.
Soutenez le Maker en achetant des produits via son Blueprint où il perçoit une Commission Maker définie par les Vendeurs, ou créez une nouvelle itération de ce Blueprint et incluez-le comme connexion dans votre propre Blueprint pour partager les revenus.