ART
BEAUTÉ ET BIEN-ÊTRE
ARTISANAT
CULTURE ET HISTOIRE
DIVERTISSEMENT
ENVIRONNEMENT
NOURRITURE ET BOISSONS
INGÉNIERIE INVERSE
SCIENCES
SPORTS
TECHNOLOGIE
TECHNOLOGIE PORTABLE


Mounting and Alignment: Runout, Misalignment and the Contact Pattern
A gear cut to a precision grade and mounted carelessly performs worse than an ordinary gear mounted well. The tooth form is one of four things that decide how the pair runs, and the other three belong to the shaft, the bearings and the housing.
Runout — the gear not running true on its shaft — makes the centre distance breathe once per revolution, so the backlash is tight at one point and slack half a turn later. Misalignment tips the tooth so it touches at one end of its face, and the load that was meant to be spread across 20 mm arrives on 6. Neither is visible on the parts. Both are visible in five minutes with engineer's blue.
This rung is how much each error costs, where it comes from, and how to read the contact pattern that shows all of them at once.
Intermédiaire
4 hours
Consignes
1
1
Getting the gear onto the shaft
Getting the gear onto the shaft
**The bore and the shaft.** A gear on a clearance fit will run eccentric by the clearance, every time. Use a transition or light interference fit — H7/k6 or H7/m6 for general work — and locate the torque with a key, not with the fit.
**A key does not centre anything.** It transmits torque. The centring is the fit, and a keyway cut too deep or a key that bottoms in the gear's slot will lift the gear off its seat and throw it out by more than any manufacturing error. Check the key is clear at the top.
**Press, do not hammer.** A gear driven on with a hammer arrives tilted and carries the shock into the bearings. Press it, or heat the gear 80–100 °C above the shaft and drop it on.
**Square it against a shoulder.** A gear butted to a shoulder is only as square as the shoulder; a shoulder with a radius left in the corner and no relief in the gear will hold the gear off and tilt it.
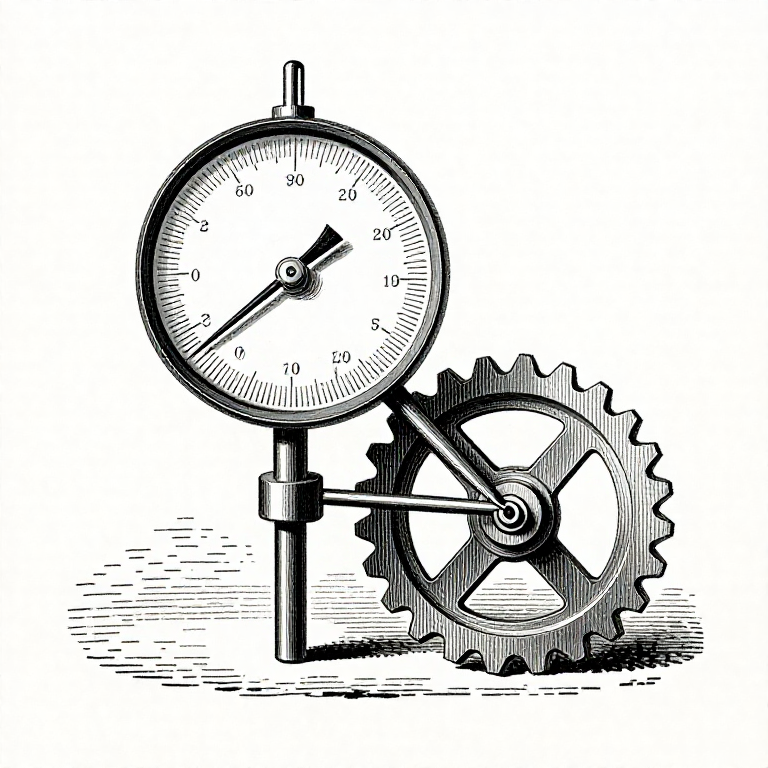
**Then measure, on the assembled shaft, between centres.** Dial indicator on the tooth flanks with a pin or ball in the tooth space, turn a full revolution and read the total indicated runout. Also run the indicator on the shaft journals to separate a bent shaft from an eccentric gear — the two give the same reading at the teeth and need different fixes.
**Write the number down before and after** anything is disturbed. A runout that changed is the most useful evidence there is.
Matériaux pour cette étape :
 Jeu d'engrenages droits (acier, 20 dents)1 pièce
 Arbre en acier de 30 mm1 pièce
 Roulement à billes2 pièces
Outils nécessaires :
 Comparateur à cadran
 Micromètre
 Carnet
2
2
What runout and misalignment cost
What runout and misalignment cost
Chargement du notebook Jupyter…
Outils nécessaires :
 Ordinateur de bureauCarnet
3
3
Reading the contact pattern
Reading the contact pattern
Five minutes with a tube of engineer's blue tells you more than an hour of measurement, because it shows the assembly under its own errors rather than the parts in isolation.
**Method.** Wipe the teeth clean. Put a thin, even film of blue on three or four teeth of the pinion — thin enough to see metal through it. Turn the pair through a few revolutions against a light brake, so the flanks are loaded. Read the marking transferred to the wheel.
**A good pattern** sits centrally on the flank, covers roughly 70–80% of the face width, and stops short of both ends — the ends are deliberately relieved on good gears so that the corner never carries.
**Contact at one end only** is misalignment. Which end tells you the direction. If it swaps ends when the load is reversed, the shaft is bending rather than the bores being wrong.
**Contact at both ends and nothing in the middle** is a bowed gear or a shaft deflecting between two widely spaced bearings.
**Contact high on the tooth, at the tips** means the centre distance is too large, or the tips need relieving.
**Contact low, at the root**, means the centres are too close — and root contact is the dangerous one, because that is where the bending stress is highest.
**A pattern that moves round the wheel** from tooth to tooth is runout or pitch error, not alignment.
**On bevels, the pattern IS the adjustment.** Move the pinion in and out on its shims until the mark sits centrally and slightly towards the toe, and record the shim stack. That mounting distance is the setting.
Matériaux pour cette étape :
 Bleu de mécanicien1 pièceJeu d'engrenages droits (acier, 20 dents)2 pièces
 Jeu d'engrenages coniques (acier, 1:1)1 pièce
Outils nécessaires :
 Loupe de bijoutier
 Jeu de cales d'épaisseurCarnet
4
4
Fixing what the pattern shows
Fixing what the pattern shows
**Misalignment in a housing you can machine.** Line bore both seats in one setup, or bore them from the same side without moving the work. Two bores done separately are parallel only by luck.
**Misalignment you cannot machine out.** Shim the bearing housings, or fit an eccentric bush in one seat and rotate it to the setting. This is standard on large open gearing.
**Shaft deflection.** Move the bearings closer to the gear, increase the shaft diameter, or centre the gear between its bearings rather than overhanging it. Deflection goes with the cube of span and the fourth power of diameter, so a small change in either is a large change in deflection.
**Deliberate helix correction.** On large gears the lead is ground with a built-in twist that cancels the known deflection at the design load. It is correct at one load only, which is the compromise.
**Crowning.** Relieving the flank slightly towards each end so contact stays central whatever the misalignment. It reduces the contact area and therefore the capacity, and it makes the gear tolerant of exactly the errors above — which is why it is standard on gears that will be mounted by someone else.
**Let it run in.** A moderate pattern will improve over the first hours under light load, as the high spots polish down. A bad pattern will not improve; it will pit. The difference is whether the peak load is above or below the contact fatigue limit, and running in a badly aligned pair simply damages it faster.
Matériaux pour cette étape :
Bleu de mécanicien1 pièceRoulement à billes2 piècesJeu d'engrenages droits (acier, 20 dents)2 piècesOutils nécessaires :
Comparateur à cadranJeu de cales d'épaisseurMicromètreMatériaux
5- Espace réservé
- 1 pièceEspace réservé
- à partir de€1.12
- 1 pièceEspace réservé
- Espace réservé
Blueprints liés
Ces blueprints partagent des connaissances — techniques, matériaux ou principes
CC0 Domaine public
Ce blueprint est publié sous CC0. Vous êtes libre de copier, modifier, distribuer et utiliser ce travail pour tout usage, sans demander la permission.
Soutenez le Maker en achetant des produits via son Blueprint où il perçoit une Commission Maker définie par les Vendeurs, ou créez une nouvelle itération de ce Blueprint et incluez-le comme connexion dans votre propre Blueprint pour partager les revenus.