The Purl Stitch and Stockinette Fabric — Knitting's Second Foundation
Every knitted fabric in the world is built from two stitches: knit and purl. The knit stitch — a loop pulled through the front of the previous loop — was the subject of the first knitting blueprint. The purl stitch is its mirror: a loop pulled through the back of the previous loop. Where a knit stitch produces a smooth V-shaped face, a purl stitch produces a bumpy horizontal bar. They are the same stitch seen from opposite sides — a knit on the front is a purl on the back, and vice versa.
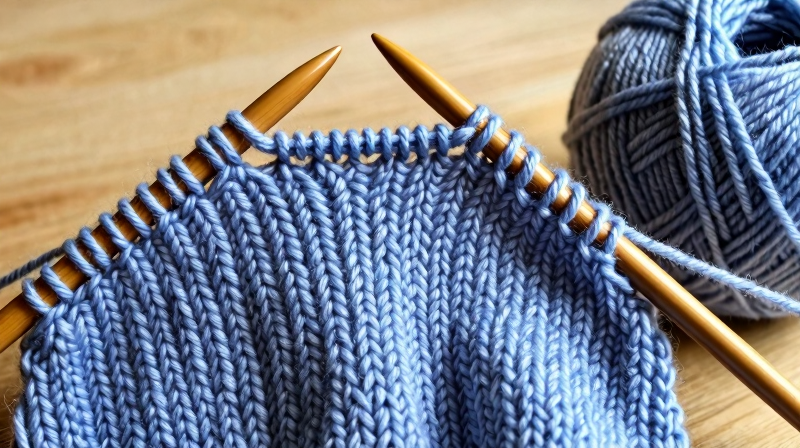
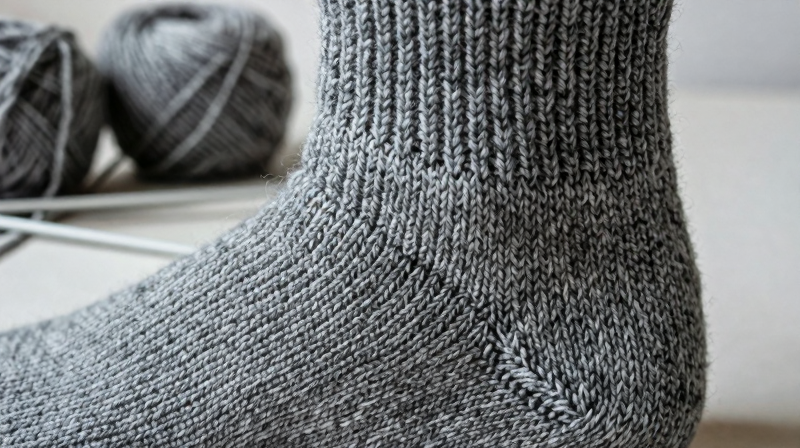
Alternating rows of knit and purl produces stockinette (also called stocking stitch), the single most common knitted fabric structure. Every T-shirt, every pair of socks, every sweater body, every machine-knitted jersey is stockinette. The fabric has a smooth right side (all V-shapes) and a bumpy wrong side (all bars). Stockinette curls at the edges — the top and bottom curl toward the smooth side, the left and right edges curl toward the bumpy side. This curl is not a defect but a property of the asymmetric structure: the knit face is slightly shorter than the purl face, creating internal tension.
The purl stitch was a genuine technical innovation. Early knitted fabrics (13th-14th century, Egypt and Spain) were worked entirely in knit stitch, producing garter stitch or worked in the round to produce stockinette without purling. The purl stitch appears in European knitting by the mid-1500s, enabling flat stockinette, ribbing (alternating columns of knit and purl for elastic edges), and seed stitch (alternating individual knit and purl stitches for a textured, non-curling fabric).
Consignes
Cast on a practice swatch
Cast on a practice swatch
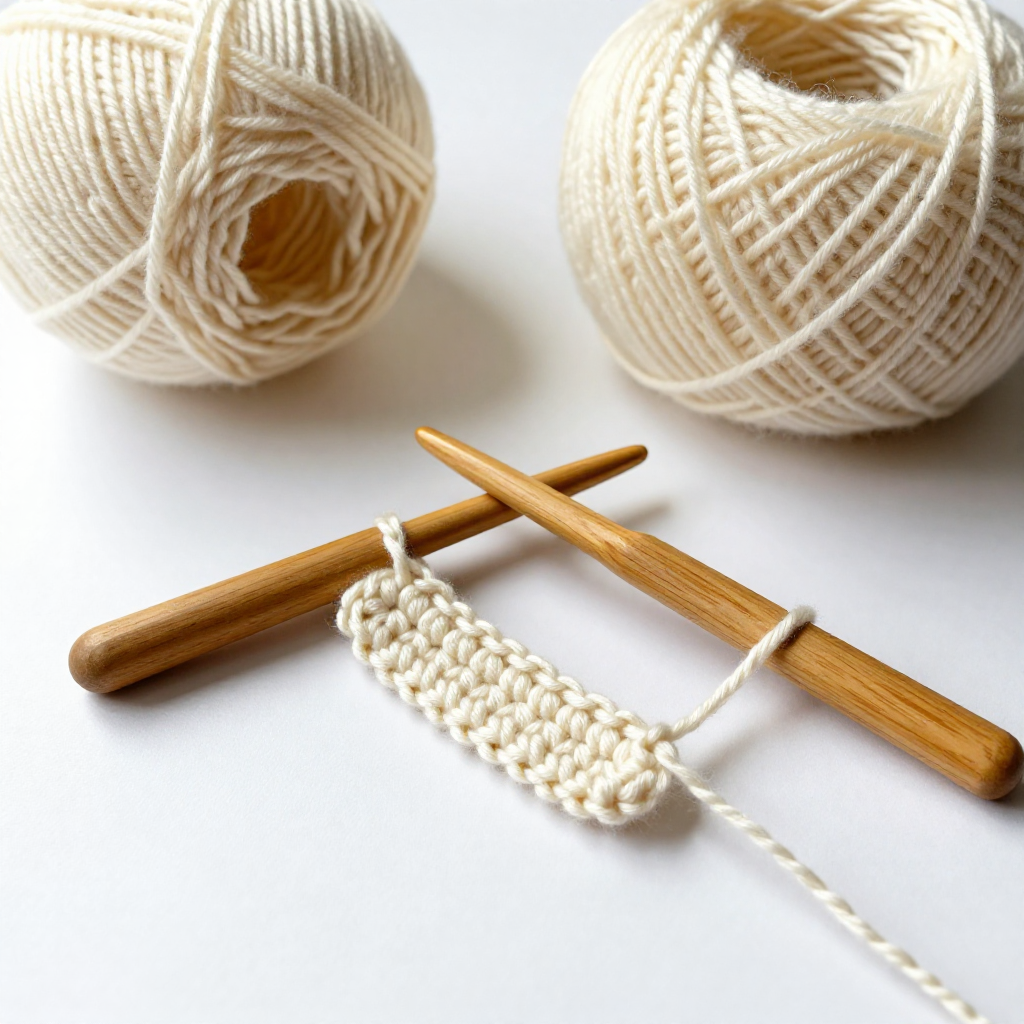
Using straight knitting needles (4-5 mm) and medium-weight wool yarn, cast on 20 stitches using the long-tail cast-on method from the garter stitch blueprint. This gives you a swatch wide enough to see the fabric structure clearly. If you have not yet learned the knit stitch, complete the garter stitch blueprint first — the purl stitch assumes you can already knit comfortably.
Matériaux pour cette étape :
 Wool Yarn Skein (Undyed)1 pièce
 Knitting Needles1 pair
Understand purl as the mirror of knit
Understand purl as the mirror of knit
In a knit stitch, the yarn sits behind the needle and you insert the right needle from left to right through the front of the loop. In a purl stitch, the yarn sits in front of the needle and you insert the right needle from right to left through the front of the loop — entering from the opposite direction. The wrap goes the same way (counterclockwise around the right needle), but the insertion is reversed. The result is a bump on the side facing you instead of a V. If you turn the fabric over after purling a row, the purl bumps are on the back — and the front shows smooth Vs, identical to a knit row seen from the other side.
Hold the yarn in front
Hold the yarn in front
Before purling, bring the working yarn to the front of the work — between the two needles, toward you. This is the opposite of the knit stitch, where the yarn stays behind. The yarn must be in front before you insert the needle. If you forget this step, you will accidentally create an extra stitch (a yarn-over) that leaves a hole in the fabric. When switching between knit and purl stitches within the same row, moving the yarn front-to-back and back-to-front is the single most common source of errors for beginners.
Insert the right needle from right to left
Insert the right needle from right to left
With the yarn in front, insert the tip of the right needle into the first stitch on the left needle from right to left — the right needle enters from the right side of the loop and exits on the left side. The right needle tip points toward the left. This is the reverse of the knit insertion (which goes left to right). The right needle should sit in front of the left needle, with both needle tips pointing in the same direction.
Wrap and pull through
Wrap and pull through
Wrap the yarn counterclockwise around the right needle tip — the same direction as a knit stitch. Pull the wrapped yarn back through the stitch on the left needle by drawing the right needle tip toward you and down, pulling the new loop through. Slide the old stitch off the left needle. You have made one purl stitch. The new stitch sits on the right needle with a horizontal bump on the side facing you. Repeat across all 20 stitches to complete one purl row.
Knit one row, purl one row — stockinette
Knit one row, purl one row — stockinette
To produce stockinette fabric on straight needles, alternate: knit all stitches on odd-numbered rows (right side facing you), purl all stitches on even-numbered rows (wrong side facing you). After 10-12 rows, the pattern becomes visible — the right side shows columns of interlocking Vs running vertically (the smooth or knit face), while the wrong side shows rows of horizontal bumps (the purl face). This is the fabric of nearly every commercial knitted garment. Continue for 30 rows to create a swatch large enough to observe the fabric's behavior.
Observe stockinette curl
Observe stockinette curl
Remove the swatch from the needles (or keep it on) and lay it flat. The top and bottom edges curl toward the smooth knit side. The left and right edges curl toward the bumpy purl side. This curl is inherent to stockinette and cannot be blocked out permanently — steaming or pressing flattens it temporarily, but it returns. This is why sweater hems, cuffs, and neckbands use ribbing instead of stockinette — ribbing combines knit and purl columns that cancel out the curl. Garter stitch (all knit, all purl on reverse) also lies flat because both sides have the same structure.
Practice 1x1 ribbing
Practice 1x1 ribbing
Cast on 20 stitches. Row 1: knit 1, bring yarn to front, purl 1, bring yarn to back, knit 1, purl 1 — repeat across the row, alternating single knit and purl stitches. Row 2: knit the knits and purl the purls (the stitches that show a V get knit, the stitches that show a bump get purled). After a few rows, the fabric forms alternating vertical ribs — one column of Vs, one column of bumps. Ribbing is elastic: it stretches widthwise and springs back. This is why every sock cuff, sweater waistband, and hat brim uses ribbing — it grips the body without binding.
Practice seed stitch
Practice seed stitch
Cast on 21 stitches (odd number). Row 1: knit 1, purl 1, repeat across, ending with knit 1. Row 2: repeat the same pattern — knit 1, purl 1. Because the stitch count is odd, the knits and purls offset on each row: a knit sits above a purl, a purl sits above a knit. This produces a fabric with a pebbly, textured surface that looks the same on both sides and lies completely flat — no curl. Seed stitch is used for blanket borders, dishcloths, and any project where a flat, reversible fabric is wanted.
Understand tension differences between knit and purl
Understand tension differences between knit and purl
Most knitters purl at a slightly different tension than they knit — usually looser. This creates visible rowing-out in stockinette: alternating rows of tighter and looser stitches that give the fabric a stripy appearance. The fix is practice: consciously snugging the yarn tighter on purl rows until the tension evens out. Some knitters solve this by switching to combination knitting (wrapping the purl stitch clockwise instead of counterclockwise, then knitting through the back loop on the return row) or by using Continental style (yarn in left hand), which tends to produce more even tension across knit and purl.
See how knit and purl build every pattern
See how knit and purl build every pattern
Every knitted stitch pattern — from simple ribbing to complex Aran cables — is a combination of knit and purl stitches arranged in different sequences. Basketweave: blocks of stockinette and reverse stockinette in a checkerboard. Broken rib: 2 knit, 2 purl, offset every few rows. Moss stitch: like seed stitch but offset every two rows instead of every row. The vocabulary is only two stitches, but the arrangements are infinite. Reading a knitting chart is reading a grid where every cell is either knit or purl — K or P, two symbols, unlimited fabric.
Matériaux
2- 1 pièceEspace réservé
- 1 pairEspace réservé
Matériaux des Blueprints connectés
Blueprints liés
Ces blueprints partagent des connaissances — techniques, matériaux ou principes
Related blueprints
Other builds that share materials, tools, or techniques with this one.

CC0 Domaine public
Ce blueprint est publié sous CC0. Vous êtes libre de copier, modifier, distribuer et utiliser ce travail pour tout usage, sans demander la permission.
Soutenez le Maker en achetant des produits via son Blueprint où il perçoit une Commission Maker définie par les Vendeurs, ou créez une nouvelle itération de ce Blueprint et incluez-le comme connexion dans votre propre Blueprint pour partager les revenus.