Collaboration
ART
BEAUTÉ ET BIEN-ÊTRE
ARTISANAT
CULTURE ET HISTOIRE
DIVERTISSEMENT
ENVIRONNEMENT
NOURRITURE ET BOISSONS
INGÉNIERIE INVERSE
SCIENCES
SPORTS
TECHNOLOGIE
TECHNOLOGIE PORTABLE
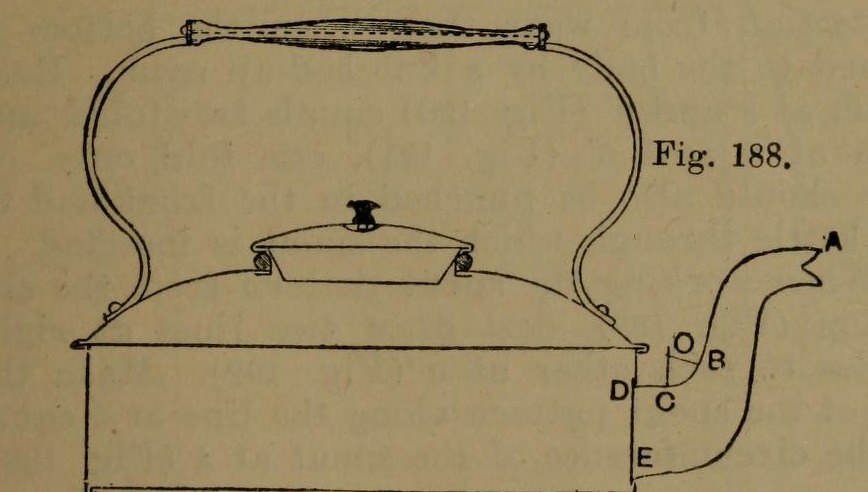


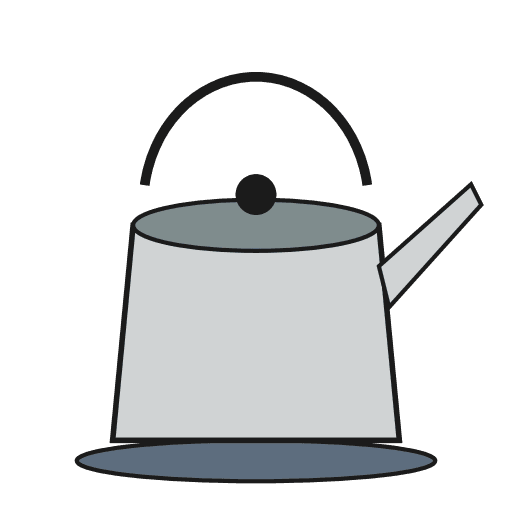
Stovetop Kettle: a Square Copper Kettle (Hasluck, 1907)
A tinsmith's square kettle in sheet copper, 9 x 9 in and 3 5/8 in deep: a box body with folded corner seams, a hollowed top pened on, a brazed and bent spout, a small cover, and a wooden handle on brass uprights.
Hasluck prefers copper; tinplate also works and is a separate route.
Source: Paul N. Hasluck, Tinplate Work (1907), pp. 91-98. Unknown: copper gauge, solder. Picture: Figs. 188-189 of the book.
Avancé
Unknown
Consignes
1
1
Cut the patterns
Cut the patterns
For a body 9 x 9 x 3 5/8 in, cut two ends 9 1/2 x 4 in and two sides 9 1/4 x 4 in, notched for box seams at the corners (Figs. 190-191), with allowances to fold at top and bottom. Punch the spout hole in the front. Cut the bottom 9 1/2 in square, notched for a 1/4 in edge. Set out the top as a 10 1/2 in square with curved allowances for hollowing and a 4 in circle for the cover hole (Fig. 193); set out the spout from the elevation (Fig. 192), the cover and its cone-shaped rim (Figs. 194-195).
Matériaux pour cette étape :
 Feuille de cuivre1 body, bottom, top, spout, cover
Outils nécessaires :
 Compas à pointes sèches
 Pointe à tracer
 Cisaille à tôle
2
2
Braze and shape the spout
Braze and shape the spout
Thin the long edges by hammering. Set in the throat with a stretching hammer on a beak iron, bend the spout round until the edges overlap, bind it with wire, lay spelter and borax along the inside of the seam and braze it; then close and braze the under seam. Fill it with lead and bend the neck with a round-faced hammer on the hollowing block; file off spare spelter and smooth it. Run out the lead, throw off a seating round the large end, trim the top with snips and tin the inside.
Matériaux pour cette étape :
 Métal inconnu1 spelter
 Étain1 tinning
Outils nécessaires :
 Marteau à planer
 Piquet
 Fil de fer
 Borax en poudre
 Chalumeau de brasage
 Plomb
 Écumoire perforée
 Bloc de bois dur
 Lime à métauxCisaille à tôle
3
3
Fold and seam the body
Fold and seam the body
Fold the top edges square, the front and back outwards and the sides likewise; fold the bottom edges right over inwards to take the bottom (Fig. 188). Hook each side's end over the front's and work the corner seam on a straight-edged tool (Figs. 198-199). Turn up the bottom's 1/4 in edge, push it edge-down into the bottom folds, and solder the bottom and seams.
Matériaux pour cette étape :
 Soudure étain-plomb1 pièce
Outils nécessaires :
 Maillet en boisPiquet
 Fer à souder électrique
 Flux
4
4
Hollow the top and make the cover
Hollow the top and make the cover
Hollow the top on the block: sink the four sides a little, hollow the corners with a bullet-faced hammer, flatten each side along the block edge, even the shoulder and smooth it all over. Pare the edges, mark the flange with an edging machine, set it down square with a hatchet stake and mallet, and take up an edge to fit over the body. Cut the cover hole with circular snips and fit a narrow wired rim, worked over inside. Make the cover: solder its cone rim to fit the wired rim, throw off a flange, hollow the cover disc and seam it on, and fix the knob.
Matériaux pour cette étape :
Fil de fer1 rimSoudure étain-plomb1 pièceMétal inconnu1 cover knobOutils nécessaires :
Marteau à planerBloc de bois durPiquetMaillet en boisCisaille à tôleFer à souder électriqueFlux5
5
Handle, top and spout
Handle, top and spout
Cut two handle uprights from stout brass or copper band (Fig. 196), drill them for rivets and for the spindle that carries the wooden handle, and bend them to shape. Rivet them to the top and solder over the rivet heads inside. Pene the top down onto the body and solder along each edge. Push the spout through its hole from inside until its large end butts against the front, and solder it strongly from inside.
Matériaux pour cette étape :
 Feuille de laiton1 handle uprights
 Barre de laiton1 spindle
 Manche1 wood
 Rivets en cuivre1 number not givenSoudure étain-plomb1 pièce
Outils nécessaires :
 Chignole à main
 Marteau à riverMaillet en boisFer à souder électriqueFlux
Matériaux
9- 1 body, bottom, top, spout, coverEspace réservé
- 1 cover knobEspace réservé
- 1 tinningEspace réservé
- 3 piècesEspace réservé
- 1 rimEspace réservé
- 1 handle uprightsEspace réservé
- 1 spindleEspace réservé
- 1 woodEspace réservé
- 1 number not givenEspace réservé
Outils requis
17- Espace réservé
- Espace réservé
- Espace réservé
- Espace réservé
- Espace réservé
- Espace réservé
- Espace réservé
- Espace réservé
- Espace réservé
- Espace réservé
- Espace réservé
- Espace réservé
- Espace réservé
- Espace réservé
- Espace réservé
- Espace réservé
- Espace réservé
Matériaux des Blueprints connectés


Ce plan fabrique
CC0 Domaine public
Ce blueprint est publié sous CC0. Vous êtes libre de copier, modifier, distribuer et utiliser ce travail pour tout usage, sans demander la permission.
Soutenez le Maker en achetant des produits via son Blueprint où il perçoit une Commission Maker définie par les Vendeurs, ou créez une nouvelle itération de ce Blueprint et incluez-le comme connexion dans votre propre Blueprint pour partager les revenus.