
Kolaborasi
SENI
KECANTIKAN & KESEHATAN
KERAJINAN
BUDAYA & SEJARAH
HIBURAN
LINGKUNGAN
MAKANAN & MINUMAN
REKAYASA BALIK
ILMU PENGETAHUAN
OLAHRAGA
TEKNOLOGI
PERANGKAT PAKAI
Plough Back-Band With Hooks: Faced, Flock-Padded Back-Band With a Rein Dee (Hasluck, Harness Making, 1904)
Tex

Dibuat oleh

Tex

13. November 2026FO
7
0
0
0
0

Plough Back-Band With Hooks: Faced, Flock-Padded Back-Band With a Rein Dee (Hasluck, Harness Making, 1904)

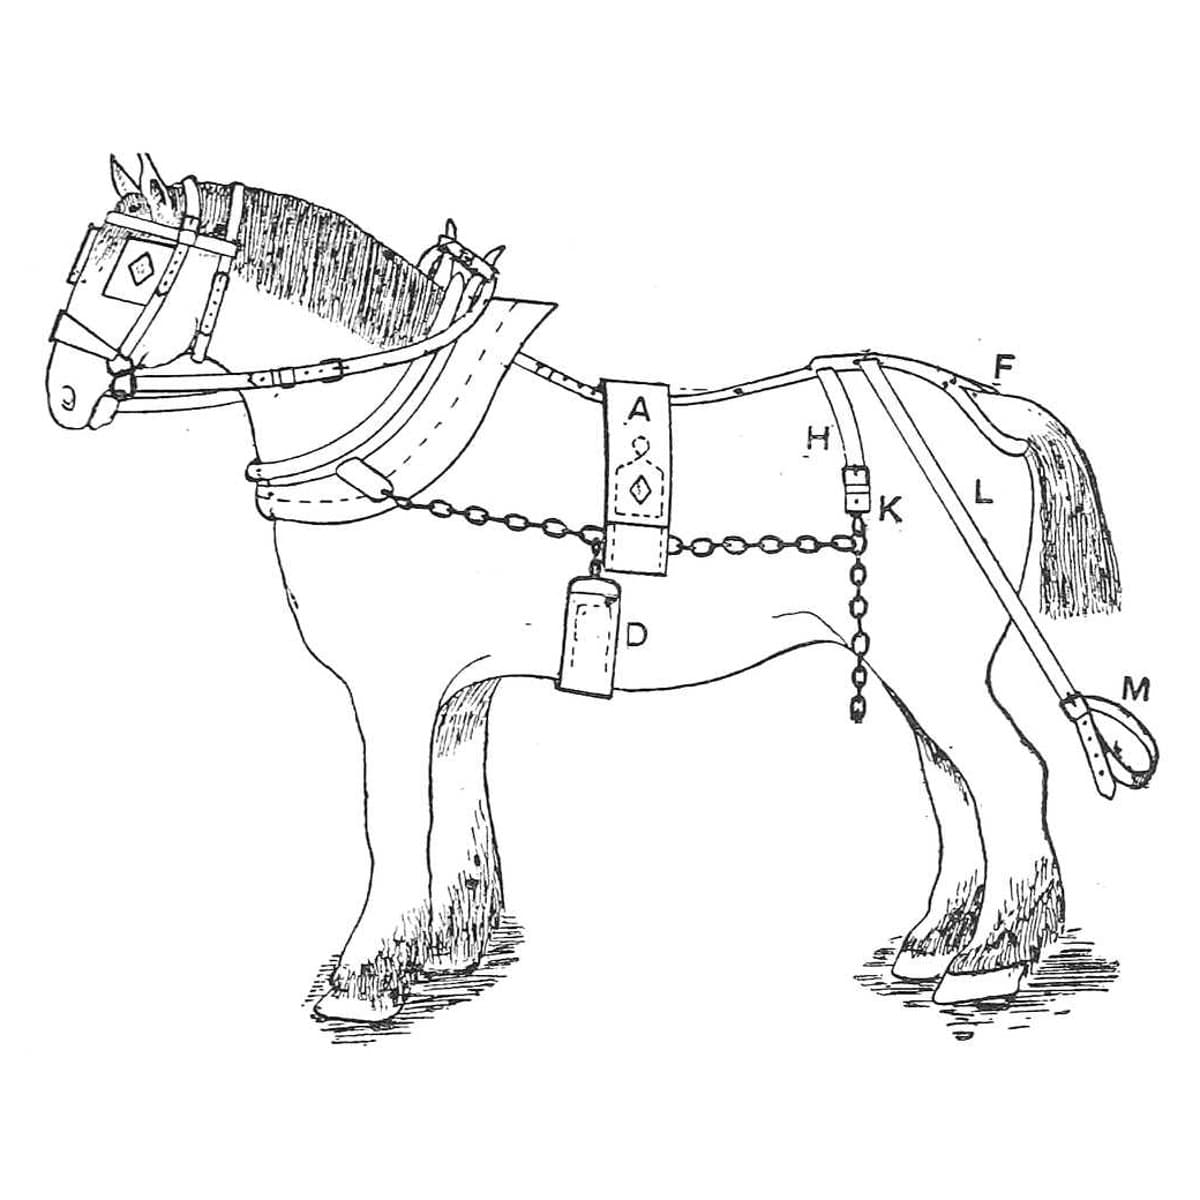
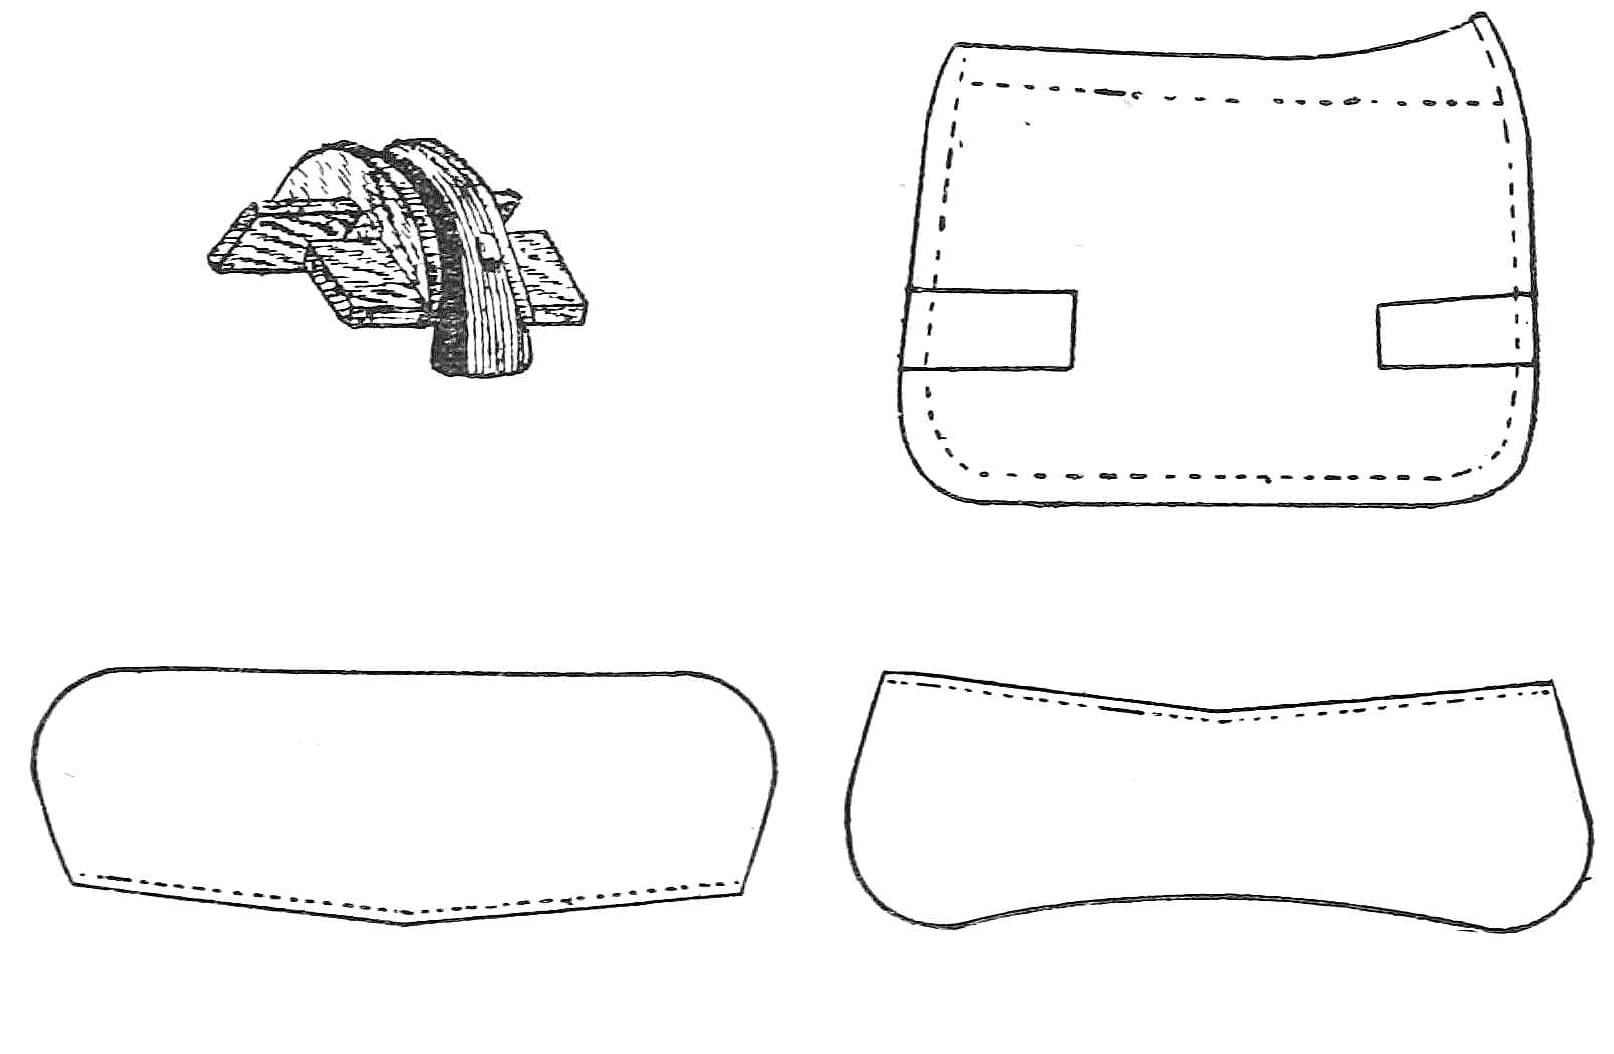
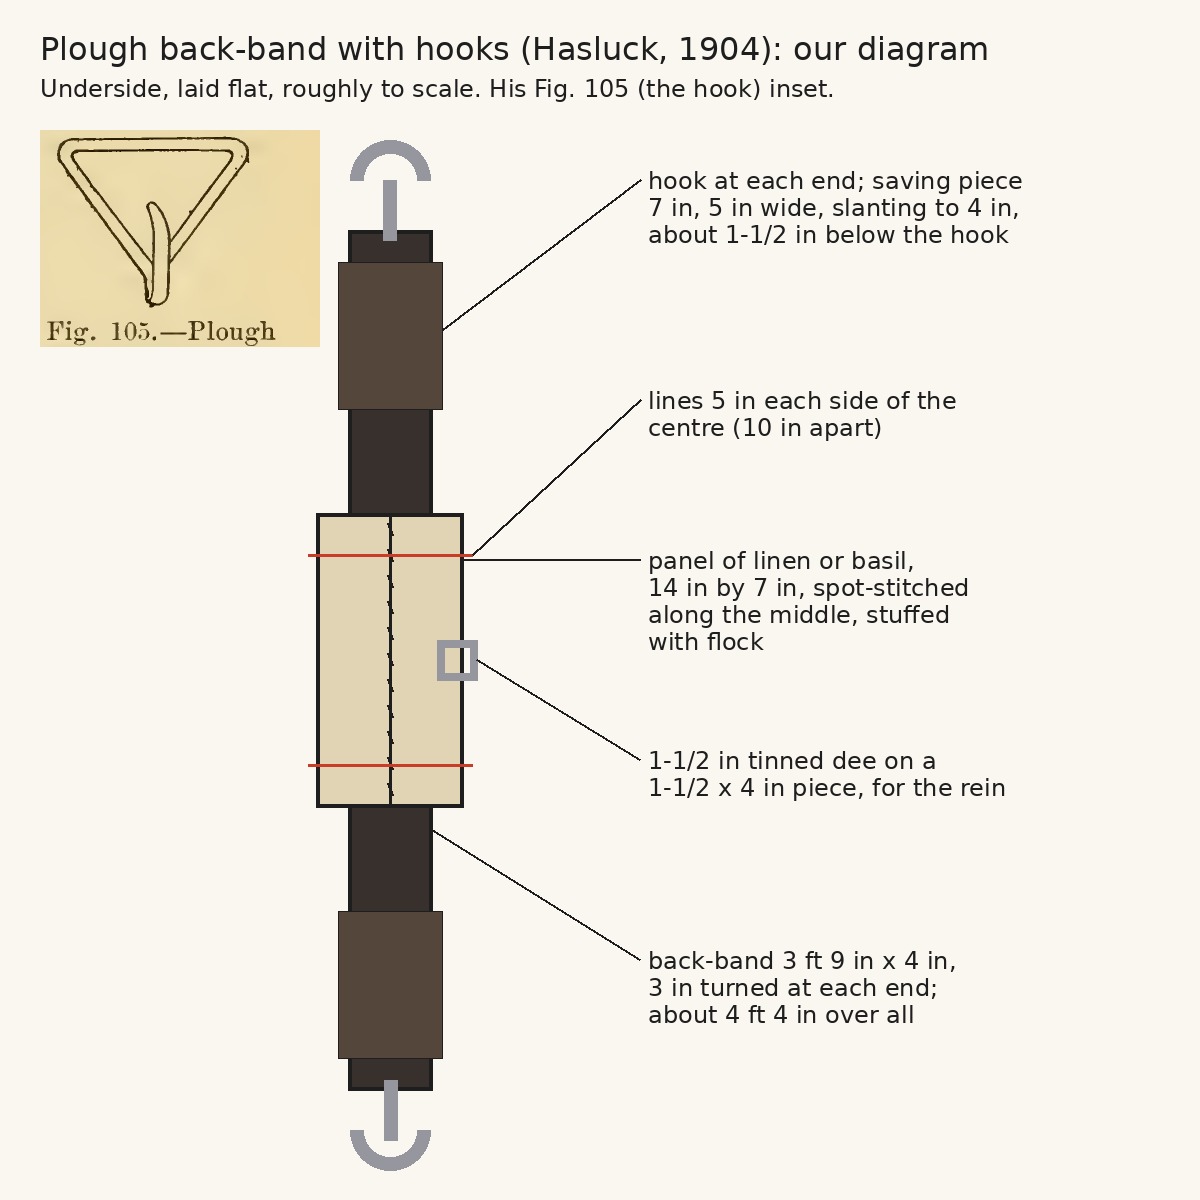
In plough harness the back-band carries the traces over the horse's back. This is the plough back-band with hooks from Paul N. Hasluck's Harness Making (1904): a 4 in band about 4 ft 4 in over all, with leather facings, a flock-stuffed panel to stop the back getting sore, a dee for the plough rein, and a hook sewn into each end. Every size is his; the picture is our diagram with his Fig. 105 inset.
Menengah
About 1 day

Instruksi

1

His sizes in centimetres

Memuat notebook Jupyter…
2

Read Harness Making, ch. IX

"In plough gears the ordinary bridle and collar are employed. The back-band is made in various ways. The method with hooks is taken first. The eye of the hook (Fig. 105) is 4 in. wide."
3

Cut and mark the back-band

Cut the leather 3 ft 9 in long and 4 in wide. Turn down 3 in at each end, beat the bend slightly with the hammer to keep it down, and crease it with the screw race, two rows on each side. Mark the centre from each end and draw a line straight across there, then two lines 5 in each side of the centre, 10 in apart.

Material untuk langkah ini:

Kulit pelana dan tali kudaKulit pelana dan tali kuda1 buah

Alat yang dibutuhkan:

Pisau kulitPisau kulit
PaluPalu
Alat pelipatAlat pelipat
Obor PropanaObor Propana
PensilPensil
Meteran GulungMeteran Gulung
4

Stitch on the facings

Cut two pieces 10-1/2 in long and 3/4 in wide; cut a small piece out of each corner of the working side, then dye and crease that side. Draw a line along the centre of each with the compasses and mark across the centre. Prick out where they go on the back-band, then place one underneath the back-band, centre to centre, as far as the drawn line, and tack it down; place the other the same way on the other side, so the pieces run a little over both lower lines at each end. Stitch, keeping the line close to the edge of the back-band, with thread of three or four cords of coarse hemp.

Material untuk langkah ini:

Kulit pelana dan tali kudaKulit pelana dan tali kuda1 buah
Pewarna kulitPewarna kulit1 buah
Paku penahan atasanPaku penahan atasan1 buah
Tali RamiTali Rami1 buah
Malam LebahMalam Lebah1 buah

Alat yang dibutuhkan:

Pisau kulitPisau kulit
Alat pelipatAlat pelipat
Jangka alur pelanaJangka alur pelana
Pahat jahit kulitPahat jahit kulit
PaluPalu
Penusuk (Uncek)Penusuk (Uncek)
Dua jarum pelanaDua jarum pelana
Penjepit kayu untuk menjahit kulitPenjepit kayu untuk menjahit kulit
5

Fit the rein dee

Cut a piece of leather 1-1/2 in by 4 in, shave and point both ends, and crease, black and prick it like the side, eight or ten marks per inch. Put a 1-1/2 in tinned dee in the centre of it, lay it flat on the back-band in the centre (measured from both sides, or from the top line to either line below), tack it and stitch. The plough rein runs through this dee; for a pair of horses put the dee on the opposite side of each back-band, for a single horse one on each side of the same back-band.

Material untuk langkah ini:

Cincin D perlengkapan kudaCincin D perlengkapan kuda1 buah
Kulit pelana dan tali kudaKulit pelana dan tali kuda1 buah
Pewarna kulitPewarna kulit1 buah
Tali RamiTali Rami1 buah
Malam LebahMalam Lebah1 buah

Alat yang dibutuhkan:
Pisau kulitPisau kulit
Pahat jahit kulitPahat jahit kulit
Penusuk (Uncek)Penusuk (Uncek)
Dua jarum pelanaDua jarum pelana
Penjepit kayu untuk menjahit kulitPenjepit kayu untuk menjahit kulit
6

Make the panel

Take linen (or basil) 14 in by 7 in and lay the back-band on it centre to centre, even on both sides. Spot-stitch across the back-band and through the linen along the middle line, like this: // // //. Turn in the linen all round about 1/2 in (basil needs no turning). Make a pleat at each corner at the end of the facing, both exactly the same length, and another opposite each, so the width equals the back-band and facing together (for basil, cut the corner off and stitch the cut instead). Stitch all round, starting about 1-1/2 in from the centre on one side to leave an opening for stuffing, along the cross lines at the bottom, to within 1-1/2 in of the centre on the other side.

Material untuk langkah ini:

Kain linenKain linen1 buah
Tali RamiTali Rami1 buah
Malam LebahMalam Lebah1 buah

Alat yang dibutuhkan:

GuntingGunting
Penusuk (Uncek)Penusuk (Uncek)
Dua jarum pelanaDua jarum pelana
7

Stuff the panel

Lay the back-band flat on the bench, leather side underneath, openings near the bench edge. Stuff each side rather tightly with flock through the openings, using the stuffing stick; smooth it well towards the sides, flatten with a mallet, and stitch along the openings to the starting point.

Material untuk langkah ini:

Isian wolIsian wol1 buah
Tali RamiTali Rami1 buah
Malam LebahMalam Lebah1 buah

Alat yang dibutuhkan:

Batang pengisiBatang pengisi
Palu KayuPalu Kayu
Penusuk (Uncek)Penusuk (Uncek)
Dua jarum pelanaDua jarum pelana
8

Sew in the hooks

Cut two saving pieces from a thick, firm face of hide (the face of a gear hide is best), 7 in long and, for a 4 in back-band, 5 in wide. Cut one end slanting to 4 in, the back-band's width, and shave it; round the corners of the other end, leaving it full width; black and crease the edges. Put the hooks in place with the saving pieces under them about 1-1/2 in lower than the end of the hook, and tack them down exactly in the centre. Mark and prick four rows from the hook up to the end of the saving pieces, stitch with four-cord thread, nine or ten stitches per inch, and stitch a line across close to the hook to bind it all together.

Material untuk langkah ini:

Kait tali punggungKait tali punggung2 buah
Kulit pelana dan tali kudaKulit pelana dan tali kuda1 buah
Pewarna kulitPewarna kulit1 buah
Paku penahan atasanPaku penahan atasan1 buah
Tali RamiTali Rami1 buah
Malam LebahMalam Lebah1 buah

Alat yang dibutuhkan:

Pisau kulitPisau kulit
Alat pelipatAlat pelipat
Obor PropanaObor Propana
Pahat jahit kulitPahat jahit kulit
PaluPalu
Penusuk (Uncek)Penusuk (Uncek)
Dua jarum pelanaDua jarum pelana
Penjepit kayu untuk menjahit kulitPenjepit kayu untuk menjahit kulit
9

Troubleshooting

Plough back-band troubleshooting.

Flow

Loading...
10

History and honest limits

From **Harness Making**, edited by Paul N. Hasluck, Cassell, 1904 (Project Gutenberg 70169), chapter IX, "Plough Harness", pp. 107-110, Fig. 105; every fraction was checked on the archive.org scan (harnessmaking00hasl). The back-band with chains instead of hooks and the coupling straps are not made here. Linen for the panel (he allows basil), the tools and metric figures are ours; the picture is our diagram with his Fig. 105 inset.

Bahan

9

Alat yang Diperlukan

14

CC0 Domain Publik

Cetak biru ini dirilis di bawah CC0. Anda bebas untuk menyalin, memodifikasi, mendistribusikan, dan menggunakan karya ini untuk tujuan apa pun, termasuk komersial, tanpa meminta izin.

Dukung Maker dengan membeli produk melalui Cetak Biru mereka di mana mereka mendapatkan Komisi Pembuat yang ditetapkan oleh Penjual, atau buat iterasi baru dari Cetak Biru ini dan masukkan sebagai koneksi di milik Anda sendiri.

Diskusi

(0)

Masuk untuk bergabung dengan diskusi

Memuat komentar...