
Kolaborasi
SENI
KECANTIKAN & KESEHATAN
KERAJINAN
BUDAYA & SEJARAH
HIBURAN
LINGKUNGAN
MAKANAN & MINUMAN
REKAYASA BALIK
ILMU PENGETAHUAN
OLAHRAGA
TEKNOLOGI
PERANGKAT PAKAI
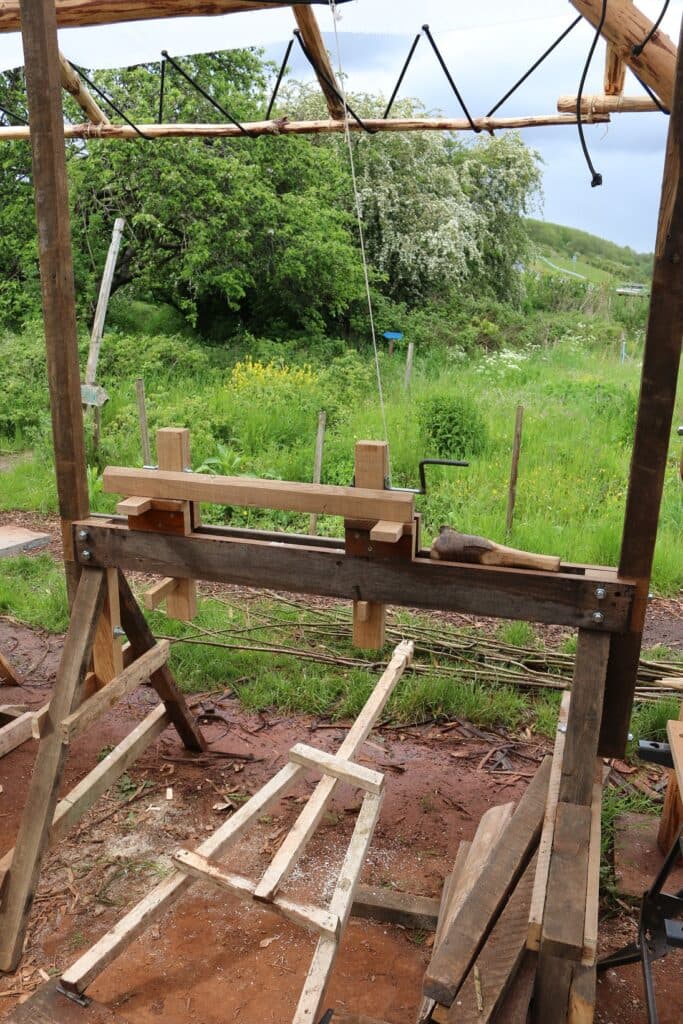
Turner's Pole Lathe with Puppets, Screw Centre and Treadle (Moxon, 1680)
Woody

Dibuat oleh

Woody

14. November 2026NO
7
0
0
0
0

Turner's Pole Lathe with Puppets, Screw Centre and Treadle (Moxon, 1680)

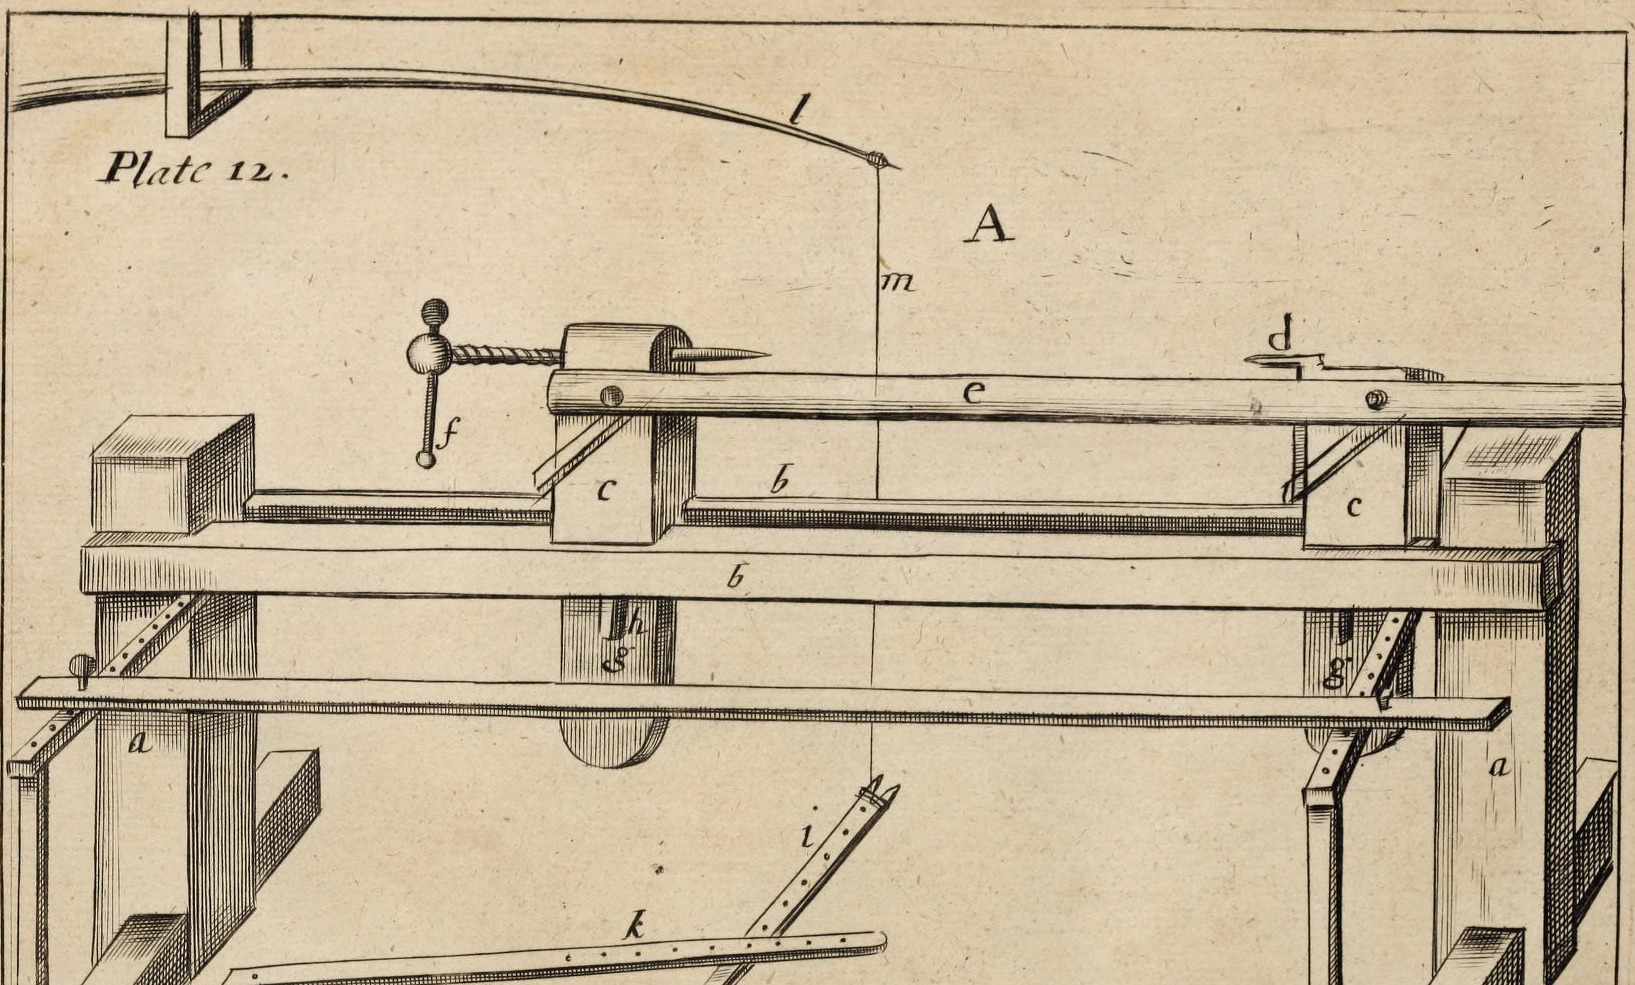
The workshop pole lathe of Joseph Moxon's Mechanick Exercises: legs and twin cheeks bolted square, sliding puppets wedged through the bed, a fixed steel-pointed pike and an adjustable screw centre, a hinged treadle with a cross-treadle, and a fir pole pinned to the ceiling for the spring.
Lanjutan
Two to three days

Instruksi

1

His sizes

Memuat notebook Jupyter…
2

Read Mechanick Exercises

"The Lathe is described in Plate 12. A. This Machine is so vulgarly known..."
3

Legs and cheeks

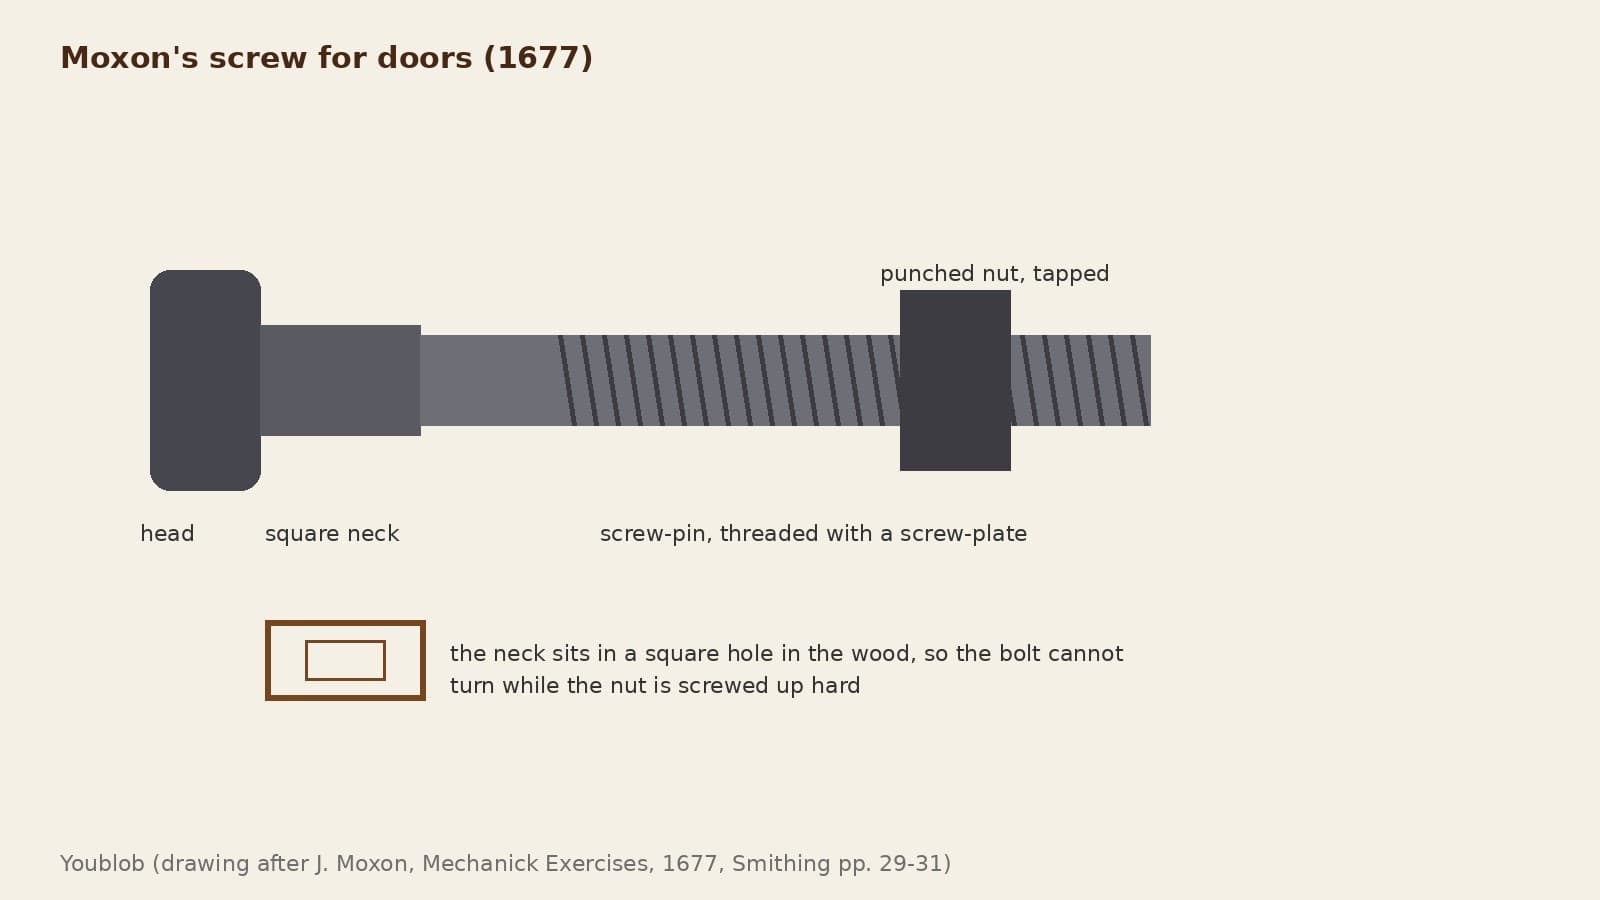
Set up two legs about 2 ft 10 in (86 cm) high, plumb, each with a tenon on top as thick as the gap you want between the two cheeks. Lay a cheek each side of the tenons, level, and fix them: pinned, or better with an iron bolt whose square neck sits in a square hole in the near cheek, drawn up by a nut. Brace legs and cheeks to the floor and walls so nothing trembles.

Material untuk langkah ini:

Papan ek putihPapan ek putih1 buah
Baut kepala bulat leher persegiBaut kepala bulat leher persegi1 buah

Alat yang dibutuhkan:

Gergaji TanganGergaji Tangan
Pahat lubang penPahat lubang pen
Palu KayuPalu Kayu
Bor engkol dan mata borBor engkol dan mata bor
4

Puppets

Make two (or two or three pairs of) square puppets, strong rather than weak and as short as your work allows: the centres must stand a little more than half the work's diameter above the cheeks. Give each a tenon at the foot that slides in the gap between the cheeks, with a mortise through it below the cheeks for a tapering wedge, driven with a mallet to clamp the puppet down.

Material untuk langkah ini:

Papan ek putihPapan ek putih1 buah
Pasak kayu kerasPasak kayu keras1 buah

Alat yang dibutuhkan:

Gergaji TanganGergaji Tangan
Pahat lubang penPahat lubang pen
Palu KayuPalu Kayu
5

Pike and screw centre

Near the top of one puppet fix a strong iron pike with a tempered steel point. Through the other fit an iron screw in a nut in the puppet, also with a steel point, both points in one straight line facing each other. Put an iron handle 7-8 in long with a knob at each end through the screw head. Cut the puppets to square shoulders just below the pikes to carry the rest.

Material untuk langkah ini:

Batang besi tempaBatang besi tempa1 buah
Batang baja perkakas persegiBatang baja perkakas persegi1 buah

Alat yang dibutuhkan:

Perapian pandai besiPerapian pandai besi
Landasan TempaLandasan Tempa
Set pembuat ulirSet pembuat ulir
Ember pendingin tempaEmber pendingin tempa
6

Rest and oil horn

Make the rest a square piece 1-1.5 in thick, 2-2.5 in broad, a little longer than the gap between the puppets. Hang a horn tip down on the outside of the right-hand puppet near the top, filled with oil, with a wooden cover and button carrying an iron wire that reaches nearly to the bottom, to oil the centre holes.

Material untuk langkah ini:

Papan ek putihPapan ek putih1 buah
Tanduk sapiTanduk sapi1 buah
Kawat besiKawat besi1 buah
Oli MesinOli Mesin1 buah

Alat yang dibutuhkan:

Gergaji TanganGergaji Tangan

Bor engkol dan mata borBor engkol dan mata bor
7

Treadle and cross-treadle

Make a treadle about 2.5 in broad, 1 in thick and 3 ft (up to 4 ft) long. Nail its back end to the floor with a piece of leather, 1-1.5 ft behind the lathe and midway between the legs, so the front reaches 1.5-2 ft past the front of the lathe. Cut a square notch 1.5 in wide and 2 in long in the far end for winding the string. Fix an iron pin about 0.5 in thick, standing 1.5-2 in up, in the middle; under the cheeks fix a cross-treadle with a row of holes 2-3 in apart to take the pin.

Material untuk langkah ini:

Papan ek putihPapan ek putih1 buah
Tali KulitTali Kulit1 buah
Paku BesiPaku Besi1 buah
Batang besi tempaBatang besi tempa1 buah

Alat yang dibutuhkan:

Gergaji TanganGergaji Tangan
PaluPalu
Bor engkol dan mata borBor engkol dan mata bor
8

Pole and string

Use a fir pole, thick or thin to suit the work; if it is too stiff, thin its upper and under sides with a draw-knife. Pin the thick end to a ceiling timber with one nail so it pivots. About a foot away nail two cheeks to the joists with a batten across their foot to carry the pole. Run the string from the pole's thin end, round the work, to the treadle.

Material untuk langkah ini:

Galah kayuGalah kayu1 buah
TaliTali1 buah
Paku BesiPaku Besi1 buah
Papan ek putihPapan ek putih1 buah

Alat yang dibutuhkan:

Pisau TarikPisau Tarik
PaluPalu
9

Troubleshooting

Pole lathe troubleshooting.

Flow

Loading...
10

History and honest limits

From Joseph Moxon, **Mechanick Exercises**, Numb. X, Turning (1680), pp. 176-185 and Plate 12 (checked on the archive.org scan mechanickexercis00moxo). He gives no sizes for cheeks, puppets or pole; metric and the wood choices are ours.

Bahan

12

Alat yang Diperlukan

10

Cetak biru ini membuat

CC0 Domain Publik

Cetak biru ini dirilis di bawah CC0. Anda bebas untuk menyalin, memodifikasi, mendistribusikan, dan menggunakan karya ini untuk tujuan apa pun, termasuk komersial, tanpa meminta izin.

Dukung Maker dengan membeli produk melalui Cetak Biru mereka di mana mereka mendapatkan Komisi Pembuat yang ditetapkan oleh Penjual, atau buat iterasi baru dari Cetak Biru ini dan masukkan sebagai koneksi di milik Anda sendiri.

Diskusi

(0)

Masuk untuk bergabung dengan diskusi

Memuat komentar...