
Kolaborasi
SENI
KECANTIKAN & KESEHATAN
KERAJINAN
BUDAYA & SEJARAH
HIBURAN
LINGKUNGAN
MAKANAN & MINUMAN
REKAYASA BALIK
ILMU PENGETAHUAN
OLAHRAGA
TEKNOLOGI
PERANGKAT PAKAI
Sprung-Leg Tubing Cutter: a Bent Rod With a Disk Outside and a Roller Inside, the Handle's Screw Bends One Leg In (Zeiler, 1958)
Forge

Dibuat oleh

Forge

13. November 2026NO
8
0
0
0
0

Sprung-Leg Tubing Cutter: a Bent Rod With a Disk Outside and a Roller Inside, the Handle's Screw Bends One Leg In (Zeiler, 1958)

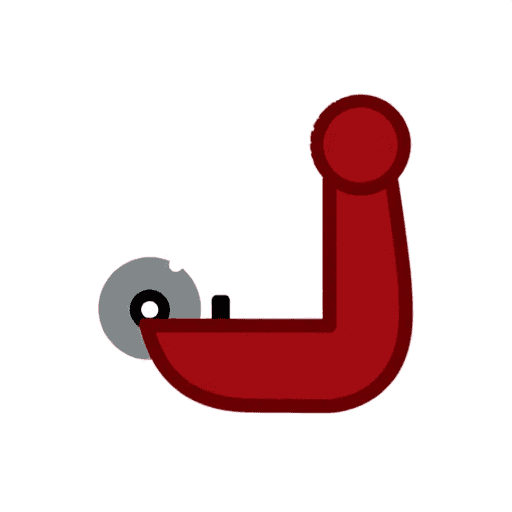
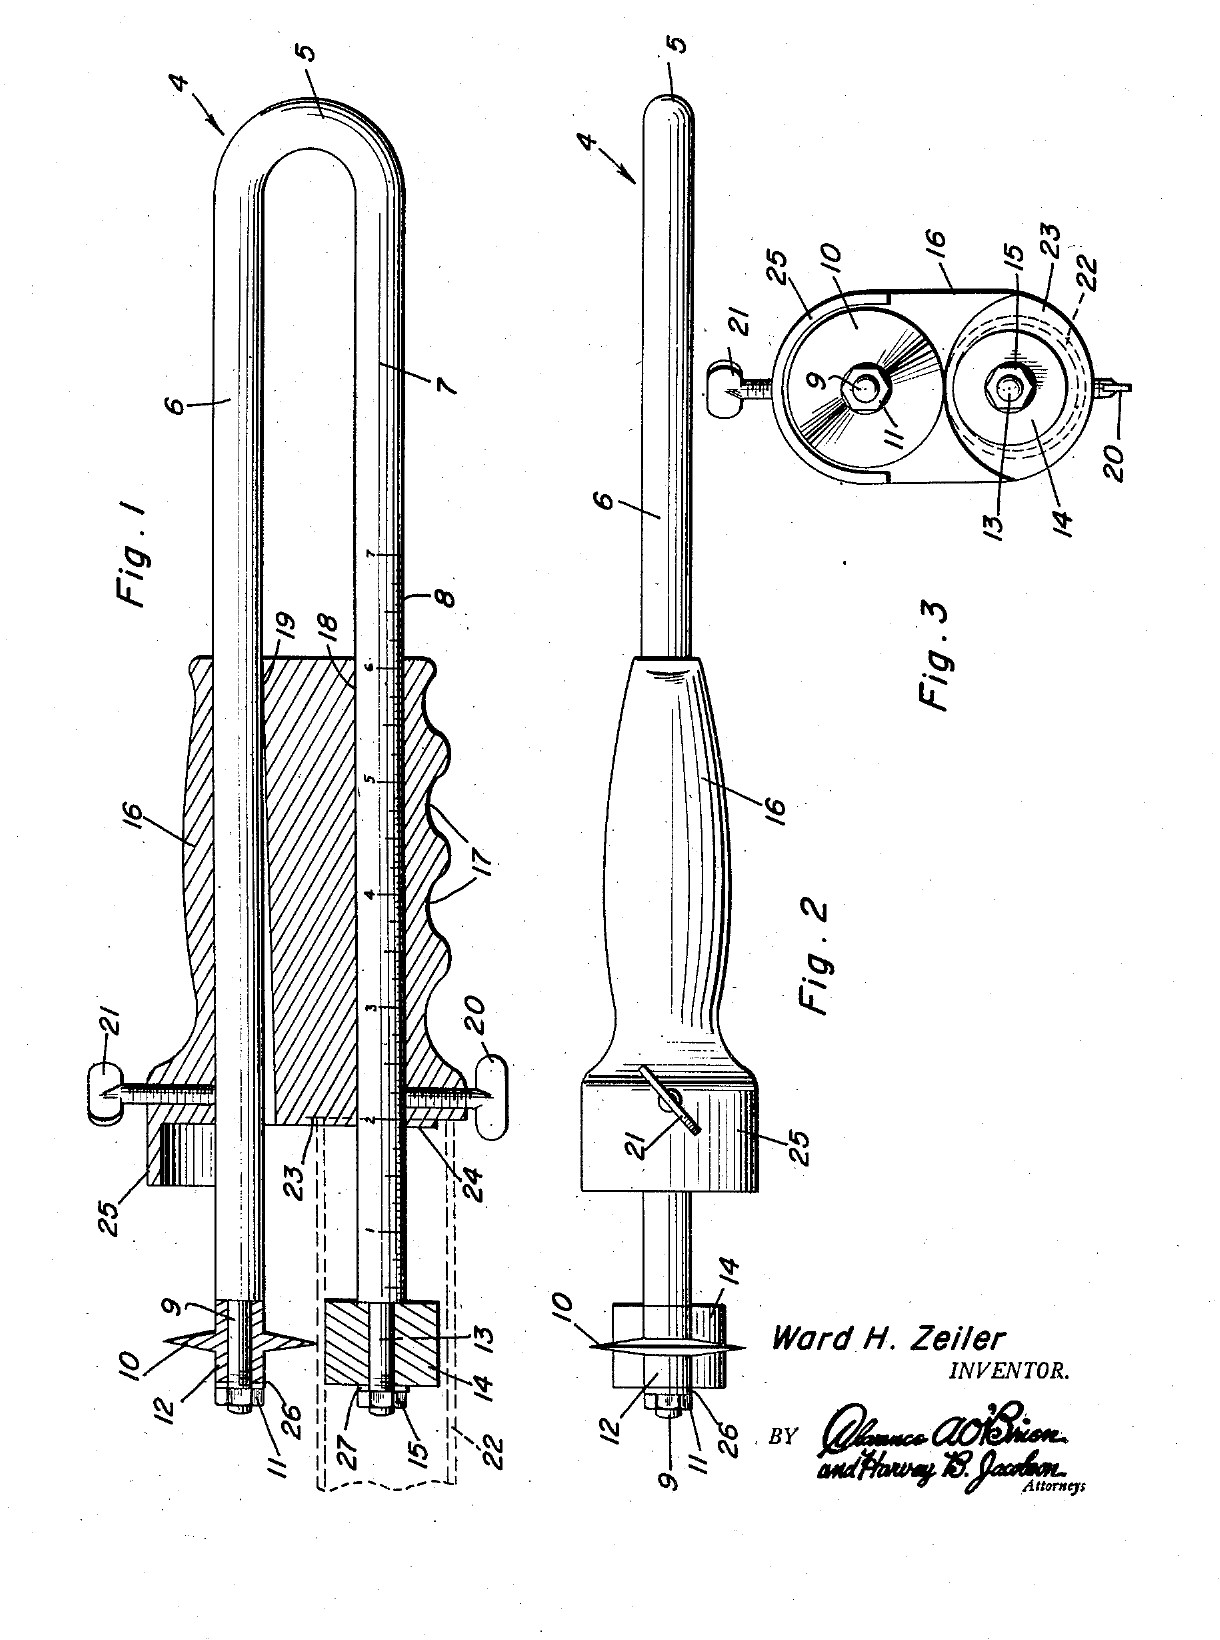
Ward H. Zeiler of Holyoke, Colorado, received US 2,821,781, dated 4 February 1958, for a plumber's tubing cutter that cuts a tube square, to length, near its end. The frame is one springy rod bent into a U. The lower leg goes into the tube and carries a roller. The upper leg carries a cutting disk outside the tube. A handle slides along both legs. Its front end stops against the tube end, so the cut length is read off a scale on the lower leg. A screw in the handle bends the upper leg in and presses the disk onto the tube, and turning the tool cuts it off. All sizes are ours.
Menengah
About 2 days

Instruksi

1

Why the frame must spring

Memuat notebook Jupyter…
2

Read US 2,821,781

"The leg 7 is then inserted in the tube 22 and the roller 14 and the projection 24 are engaged in the upper portion of said tube. The screw 21 is then tightened for bending the leg 6 of the frame 4, thus engaging the knife 10 with the periphery of the tube 22."
3

Print the template

The bent frame, its ends, the disk, roller and handle at 1:1, with the oval bore, the screws and the scale. print at 100 % (check the 50 mm bar).
Berkas desainPDFCC0 - Free
4

Bend the frame

Cut 470 mm of 6 mm spring steel wire. Heat the middle 40 mm red with the torch and bend it round a 10 mm bar into a U with the legs 16 mm apart, and straighten the legs parallel. Heat the last 25 mm of each leg red and let it cool slowly in the dying forge, so the ends are soft enough to file and thread. Leave the rest of the legs as they are: they must spring.

Material untuk langkah ini:

Kawat baja pegasKawat baja pegas1 buah

Alat yang dibutuhkan:

Obor patri kerasObor patri keras
Tungku TempaTungku Tempa
Penjepit TempaPenjepit Tempa
Ragum MejaRagum Meja
Palu kepala bulatPalu kepala bulat
Gergaji BesiGergaji Besi
Sarung tangan lasSarung tangan las
Kacamata pengamanKacamata pengaman
5

Thread the leg ends

Turn or file the last 24 mm of each leg to 5 mm, leaving a square shoulder, and cut an M5 thread on the last 8 mm with the die.

Alat yang dibutuhkan:

Mesin Bubut LogamMesin Bubut Logam
Cekam bubut 3 rahangCekam bubut 3 rahang
Pahat bubutPahat bubut
Set KikirSet Kikir
Set pembuat ulirSet pembuat ulir
Jangka Sorong Digital 6 InciJangka Sorong Digital 6 Inci
Minyak potongMinyak potong
6

Turn the disk and the roller

Disk: chuck a tool steel bar, turn 12 mm of it to 18 mm, drill it 5 mm, and turn the front 6 mm to a 50 degree edge, sharp in its middle. Turn the next 4 mm down to a 10 mm hub and part it off. Roller: turn 10 mm mild steel bar 16 mm long and drill it 5.2 mm, so it spins freely on the leg.

Material untuk langkah ini:

Batang baja perkakasBatang baja perkakas1 buah
Batang bulat baja lunakBatang bulat baja lunak1 buah

Alat yang dibutuhkan:

Mesin Bubut LogamMesin Bubut Logam
Cekam bubut 3 rahangCekam bubut 3 rahang
Pahat bubutPahat bubut
Pahat potong bubutPahat potong bubut
Set mata bor senterSet mata bor senter
Set Mata BorSet Mata Bor
Jangka Sorong Digital 6 InciJangka Sorong Digital 6 Inci
Kacamata pengamanKacamata pengaman
7

Harden and temper

Heat the disk to a cherry red, until a magnet no longer sticks, and quench it in water, moving it about. Rub it bright with a stone, warm it on a piece of steel plate over the fire, and quench again as soon as it turns a light straw colour.

Alat yang dibutuhkan:

Tungku TempaTungku Tempa
Penjepit TempaPenjepit Tempa
Magnet KecilMagnet Kecil
Ember pendingin tempaEmber pendingin tempa
AirAir
Batu AsahBatu Asah
Sarung tangan lasSarung tangan las
Kacamata pengamanKacamata pengaman
8

Make the handle

Saw 90 mm of 32 mm aluminium bar and face the ends. Drill two 6.2 mm holes through it lengthways, 16 mm apart, each 8 mm off the centre. With a round file, open the front 70 mm of the upper hole towards the lower one, 1.8 mm at the front face, tapering to nothing. Drill and tap M6 into the upper hole from the top, 12 mm from the front, and into the lower hole from below, 14 mm from the front. Saw and file away the lower half of the front 8 mm, leaving a 10 mm round boss round the lower hole. File three finger grooves underneath.

Material untuk langkah ini:

Batang bulat aluminiumBatang bulat aluminium1 buah

Alat yang dibutuhkan:

Gergaji BesiGergaji Besi
Mesin Bubut LogamMesin Bubut Logam
Cekam bubut 3 rahangCekam bubut 3 rahang
Mesin Bor DudukMesin Bor Duduk
Ragum MesinRagum Mesin
Set Mata BorSet Mata Bor
Set pembuat ulirSet pembuat ulir
Set KikirSet Kikir
Set Kikir JarumSet Kikir Jarum
Jangka Sorong Digital 6 InciJangka Sorong Digital 6 Inci
9

Make the guard

Cut a strip of brass sheet 12 mm wide and 50 mm long, bend it into a half round hood that reaches 12 mm past the handle's front over the disk, and fix its back end on top of the handle with two small screws.

Material untuk langkah ini:

Lembaran KuninganLembaran Kuningan1 buah
Sekrup Kepala SoketSekrup Kepala Soket2 buah

Alat yang dibutuhkan:

Gergaji BesiGergaji Besi
Set KikirSet Kikir
Mesin Bor DudukMesin Bor Duduk
Set Mata BorSet Mata Bor
Set pembuat ulirSet pembuat ulir
Ragum MejaRagum Meja
10

Assemble

Slide the handle onto the legs from the open end, the upper leg in the oval bore. Put the disk on the upper leg's end, hub outwards, then a washer and an M5 nut, snug enough that the disk still turns. Fit the roller the same way on the lower leg. Screw in the M6 feed screw on top and the setscrew below.

Material untuk langkah ini:

Ring RataRing Rata2 buah
Mur Segi EnamMur Segi Enam2 buah
Sekrup Kepala SoketSekrup Kepala Soket1 buah
Baut tanam ujung cekungBaut tanam ujung cekung1 buah

Alat yang dibutuhkan:

Kunci InggrisKunci Inggris
Set kunci LSet kunci L
11

Mark the scale

Slide the handle so its recess face is 20 mm from the disk's edge and lock it. File a nick across the lower leg at the handle's back face and mark it 20. File a nick every 10 mm towards the bend, deeper every 50 mm. The handle's back face now reads the cut length.

Alat yang dibutuhkan:

Set Kikir JarumSet Kikir Jarum
Jangka Sorong Digital 6 InciJangka Sorong Digital 6 Inci
12

Cut a tube to length

Set the handle to the length you want and lock the setscrew. Push the lower leg into the tube until the end bears in the recess, with the roller and boss against the inside. Tighten the feed screw until the disk touches. Turn the tool round the tube, giving the screw a little more each turn, until the end drops off. Clean the cut with a deburring tool.

Material untuk langkah ini:

Pipa tembagaPipa tembaga1 buah

Alat yang dibutuhkan:

Ragum MejaRagum Meja

Alat penghilang duri sisaAlat penghilang duri sisa
Set kunci LSet kunci L
Jangka Sorong Digital 6 InciJangka Sorong Digital 6 Inci
13

Troubleshooting

Sprung-leg tubing cutter troubleshooting.

Flow

Loading...
14

History and honest limits

**Ward H. Zeiler** of Holyoke, Colorado, US 2,821,781, dated 4 February 1958, filed 23 November 1956. He claimed "a substantially U-shaped resilient frame including legs extending slidably through the bores" and "a feed screw ... for bending said one leg within the confines of the handle for engaging the cutting disk with the tube". His frame was "suitable resilient metal"; ours is spring steel wire. His handle was a metal sleeve with a guard formed on it; ours is aluminium bar with a brass guard. The patent gives no sizes; all of ours are ours.

Bahan

10

Alat yang Diperlukan

28

Berkas desain

1

Cetak biru ini membuat

CC0 Domain Publik

Cetak biru ini dirilis di bawah CC0. Anda bebas untuk menyalin, memodifikasi, mendistribusikan, dan menggunakan karya ini untuk tujuan apa pun, termasuk komersial, tanpa meminta izin.

Dukung Maker dengan membeli produk melalui Cetak Biru mereka di mana mereka mendapatkan Komisi Pembuat yang ditetapkan oleh Penjual, atau buat iterasi baru dari Cetak Biru ini dan masukkan sebagai koneksi di milik Anda sendiri.

Diskusi

(0)

Masuk untuk bergabung dengan diskusi

Memuat komentar...