همکاری
هنر
زیبایی و سلامت
صنایع دستی
فرهنگ و تاریخ
سرگرمی
محیط زیست
غذا و نوشیدنی
مهندسی معکوس
علوم
ورزش
فناوری
پوشیدنیها
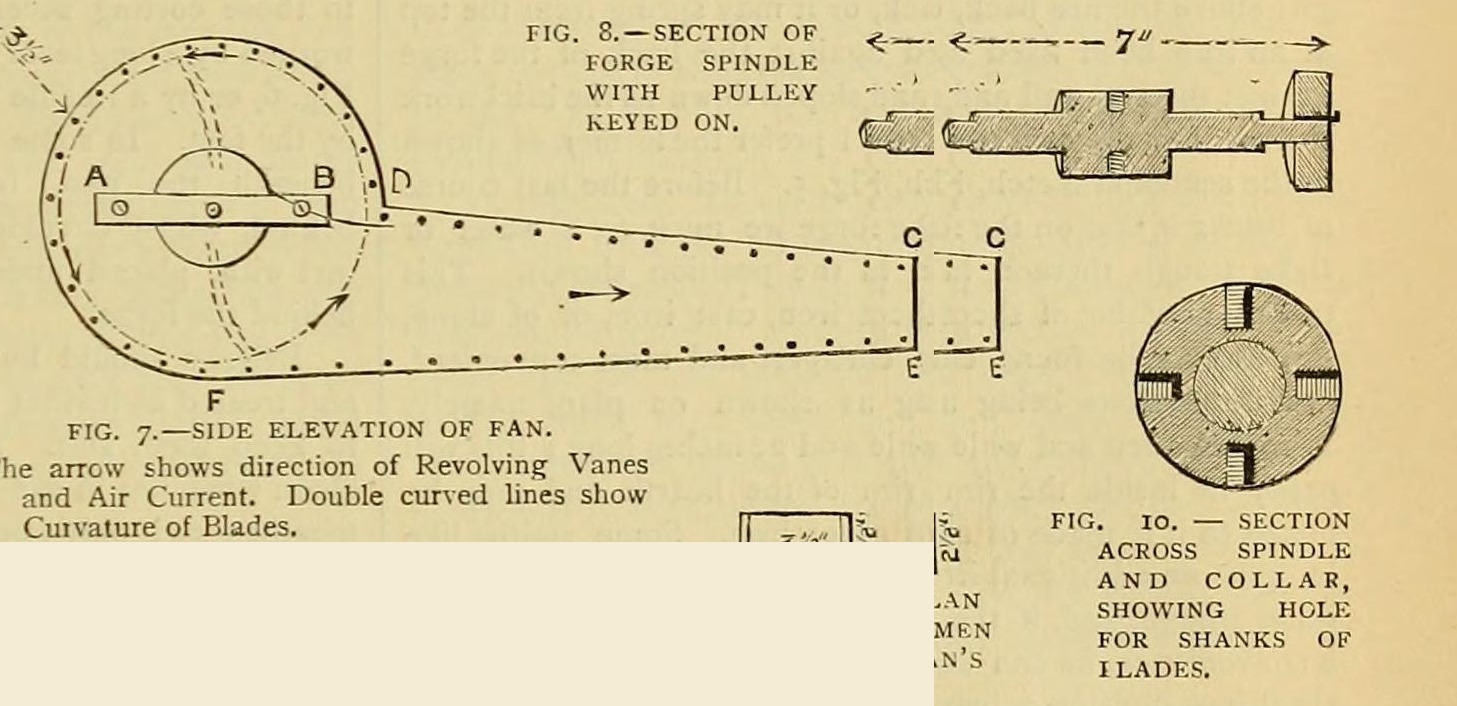


Forge Blast Fan: Riveted Sheet-Iron Drum, Shrunk-Collar Spindle and Four Screwed Blades, Belt-Driven at 360 rpm (Edwinson, 1886)
George Edwinson's home-made forge fan (Amateur Work, 1886), which he preferred to bellows: two 1/8 in. sheet-iron sides with a 3 1/2 in. intake, a riveted 1/16 in. casing, a turned 3/4 in. spindle with a shrunk-on collar holding four forged, slightly scooped blades, brass bearings, and a 2 in. pulley driven from a 2 ft hand wheel at 30 rpm for 360 rpm.
پیشرفته
Three to four days
دستورالعملها
1
1
His sizes
His sizes
در حال بارگذاری دفترچهٔ Jupyter…
2
2
Read Edwinson
Read Edwinson
"Under no circumstances should I advise an amateur to make his own bellows, but he may be able to make a fan."
3
3
Cut the sides
Cut the sides
Cut two sides from 1/8 in. sheet iron to his fig. 7: 9 in. across at the widest, 2 1/2 in. at the narrowest, 2 ft long. Cut a 3 1/2 in. hole in each for the spindle and air intake, drill two 3/8 in. holes for bolts A and B (filed square), and drill the rivet holes round the edge.
مواد مورد نیاز این مرحله:
 ورق فولاد نرم1 قطعه
ابزارهای مورد نیاز:
 قیچی ورقبری
 دریل ستونی
 سوهان (سوهان دستی)
 سنبهٔ نشانهگذاری
4
4
Rivet the casing
Rivet the casing
Cut 5 in. strips of 1/16 in. sheet with 3/4 in. margins bent down (4 in. clear): 14 in. from C to D, 20 in. from E to F, and about 22 in. round the drum from D to F (measure it). Mark the rivet holes through the side holes, nick between holes so the drum strip bends without buckling, and rivet, backing each head with stout iron. Leave a foot of the drum strip open. (Easier: make the sides 2 in. larger with outward flanges and rivet the strips to them.)
مواد مورد نیاز این مرحله:
ورق فولاد نرم1 قطعه پرچهای آهنی1 قطعه
ابزارهای مورد نیاز:
قیچی ورقبریدریل ستونی مجموعهٔ پرچ
 چکش
 متر نواری
5
5
Turn the spindle
Turn the spindle
Turn 7 in. of 3/4 in. round iron smooth. Turn one end to 1/2 in. for 5/8 in. and the other to 1/2 in. for 2 1/8 in., with sharp shoulders. Bore a 2 x 2 in. collar a shade under size, heat it red and slip it on 1 in. in from a shoulder, then cool it in water to shrink it tight.
مواد مورد نیاز این مرحله:
 میلهٔ آهن چکشخوار1 قطعه
 آب1 قطعه
ابزارهای مورد نیاز:
 تراش فلز
 کورهٔ آهنگری
 انبر آهنگری
6
6
Drill the collar
Drill the collar
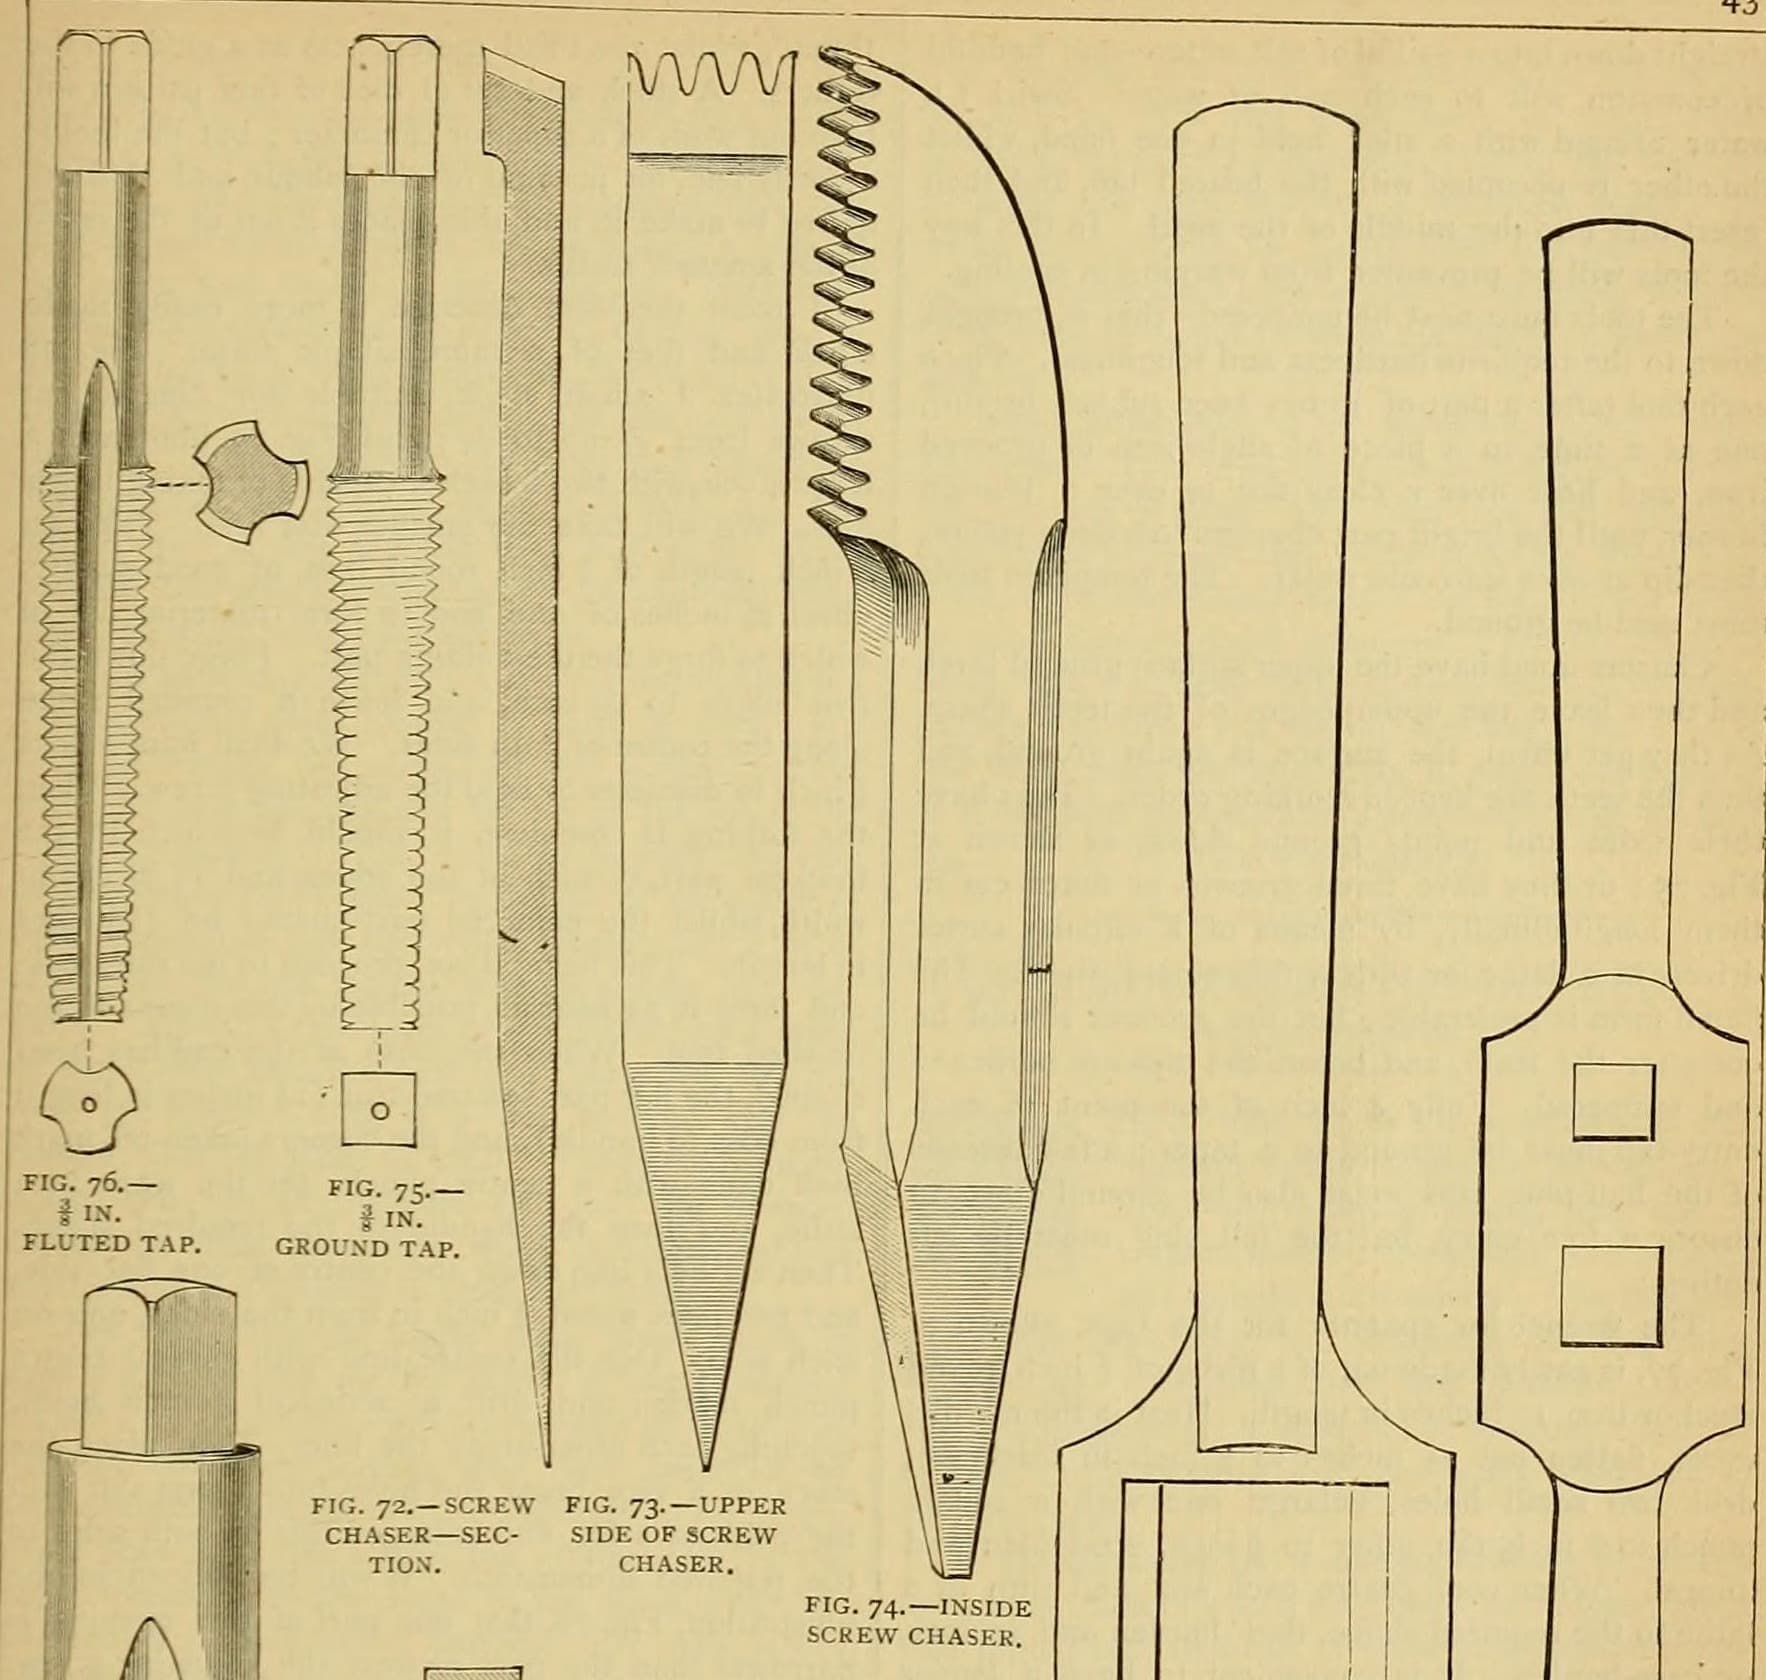
Drill four 5/16 in. holes 5/8 in. deep at quarters round the middle of the collar and tap them 3/8 in. (fig. 10).
ابزارهای مورد نیاز:
دریل ستونی قلاویز دستی
 دسته قلاویز
7
7
Forge the blades
Forge the blades
Forge four blades (fig. 9) from 5/8 or 3/4 in. round iron, upsetting and flattening the ends to 1/16 in. thick (or weld 1/4 in. plate to 5/8 in. arms and thin it). Thread the arm ends to fit the collar, curve the blades slightly into a scoop, and bend the arms a little off concentric for a steadier blast.
مواد مورد نیاز این مرحله:
میلهٔ آهن چکشخوار1 قطعهابزارهای مورد نیاز:
کورهٔ آهنگری سندانچکشقلاویز دستی
8
8
Bearings and assembly
Bearings and assembly
Bolt a 1/2 in. brass bar at least 1 1/4 in. wide across each intake hole (A-B) and bore it true for the spindle. Fit one bearing, pass the spindle in, fit the other and bolt up. Screw the blades in through the open part of the drum, each slightly askew, check they turn without touching, and close the drum with thin-headed bolts, nuts outside.
مواد مورد نیاز این مرحله:
 میلگرد برنجی1 قطعه
 مجموعهٔ پیچهای ششگوش1 قطعه
ابزارهای مورد نیاز:
دریل ستونیتراش فلزسوهان (سوهان دستی)9
9
Drive it
Drive it
File a flat on the 1 1/2 in. of spindle that stands out on the pulley side and key a 2 in. pulley with a 1 1/2 in. face to it. Belt it from a 2 ft wheel turned at 30 rpm: the fan runs at 360 rpm. Put the crank by the forge head, worked by hand or a foot lever (ours: details left to the reader in the source), and pipe the 3 1/2 x 2 1/2 in. mouth to the tuyere.
مواد مورد نیاز این مرحله:
 قرقره1 قطعه
 تسمهٔ انتقال نیرو1 قطعه
ابزارهای مورد نیاز:
سوهان (سوهان دستی)چکش10
10
Troubleshooting
Troubleshooting
Fan troubleshooting.
Flow
Loading...
11
11
History and honest limits
History and honest limits
From George Edwinson, "Smithing and Forging" I, **Amateur Work, Illustrated**, vol. V (1886), pp. 162-164 and figs. 7-11 (checked on the archive.org scan amateurworkillus05lond). He leaves the crank, wheel frame and pipe to the reader; the metric figures and tools are ours.
مواد
8- 1 قطعهجایگزین
- 1 قطعهجایگزین
- 1 قطعهجایگزین
- 1 قطعهجایگزین
- 1 قطعهجایگزین
- 1 قطعهجایگزین
- 1 قطعهجایگزین
- 1 قطعهجایگزین
ابزارهای لازم
13- جایگزین
- جایگزین
- جایگزین
- جایگزین
- جایگزین
- جایگزین
- 1 vendor sell this, none ship to you yetجایگزین
- جایگزین
- جایگزین
- جایگزین
- جایگزین
- جایگزین
- جایگزین
این نقشه میسازد

نقشههای مرتبط
این نقشهها دانش مشترکی دارند — تکنیکها، مواد یا اصول
CC0 مالکیت عمومی
این نقشه تحت مجوز CC0 منتشر شده است. شما آزاد هستید آن را کپی، ویرایش، توزیع و برای هر هدفی بدون نیاز به اجازه استفاده کنید.
با خرید محصولات از طریق نقشه از سازنده حمایت کنید و او کمیسیون سازنده تعیین شده توسط فروشندگان، دریافت میکند یا یک نسخه جدید از این نقشه ایجاد کنید و آن را به عنوان اتصال در نقشه خود قرار دهید تا درآمد به اشتراک گذاشته شود.