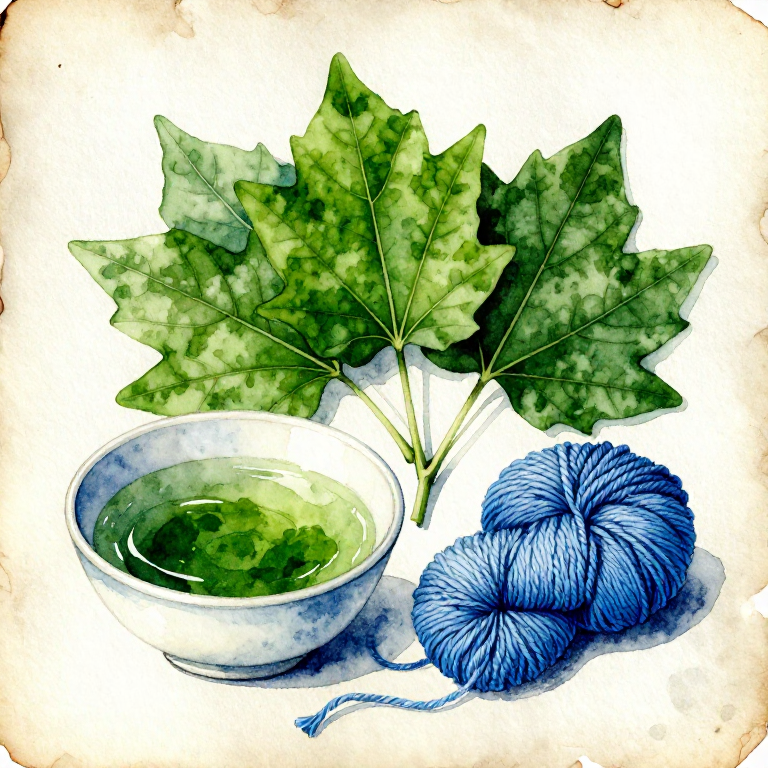
Dyeing Blue with Japanese Indigo — The Fresh-Leaf Salt-Rub Method
Japanese indigo (Persicaria tinctoria, formerly Polygonum tinctorium) is an annual plant native to East and Southeast Asia that has been cultivated for blue dyeing in Japan, China, and Korea for over 2,000 years. Like tropical indigo (Indigofera tinctoria) and European woad (Isatis tinctoria), Japanese indigo leaves contain a precursor — indican — that converts to the blue pigment indigotin. The fresh-leaf method described here extracts blue directly from freshly harvested leaves without the need for a fermentation vat, making it the most accessible route to natural blue for home dyers.
In Japan, Persicaria tinctoria (known as 'ai' or 'tade-ai') was the foundation of the country's legendary indigo dyeing tradition. Japanese indigo has a higher indican content than woad (though lower than tropical Indigofera) and the crucial advantage of being cultivable in temperate climates as an annual crop. It grows readily in European and North American gardens — seeds are available from dye plant suppliers worldwide. A single season's harvest from a small garden bed provides enough leaves for multiple dyeing sessions.
The fresh-leaf salt-rub method works by mechanically breaking the leaf cells to release indican, which is then enzymatically converted to indoxyl by the plant's own enzymes. The indoxyl is absorbed into the fibre and oxidises to indigotin on contact with air — the same chemistry as a vat, but happening directly in the leaf extract without a separate reduction step. This method produces lighter blues than a fermentation vat but requires no chemicals beyond salt and water.
Leiðbeiningar
Harvest fresh Japanese indigo leaves
Harvest fresh Japanese indigo leaves
Use 200-300% WOF of fresh Japanese indigo leaves. For 100 g of wool, harvest 200-300 g of fresh leaves. Pick leaves in the morning after the dew has dried — indican content is highest at this time. Strip leaves from stems and discard the stems (they contain little dye). Use the leaves immediately — indican begins degrading within hours of harvest. The leaves should be bright green and healthy-looking. Wilted, yellowed, or insect-damaged leaves have lower dye potential.
Efni fyrir þetta skref:
 Japanese Indigo Leaves (Fresh)250 g
Nauðsynleg verkfæri:
 Digital Kitchen Scale
Blend the leaves with water to make extract
Blend the leaves with water to make extract
Place the fresh leaves in a blender with 500 ml of cold water. Blend for 30-60 seconds until the leaves are thoroughly pulverised into a green slurry. Work quickly — the indican begins converting to indoxyl as soon as the cell walls are broken. Strain the green slurry through a fine mesh strainer or muslin cloth into a bowl, pressing firmly to extract all liquid. The strained extract will be a murky green. Discard the leaf pulp.
Nauðsynleg verkfæri:
 Fine Mesh Strainer
Add salt and soak the wool in the extract
Add salt and soak the wool in the extract
Add 2 tablespoons of salt to the leaf extract and stir to dissolve. The salt helps draw the dye into the fibre. Add enough cold water to cover the wool — approximately 2 litres total. Pre-wet the wool in cold water (no mordant needed for indigo). Lower the wool into the extract. Work the extract gently through the fibres with your hands, squeezing and turning for 10-15 minutes. Keep the wool submerged. The extract will slowly change colour as the indoxyl is absorbed by the fibres.
Efni fyrir þetta skref:
 Coarse Sea Salt2 tablespoon
 Wool Yarn Skein (Undyed)100 g
Remove and oxidise in air
Remove and oxidise in air
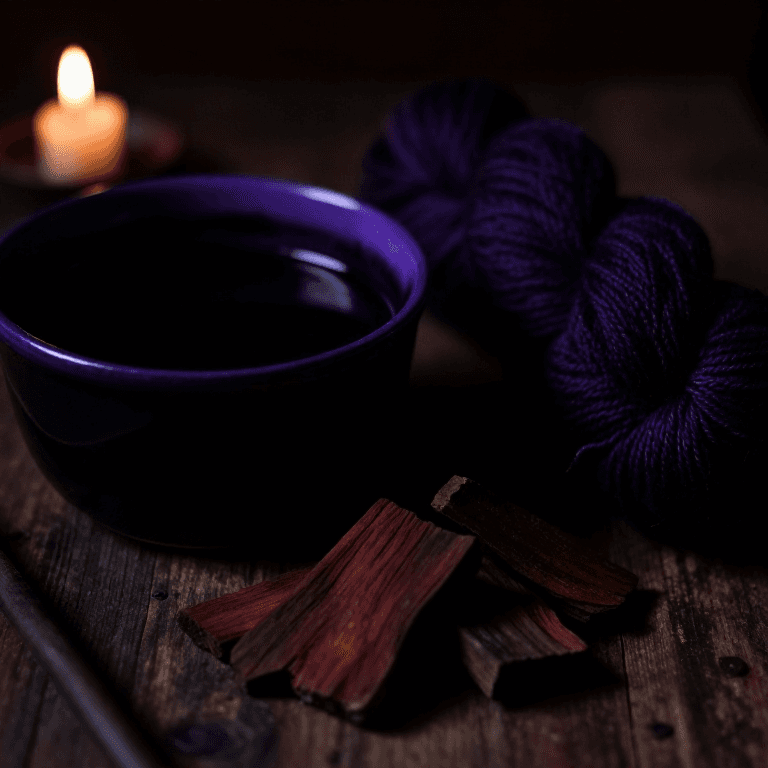
Remove the wool from the extract, squeeze gently, and spread it out in the air. Watch the colour transform: the green-tinged wool will turn blue within minutes as the indoxyl oxidises to indigotin on contact with atmospheric oxygen. This is the same magical colour change that happens in a traditional indigo vat, but happening from a simple leaf extract. Turn the wool to expose all surfaces to air. Allow 20-30 minutes for full oxidation.
Repeat dipping for deeper blue
Repeat dipping for deeper blue
For deeper blue, return the wool to the extract and work through the fibres again for 10 minutes. Remove and oxidise for 20 minutes. Each cycle adds another layer of indigotin. The fresh-leaf method produces lighter blues than a fermentation vat — expect pale sky-blue to medium blue from 3-5 dips. If making a fresh batch of extract for additional dips, harvest and process new leaves (the first extract will be exhausted after 3-4 uses).
Rinse and dry
Rinse and dry
After the final oxidation, rinse the wool in lukewarm water until the runoff is clear. Some green leaf pigment (chlorophyll) may wash out — this is normal and desirable, as chlorophyll is not lightfast but the blue indigotin is. The final colour is a soft, clear sky-blue to medium blue — lighter and more delicate than vat-dyed indigo but with the same excellent lightfastness. The blue will not fade significantly with washing or sunlight, as indigotin is among the most stable natural pigments. Dry in shade or sun — indigo is stable to light.
Efni
3- Staðgengill
- 2 tablespoonStaðgengill
- Staðgengill
Nauðsynleg verkfæri
2- Staðgengill
- Staðgengill
Efni úr tengdum teikningum


Tengd Blueprint
Þessi blueprint deila þekkingu — tækni, efni eða meginreglur

CC0 opinbert ríki
Þessi teikning er gefin út undir CC0. Þér er frjálst að afrita, breyta, dreifa og nota þetta verk í hvaða tilgangi sem er, án þess að biðja um leyfi.
Studdu smiðinn með því að kaupa vörur í gegnum teikningu hans þar sem hann fær þóknun smiða sem seljendur ákvarða, eða búðu til nýja endurskoðun á þessari teikningu og tengdu hana sem tengingu í þinni eigin teikningu til að deila tekjum.