
Samvinna
LIST
FEGURÐ OG VELLÍÐAN
HANDVERK
MENNING OG SAGA
SKEMMTUN
UMHVERFI
MATUR OG DRYKKUR
ÖFUGVERKFRÆÐI
VÍSINDI
ÍÞRÓTTIR
TÆKNI
KLÆÐANLEG TÆKNI
Cart Bridle With Winkers, Cut, Creased and Stitched (Hasluck, Harness Making, 1904)
Tex

Búin til af

Tex

13. nóvember 2026FO
0
0
0
0
0

Cart Bridle With Winkers, Cut, Creased and Stitched (Hasluck, Harness Making, 1904)

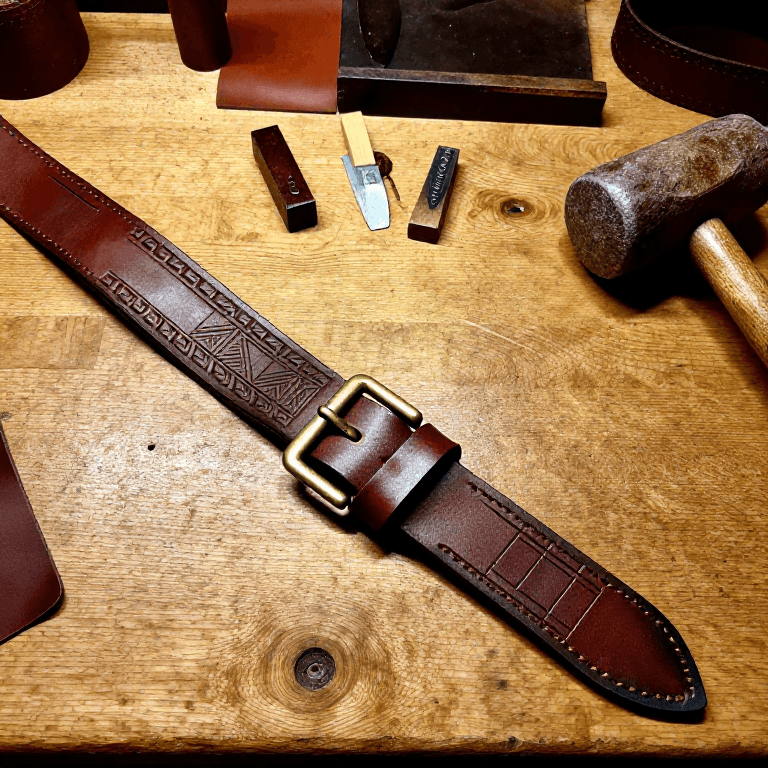
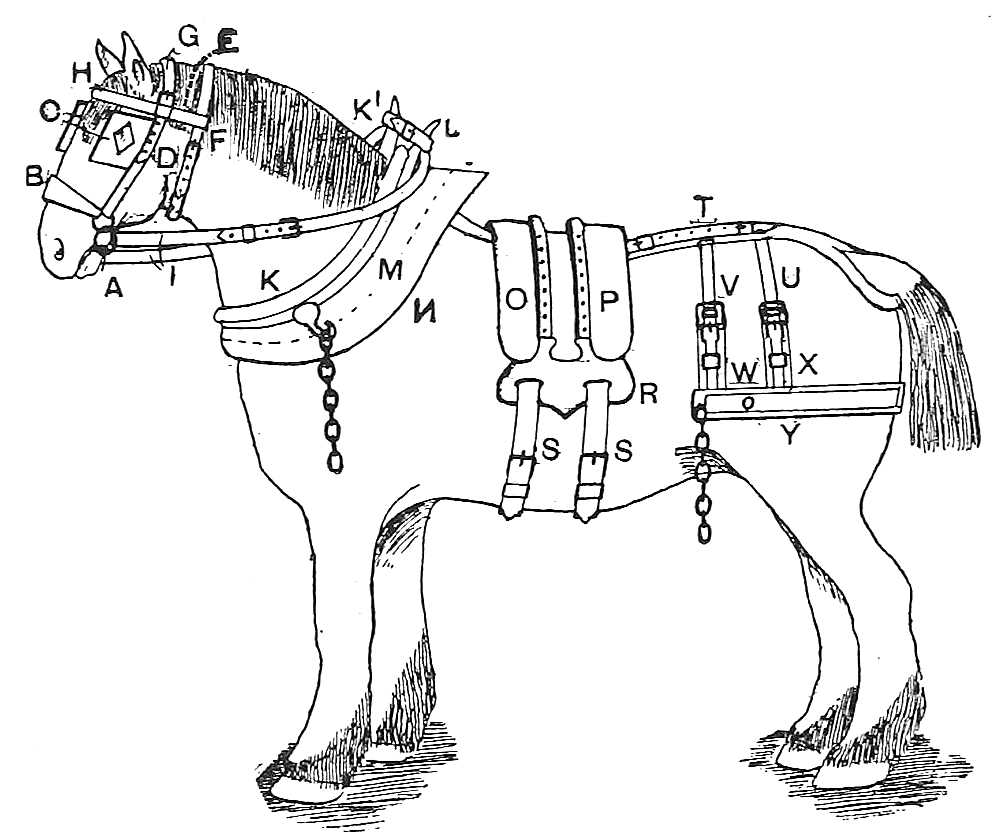
The bridle of a working cart horse, from Paul N. Hasluck's Harness Making (1904): japanned winkers set to shape, cheeks with bit rings, nose-band, forehead band, ear-pieces, chin strap, winker strap, head strap, throat lash and reins, all cut from harness leather, creased, blacked and stitched by hand eight to the inch. All sizes are his. It is the first part of a cart harness; the collar and the cart saddle follow in their own blueprints.
Lengra kominn
About 3 days

Leiðbeiningar

1

Cutting list

Hleð Jupyter-vinnubók…
2

Read Harness Making, ch. V

"Cart and leading gear made according to the following directions will be useful anywhere, and when this method has been learned any other style can be made."
3

Cut out all the parts

Cut every part on the cutting list from harness leather. Cut the two winkers straight, 7 x 7½ in, from japanned (patent) winker leather.

Efni fyrir þetta skref:

AktygjaleðurAktygjaleður1 stykki
LakkleðurLakkleður1 stykki

Nauðsynleg verkfæri:

LeðurhnífurLeðurhnífur
MálbandMálband
4

Shape the winkers

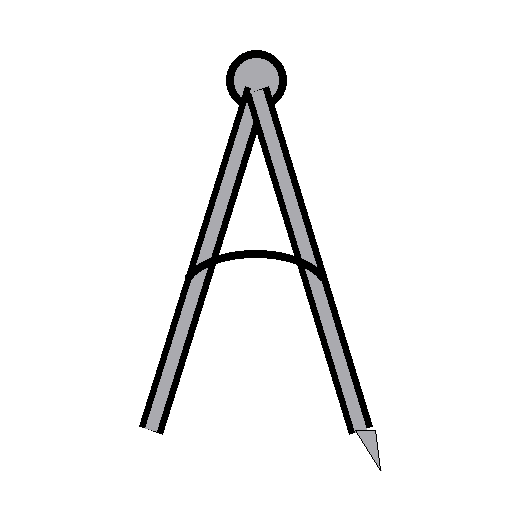
Mark three rows round the long side and across one short side with the race compass, making the groove deep. Edge them above and below with the edge tool and black the edges. Soak them well in water and bend each along the middle of its longer width into "something that is nearly, though not quite, a semicircle". Nail them, raised part up, on a flat board, the nails near the edges only on the side the cheek will cover, and dry them near a stove. Then run a big hot beveller round the edges and along the lines until the groove looks deep and polished.

Efni fyrir þetta skref:

LeðurliturLeðurlitur1 stykki

Nauðsynleg verkfæri:
Rákasirkill söðlasmiðsRákasirkill söðlasmiðs
KantskurðarjárnKantskurðarjárn
FuruborðFuruborð
NaglarNaglar
KlóhamarKlóhamar
Kantjárn söðlasmiðsKantjárn söðlasmiðs
PrópanbrennariPrópanbrennari
5

Put the buckles on the winkers

Cut two chapes ¾ in wide, 3½ in long, turned down 2 in from one end; thin the short end, point the piece, cut the buckle hole at the bend, edge, crease and prick. Put a ¾ in buckle in each. Tack the chape in the front corner of the winker, where the creasing meets, and stitch it, with a loop for a tinned buckle. Put the second on the reverse corner of the other winker, so the two make a pair.

Efni fyrir þetta skref:

Járnsylgja með þorniJárnsylgja með þorni2 stykki

Nauðsynleg verkfæri:

LeðurhnífurLeðurhnífur

Gatajárn fyrir leðurGatajárn fyrir leður
KantskurðarjárnKantskurðarjárn
SaumagatajárnSaumagatajárn
SýllSýll
Tvær söðlasmíðanálarTvær söðlasmíðanálar
SöðlasmíðaklemmaSöðlasmíðaklemma
6

Make the cheeks

Each cheek is 2 ft 2 in x 1¼ in. Turn it so both ends meet underneath in the centre and tap the bends with the hammer; draw the under part in a little so the top is slightly longer. Cut a hole for the buckle in one end and another in the centre of the bend at the other end, and slit straight out from it to each side. Edge the outside only, race two close lines along the top and a third a little over ⅛ in from them, black the edges and lines. Prick the two inner rows eight per inch, put the buckle in one end and the larger bit ring in the other, and stitch both ends together. Each larger ring carries a smaller one by a small link, kept for the bit. Make the second cheek the same, with its slit reversed so the cheeks pair.

Efni fyrir þetta skref:

Járnsylgja með þorniJárnsylgja með þorni2 stykki
MélahringurMélahringur4 stykki
LeðurþráðurLeðurþráður1 stykki
LeðurliturLeðurlitur1 stykki

Nauðsynleg verkfæri:

KlóhamarKlóhamar
Gatajárn fyrir leðurGatajárn fyrir leður
LeðurhnífurLeðurhnífur
KantskurðarjárnKantskurðarjárn
Rákasirkill söðlasmiðsRákasirkill söðlasmiðs
SaumagatajárnSaumagatajárn
SýllSýll
Tvær söðlasmíðanálarTvær söðlasmíðanálar
SöðlasmíðaklemmaSöðlasmíðaklemma
7

Make the nose-band

Cut it about 2 ft long and 2 in wide; turn in both ends equally, leaving about 1 ft 4 in for the band, shave the ends thin, punch the centre of each bend and slit straight out from both holes on the same side. Edge both sides where it is single, race two rows along it and deepen them with the hot beveller, then prick the double row on both sides from the bend to the lined part.

Nauðsynleg verkfæri:

LeðurhnífurLeðurhnífur
Gatajárn fyrir leðurGatajárn fyrir leður
KantskurðarjárnKantskurðarjárn
Rákasirkill söðlasmiðsRákasirkill söðlasmiðs
Kantjárn söðlasmiðsKantjárn söðlasmiðs
SaumagatajárnSaumagatajárn
8

Make the forehead band and ear-pieces

Cut the forehead band about 2 ft 3 in x 1½ in; edge, crease, black and rub it and pass the hot beveller over the grooves. Cut the ear-pieces 1½ x 9 in, double them and flatten the bend. Put a 1¼ in strap in the bend, mark how far its inner side runs, and prick two rows eight per inch on each side from that mark to the point. Stitch with three-cord thread; stitch the cross line coarse, about two stitches for one. Stitch the forehead band end to end with the ear-pieces and cut a small V-nick in each joint, on the same side, for the tongue of the buckle.

Efni fyrir þetta skref:

LeðurþráðurLeðurþráður1 stykki
LeðurliturLeðurlitur1 stykki

Nauðsynleg verkfæri:

LeðurhnífurLeðurhnífur
KantskurðarjárnKantskurðarjárn
Kantjárn söðlasmiðsKantjárn söðlasmiðs
SaumagatajárnSaumagatajárn
SýllSýll
Tvær söðlasmíðanálarTvær söðlasmíðanálar
SöðlasmíðaklemmaSöðlasmíðaklemma
9

Make the corner-pieces and chin strap

Corner-pieces join cheek and nose-band near the bit ring, one piece each side. For the chin strap cut two pieces 1½ in wide: one 6 in long, keeping 2 in of full width and narrowing the rest to ¾ in with a rounded point; the other 12 in long, 2 in full width, the rest ¾ in, with a chape and buckle hole in the narrow end. Edge, crease and black both, and fit the buckle and loop.

Efni fyrir þetta skref:

Járnsylgja með þorniJárnsylgja með þorni1 stykki

Nauðsynleg verkfæri:

LeðurhnífurLeðurhnífur
KantskurðarjárnKantskurðarjárn
Gatajárn fyrir leðurGatajárn fyrir leður
10

Put the bridle together

Place the forehead band between the cheeks so its joint with the ear-piece lies under the centre of the buckle, the nick against the tongue, and tack it. Put the nose-band in the same ring as the cheek, slits upward, with the corner-pieces between the two leathers of cheek and nose-band, following the ring like a half circle. Set the winkers, buckles in the front corners turned up to meet, close to the ear-pieces and flush with the outer edge of the cheek, and tack them keeping their bend. Fill the hollow between the two sides of the cheek, from the corner-piece to the winker, with a piece as thick as the winker; it must fit tight. Tack the chin strap inside the cheek, about ¾ in under the filling and 1½ in from the bottom ring, short piece on the right as you face the bridle. Nail the long loop over a loop-stick, clinching the nails underneath.

Efni fyrir þetta skref:

AktygjaleðurAktygjaleður1 stykki
NaglarNaglar1 stykki

Nauðsynleg verkfæri:

KlóhamarKlóhamar
LykkjustokkurLykkjustokkur
11

Stitch it

Begin on the near side at the ring and stitch up to the loop on the outside; then from the loop on the other cheek down to its ring. Stitch the outer row on the inner side of each cheek. Opposite the winkers, slip a stitch between each, because "fine stitching is apt to cut the winkers". Then a row each side of the nose-piece, the inner rows of the cheeks, and last the inner rows of the nose-band.

Efni fyrir þetta skref:

LeðurþráðurLeðurþráður1 stykki

Nauðsynleg verkfæri:

SýllSýll
Tvær söðlasmíðanálarTvær söðlasmíðanálar
SöðlasmíðaklemmaSöðlasmíðaklemma
12

Finish the edges

Level the edges of the cheeks and nose-band, scrape them and black them; then rub them with tallow and bone.

Efni fyrir þetta skref:

LeðurliturLeðurlitur1 stykki
TólgTólg1 stykki

Nauðsynleg verkfæri:

LeðurhnífurLeðurhnífur
Beinbrjótur (falsbein)Beinbrjótur (falsbein)
13

Make the cheek pads

Make two basil pads as long as from the buckle to the bottom of the winker; for a 1¼ in cheek cut them 1 in wider than twice its width. Fold lengthwise, edges meeting in the centre, stitch the ends with the basil inside out, turn them, and stitch the edges with a pointed needle, thimble and white linen thread, leaving 1 in open in the middle. Ram flock in, not too hard, and close it. Nail each pad under the winker with three large-headed nails, a tuft of flock under each head, the points not coming through; trim the flock.

Efni fyrir þetta skref:

Sauðskinnsleður (basil)Sauðskinnsleður (basil)1 stykki
UllarfyllingUllarfylling1 stykki
LíntvinniLíntvinni1 stykki
NaglarNaglar1 stykki

Nauðsynleg verkfæri:

SkæriSkæri
Tvær söðlasmíðanálarTvær söðlasmíðanálar
KlóhamarKlóhamar
14

Make the winker strap

Cut it 24 in x 1½ in and slit the centre for 13 in, punching a hole at the end of the slit; shape the points to go through the winker buckles. Mark deep cross lines 1½ in from the end of the slit, 1½ in beyond that, and 1⅝ in beyond that, and turn the strap down with the bend at the last mark. Edge, crease, race and black it. Leave the first space open, fill the next with a piece of leather, leave the next open, and stitch; the cross lines twice as coarse as the straight. The two openings take the throat lash and the head strap.

Efni fyrir þetta skref:

LeðurþráðurLeðurþráður1 stykki
LeðurliturLeðurlitur1 stykki

Nauðsynleg verkfæri:

LeðurhnífurLeðurhnífur
Gatajárn fyrir leðurGatajárn fyrir leður
KantskurðarjárnKantskurðarjárn
Rákasirkill söðlasmiðsRákasirkill söðlasmiðs
SýllSýll
Tvær söðlasmíðanálarTvær söðlasmíðanálar
15

Make the head strap, throat lash and reins

Head strap 1 ft 10 in x 1¼ in, ends narrowed for the buckles. Throat lash 3 ft 8 in x 1¼ in, 2 in turned in for the buckle at the best end, the other pointed. Reins 1¼ in wide: 5 ft for the off side, 2 ft 4 in for the near side; turn a chape for a buckle in the weakest end of the short rein and 3 in at the best end of each for the ring. Crease, black and finish all, stitch on the buckles and loops, with a running loop on the short rein. Stitch the short rein to the small ring on the right as you face the bridle and the long rein to the other. Punch three holes each side of the head strap, six in the throat lash, three in each winker-strap slit and nine in the long rein.

Efni fyrir þetta skref:

AktygjaleðurAktygjaleður1 stykki
Járnsylgja með þorniJárnsylgja með þorni2 stykki
LeðurþráðurLeðurþráður1 stykki
LeðurliturLeðurlitur1 stykki

Nauðsynleg verkfæri:

LeðurhnífurLeðurhnífur
Gatajárn fyrir leðurGatajárn fyrir leður
SýllSýll
Tvær söðlasmíðanálarTvær söðlasmíðanálar
SöðlasmíðaklemmaSöðlasmíðaklemma
16

Put it on its straps

Pass the head strap to its centre through the opening next to the slit in the winker strap and buckle its ends to the cheek buckles through the second holes. Run the throat lash through the off-side ear-piece, the outer opening of the winker strap and the other ear-piece, into its buckle. Buckle the winker-strap slits to the winker buckles and buckle the rein in the sixth hole. Any polishing or ornament goes on before the parts are put together.
17

Troubleshooting

Cart bridle troubleshooting.

Flow

Loading...
18

History and honest limits

From **Harness Making**, edited by Paul N. Hasluck, Cassell and Company, 1904, chapter V, "Cart Harness" (Project Gutenberg #70169). He notes that cart gear "is very varied in all parts of the kingdom" and that "the only gear which can claim special favour is one that combines proper strength with minimum weight". All sizes are his; the brass ornaments, the cloth-covered forehead band and the bit are not made here. The heat source for the beveller and the metric figures are ours.

Efni

11

Nauðsynleg verkfæri

17

Þessi teikning býr til

CC0 opinbert ríki

Þessi teikning er gefin út undir CC0. Þér er frjálst að afrita, breyta, dreifa og nota þetta verk í hvaða tilgangi sem er, án þess að biðja um leyfi.

Studdu smiðinn með því að kaupa vörur í gegnum teikningu hans þar sem hann fær þóknun smiða sem seljendur ákvarða, eða búðu til nýja endurskoðun á þessari teikningu og tengdu hana sem tengingu í þinni eigin teikningu til að deila tekjum.

Umræða

(0)

Skrá inn til að taka þátt í umræðunni

Hleður athugasemdum...