Samvinna
LIST
FEGURÐ OG VELLÍÐAN
HANDVERK
MENNING OG SAGA
SKEMMTUN
UMHVERFI
MATUR OG DRYKKUR
ÖFUGVERKFRÆÐI
VÍSINDI
ÍÞRÓTTIR
TÆKNI
KLÆÐANLEG TÆKNI
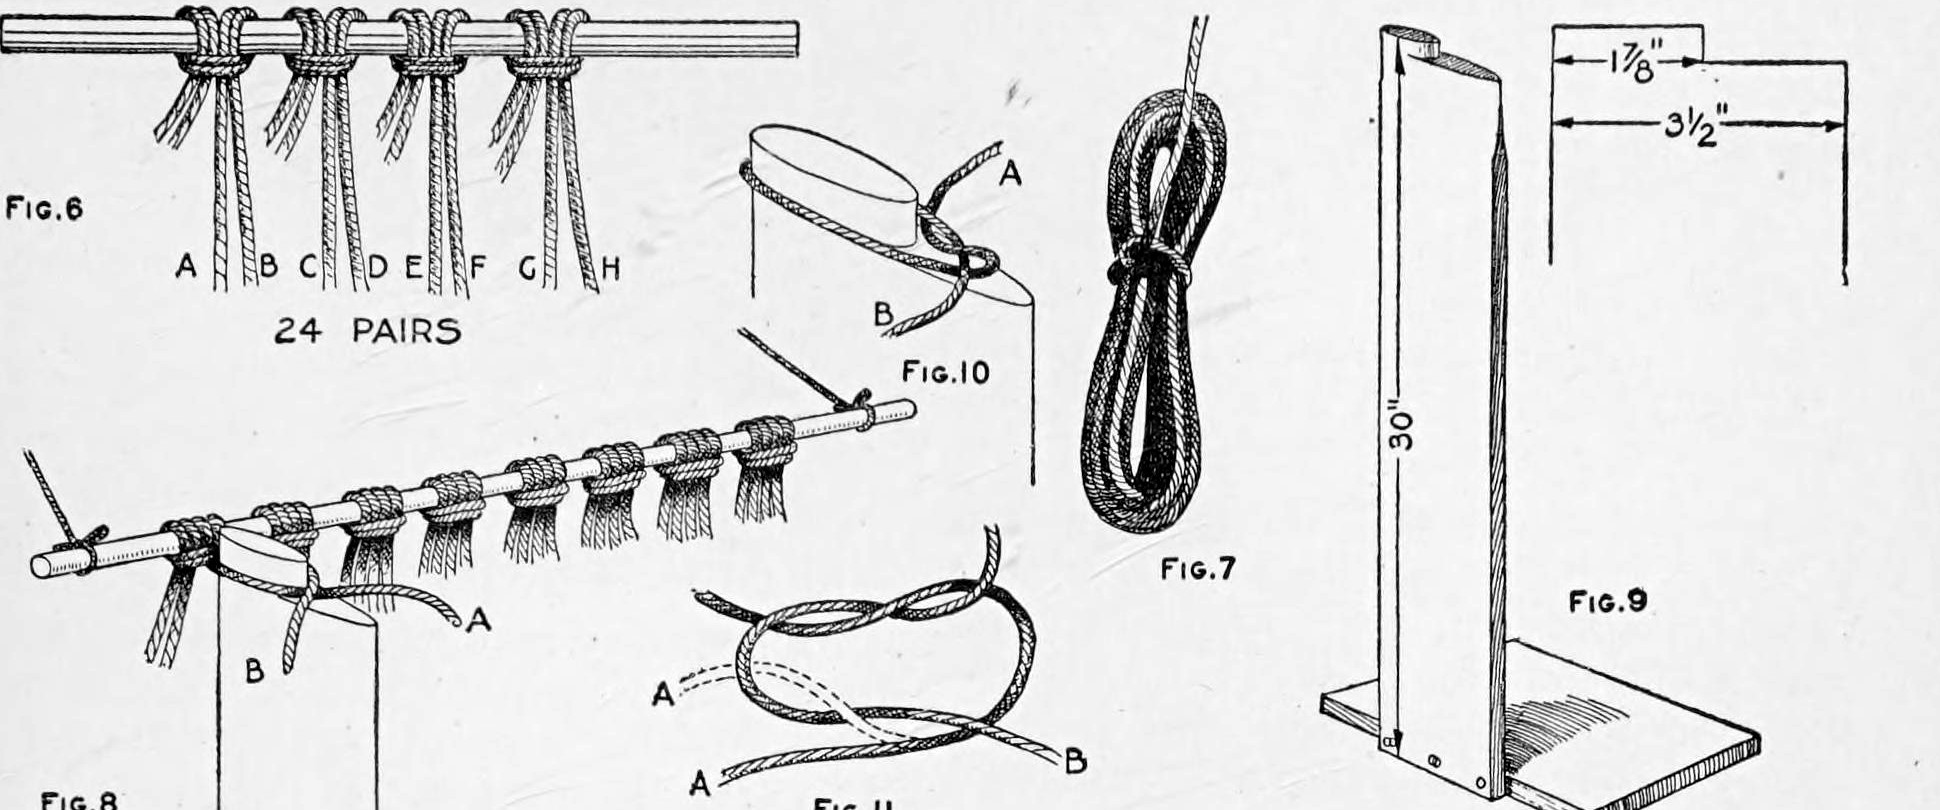


Knotted Twine Hammock: 48 Seine-Twine Cords Tied From a Centre Rod Over a Two-Size Mesh Post (Boy Mechanic, 1919)
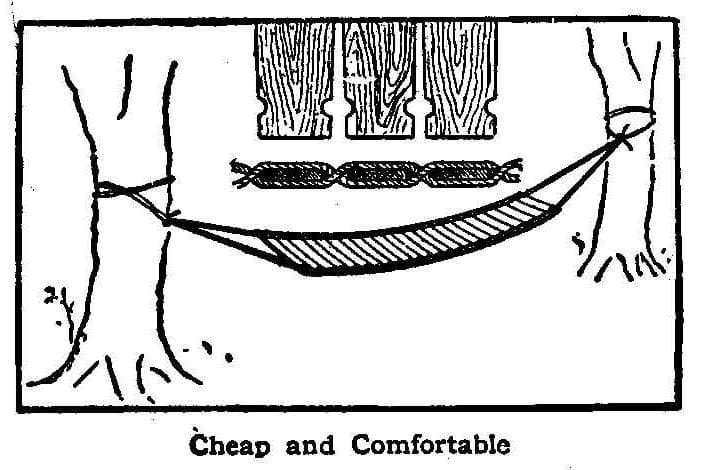
Charles M. Miller's knotted hammock from The Boy Mechanic, Book 3 (1919): 24 pairs of 18 ft seine-twine cords looped over a centre rod and knotted toward each end with flat reef (or overhand, or Solomon's) knots over a 30 in mesh post, then gathered into a 2-1/2 in galvanized ring at each end and bound.
Miðlungs
Several days
Leiðbeiningar
1
1
Cord budget
Cord budget
Hleð Jupyter-vinnubók…
2
2
Read The Boy Mechanic, Book 3
Read The Boy Mechanic, Book 3
"The flat reef knot is small, is easily tied and will not slip."
3
3
Make the mesh post and ring board
Make the mesh post and ring board
Make a mesh post 30 in high on a base you can rest a foot on, its top cut to two sizes: 1-7/8 in across for the first row of meshes and 3-1/2 in for all others (Fig. 9). Make a ring board 30 in long, 3 in or more wide and 1 in thick, with three nails driven slanting (Fig. 14).
Efni fyrir þetta skref:
 Harðviðarborð1 stykki
 Furuborð1 stykki
 Naglar4 stykki
Nauðsynleg verkfæri:
 Handsög
 Handhefill
 Hamar
 Málband
4
4
Cut and hang the cords
Cut and hang the cords
Cut 48 cords of medium-hard 24-ply seine twine, each 18 ft long, and loop them in 24 pairs over a centre rod (an old broom handle) anchored to a wall (Figs. 6, 8). Loop the opposite halves up out of the way. Wind each working cord into a small bundle secured with a half hitch, leaving about 3 ft free (Fig. 7).
Efni fyrir þetta skref:
 Netagarn48 cord
 Kústur1 stykki
Nauðsynleg verkfæri:
Málband Skæri
5
5
Knot the body
Knot the body
Set the post's small top between the first pair, A and B, and tie them with a flat reef knot: B over A, A tucked behind; B over again and A tucked under, drawn very hard (Figs. 8, 10, 11). Move along tying each pair, to the 24th (Y, Z). On the way back use the large top and tie neighbouring pairs together (Y with X, W with V ...). Alternate the rows to within 2-1/2 ft of the end. Then move the rod into the second row and knot the other half the same way. An overhand or Solomon's knot may be used instead (Figs. 1, 3, 12).
Efni fyrir þetta skref:
Netagarn1 stykkiNauðsynleg verkfæri:
 Möskvamælistokkur
6
6
Fit the rings and bind
Fit the rings and bind
Put the centre rod in the last row of meshes and set it on the ring board with a 2-1/2 in galvanized ring tied by a string to the end nail, 2 ft from the rod. Tie the cords to the ring in pairs with flat reef knots, one cord under and one over its side. Turn the ends back along the cords and wind them about 1-1/2 in with an extra cord, starting with a loop and a flat reef knot and looping each turn through its own winding; finish with a double loop and draw the end back under the turns with an awl (Fig. 15). Do the other end the same way.
Efni fyrir þetta skref:
 Málmhringur2 stykkiNetagarn1 stykki
Nauðsynleg verkfæri:
 SýllSkæri
7
7
Finishing and troubleshooting
Finishing and troubleshooting
Hammock troubleshooting.
Flow
Loading...
8
8
History and honest limits
History and honest limits
From "How to Make Hammocks, Part I: A Twine Hammock" by Charles M. Miller, in **The Boy Mechanic, Book 3**, Popular Mechanics, 1919 (Project Gutenberg 71856; checked on the archive.org scan boymechanic0003unse, pp. 277-280). He gives no size for the mesh post's base or the winding cord. The tools and metric figures are ours.
Efni
6- 1 stykkiStaðgengill
- 1 stykkiStaðgengill
- 4 stykkiStaðgengill
- 2 stykkiStaðgengill
- 1 stykkiStaðgengill
- 2 stykkiStaðgengill
Þessi teikning býr til
Tengd Blueprint
Þessi blueprint deila þekkingu — tækni, efni eða meginreglur

CC0 opinbert ríki
Þessi teikning er gefin út undir CC0. Þér er frjálst að afrita, breyta, dreifa og nota þetta verk í hvaða tilgangi sem er, án þess að biðja um leyfi.
Studdu smiðinn með því að kaupa vörur í gegnum teikningu hans þar sem hann fær þóknun smiða sem seljendur ákvarða, eða búðu til nýja endurskoðun á þessari teikningu og tengdu hana sem tengingu í þinni eigin teikningu til að deila tekjum.