Collaborazione
ARTE
BELLEZZA E BENESSERE
MESTIERE
CULTURA E STORIA
DIVERTIMENTO
AMBIENTE
CIBO E BEVANDE
INGEGNERIA INVERSA
SCIENZE
SPORT
TECNOLOGIA
INDOSSABILI
Round-Bottom Square Churn: A Geared Dasher Turns in a Vessel Round Up to Its Blades and Square Above, Breakers From the Lid
Buttercup

Creato da

Buttercup

12. novembre 2026IE
2
0
0
0
0

Round-Bottom Square Churn: A Geared Dasher Turns in a Vessel Round Up to Its Blades and Square Above, Breakers From the Lid

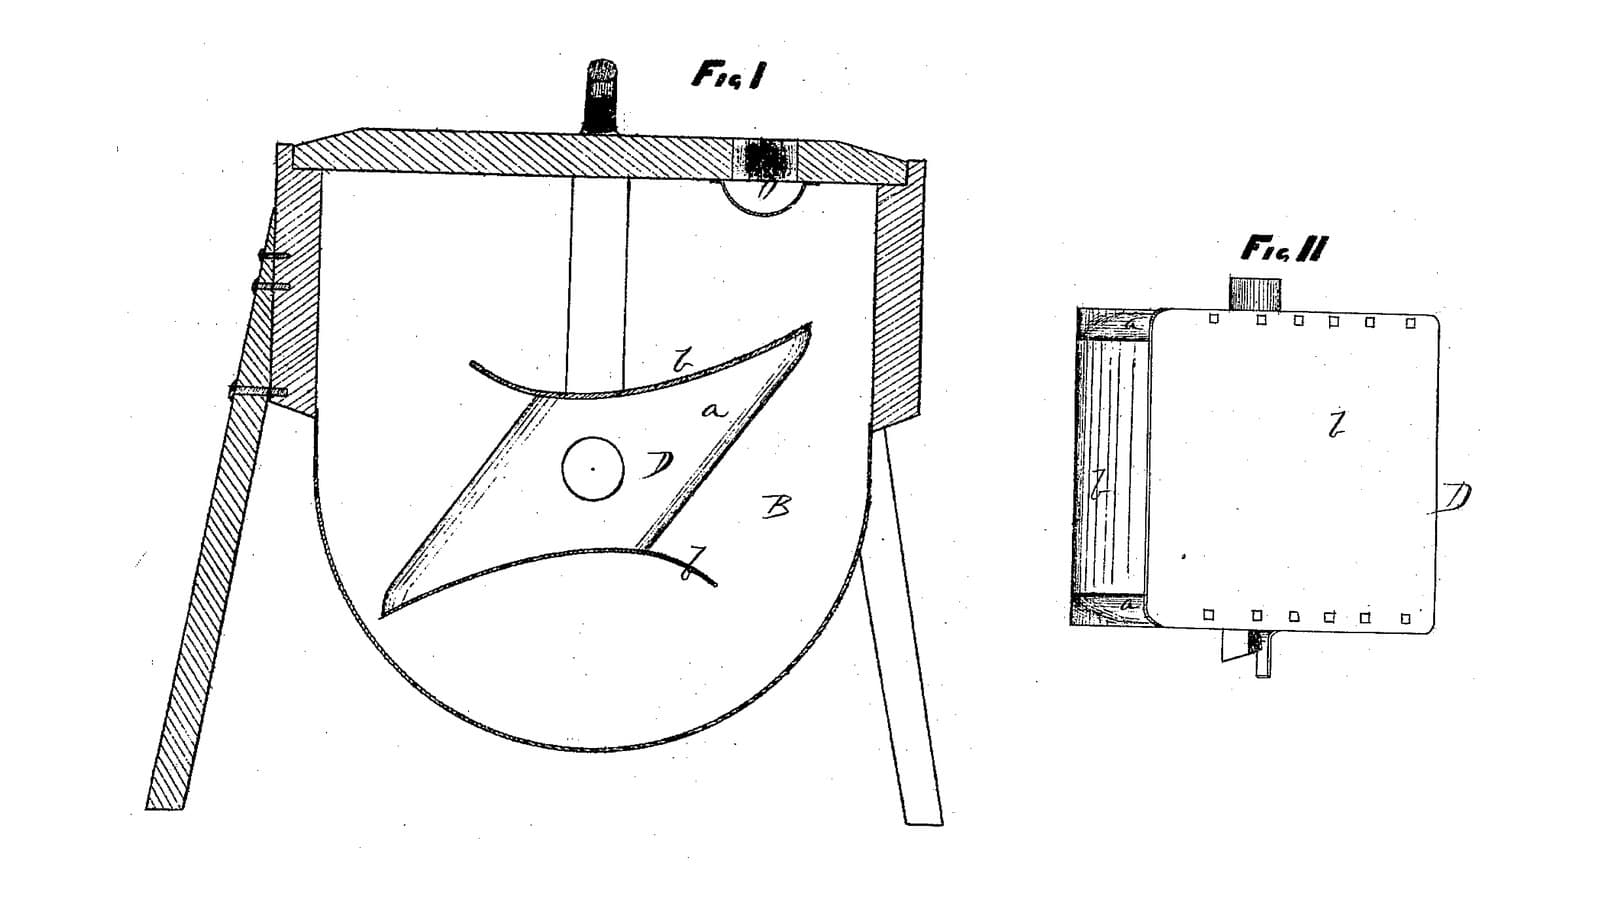
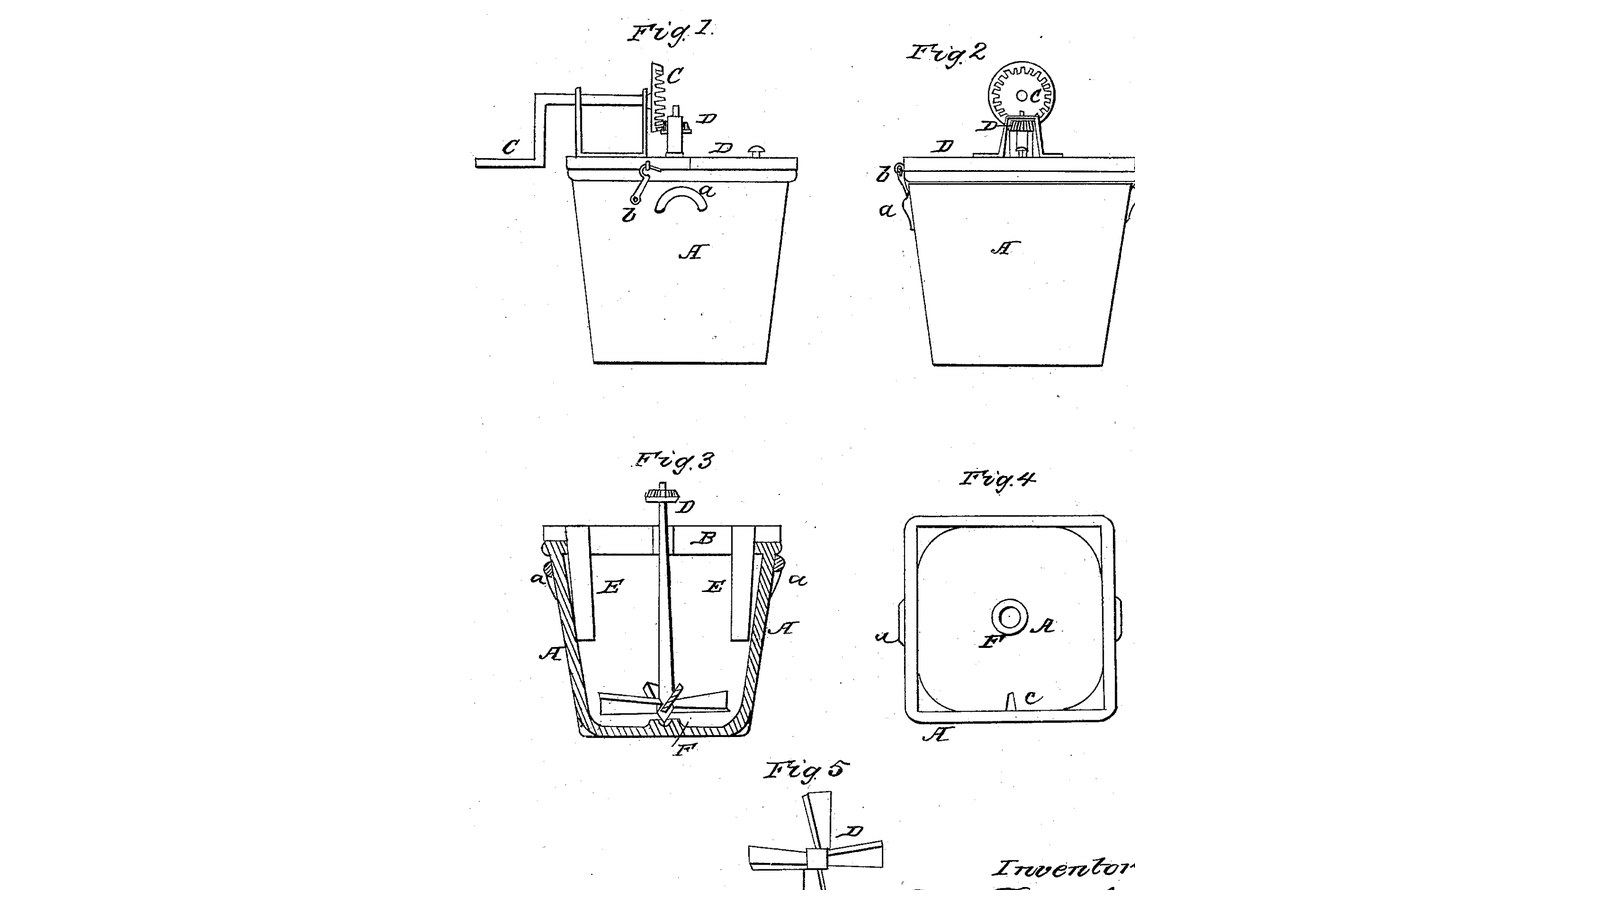
Thomas R. Markillie of Winchester, Illinois, received US 33,154, dated 27 August 1861, for the shape of a churn vessel: round at the bottom as high as the dasher, square above. A geared crank on the lid turns a dasher with sloping blades near the bottom; the blades lift and swirl the cream in the round part, and it is thrown from side to side and corner to corner against two breakers hanging from the lid and a rib on the wall. He made the vessel of earthenware, as easiest to keep sweet. The patent gives no sizes; every size here is ours.
Intermedio
About 3 days

Istruzioni

1

Round below, square above

Caricamento del notebook Jupyter…
2

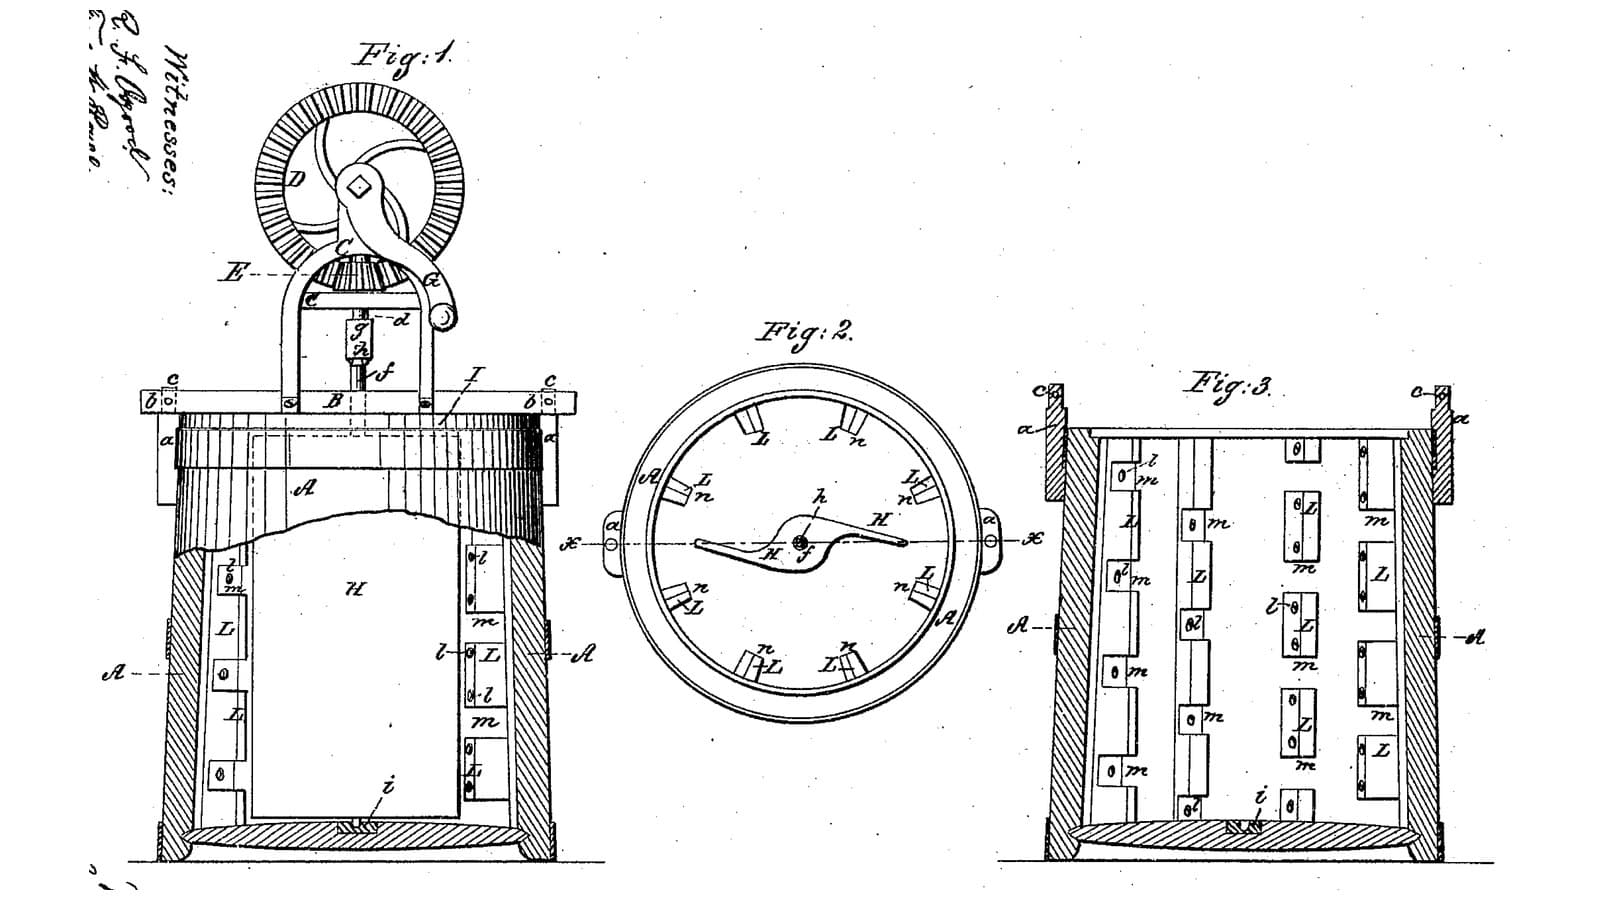
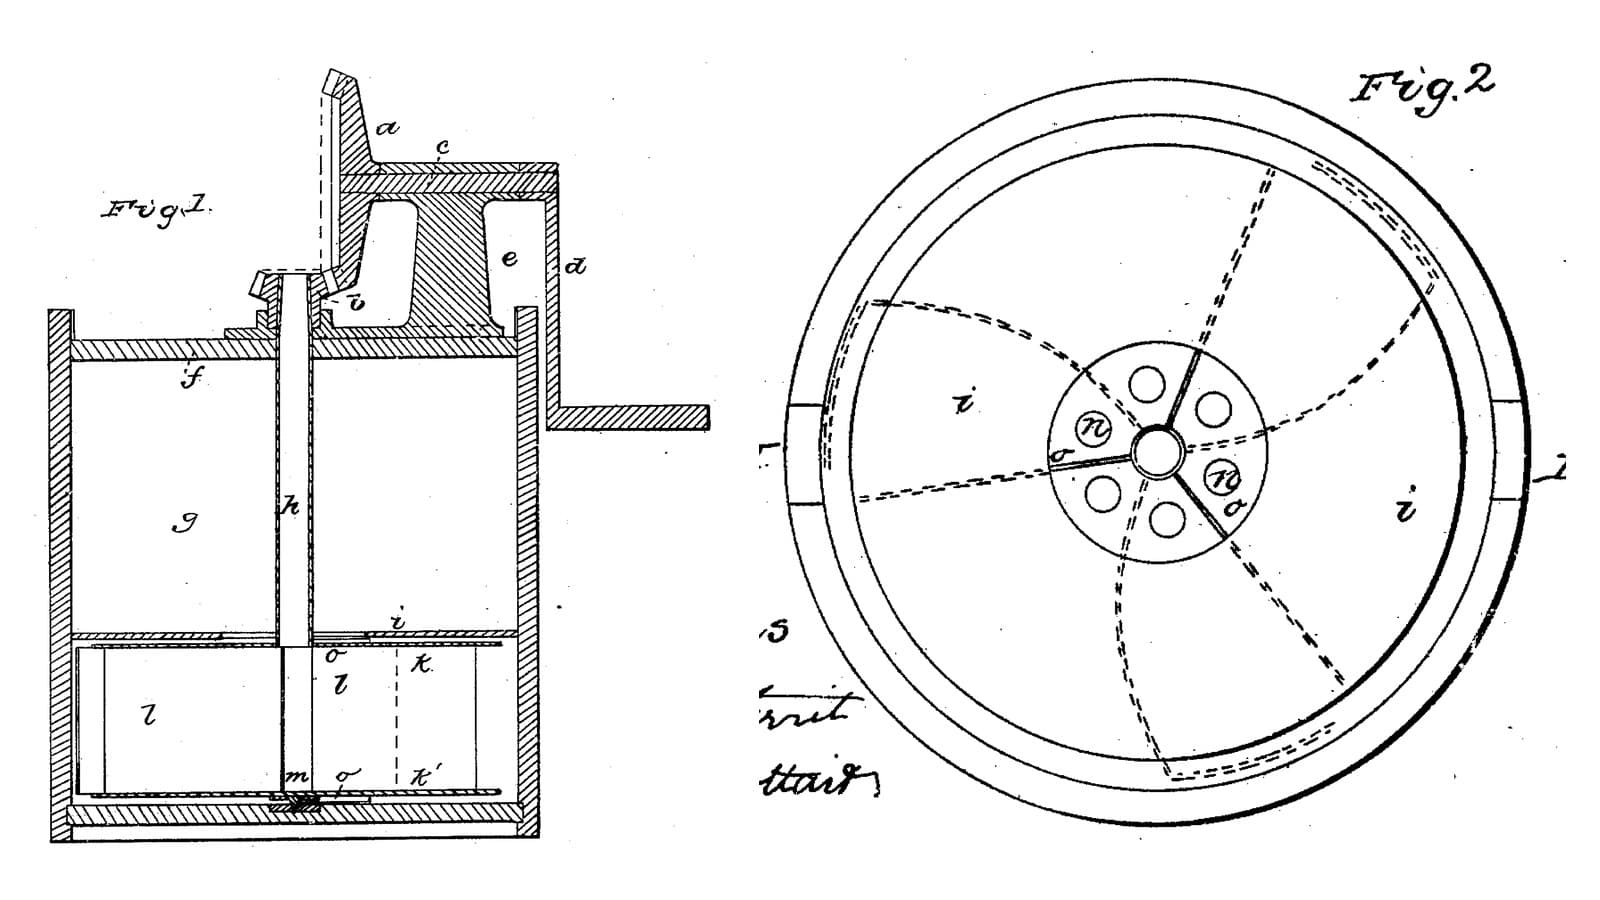
A turning dasher against breakers on the wall, six months before

Stirewatt lines a round body with notched ribs. Markillie shapes the vessel itself, round below and square above.
3

Read US 33,154

"The shape of the dasher-blades and their inclined position to the bottom when revolving is such as to give a lifting and revolving motion to the cream, while the shape of the cream-vessel further assists in lessening the time usually required to churn, for the cream when driven by the dasher against the breakers E and c and from side to side and corner to corner of the cream-vessel is very greatly agitated."
4

Print the corner fillets (four)

A corner fillet: fills one corner of the square vessel so the bottom 110 mm is a 260 mm round, with a flare above. Print four. PETG, 0.2 mm layers, 30 % infill, 4 walls.
File di designSTLCC0 - Free
5

Print the bottom skirt

The rounded edge ring for the floor: 260 mm across, 12 high, sloping inside. Needs a 270 mm bed, or print in quarters. PETG, 0.2 mm layers, 30 % infill, 4 walls.
File di designSTLCC0 - Free
6

Print the step F

The step for the dasher's pin: 36 mm across, 10 high, with an 8.6 mm hole 7 deep. PETG, 0.2 mm layers, 30 % infill, 4 walls.
File di designSTLCC0 - Free
7

Print the breaker c

The breaker on the wall: a curved rib 16 mm deep and 98 high, to stand on the round part's wall. PETG, 0.2 mm layers, 30 % infill, 4 walls.
File di designSTLCC0 - Free
8

Vessel A: square box with a round bottom, lugs a

Glue up a square hardwood box 260 x 260 mm inside and 300 deep from 20 mm boards with a 20 mm bottom. Seal the four corner fillets into the corners with food-safe silicone so the lower 110 mm is round, the skirt round the floor's edge, the step at the centre of the floor and the rib c on one side of the round part. Seal every joint. Screw a hardwood lug a 60 x 25 mm to two opposite sides near the top to lift it.

Materiali per questo passaggio:

Tavola di legno duroTavola di legno duro4 pezzi
Colla da legnoColla da legno1 pezzo
Filamento PETGFilamento PETG1 pezzo
Sigillante siliconicoSigillante siliconico2 pezzi
Viti da legnoViti da legno24 pezzi

Strumenti necessari:

Stampante 3D a filamento (FDM)Stampante 3D a filamento (FDM)

Sega circolare da bancoSega circolare da banco
Trapano a batteriaTrapano a batteria
Serie di punte da trapanoSerie di punte da trapano
Morsetto a barraMorsetto a barra
Set di cacciavitiSet di cacciaviti
Metro a nastroMetro a nastro
9

Print the dasher blades (four)

A dasher blade: 93 x 30 x 6 mm on a 28 mm hub with a 12.2 mm bore. Print four; set each at 30 degrees. PETG, 0.2 mm layers, 30 % infill, 4 walls.
File di designSTLCC0 - Free
10

Print the pinion D

The bevel pinion on the dasher shaft: 14 teeth, module 2.5, 12.2 mm bore. PETG, 0.2 mm layers, 30 % infill, 4 walls.
File di designSTLCC0 - Free
11

Print the driving wheel C

The driving wheel: a crown wheel of 42 teeth, module 2.5, 16.2 mm bore. PETG, 0.2 mm layers, 30 % infill, 4 walls.
File di designSTLCC0 - Free
12

Dasher D, lid B with breakers E, wheel C and crank

Cut a 12 mm stainless dasher shaft 360 mm long with a pin turned on its foot to fit the step. Fix the four blades on a printed or hardwood hub 25 to 45 mm above its foot, a quarter turn apart, each sloping 30 degrees. Cut a 12 mm HDPE lid B to the box's outside in two halves; hinge one half to the box and leave the other loose, with hooks and eyes b to fasten them. Screw two hardwood breakers E 12 x 80 mm, 140 long, under the lid 70 mm either side of the centre, reaching down to 160 mm above the floor. Bore the lid 14 mm at the centre for the shaft. Screw two hardwood bearing blocks 50 x 25 x 118 mm on the fixed half, bored 16.6 mm across 93 mm up; pin the pinion on the shaft 40 mm above the lid, and run a 16 mm stainless shaft 150 mm long through the blocks with the wheel C pinned on meshing it, a shaft collar, and a crank of mild steel flat bar, 100 mm throw, with a hardwood handle.

Materiali per questo passaggio:

Barra di acciaio inossidabileBarra di acciaio inossidabile2 pezzi
Filamento PETGFilamento PETG1 pezzo
Lastra di HDPELastra di HDPE1 pezzo
Cerniera a libro per mobiliCerniera a libro per mobili2 pezzi
Gancio e occhielloGancio e occhiello2 pezzi
Tavola di legno duroTavola di legno duro1 pezzo
Viti da legnoViti da legno12 pezzi
Shaft CollarShaft Collar1 pezzo
CoppigliaCoppiglia3 pezzi
Piatto di acciaio dolcePiatto di acciaio dolce1 pezzo
Tasselli di legno duroTasselli di legno duro1 pezzo

Strumenti necessari:

Stampante 3D a filamento (FDM)Stampante 3D a filamento (FDM)
Seghetto alternativoSeghetto alternativo
Set di punte a lanciaSet di punte a lancia
Trapano a batteriaTrapano a batteria
Serie di punte da trapanoSerie di punte da trapano
Seghetto per metalliSeghetto per metalli
Lime (lima a mano)Lime (lima a mano)
Morsa da bancoMorsa da banco
Set di cacciavitiSet di cacciaviti
13

The build in 3D

FreeCAD model of this build, half cut away: the square vessel with its four corner fillets making the bottom round, the skirt, step and wall rib, the dasher with four sloping blades, the two breakers from the lid, and the gearing and crank on the fixed half of the lid.
File di designBLENDCC0 - Free
14

Churn

Set the dasher in its step, pour about 9 litres of heavy cream at about 15 °C, checked with the thermometer, into the vessel so it stands a little above the round part, close the loose half of the lid and hook it. Turn the crank steadily, timing it. When the butter comes, lift the loose half, take out the dasher by lifting the fixed half on its hinges, take out the butter, pour the buttermilk into a bowl, wash the butter in cold water until it runs clear, salt and weigh it.

Materiali per questo passaggio:

Panna da montarePanna da montare9 l
Sale marino grossoSale marino grosso1 pezzo
AcquaAcqua1 pezzo

Strumenti necessari:

Termometro a sonda permanenteTermometro a sonda permanente
CronometroCronometro
Bilancia digitale da cucinaBilancia digitale da cucina
Grande ciotola da impasto in acciaio inossidabileGrande ciotola da impasto in acciaio inossidabile
15

Troubleshooting

Round-bottom churn troubleshooting.

Flow

Loading...
16

History and honest limits

**Thomas R. Markillie** of Winchester, Scott County, Illinois, US 33,154, 27 August 1861, "Improvement in Churns". He claimed "the cream-vessel constructed round at the bottom as high up as the height of the dashers, with the rest of the body of the vessel square, and this in combination with the revolving dasher". He made the vessel of earthenware, finding it the easiest to clean and keep sweet; ours keeps his shape in a sealed hardwood box with printed fillets, which must be scalded and dried with care; his vessel narrows toward the bottom, ours has straight sides. His gearing was a bevel wheel and pinion; ours is a printed crown wheel and pinion. The patent gives no sizes; every size here is ours.

Materiali

16

Strumenti richiesti

16

File di progetto

8

CC0 Pubblico dominio

Questo progetto è rilasciato sotto CC0. Sei libero di copiare, modificare, distribuire e utilizzare quest'opera per qualsiasi scopo, senza chiedere permesso.

Supporta il Maker acquistando prodotti tramite il suo progetto dove guadagna una Commissione Maker stabilita dai venditori, oppure crea una nuova iterazione di questo progetto e includilo come collegamento nel tuo progetto per condividere i ricavi.

Commenti

(0)

Accedi per partecipare alla discussione

Caricamento commenti...