
Collaborazione
ARTE
BELLEZZA E BENESSERE
MESTIERE
CULTURA E STORIA
DIVERTIMENTO
AMBIENTE
CIBO E BEVANDE
INGEGNERIA INVERSA
SCIENZE
SPORT
TECNOLOGIA
INDOSSABILI
Safety Goggles: Soft Plastic Frame with Turnable Splash-Proof Vent Caps (Hirschmann, US 3,141,172, 1964)
Emma

Creato da

Emma

3. novembre 2026SE
6
0
0
0
0

Safety Goggles: Soft Plastic Frame with Turnable Splash-Proof Vent Caps (Hirschmann, US 3,141,172, 1964)

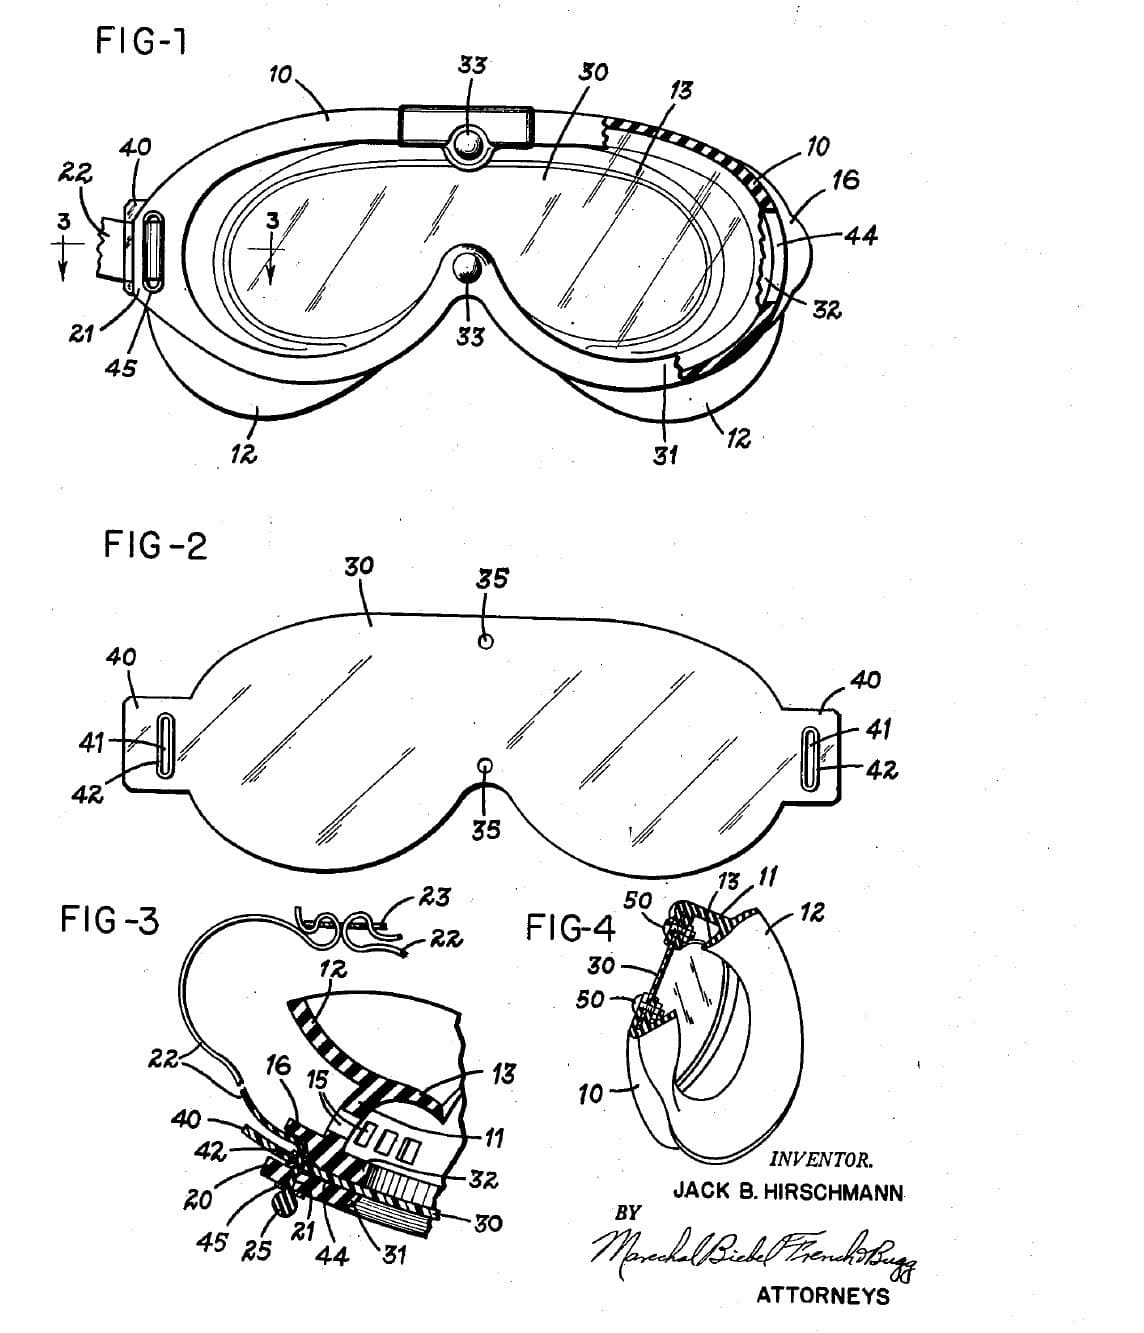
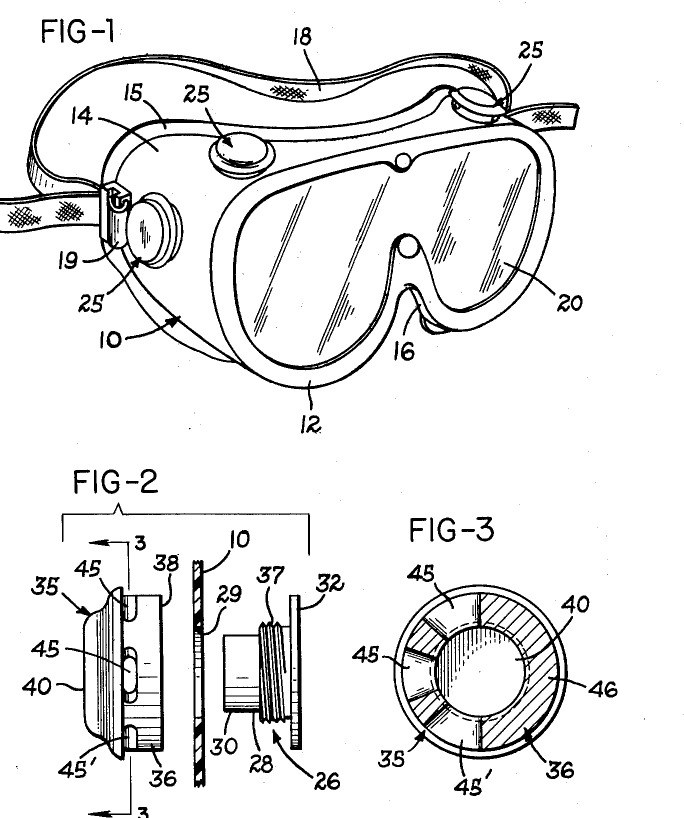
Goggles that let air in but keep splashes out. A soft polyethylene frame seals on the face and holds one clear lens for both eyes. Four vents sit in the frame, each a short tube under a cup-shaped cap with holes on one side only. You turn each cap so its solid side faces the splash; air takes a winding path in, and any liquid that gets into a cap drains out of a hole at the bottom. Result: ventilated safety goggles against liquids, chips and particles, with a lens you can replace. Source: J. B. Hirschmann, US 3,141,172 (1964), with the frame and lens of his US 2,773,260 (1956). Unknown: sizes, the moulding, the strap. Picture: the patent drawing.
Intermedio
Unknown

Istruzioni

1

Mould the frame

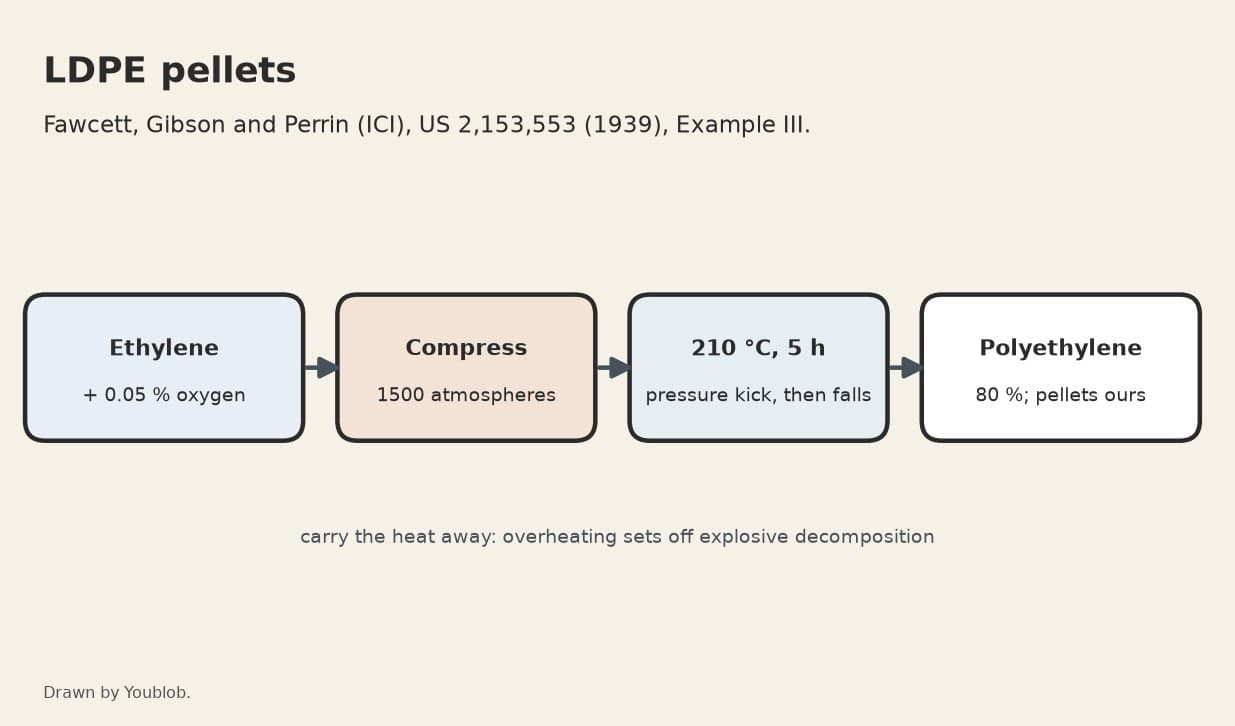
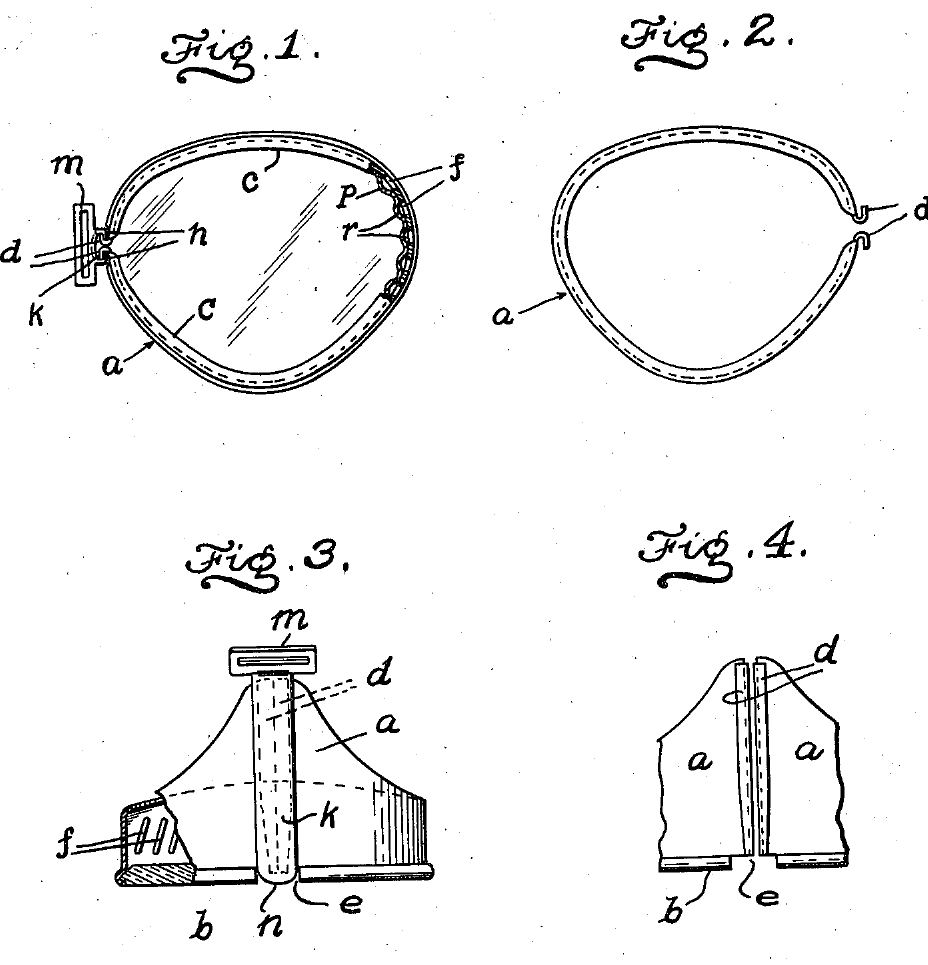
Mould a one-piece goggle frame of a soft, light-transmitting plastic such as polyethylene. Give it a front rim with one opening for both eyes, narrower above the nose, and a nose pad moulded with the rim. Behind the rim, a wall runs back and ends in a flange that fits the face. Form a flange on the front of the rim to seat the lens, and short shoulders with sloping backs round the inside of the rim. Put a strap loop near the back edge on each side: a soft frame strapped at the front would be squeezed out of shape. Ours: LDPE. Not given: sizes, how it is moulded.

Materiali per questo passaggio:

Granuli di LDPEGranuli di LDPE1 frame

Strumenti necessari:

Dimensioni sconosciuteDimensioni sconosciute
2

Make the lens

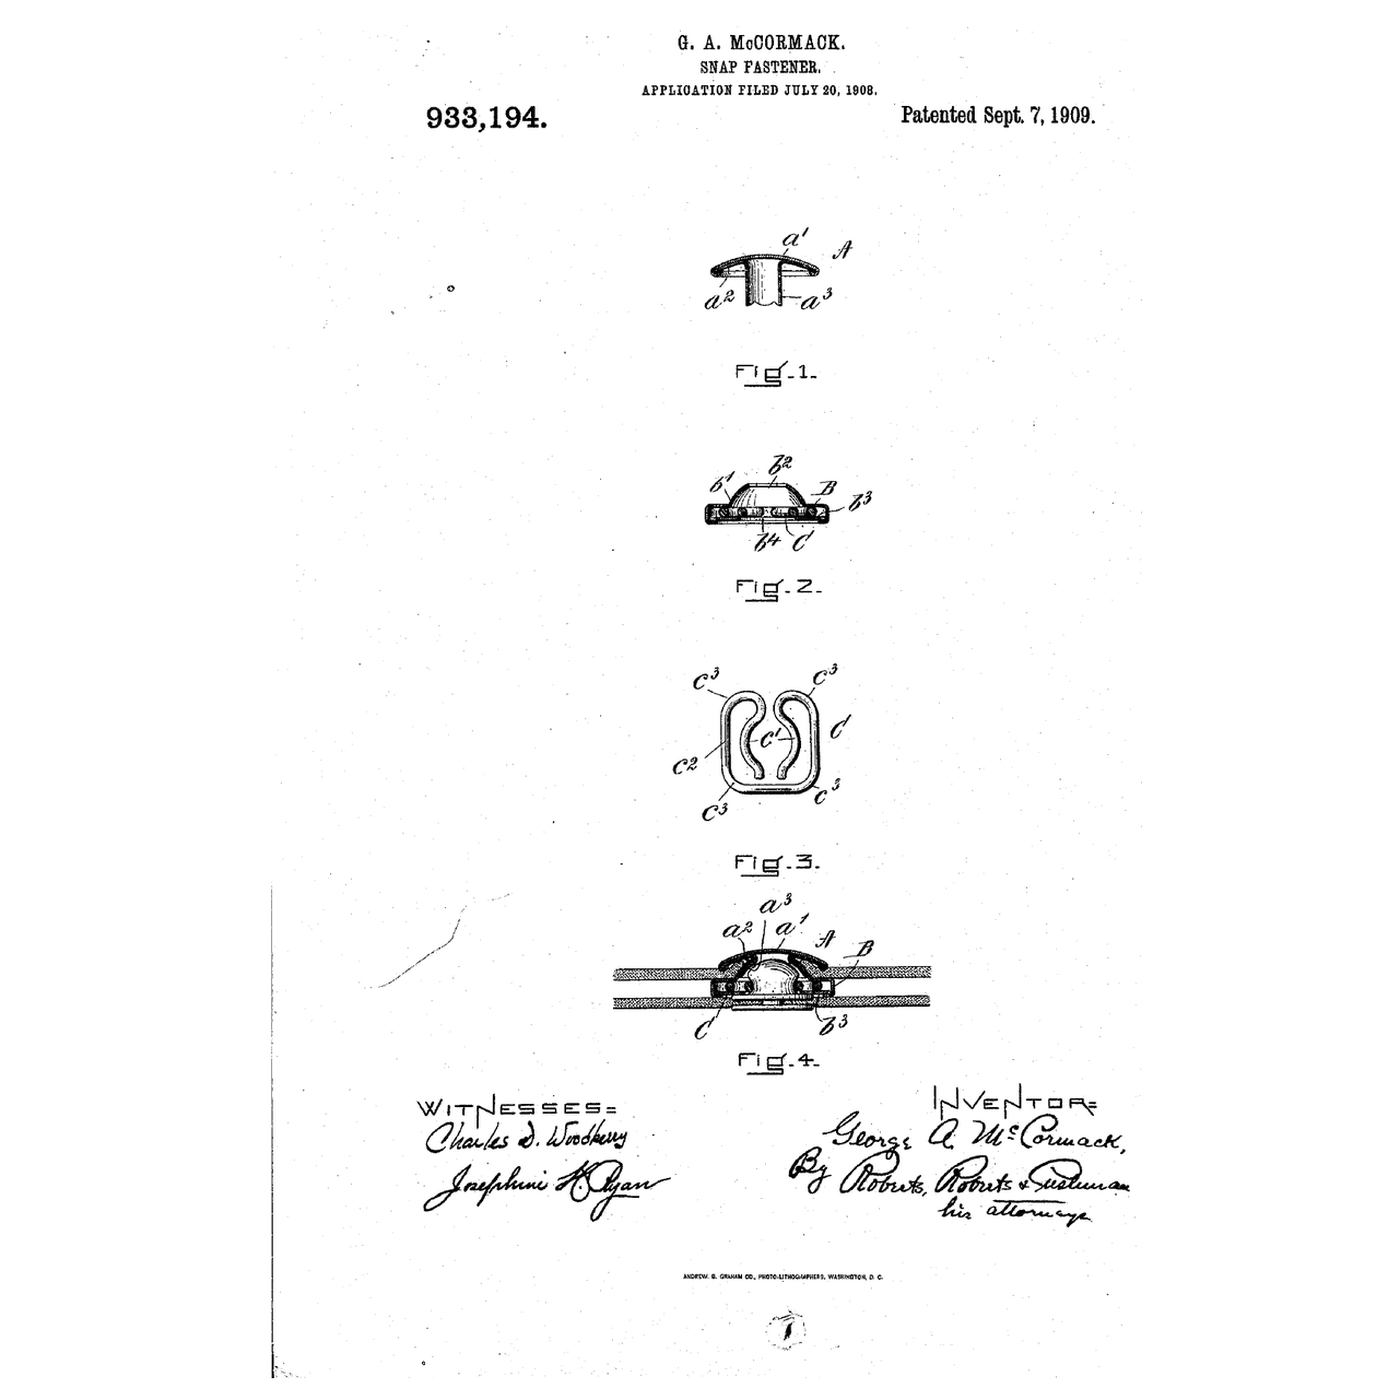
Cut one lens from clear, flexible plastic such as cellulose acetate, shaped to match the rim, and pre-curve it to the shape it takes in the frame. Fit male snap fasteners (the 'Dot' type) to its edge strip above and below the nose part, and matching female ones in the rim flange. Not given: the thickness.

Materiali per questo passaggio:

Lastra di plastica trasparenteLastra di plastica trasparente1 lens
Kit di bottoni automatici (per uso gravoso)Kit di bottoni automatici (per uso gravoso)1 2 pairs

Strumenti necessari:

ForbiciForbici
Dimensioni sconosciuteDimensioni sconosciute
3

Make the four vents

Mould each vent in two parts, of plastic or metal. The base is a short tube with a flange round its inner end; the cap is a cup that screws onto the tube (a press fit or solvent seal also serves), with a closed end and an outer flange. Through the cap's side, between the tube's end and the frame, make about three holes covering half the way round, and leave the other half solid. Not given: sizes.

Materiali per questo passaggio:

Materiale sconosciutoMateriale sconosciuto4 vent bases and caps

Strumenti necessari:

Dimensioni sconosciuteDimensioni sconosciute
4

Assemble and set the caps

Make four holes in the frame wall: two at the top, two at the sides. Push each vent tube through from inside so its flange seals on the inside of the wall, and screw the cap on so its flange seals on the outside. Seat the lens against the rim flange, guided by the shoulders, and press the snaps home. Thread a head strap through the two loops. Before work, turn each cap so its solid side faces the expected splash, with one hole pointing down. Air then winds in under the cap and back down the tube; particles strike the walls and drop, and any liquid drains out of the lower hole. Not given: the strap material.

Materiali per questo passaggio:

Materiale sconosciutoMateriale sconosciuto1 head strap

Strumenti necessari:

PerforatricePerforatrice

Materiali

4

Strumenti richiesti

3

Blueprint correlati

Questi blueprint condividono conoscenze — tecniche, materiali o principi
CC0 Pubblico dominio

Questo progetto è rilasciato sotto CC0. Sei libero di copiare, modificare, distribuire e utilizzare quest'opera per qualsiasi scopo, senza chiedere permesso.

Supporta il Maker acquistando prodotti tramite il suo progetto dove guadagna una Commissione Maker stabilita dai venditori, oppure crea una nuova iterazione di questo progetto e includilo come collegamento nel tuo progetto per condividere i ricavi.

Commenti

(0)

Accedi per partecipare alla discussione

Caricamento commenti...