Fusione del Rame dalla Malachite — Dal Minerale Verde al Metallo Rosso
Istruzioni
Comprendi la chimica
Comprendi la chimica
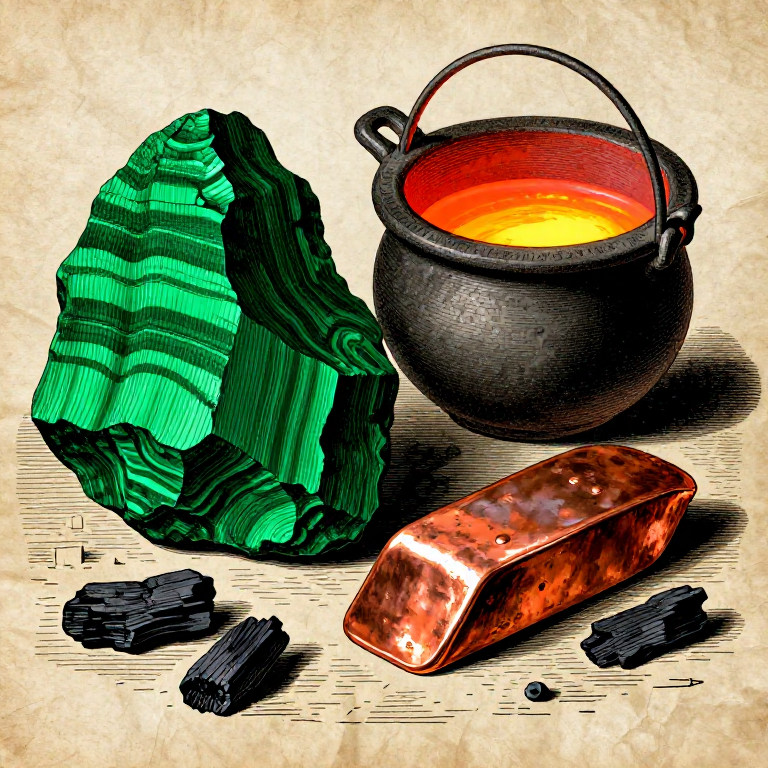
La malachite si decompone quando riscaldata: Cu₂CO₃(OH)₂ → 2CuO + CO₂ + H₂O (a ~300°C). L'ossido di rame risultante (CuO) viene quindi ridotto dal monossido di carbonio dalla combustione del carbone: CuO + CO → Cu + CO₂. Il rame fonde a 1085°C. La resa totale di rame dalla malachite pura è approssimativamente del 57,5%.
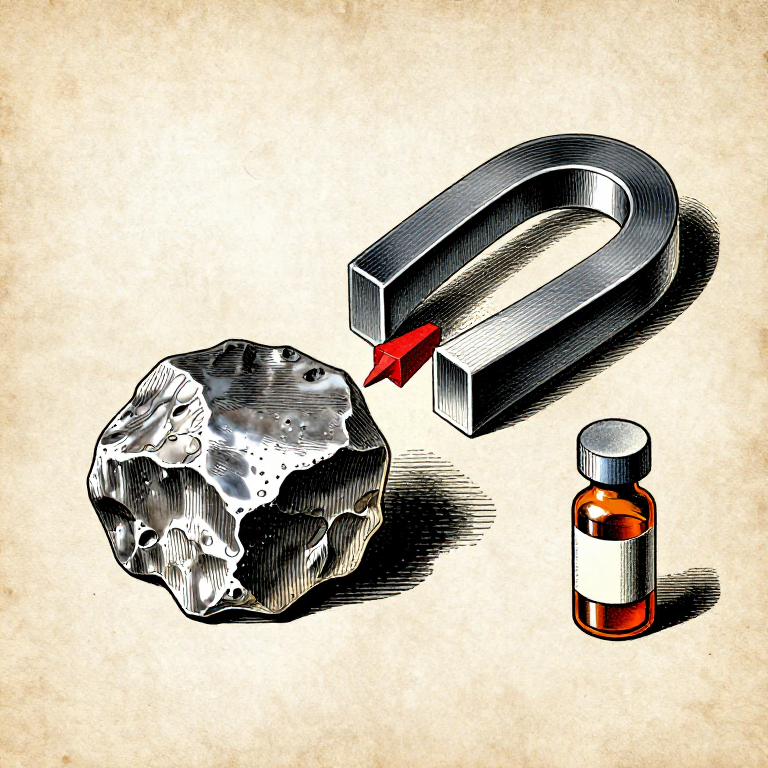
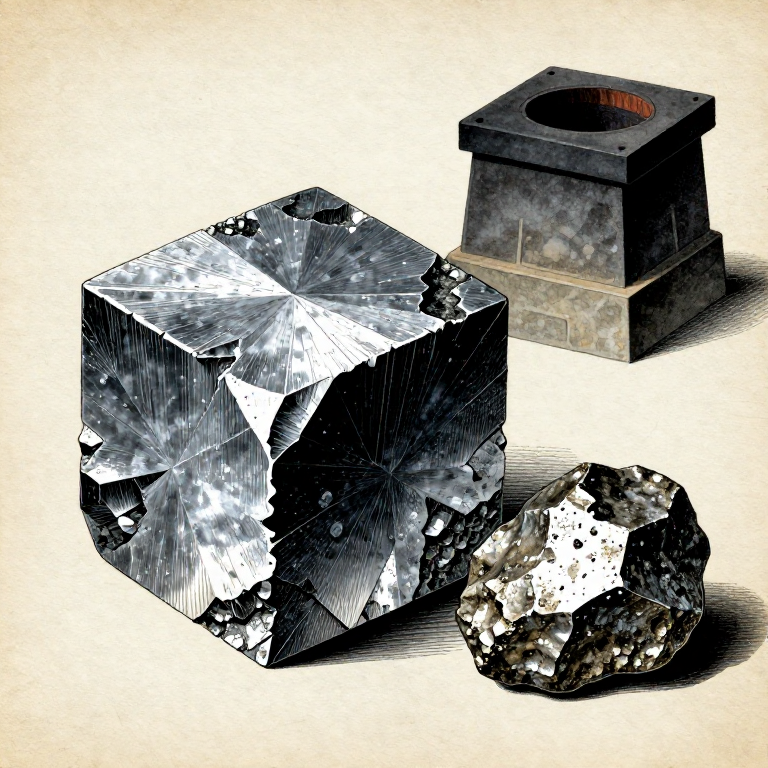
Frantuma la malachite
Frantuma la malachite
Rompi la malachite in pezzi più piccoli di 1 cm usando un martello e un'incudine. Più fine è la frantumazione, più veloce e completa è la riduzione. Se disponibile, usa un mortaio e pestello per la frantumazione finale. Mira a frammenti di dimensioni di un pisello o più piccoli.
Materiali per questo passaggio:
 Malachite Ore (crushed)2 kilogram
Strumenti necessari:
 Geological Hammer
 Mortar and Pestle
Prepare the crucible
Prepare the crucible
Use a clay crucible that can withstand 1200°C+. A graphite-clay crucible is ideal. The crucible should hold at least 500 ml. If making your own, mix fireclay with sand (2:1 ratio) and fire it slowly in a kiln to 1000°C before use. Pre-fired crucibles crack less.
Materiali per questo passaggio:
 Clay Crucible (refractory)1 pezzo
Layer ore and charcoal in the crucible
Layer ore and charcoal in the crucible
Place a 2 cm layer of charcoal pieces at the bottom of the crucible. Add a layer of crushed malachite (2-3 cm). Top with another layer of charcoal. The charcoal both provides carbon for reduction and protects the copper from re-oxidation. Fill to about 2/3 full.
Materiali per questo passaggio:
Build or prepare the forge
Build or prepare the forge
You need a forge or furnace capable of reaching 1100-1200°C. A simple charcoal forge with forced air (bellows or blower) works well. The crucible sits in a bed of burning charcoal with additional charcoal piled around and above it. The air supply must be controllable.
Materiali per questo passaggio:
Strumenti necessari:
Put on safety equipment
Put on safety equipment
Copper smelting involves extreme heat, toxic fumes, and molten metal. Wear: leather apron, leather gauntlet gloves, face shield, safety boots (no synthetic materials). Work outdoors or in a well-ventilated space. Copper oxide fumes cause metal fume fever if inhaled. Keep a bucket of dry sand nearby for spill containment.
Strumenti necessari:
 Leather Apron
 Leather Gauntlet Gloves
 Face Shield
 Dry Sand Bucket
Light the forge and preheat
Light the forge and preheat
Light the forge charcoal and bring it to full heat over 30-45 minutes with gentle bellows action. Place the loaded crucible into the forge once the coals are glowing white-hot. Pack charcoal tightly around the crucible. Increase bellows speed gradually.
Maintain temperature for 2-3 hours
Maintain temperature for 2-3 hours
Keep the forge at 1100-1200°C for 2-3 hours. The malachite first decomposes (green changes to black CuO at ~300°C), then the CuO reduces to copper as temperature climbs. Add charcoal to the forge as needed to maintain heat. The crucible contents will shrink as CO₂ gas escapes.
Check for completion
Check for completion
After 2-3 hours, carefully lift the crucible lid with tongs and peek inside. You should see a bright orange-red pool of molten copper beneath a layer of slag (glassy dark material). If you see unmelted green or black chunks, continue heating for another 30 minutes.
Strumenti necessari:
 Long-Handled Tongs
Prepare the ingot mold
Prepare the ingot mold
While the copper melts, prepare a sand mold or a flat stone depression for pouring. Preheat the mold with a torch to prevent thermal shock cracking. A simple bar-shaped mold carved into a sandstone block works well. Ensure the mold is completely dry — any moisture causes explosive splattering of molten metal.
Strumenti necessari:
 Sandstone Ingot Mold
Pour the copper
Pour the copper
Using crucible tongs, lift the crucible from the forge. Tilt slowly to pour molten copper into the mold. The dark glassy slag floats on top and can be held back with a stick while the copper flows under it. Pour steadily — interrupted pours create cold shuts (weak seams).
Strumenti necessari:
 Crucible Tongs
Let the ingot cool
Let the ingot cool
Allow the copper ingot to cool in the mold for at least 30 minutes. Do not quench in water — rapid cooling makes copper brittle with internal stresses. Air cooling produces a softer, more workable metal. The copper surface oxidizes to a dark red-brown as it cools.
Remove and clean the ingot
Remove and clean the ingot
Once cool enough to handle (below 100°C), remove the ingot from the mold. Brush off adhering sand and slag with a wire brush. The ingot should have the characteristic salmon-pink color of fresh copper on freshly exposed surfaces. Any dark patches are trapped slag or oxide inclusions.
Strumenti necessari:
 Wire Brush
Weigh and assess yield
Weigh and assess yield
Weigh the clean copper ingot. From 2 kg of good malachite ore, expect 800-1000 g of copper (40-50% yield, accounting for slag losses and impurities). Pure malachite would yield 1150 g, but field-collected ore is rarely pure. Record the yield for future optimization.
Strumenti necessari:
 Kitchen Scale
Test the copper quality
Test the copper quality
Hammer the edge of the ingot on an anvil. Good copper deforms plastically without cracking — it is one of the most malleable metals. If it cracks, it contains too much slag or oxide. File a small area to expose fresh metal — pure copper is salmon-pink. A green tinge indicates incomplete reduction.
Strumenti necessari:
 Heavy Hammer (2-3 kg)
 Metal File
Store the copper ingot
Store the copper ingot
Copper oxidizes slowly in air (forming green patina over months). For short-term storage, keep dry. For long-term, coat with a thin layer of oil. Label with date, source ore, and weight. This copper is ready for casting, hammering into sheet, or alloying with tin to make bronze.
Materiali
5- 2 kilogramSegnaposto
- 1 pezzoSegnaposto
- 5 kilogramSegnaposto
Strumenti richiesti
16- Segnaposto
- Segnaposto
- Segnaposto
- Segnaposto
- Segnaposto
- Segnaposto
- Segnaposto
- Segnaposto
- Segnaposto
- Segnaposto
- Segnaposto
- Segnaposto
- Segnaposto
- Segnaposto
- Segnaposto
Materiali dei progetti collegati
Blueprint correlati
Questi blueprint condividono conoscenze — tecniche, materiali o principi
Related blueprints
Other builds that share materials, tools, or techniques with this one.


CC0 Pubblico dominio
Questo progetto è rilasciato sotto CC0. Sei libero di copiare, modificare, distribuire e utilizzare quest'opera per qualsiasi scopo, senza chiedere permesso.
Supporta il Maker acquistando prodotti tramite il suo progetto dove guadagna una Commissione Maker stabilita dai venditori, oppure crea una nuova iterazione di questo progetto e includilo come collegamento nel tuo progetto per condividere i ricavi.