Collaborazione
ARTE
BELLEZZA E BENESSERE
MESTIERE
CULTURA E STORIA
DIVERTIMENTO
AMBIENTE
CIBO E BEVANDE
INGEGNERIA INVERSA
SCIENZE
SPORT
TECNOLOGIA
INDOSSABILI
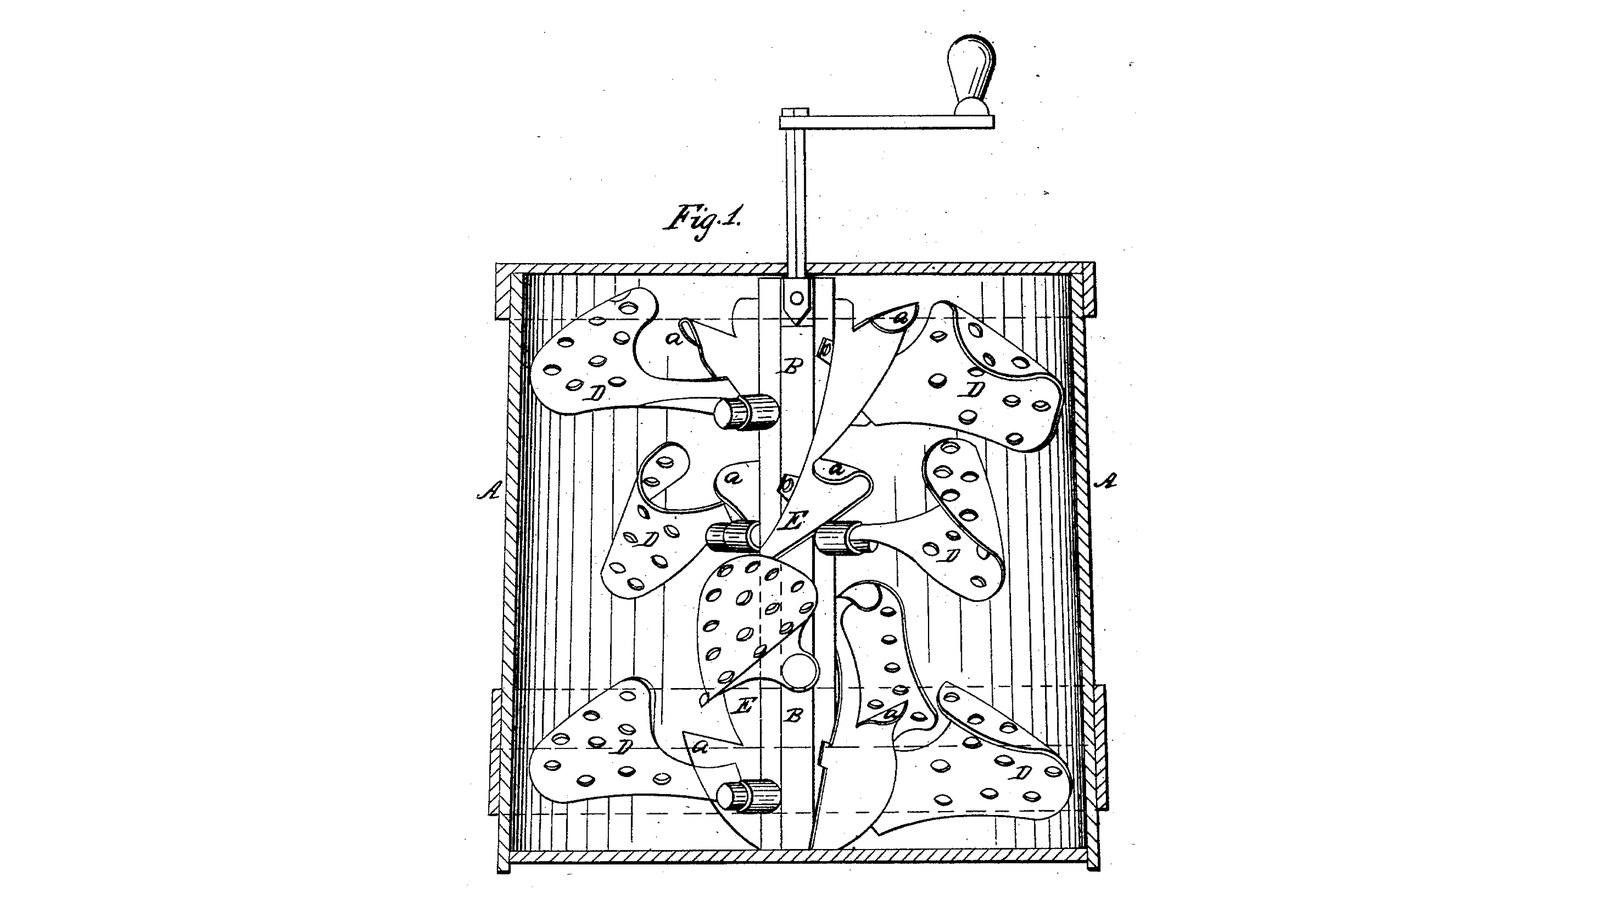

Spiral-Flange Perforated Dasher Churn: Curved Holed Dashers Fling the Cream Out, a Spiral Flange With Vanes Drives It Back Down
John J. Watson of Buffalo, New York, received US 30,438, dated 16 October 1860, for a churn dasher turned by a crank on its staff. Curved main dashers with turned, perforated ends catch the cream as it flies outward, part through their holes and part along the curve back toward the staff, rising; a spiral flange round the staff, with small unperforated vanes, catches that rising cream and throws it back down to the main dashers.
The patent gives no sizes; every size here is ours.
Intermedio
About 2 days
Istruzioni
1
1
Flinging out, falling back
Flinging out, falling back
Caricamento del notebook Jupyter…
2
2
Perforated dashers that break the cream, ten months before
Perforated dashers that break the cream, ten months before
Sprinkle's perforated dasher is driven at a slant. Watson curves and turns the ends of his and adds a spiral flange to send the cream back down.
3
3
Read US 30,438
Read US 30,438
"Around the dasher staff is wound a spiral flange, E, upon which are formed auxiliary dashers, a, a. These dashers are not perforated but catch the cream as it approaches the shaft with an upward tendency and throw it back toward the bottom of the churn box or toward the large or main dashers below them."
4
4
Box A and lid
Box A and lid
Use a 20-litre food-grade bucket as the box A. Cut a 12 mm HDPE lid to its top, 304 mm across, bored 16.6 mm at the centre as the staff's top bearing.
Materiali per questo passaggio:
 Secchio da 20 litri1 pezzo
 Lastra di HDPE1 pezzo
Strumenti necessari:
 Bussola
 Seghetto alternativo
 Set di punte a lancia
 Trapano a batteria
5
5
Print the step
Print the step
The step on the bucket's floor: 60 mm across, 10 high, with a 10.6 mm hole 9 deep. PETG, 0.2 mm layers, 30 % infill, 4 walls.
6
6
Print the main dashers D (six)
Print the main dashers D (six)
One main dasher D: a blade 60 mm high and 4 thick, straight from the hub then curved forward over its outer 40 mm to 120 mm from the staff's centre, with 8 mm holes in two rows along the curve, on an 18 mm hub with a 10.4 mm bore and a split-pin hole. Print six. PETG, 0.2 mm layers, 30 % infill, 4 walls.
7
7
Print the spiral flange sections E (two)
Print the spiral flange sections E (two)
One section of the spiral flange E: a third of a turn of 120 mm pitch, reaching from a 38 mm sleeve (32.4 mm bore, 40 high) to 55 mm out, 4 thick, with three vanes a 10 mm high leaning 30 degrees. Print two, with supports. PETG, 0.2 mm layers, 30 % infill, 4 walls.
8
8
Staff B, flange E and dashers D
Staff B, flange E and dashers D
Turn a hardwood staff B 32 mm across and 315 mm long. Set a 10 mm stainless pin 10 mm out of its foot and a 16 mm stainless rod 133 mm long 20 mm into its top. Slide the two flange sections on, one 80 to 120 mm above the foot and one 190 to 230 mm, the upper turned a quarter turn on from the lower, and fix each with a screw through its sleeve. Bore the staff 10.2 mm across at 45, 155 and 265 mm above its foot, each a quarter turn from the last, and push a 10 mm stainless rod 120 mm long through each. Slide a dasher D on each end, curves leading the same way round, and fix it with a split pin. Pin a crank of mild steel flat bar, 108 mm throw, with a hardwood handle on the stainless top.
Materiali per questo passaggio:
 Tavola di legno duro1 pezzo
 Barra di acciaio inossidabile3 pezzi
 Filamento PETG1 pezzo
 Viti da legno2 pezzi
 Coppiglia6 pezzi
 Piatto di acciaio dolce1 pezzo
 Tasselli di legno duro1 pezzo
Strumenti necessari:
 Stampante 3D a filamento (FDM)
 Tornio per legnoTrapano a batteria
 Serie di punte da trapano
 Seghetto per metalli
 Lime (lima a mano)
 Morsa da banco
 Set di cacciaviti
 Metro a nastro
9
9
The build in 3D
The build in 3D
FreeCAD model of this build, the bucket cut open: the step, the staff with its three pairs of curved, holed dashers on cross-rods, the two spiral flange sections with their vanes between the levels, the lid and the crank.
10
10
Churn
Churn
Set the step on the bucket's floor, stand the dasher in it, pour in about 12 litres of heavy cream at about 15 °C, checked with the thermometer, and put on the lid over the staff's top. Turn the crank steadily, the dashers' curved ends leading, timing it. When the butter comes, lift the lid and dasher out, take out the butter, pour the buttermilk into a bowl, wash the butter in cold water until it runs clear, salt and weigh it.
Materiali per questo passaggio:
 Panna da montare12 l
 Sale marino grosso1 pezzo
 Acqua1 pezzo
Strumenti necessari:
 Termometro a sonda permanente
 Cronometro
 Bilancia digitale da cucina
 Grande ciotola da impasto in acciaio inossidabile
11
11
Troubleshooting
Troubleshooting
Spiral-flange churn troubleshooting.
Flow
Loading...
12
12
History and honest limits
History and honest limits
**John J. Watson** of Buffalo, Erie County, New York, US 30,438, 16 October 1860, "Churn-Dasher". He claimed "the arrangement of the main dashers, D, D, with the auxiliary dashers, a a and the spiral flange E". He gives the dashers' form only as drawn, and does not say how many there are or how far round the flange runs; Fig. 1 draws one twisted band up the staff's height, while ours is two short sections between the dashers' levels. His dashers were metal; ours are printed. Every size here is ours.
Materiali
12- 1 pezzoSegnaposto
- 1 pezzoSegnaposto
- 1 pezzoSegnaposto
- Segnaposto
- 1 pezzoSegnaposto
- 2 pezziSegnaposto
- 6 pezziSegnaposto
- 1 pezzoSegnaposto
- 1 pezzoSegnaposto
- 12 lSegnaposto
- 1 pezzoSegnaposto
- 1 pezzoSegnaposto
Strumenti richiesti
16- Segnaposto
- 1 vendor sell this, none ship to you yetSegnaposto
- Segnaposto
- 1 vendor sell this, none ship to you yetSegnaposto
- Segnaposto
- Segnaposto
- Segnaposto
- Segnaposto
- Segnaposto
- Segnaposto
- Segnaposto
- 1 vendor sell this, none ship to you yetSegnaposto
- Segnaposto
- Segnaposto
- Segnaposto
File di progetto
4Questo progetto realizza


Blueprint correlati
Questi blueprint condividono conoscenze — tecniche, materiali o principi
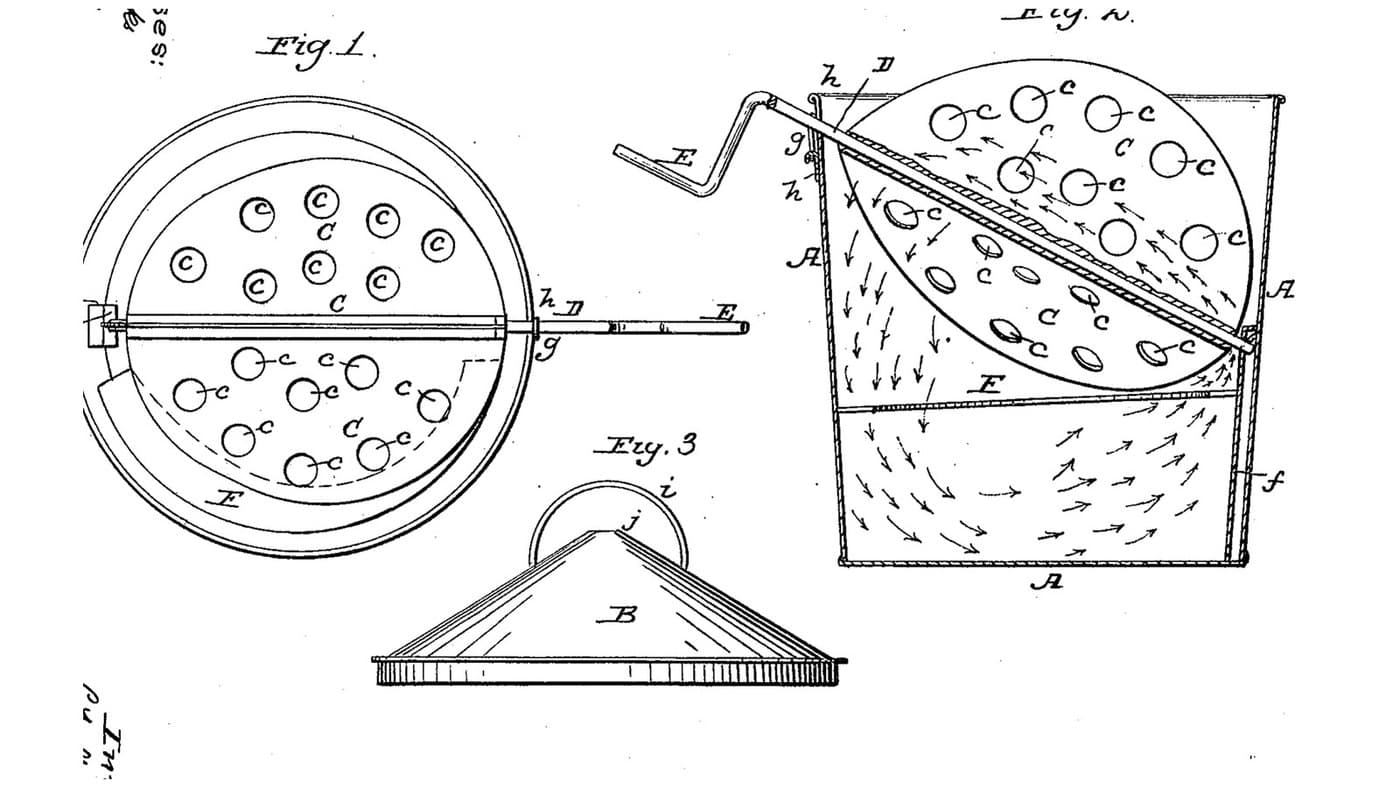
Oblique Perforated-Dasher Churn: A Slanted Spindle Drives the Cream Down and Sideways, a Guard Turns It Back
di Buttercup
CIBO E BEVANDE
2
0
0
0
0
0
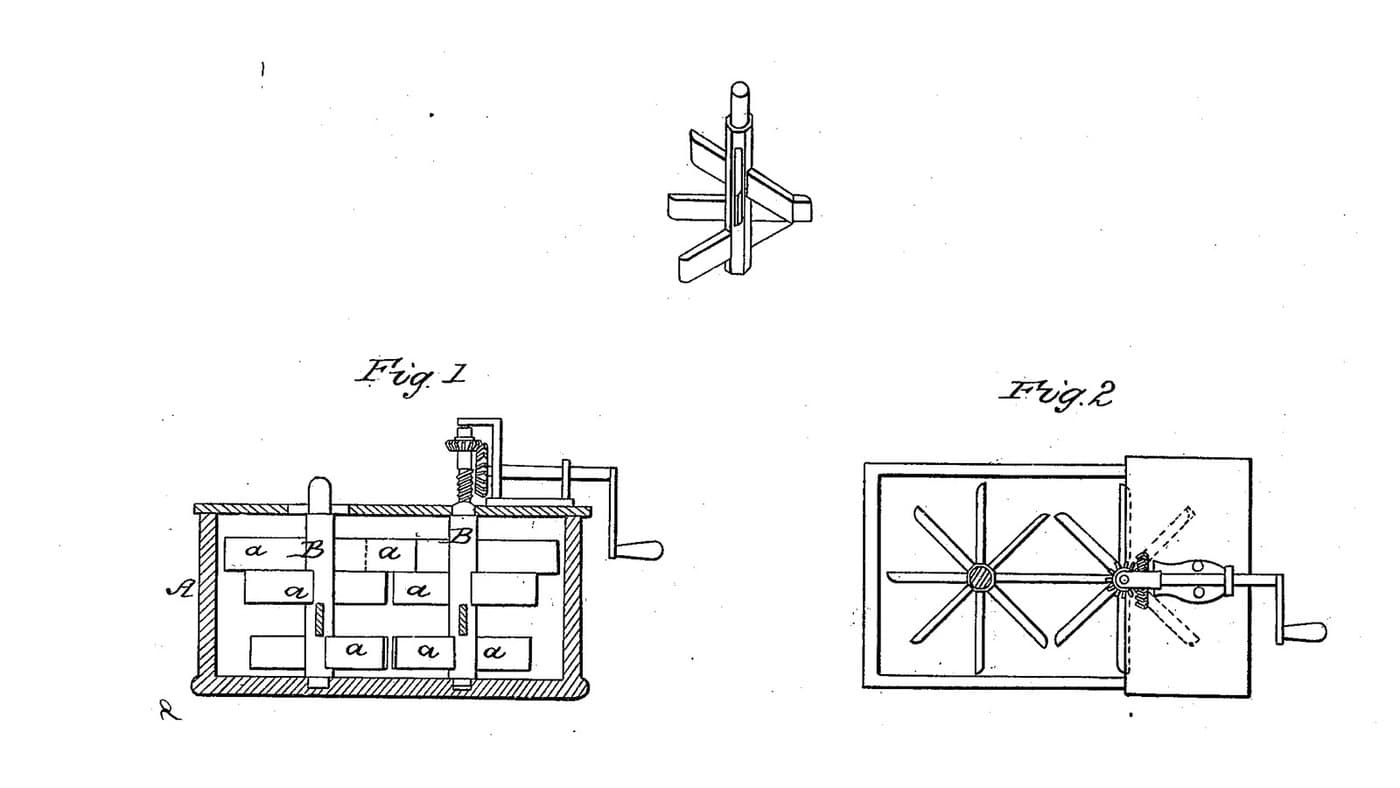
Interlapping Spiral-Dasher Churn: Two Upright Shafts With Arms Set in Screw Form Interlap, One Turning the Other
di Buttercup
Lavorazione del legno
0
0
0
0
0
0
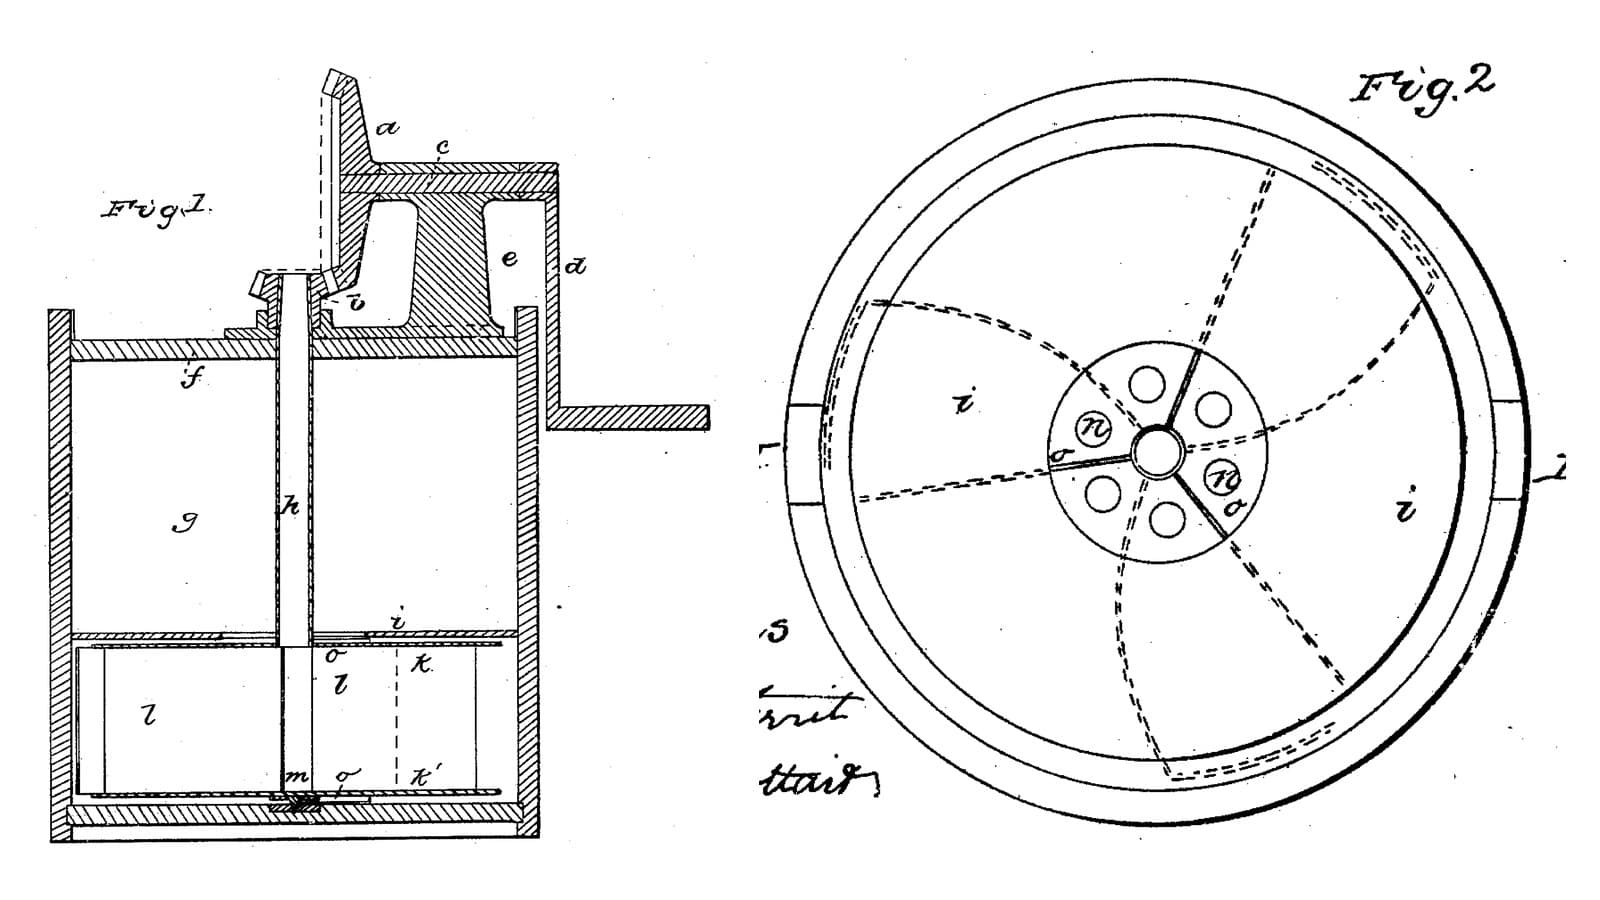
Centrifugal-Dasher Churn: Curved Wings on a Hollow Shaft Throw the Cream at the Wall, a Fixed Disk Turns It Back
di Buttercup
Lavorazione del legno
1
0
0
0
0
0

Churning Butter from Cream — The 5,000-Year-Old Fat Separation
di TheChef
MESTIERE
60
0
0
0
0
0
CC0 Pubblico dominio
Questo progetto è rilasciato sotto CC0. Sei libero di copiare, modificare, distribuire e utilizzare quest'opera per qualsiasi scopo, senza chiedere permesso.
Supporta il Maker acquistando prodotti tramite il suo progetto dove guadagna una Commissione Maker stabilita dai venditori, oppure crea una nuova iterazione di questo progetto e includilo come collegamento nel tuo progetto per condividere i ricavi.