Collaborazione
ARTE
BELLEZZA E BENESSERE
MESTIERE
CULTURA E STORIA
DIVERTIMENTO
AMBIENTE
CIBO E BEVANDE
INGEGNERIA INVERSA
SCIENZE
SPORT
TECNOLOGIA
INDOSSABILI
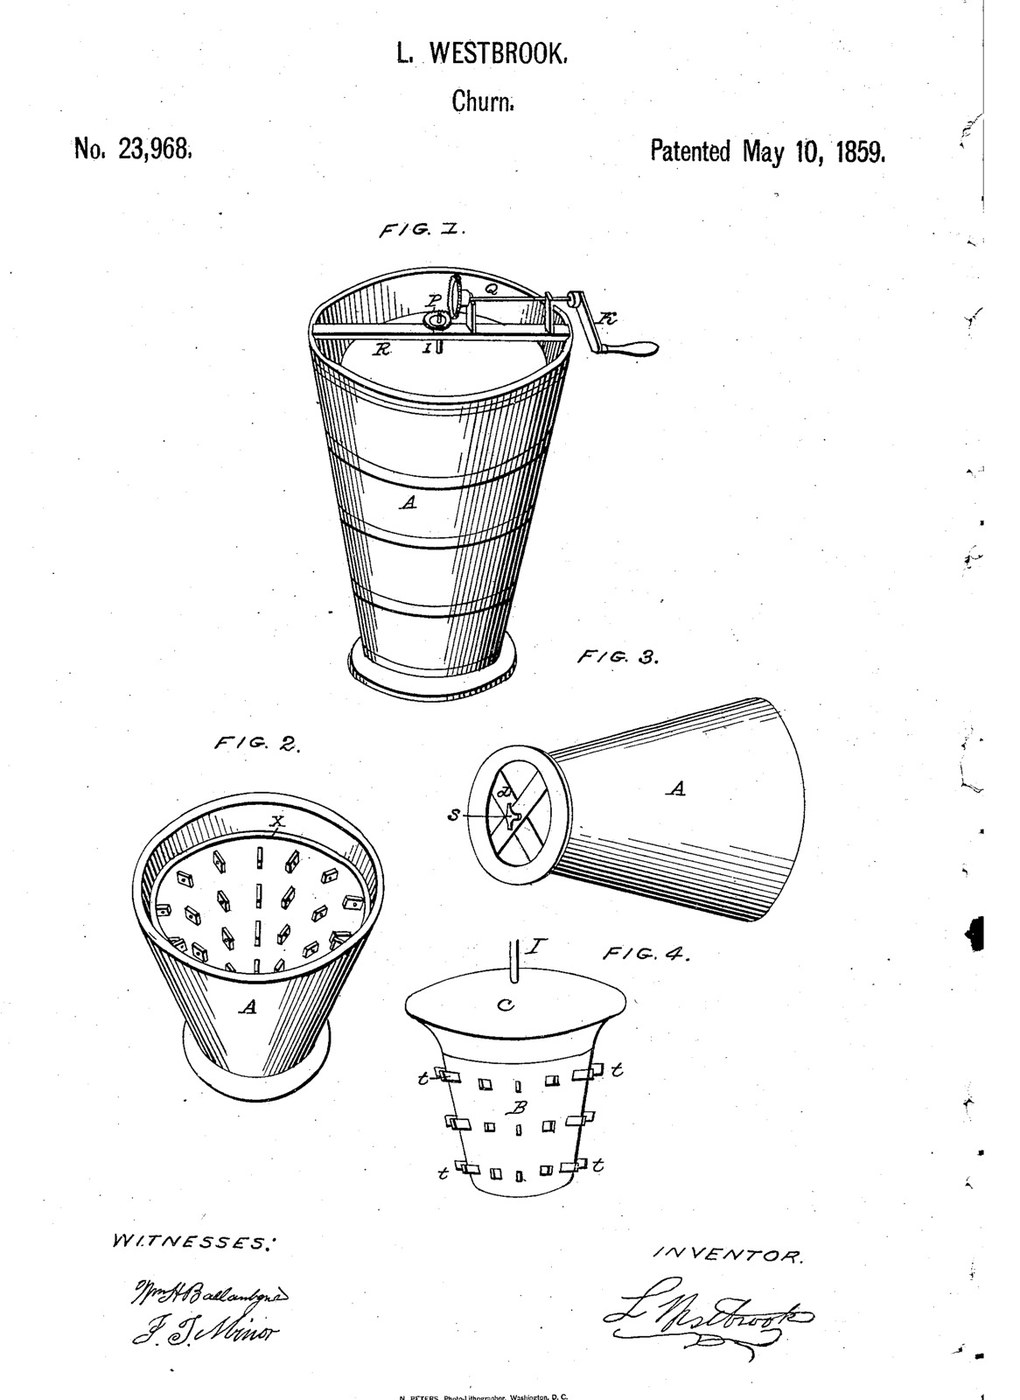


Rim-and-Disk Flow Churn: Cream Is Rubbed Past a Turning Disk, Then Falls Through Fixed and Turning Dashers
Leonardo Westbrook of New York received US 23,968, dated 10 May 1859, for a churn the cream passes through once. It stands over a pail. Cream poured on a turning disk at the top is rubbed between the disk's edge and a rounded rim inside the case, then falls through slats fixed to the case and dashers turning on the spindle, and runs out of the open bottom. A thumb screw under the spindle raises or lowers the disk on the rim.
This rung builds it in a 20-litre bucket with its floor cut out.
Intermedio
About 6 hours, plus printing
Istruzioni
1
1
The gap at the rim, and the speeds
The gap at the rim, and the speeds
Caricamento del notebook Jupyter…
2
2
Cream rubbed in one pass, before it
Cream rubbed in one pass, before it
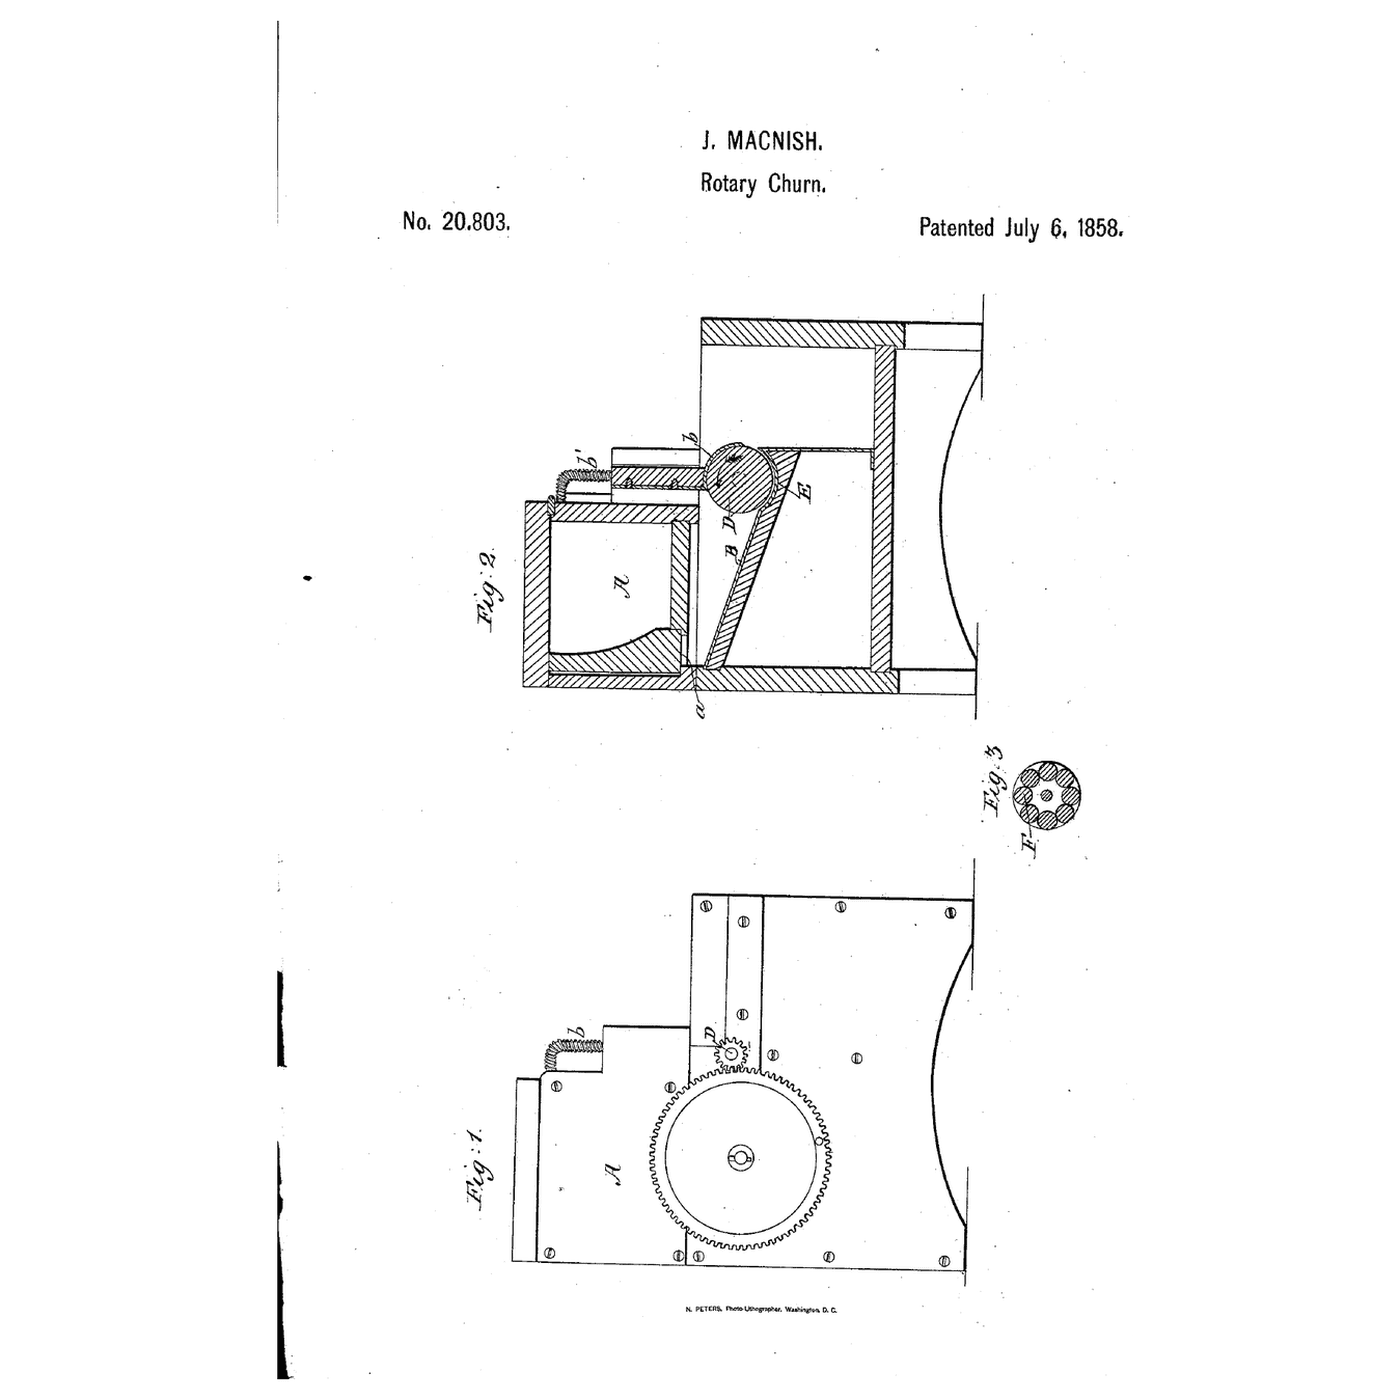
MacNish ran the cream once between a roller and a concave. Westbrook rubs it at a disk's edge, then beats it on the way down.
3
3
Read US 23,968
Read US 23,968
"The disk C, being slightly in contact with the rim X X X, as it revolves, rubs the milk or cream as it passes through ... then falling among the numerous dashers is thoroughly churned, before it passes out into the receiving vessel at the bottom."
4
4
Print the rim segment
Print the rim segment
A quarter of rim X, half-round, 16 mm wide. Print four. PETG, 0.2 mm layers, 40 % infill, 4 walls; wash before first use.
5
5
Print the pinion P
Print the pinion P
The 12-tooth pinion for spindle I's top. PETG, 0.2 mm layers, 40 % infill, 4 walls; wash before first use.
6
6
Print the crown wheel P'
Print the crown wheel P'
The 36-tooth wheel for shaft Q, teeth on its face. PETG, 0.2 mm layers, 40 % infill, 4 walls; wash before first use.
7
7
Print the thumb head
Print the thumb head
The wing head for the thumb screw. PETG, 0.2 mm layers, 40 % infill, 4 walls; wash before first use.
8
8
Case A, bars and thumb screw
Case A, bars and thumb screw
Cut the floor out of a food-grade 20-litre bucket, leaving a 25 mm flange round the edge (a 230 mm hole). Screw two hardwood bars d d' 340 x 30 x 20 mm across under the flange, halved where they cross, and drill the crossing 10.5 mm. Run an M10 threaded rod 123 mm long up through it with a nut on top of the bars, and glue the printed thumb head on its lower end.
Materiali per questo passaggio:
 Secchio da 20 litri1 pezzo
 Tavola di legno duro1 pezzo
 Viti da legno8 pezzi
 Barra filettata1 pezzo
 Dado esagonale1 pezzo
 Filamento PETG1 pezzo
 Colla da legno1 pezzo
Strumenti necessari:
 Stampante 3D a filamento (FDM)
 Seghetto alternativo
 Sega a mano
 Scalpelli
 Trapano a batteria
 Serie di punte da trapano
 Seghetto per metalli
 Set di cacciaviti
 Metro a nastro
9
9
Rim X and fixed dashers o
Rim X and fixed dashers o
Screw the four rim segments inside the bucket 300 mm above the cut floor, round side inward, with stainless screws from outside. Cut 24 hardwood slats o 50 x 20 x 12 mm and screw them through the wall in three rings of eight, 80, 160 and 240 mm up, each ring turned half a space from the last.
Materiali per questo passaggio:
Tavola di legno duro1 pezzo Viti da metallo32 pezzi
 Dado autobloccante con inserto in nylon32 pezzi
Strumenti necessari:
Sega a manoTrapano a batteriaSerie di punte da trapanoSet di cacciavitiMetro a nastro10
10
Spindle B, dashers t and disk C
Spindle B, dashers t and disk C
Cut a 40 mm hardwood dowel 290 mm long for spindle B and drill an 11 mm hole 10 mm deep in the middle of its foot (the indentation). Chisel twelve mortises and glue in hardwood dashers t 82 x 20 x 12 mm, four at each of 80, 160 and 230 mm above the foot, each ring turned an eighth from the last, so they pass between the slats' rings. Glue a 12 mm stainless rod 145 mm long 30 mm into the top as spindle I. Cut disk C from 12 mm plywood, 282 mm across, and glue it on the spindle 268 mm above the foot.
Materiali per questo passaggio:
 Tasselli di legno duro1 pezzoTavola di legno duro1 pezzoColla da legno1 pezzo
 Barra di acciaio inossidabile1 pezzo
 Pannello di compensato1 pezzo
Strumenti necessari:
Sega a manoScalpelliTrapano a batteria Set di punte a lanciaSeghetto alternativoSeghetto per metalli
 Carta abrasiva
11
11
Beam R, shaft Q and crank K
Beam R, shaft Q and crank K
Lower the spindle in so its foot sits on the thumb screw and the disk on the rim. Cut a hardwood beam R 320 x 44 x 30 mm with a 13 mm hole in the middle, slip it over spindle I onto the rim and screw two cleats under its ends inside the bucket. Fix the pinion on spindle I. Screw two bearing blocks 95 mm tall on the beam, bore them 12.5 mm 70 mm above it, and run a 12 mm stainless rod through them as shaft Q, with the crown wheel meshing the pinion and a hardwood crank K with a dowel handle on the end beyond the bucket.
Materiali per questo passaggio:
Tavola di legno duro1 pezzoViti da legno8 pezziBarra di acciaio inossidabile1 pezzoViti da metallo3 pezziDado autobloccante con inserto in nylon3 pezziTasselli di legno duro1 pezzoColla da legno1 pezzoStrumenti necessari:
Sega a manoTrapano a batteriaSerie di punte da trapanoSeghetto per metalliSet di cacciaviti12
12
The build in 3D
The build in 3D
FreeCAD model of this build, the near half of the bucket and rim cut away: the bars and thumb screw, the three rings of slats, the spindle with its dashers and disk on the rim, the beam with spindle I and the pinion, and shaft Q with the crown wheel and crank.
13
13
Churn
Churn
Stand the churn on its bars over a clean pail or tub. Turn the thumb screw until the disk just touches the rim. Turn the crank and pour about 8 litres of heavy cream at about 15 °C slowly onto the disk, checked with the thermometer; it runs past the rim, through the dashers and into the pail. How many passes it needs is not given: pour it through again until the butter comes, timing it. Then pour off the buttermilk, wash the butter in cold water until it runs clear, work in a pinch of salt and weigh it.
Materiali per questo passaggio:
 Panna da montare8 l
 Sale marino grosso1 pezzo
 Acqua1 pezzo
Strumenti necessari:
 Contenitore di conservazione per uso alimentare
 Termometro a sonda permanente
 Cronometro
 Bilancia digitale da cucina
 Grande ciotola da impasto in acciaio inossidabile
14
14
Troubleshooting
Troubleshooting
Rim-and-disk churn troubleshooting.
Flow
Loading...
15
15
History and honest limits
History and honest limits
**Leonardo Westbrook** of New York, US 23,968, 10 May 1859, "Churn". He did not claim friction, compression or level turning dashers among fixed ones as such, only the rim with the disk working over it, with the dashers and the thumb screw. His only size is the rim, 1/2 to 3/4 in. wide. We use the plain spindle he allows instead of his cone-shaped one, and a crown wheel and pinion for his two pinions; every other size and material is ours.
Materiali
15- 1 pezzoSegnaposto
- 1 pezzoSegnaposto
- 16 pezziSegnaposto
- 1 pezzoSegnaposto
- 1 pezzoSegnaposto
- 1 pezzoSegnaposto
- 3 pezziSegnaposto
- 35 pezziSegnaposto
- Segnaposto
- 1 pezzoSegnaposto
- Segnaposto
- 1 pezzoSegnaposto
- Segnaposto
- 1 pezzoSegnaposto
- 1 pezzoSegnaposto
Strumenti richiesti
16- Segnaposto
- 1 vendor sell this, none ship to you yetSegnaposto
- Segnaposto
- Segnaposto
- 1 vendor sell this, none ship to you yetSegnaposto
- Segnaposto
- Segnaposto
- Segnaposto
- 1 vendor sell this, none ship to you yetSegnaposto
- Segnaposto
- Segnaposto
- Segnaposto
- Segnaposto
- Segnaposto
File di progetto
5Questo progetto realizza


Blueprint correlati
Questi blueprint condividono conoscenze — tecniche, materiali o principi



CC0 Pubblico dominio
Questo progetto è rilasciato sotto CC0. Sei libero di copiare, modificare, distribuire e utilizzare quest'opera per qualsiasi scopo, senza chiedere permesso.
Supporta il Maker acquistando prodotti tramite il suo progetto dove guadagna una Commissione Maker stabilita dai venditori, oppure crea una nuova iterazione di questo progetto e includilo come collegamento nel tuo progetto per condividere i ricavi.