Collaborazione
ARTE
BELLEZZA E BENESSERE
MESTIERE
CULTURA E STORIA
DIVERTIMENTO
AMBIENTE
CIBO E BEVANDE
INGEGNERIA INVERSA
SCIENZE
SPORT
TECNOLOGIA
INDOSSABILI


Valve-and-Cap Churn Dasher: Cream Driven Through Hinged Valves and Out of a Perforated Top Against a Sliding Cap
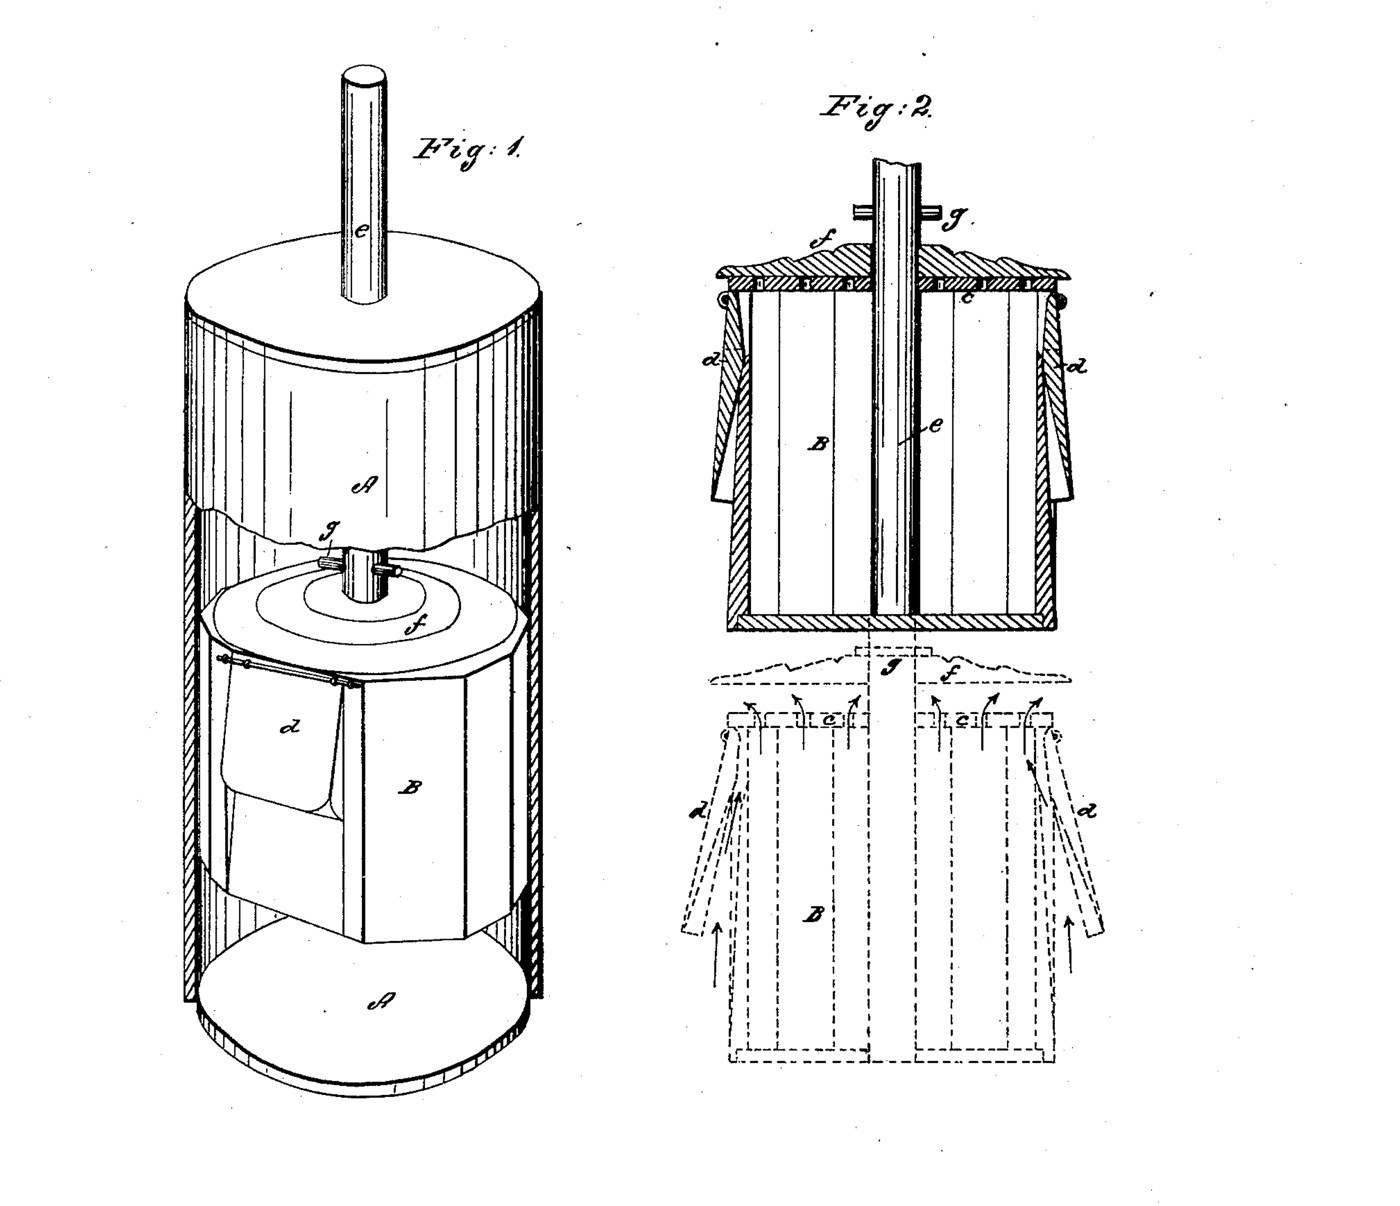
Parker Wineman of Loydsville, Ohio, received US 24,898, dated 26 July 1859, for a churn dasher that is itself a closed vessel. Pushed down, it takes cream in under hinged valves on its sides; the cream mingles with the air inside and is driven out through the holes of its perforated top against a cap that slides on the shaft up to a stop. The butter falls to the bottom of the dasher, and a segment of it is taken out to remove the butter.
This rung prints the dasher for a 20-litre bucket.
Intermedio
About 1 day, plus printing
Istruzioni
1
1
Where the cream stands
Where the cream stands
Caricamento del notebook Jupyter…
2
2
An up-and-down dasher, before it
An up-and-down dasher, before it
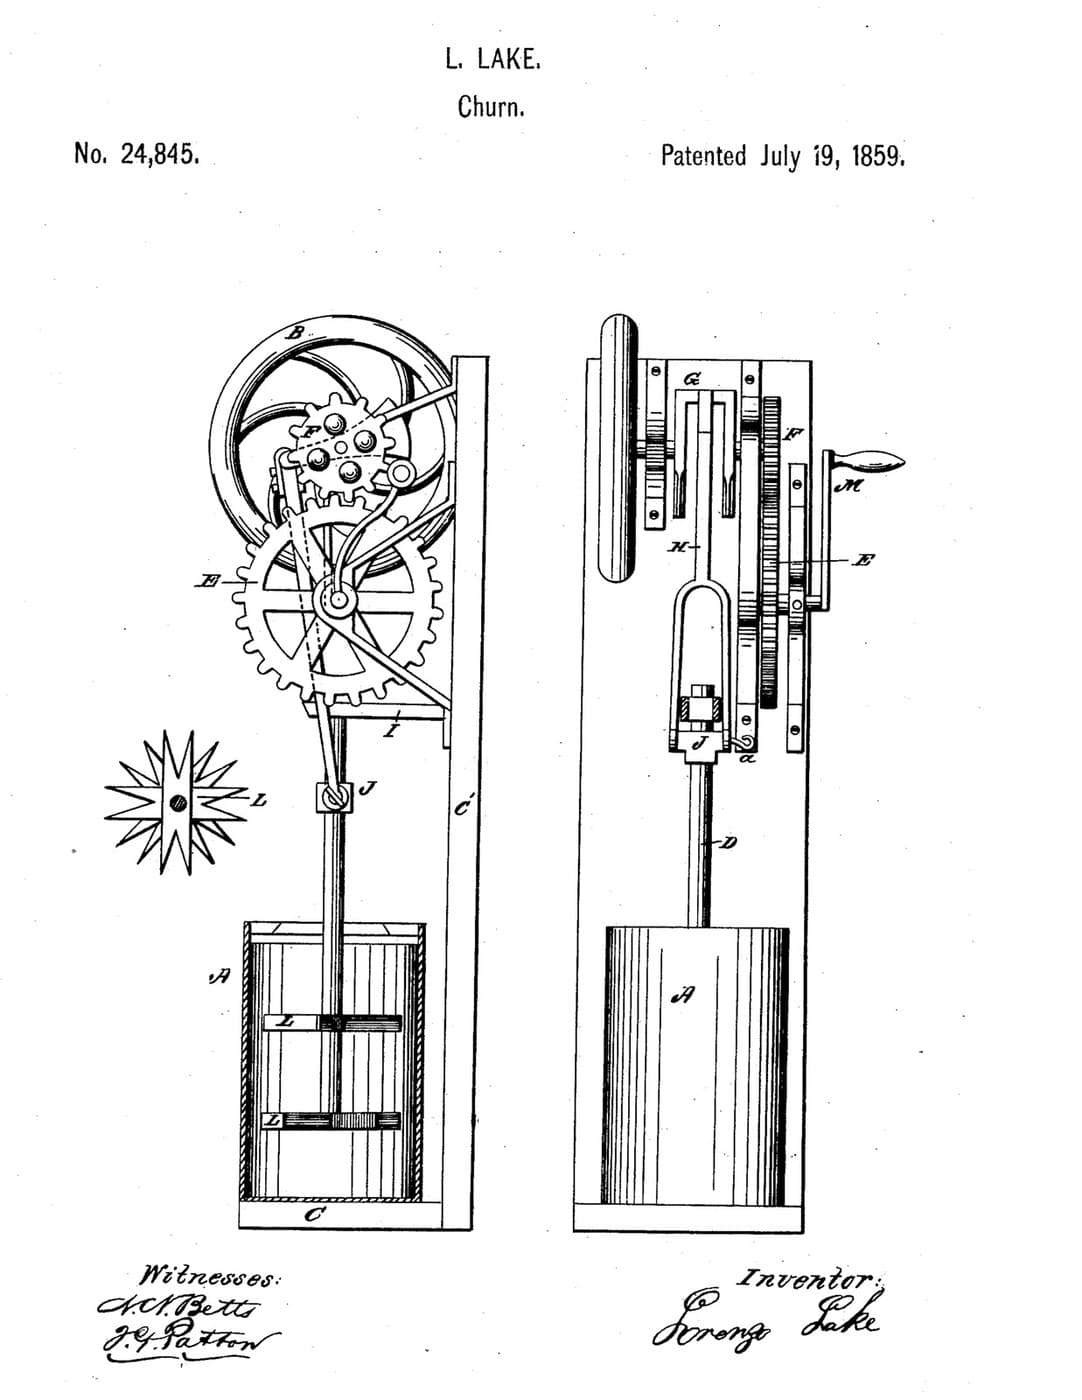
Lake's dashers cut the cream with notched boards. Wineman's dasher takes the cream inside it and drives it out against a cap.
3
3
Read US 24,898
Read US 24,898
"As the dasher is forced downward, the cream is forced under the valves (d) into the dasher, where it instantly mingles with the contained air, and is forced through the perforations (i) of the top of the dasher (c) against the cap with such violence as to burst the particles of cream or milk in which the butter is contained."
4
4
Print the dasher body
Print the dasher body
The octagonal dasher B, 160 mm across flats and 190 mm tall, closed at the floor, with two ports, the hinge lugs, the hub for the shaft and the opening for the side panel. Print it standing on its floor. PETG, 0.2 mm layers, 30 % infill, 4 walls.
5
5
Print the perforated top c
Print the perforated top c
The top c with 56 holes of 6 mm, a lip that drops into the body and a hub for the shaft. PETG, 0.2 mm layers, 30 % infill, 4 walls.
6
6
Print the valve flaps d
Print the valve flaps d
One flap, 50 x 100 mm with its hinge knuckle. Print two. PETG, 0.2 mm layers, 30 % infill, 4 walls.
7
7
Print the side panel
Print the side panel
The removable segment, a panel with a flange that sits on a lip at its foot. PETG, 0.2 mm layers, 30 % infill, 4 walls.
8
8
Print the cap f
Print the cap f
The cap, 168 mm across, a shallow cone with a 26 mm bore that slides on the shaft. PETG, 0.2 mm layers, 30 % infill, 4 walls.
9
9
Shaft, pins and handle
Shaft, pins and handle
Cut a 25 mm stainless tube 600 mm long for the shaft e. Drill 6 mm holes across it 10 mm and 185 mm from its foot for the pins that hold the body's hub and the top's hub, and one 233 mm from its foot for stop g. Cut 6 mm stainless pins 44 mm long and 3 mm pins 64 mm long, file their ends smooth, and make a hardwood T handle 200 mm wide bored for the tube's top.
Materiali per questo passaggio:
 Tubo di acciaio inossidabile1 pezzo
 Barra di acciaio inossidabile2 pezzi
 Tavola di legno duro1 pezzo
 Colla da legno1 pezzo
Strumenti necessari:
 Seghetto per metalli
 Sega a mano
 Trapano a batteria
 Serie di punte da trapano
 Set di punte a lancia
 Lime (lima a mano)
 Carta abrasiva
 Metro a nastro
10
10
Assemble the dasher
Assemble the dasher
Slide the body onto the shaft and pin its hub. Hang a flap over each port on a 3 mm pin through the lugs, and check it swings out freely and falls back shut. Press the top c into the body and pin its hub. Slide the cap f on above it and push the stop pin g through, so the cap can lift 20 mm. Set the side panel's foot on its lip and slide the 3 mm locking pin over its top. Put the handle on, and pass the shaft through a 28 mm hole in the bucket's lid.
Materiali per questo passaggio:
 Filamento PETG1 pezzo
 Secchio da 20 litri1 pezzo
Strumenti necessari:
 Stampante 3D a filamento (FDM)Trapano a batteriaSet di punte a lancia
11
11
The build in 3D
The build in 3D
FreeCAD model of this build, half the bucket and lid cut away: the octagonal dasher with its flaps swung open, the perforated top, the cap lifted to its stop, the shaft and handle. It was checked at three heights of the stroke with the flaps shut and open and the cap down and up.
12
12
Churn
Churn
Pour about 8 litres of heavy cream at about 15 °C into the bucket, checked with the thermometer, and put the lid on. Work the handle up and down about 100 mm, keeping the dasher's floor off the bucket's floor, and time it. When the butter has come, lift the dasher out, pull the panel's pin, take out the panel and scoop out the butter. Pour off the buttermilk, wash the butter in cold water until it runs clear, work in a pinch of salt and weigh it.
Materiali per questo passaggio:
 Panna da montare8 l
 Sale marino grosso1 pezzo
 Acqua1 pezzo
Strumenti necessari:
 Termometro a sonda permanente
 Cronometro
 Bilancia digitale da cucina
 Grande ciotola da impasto in acciaio inossidabile
13
13
Troubleshooting
Troubleshooting
Valve-and-cap dasher troubleshooting.
Flow
Loading...
14
14
History and honest limits
History and honest limits
**Parker Wineman** of Loydsville, Belmont County, Ohio, US 24,898, 26 July 1859, "Churn-Dasher". He claimed the dasher with its perforated top, movable cap and hinged valves. He gives no sizes and says the valves may be arranged in various ways. Fig. 1 draws the dasher with flat sides, which we copy; our flaps hang over ports near the top as in Fig. 2. Every size is ours, and our printed build has not been churned with.
Materiali
9- 1 pezzoSegnaposto
- Segnaposto
- 1 pezzoSegnaposto
- 1 pezzoSegnaposto
- 1 pezzoSegnaposto
- 1 pezzoSegnaposto
- Segnaposto
- 1 pezzoSegnaposto
- 1 pezzoSegnaposto
Strumenti richiesti
13- Segnaposto
- Segnaposto
- 1 vendor sell this, none ship to you yetSegnaposto
- Segnaposto
- Segnaposto
- Segnaposto
- Segnaposto
- 1 vendor sell this, none ship to you yetSegnaposto
- Segnaposto
- Segnaposto
- Segnaposto
- Segnaposto
File di progetto
6Questo progetto realizza


Blueprint correlati
Questi blueprint condividono conoscenze — tecniche, materiali o principi



CC0 Pubblico dominio
Questo progetto è rilasciato sotto CC0. Sei libero di copiare, modificare, distribuire e utilizzare quest'opera per qualsiasi scopo, senza chiedere permesso.
Supporta il Maker acquistando prodotti tramite il suo progetto dove guadagna una Commissione Maker stabilita dai venditori, oppure crea una nuova iterazione di questo progetto e includilo come collegamento nel tuo progetto per condividere i ricavi.