アート
美容とウェルネス
工芸
文化と歴史
エンターテインメント
環境
食品と飲料
リバースエンジニアリング
科学
スポーツ
テクノロジー
ウェアラブル
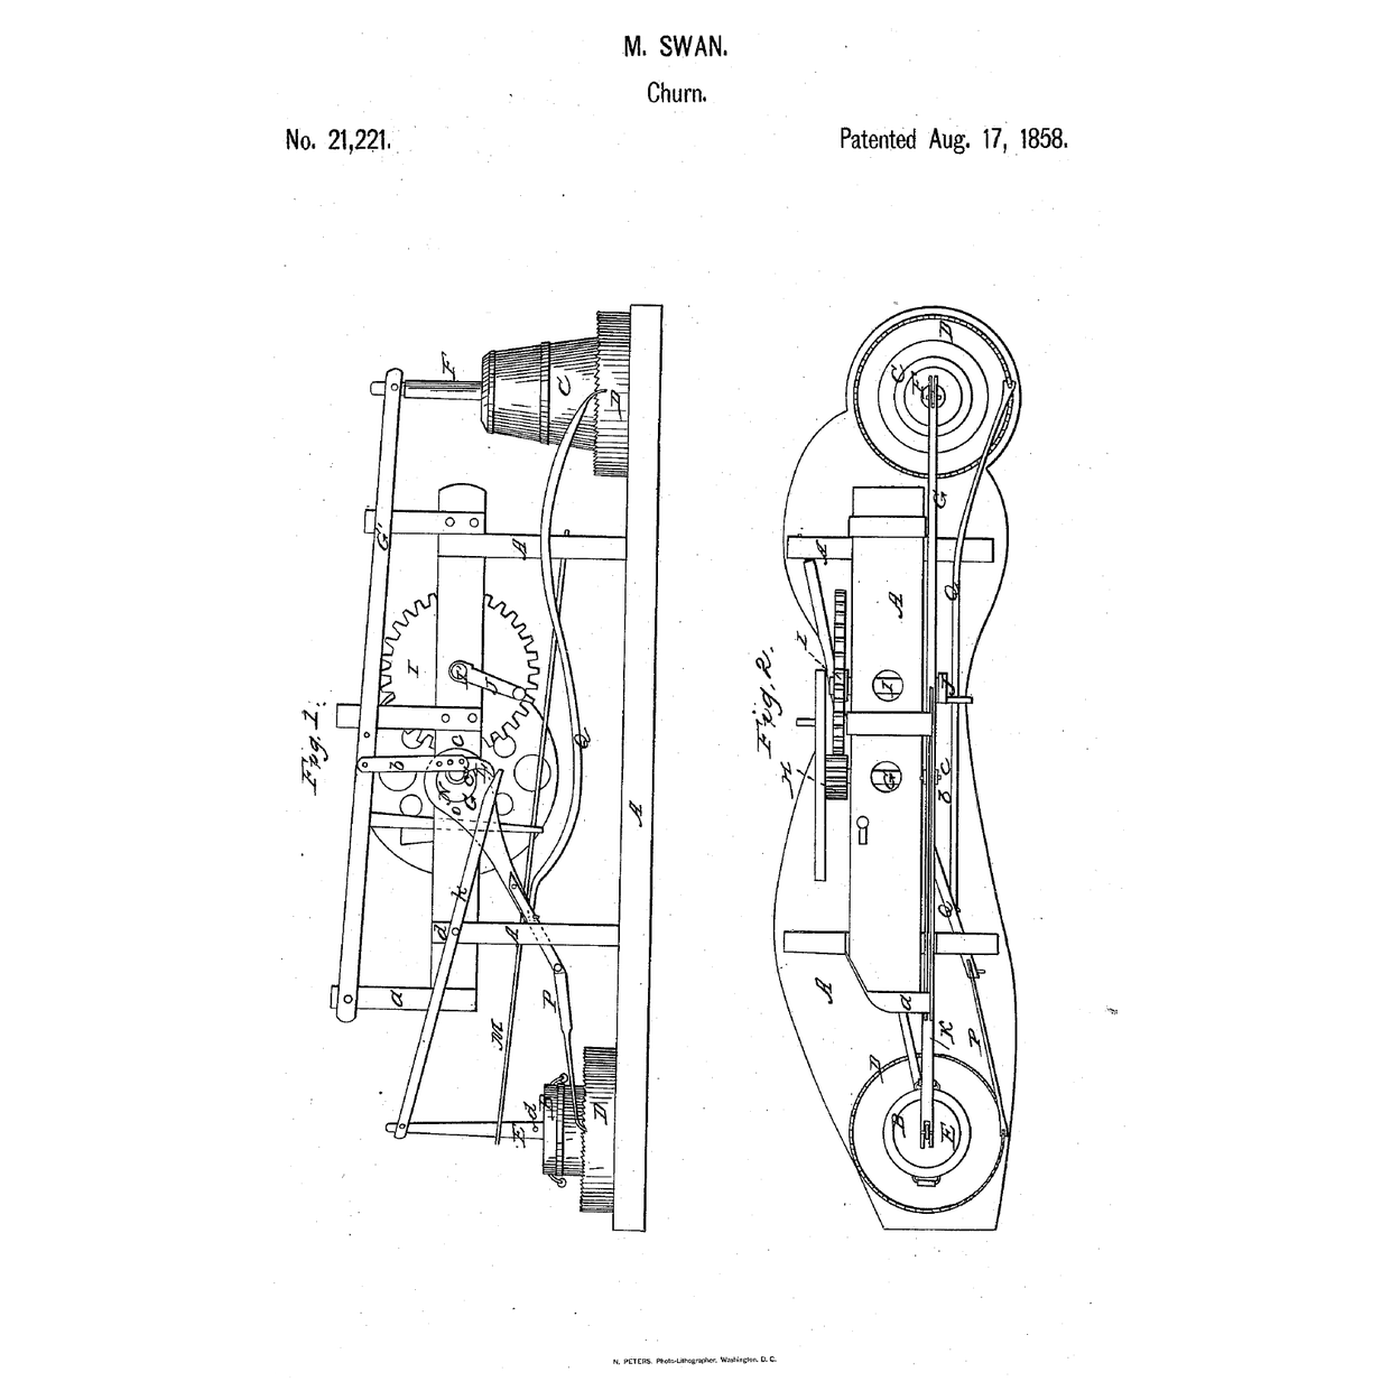


Churn-and-Washtub Mechanism: One Crank Works a Dasher and a Plunger and Turns Both Tubs
Moses Swan of Potter Hill, New York, received US 21,221, dated 17 August 1858, for one mechanism that works a churn and a washtub together: a crank and spur gears turn a shaft whose eccentric lifts the churn's dasher by a lever, whose cam lifts the washtub's plunger against a flat spring, and whose second eccentric drives pawls that turn both tubs a little at each stroke, so one person does both jobs.
This rung builds the base and posts in pine and prints the tubs, ratchet rims and gearing at tabletop scale.
上級者
About 9 hours, plus printing
手順
1
1
One crank, three motions
One crank, three motions
Jupyter ノートブックを読み込み中…
2
2
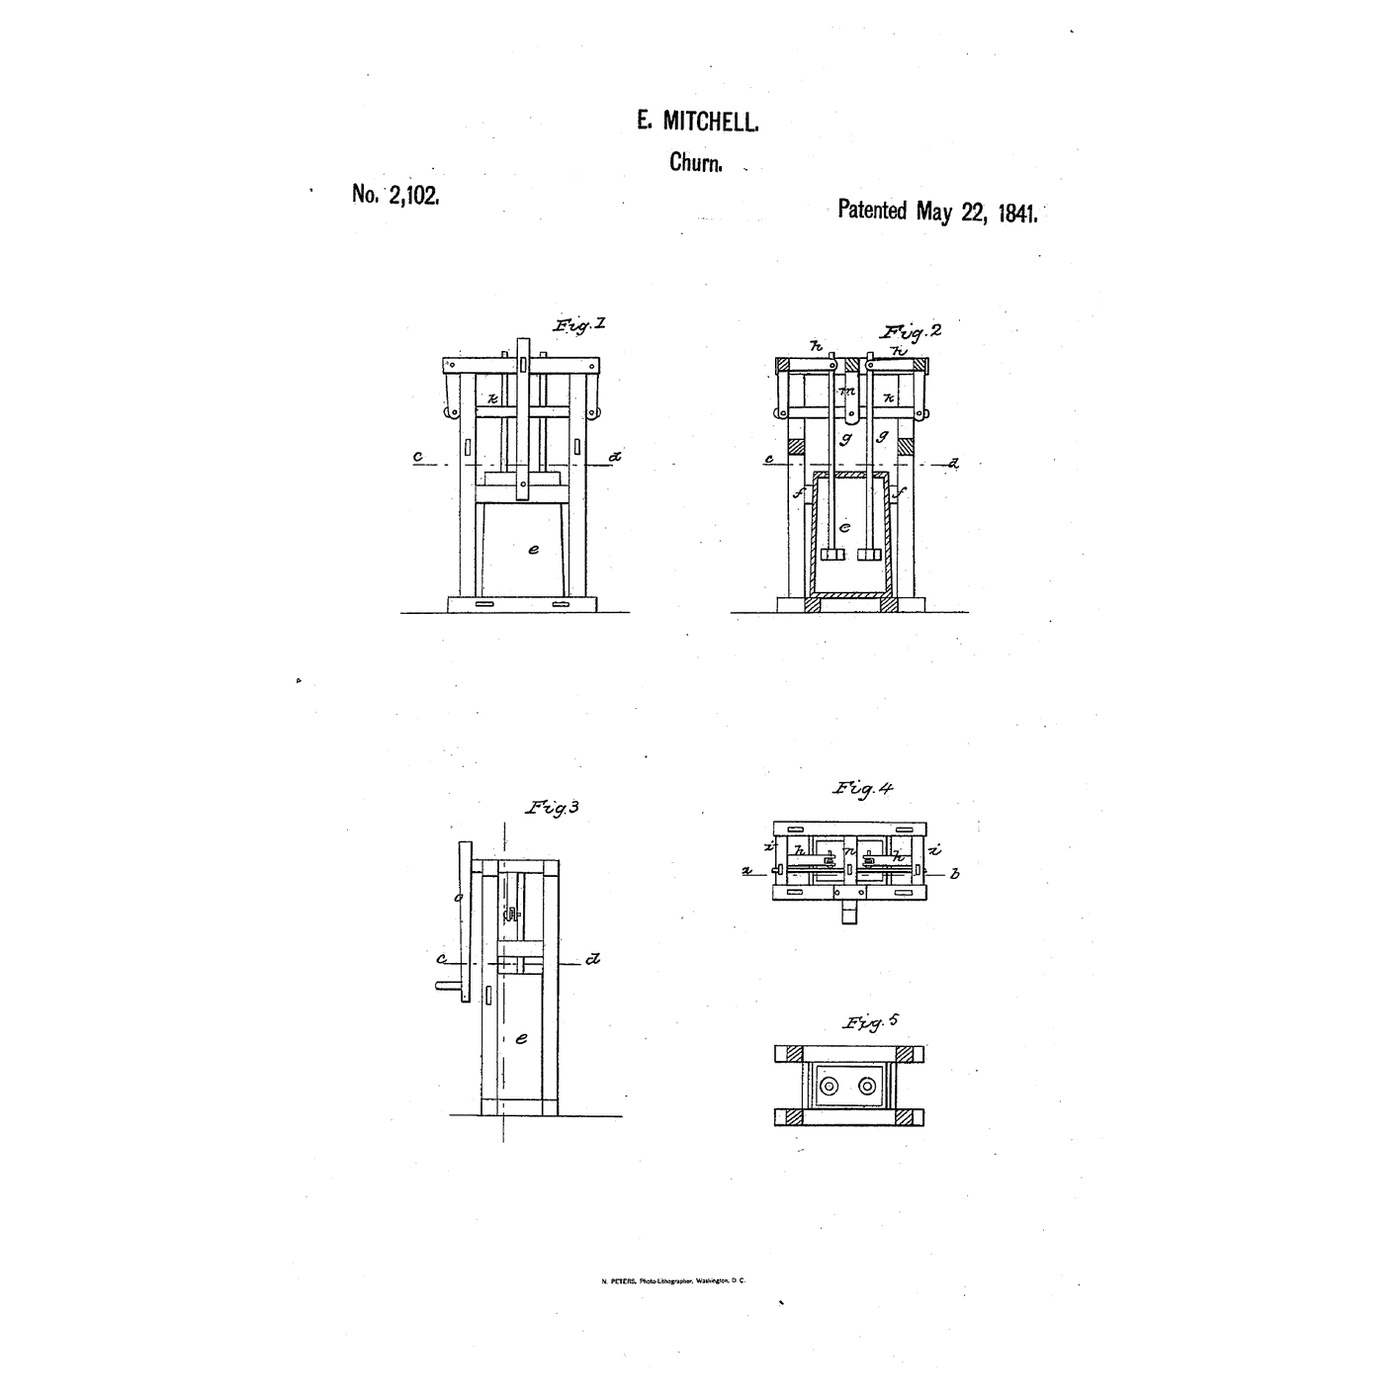
Lever-worked dashers, before it
Lever-worked dashers, before it
There a lever was swung by hand; Swan's is worked by an eccentric, which also works a washtub beside it.
3
3
Read US 21,221
Read US 21,221
"It is advantageous to rotate the tubs, for by so doing if churning is being performed, the whole body of the cream will be more perfectly subjected to the action of the dasher, and if washing is being performed, the plunger will be brought in contact with every portion of the clothes."
4
4
Print the parts
Print the parts
Print two ratchet rims, the churn tub, the washtub, pinion H, wheel I, the eccentric c, the cam L, the eccentric N, the strap O, two pawls, the link b, the dash, the dasher head, the plunger and the crank. The rims need a 220 mm print bed. Print in PETG at 0.2 mm layers, 30 % infill, 4 walls; wash before first use.
このステップの材料:
 PETGフィラメント1 個
必要な工具:
 FDM 3D プリンター
5
5
Print the ratchet rim
6
6
Print the churn tub
7
7
Print the washtub
8
8
Print the pinion H
9
9
Print the wheel I
10
10
Print the eccentric c
11
11
Print the cam L
12
12
Print the eccentric N
13
13
Print the strap O
14
14
Print the pawl
15
15
Print the link b
16
16
Print the dash
17
17
Print the dasher head
18
18
Print the plunger
19
19
Print the crank
20
20
Base and posts
Base and posts
Cut a pine base 560 by 240 mm. Glue and screw two posts 40 by 18 mm and 180 mm tall in its middle, 100 mm apart inside, with a block 30 mm thick on the front post's inner face; drill 10.5 mm holes through both posts 102 mm above the base for shaft G, and through the front post and its block 150 mm up for shaft I'. Stand an 18 mm square standard a 254 mm tall 55 mm left of the middle, a post d 122 mm tall behind it, and a post 232 mm tall at the back left for the spring. Screw an M6 screw up through the base 170 mm each side of the middle as the rims' pins.
このステップの材料:
 松板1 個
 木工用接着剤1 個
 木ねじ1 個
 小ねじ1 個
必要な工具:
 手のこぎり
 コードレスドリル
 紙やすり
 ドライバーセット
 メジャー(巻尺)
21
21
Shafts, gears and tubs
Shafts, gears and tubs
Drop a ratchet rim on each pin and stand the washtub on the left rim, the churn tub on the right. Cut 10 mm dowels 202 mm for shaft G and 148 mm for shaft I'. Thread G through the posts with pinion H, the eccentric c behind it, the cam L further back and the eccentric N on its front end; thread I' through the front post with wheel I on its inner end meshing H and the crank on its front end. Fix each with an M3 screw drilled through the dowel.
このステップの材料:
 堅木のダボ1 個小ねじ1 個
必要な工具:
手のこぎりコードレスドリルドライバーセット22
22
Dasher, plunger and pawls
Dasher, plunger and pawls
Pivot an 18 mm square pine lever G1, 243 mm long, on the standard a with an M6 screw, the link b from the eccentric's pin to its middle hole, and pin the dasher's head into its fork over the churn: a 10 mm dowel 155 mm long with the dash on its foot. Pivot the lever K on post d, its short end under the cam, and hang the plunger beside its long end on a 10 mm dowel 153 mm long, with an M3 screw through the dowel's top as the pin d. Screw a spring steel strip to the back left post, reaching over the pin. Hang the strap O on the eccentric N and pin both pawls to its foot with one M6 screw, resting on the rims' teeth at their front points.
このステップの材料:
松板1 個堅木のダボ1 個小ねじ1 個 ナイロンナット(ゆるみ止め)1 個
 平ワッシャー1 個
 ばね鋼帯1 個
必要な工具:
手のこぎりコードレスドリルドライバーセット23
23
The build in 3D
The build in 3D
FreeCAD model of this build: the pine base and posts, the washtub and churn tub on their ratchet rims, the crank and spur gears, shaft G with its eccentric, cam and second eccentric, the lever G1 and dasher, the lever K, plunger and flat spring, and the strap and pawls on the rims.
24
24
Churn, or wash
Churn, or wash
Pour 1.2 litres of heavy cream at about 15 °C, checked with the thermometer, into the churn tub, and warm soapy water and a cloth into the washtub. Turn the crank steadily and time it with the stopwatch: the dasher and plunger rise and fall and both tubs creep round. When the butter comes, lift the dasher out, pour off the buttermilk, wash the butter in cold water until it runs clear, work in a pinch of salt and weigh it.
このステップの材料:
 生クリーム1.2 l
 粗い海塩1 個
 水1 個
 固形石けん1 個
必要な工具:
 差しっぱなしのプローブ温度計
 ストップウォッチ
 デジタルキッチンスケール
 ステンレス鋼の大きな混ぜ鉢
25
25
Troubleshooting
Troubleshooting
Churn-and-washtub troubleshooting.
Flow
Loading...
26
26
History and honest limits
History and honest limits
**Moses Swan** of Potter Hill, Rensselaer County, New York, US 21,221, 17 August 1858, "Operating Churns, &c." He combined the two tubs so that neither two systems of gearing nor two persons are needed, and claimed the arrangement of mechanism that gives the plunger and dasher their up and down motion and both tubs their rotary motion. Our crown ratchets, sizes, pine frame and printed tubs are ours. FDM prints hold food in their layer lines, so wash well and replace when worn.
材料
13- 1 個プレースホルダー
- 1 個プレースホルダー
- 1 個プレースホルダー
- 1 個プレースホルダー
- 3 個プレースホルダー
- 1 個プレースホルダー
- プレースホルダー
- 1 個プレースホルダー
- 1 個プレースホルダー
- 1.2 lプレースホルダー
- 1 個プレースホルダー
- 1 個プレースホルダー
- 1 個プレースホルダー
必要な工具
10- プレースホルダー
- プレースホルダー
- 1 vendor sell this, none ship to you yetプレースホルダー
- プレースホルダー
- プレースホルダー
- 1 vendor sell this, none ship to you yetプレースホルダー
- プレースホルダー
- プレースホルダー
- プレースホルダー
- プレースホルダー
設計ファイル
16この設計図で作るもの

関連ブループリント
これらのブループリントは知識を共有しています — 技術、材料、原理



CC0 パブリックドメイン
このブループリントはCC0で公開されています。許可を求めずに、自由にコピー、修正、配布、あらゆる目的で使用できます。
メイカーを応援するには、ブループリント経由で製品を購入してください。メイカーには メイカーコミッション がベンダーにより設定されています。または、このブループリントの新しいイテレーションを作成し、自分のブループリントにコネクションとして含めて収益を共有できます。