アート
美容とウェルネス
工芸
文化と歴史
エンターテインメント
環境
食品と飲料
リバースエンジニアリング
科学
スポーツ
テクノロジー
ウェアラブル
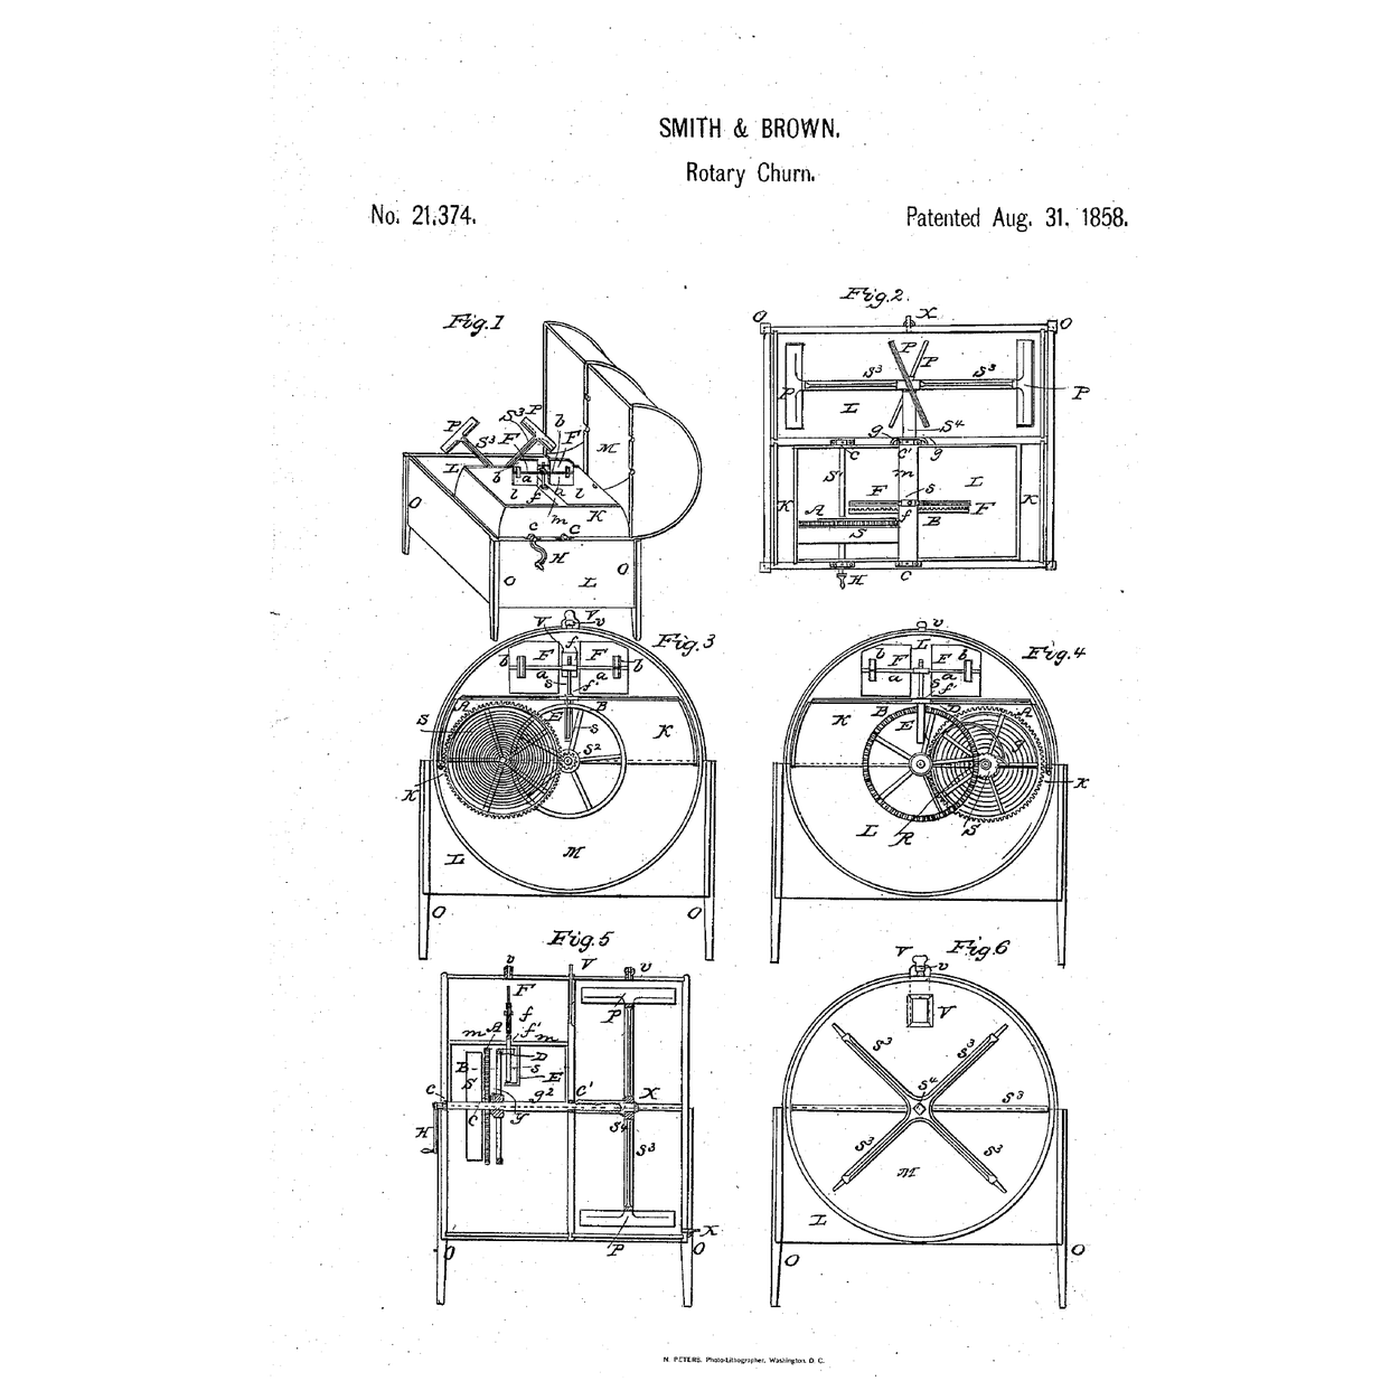


Clockwork Vane Churn: A Wound Spring Turns Oblique Beaters, a Vane Sets the Pace and Airs the Milk
John F. Smith of Galen and Wightman Brown of Rose, New York, received US 21,374, dated 31 August 1858, for a self-going churn: a wound mainspring turns beaters of oblique slats in one chamber of a cylinder, while a vane on the train both regulates the speed and blows fresh air through the partition into the milk.
This rung prints the chambers, train, ratchet, beaters and vane at tabletop scale, with a spring steel strip as the mainspring.
上級者
About 8 hours, plus printing
手順
1
1
The train
The train
Jupyter ノートブックを読み込み中…
2
2
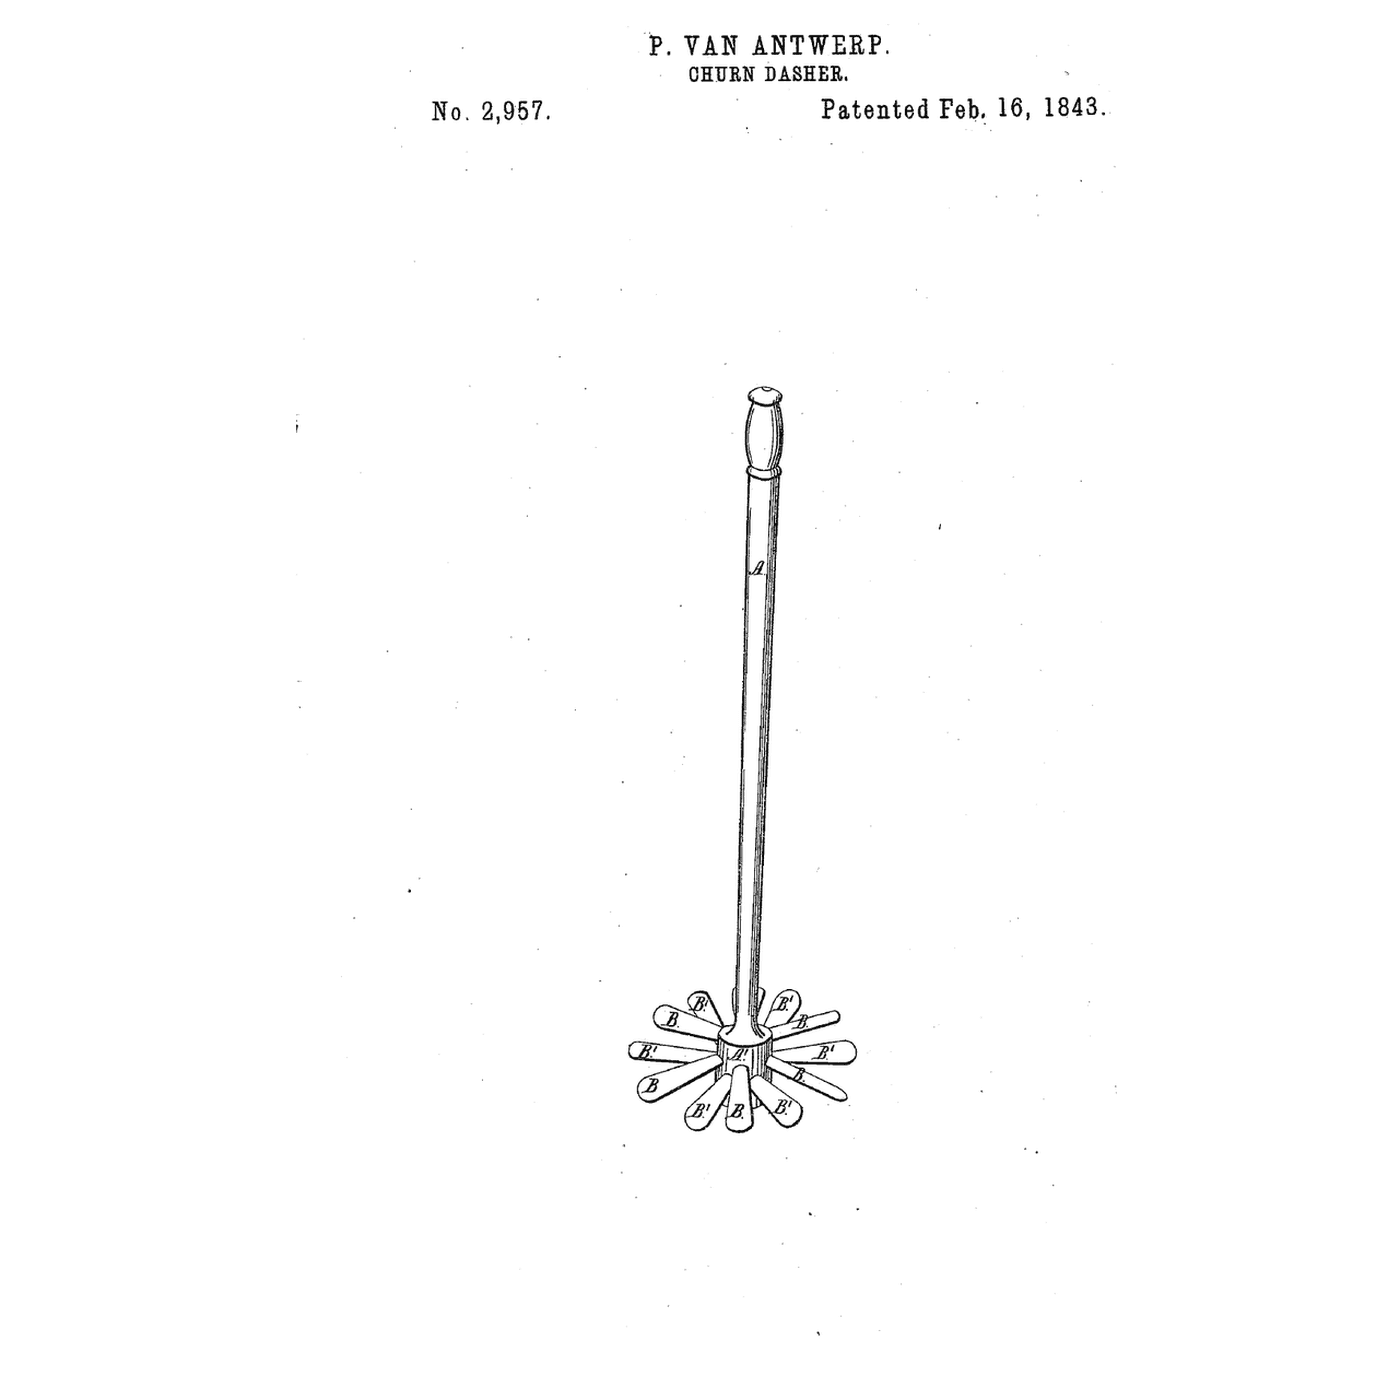
Oars pitched opposite ways, before it
Oars pitched opposite ways, before it
Those oars were turned by hand; Smith and Brown's oblique beaters are driven by a spring and paced by a vane.
3
3
Read US 21,374
Read US 21,374
"The vane F, serves at once as a regulator of the motion of the beater, as well as a means of refrigerating and supplying fresh air to the milk chamber."
4
4
Print the parts
Print the parts
Print the milk chamber closed end down, the partition, the end plate, the beaters with supports, pinion C, wheel A, the ratchet, the catch, the bevel wheel, pinion E, the vane's hub, four vane wings and the crank. The chamber, partition and end plate need a 230 mm print bed. Print in PETG at 0.2 mm layers, 30 % infill, 4 walls; wash before first use.
このステップの材料:
 PETGフィラメント1 個
必要な工具:
 FDM 3D プリンター
5
5
Print the milk chamber
6
6
Print the partition
7
7
Print the end plate
8
8
Print the beaters
9
9
Print the pinion C
10
10
Print the wheel A
11
11
Print the ratchet
12
12
Print the catch
13
13
Print the bevel wheel
14
14
Print the pinion E
15
15
Print the vane's hub
16
16
Print the vane wing
17
17
Print the crank
18
18
Stand and frame
Stand and frame
Cut a pine base 380 by 260 mm and three cradles with a 221 mm round cut out of each; glue and screw them across the base under the end plate, the partition and the chamber's far end. Screw the end plate's two ties to the partition.
このステップの材料:
 松板1 個
 木工用接着剤1 個
 木ねじ1 個
必要な工具:
 手のこぎり
 ジグソー
 コードレスドリル
 紙やすり
 ドライバーセット
19
19
Spring and train
Spring and train
Cut 10 mm dowels 170 mm for S1 and 330 mm for S2. Wearing gloves, coil a spring steel strip about 12 mm wide, 0.4 mm thick and 650 mm long round S1, its inner end hooked in a saw cut in the dowel and its outer end bent round the post k. Thread S1 through the end plate and partition with the ratchet fixed on it by an M3 screw, wheel A loose beside it, the catch on A's post with a short piece of strip pressing it into the teeth, and the crank on its outer end. Thread S2 through both plates with pinion C pressed on to mesh A and the bevel wheel pressed on behind the partition. Put the upright shaft, a 10 mm dowel 100 mm long, in the partition's bracket with pinion E on its foot meshing the bevel wheel and the vane's hub on its top; push the four wings onto their arms.
このステップの材料:
 堅木のダボ1 個
 ばね鋼帯1 個
 小ねじ1 個
必要な工具:
手のこぎりコードレスドリルドライバーセット 革製ガントレット手袋
20
20
Beaters and chamber
Beaters and chamber
Slide the beaters onto S2 beyond the partition and fix them with an M3 screw drilled through. Slip the milk chamber over them, S2's end in its far bearing, and bolt its flange to the partition with two M4 screws.
このステップの材料:
小ねじ1 個必要な工具:
コードレスドリルドライバーセット21
21
The build in 3D
The build in 3D
FreeCAD model of this build: the pine stand, the end plate and partition, the mainspring on S1 with the ratchet, catch and wheel A, pinion C and the bevel wheel on S2, pinion E and the vane on the upright shaft, the opening in the partition, and the milk chamber with the oblique-slatted beaters.
22
22
Wind and churn
Wind and churn
Pour 1.5 litres of heavy cream at about 15 °C, checked with the thermometer, through the hatch. Wind the spring with the crank and let it go, timing it with the stopwatch; turn the vane's wings flatter to run faster or edgewise to run slower, and wind again whenever it stops. When the butter comes, unbolt the chamber, pour off the buttermilk, wash the butter in cold water until it runs clear, work in a pinch of salt and weigh it.
このステップの材料:
 生クリーム1.5 l
 粗い海塩1 個
 水1 個
必要な工具:
 差しっぱなしのプローブ温度計
 ストップウォッチ
 デジタルキッチンスケール
 ステンレス鋼の大きな混ぜ鉢
23
23
Troubleshooting
Troubleshooting
Clockwork churn troubleshooting.
Flow
Loading...
24
24
History and honest limits
History and honest limits
**John F. Smith** of Galen, Wayne County, and **Wightman Brown** of Rose, New York, US 21,374, 31 August 1858. They enclosed the machinery in a case with tight sliding covers to keep its oil from the butter, covered the metal shaft with wood where it lay in the milk, and held each vane wing to its arm with a small spring. They did not claim an automatic churn as such, but the divided cylinder, the close case, the adjustable vane, the passage V and the ventilators working together. Our machinery is open and has no oil; our dowel shafts, friction-fit wings, strip spring and sizes are ours, and we have not timed how long it runs. FDM prints hold food in their layer lines, so wash well and replace when worn.
材料
10- 1 個プレースホルダー
- 1 個プレースホルダー
- 1 個プレースホルダー
- 1 個プレースホルダー
- 1 個プレースホルダー
- 1 個プレースホルダー
- 2 個プレースホルダー
- 1.5 lプレースホルダー
- 1 個プレースホルダー
- 1 個プレースホルダー
必要な工具
11- プレースホルダー
- プレースホルダー
- 1 vendor sell this, none ship to you yetプレースホルダー
- 1 vendor sell this, none ship to you yetプレースホルダー
- プレースホルダー
- プレースホルダー
- プレースホルダー
- プレースホルダー
- プレースホルダー
- プレースホルダー
- プレースホルダー
設計ファイル
14この設計図で作るもの

関連ブループリント
これらのブループリントは知識を共有しています — 技術、材料、原理

CC0 パブリックドメイン
このブループリントはCC0で公開されています。許可を求めずに、自由にコピー、修正、配布、あらゆる目的で使用できます。
メイカーを応援するには、ブループリント経由で製品を購入してください。メイカーには メイカーコミッション がベンダーにより設定されています。または、このブループリントの新しいイテレーションを作成し、自分のブループリントにコネクションとして含めて収益を共有できます。