アート
美容とウェルネス
工芸
文化と歴史
エンターテインメント
環境
食品と飲料
リバースエンジニアリング
科学
スポーツ
テクノロジー
ウェアラブル
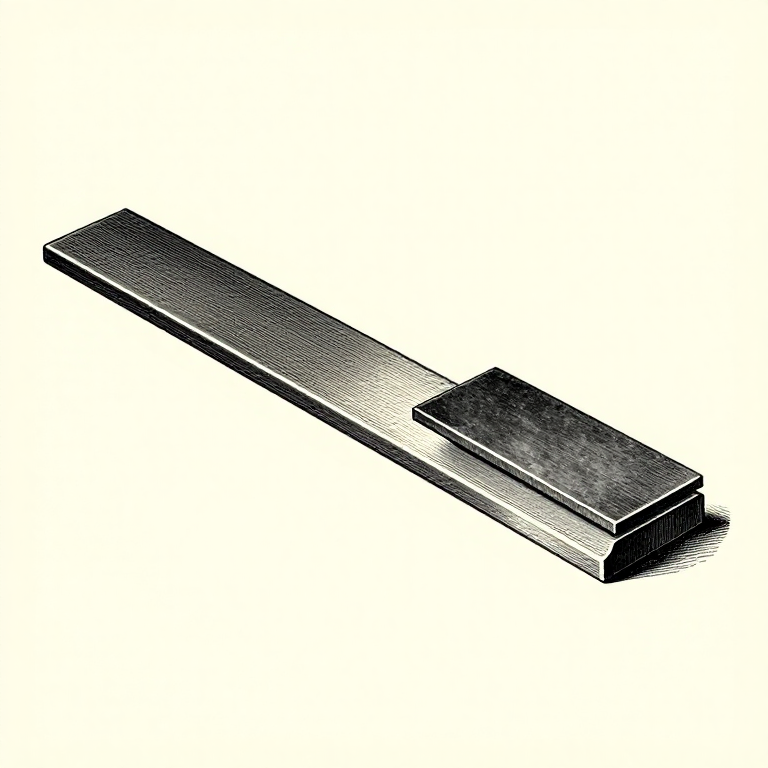


Draw-Filing: The Finish a File Can Leave
Turn the file sideways, hold it in both hands like a spokeshave, and push and pull it along the work rather than across it. That is draw-filing, and it leaves a surface a cross-filed face cannot approach.
The reason is geometry. Held sideways, the teeth meet the work almost square instead of at their cutting angle, so each takes a much finer shaving — and the scratches all run along the length of the part, where the eye reads them as a finish rather than as damage.
It is the bridge between the file and abrasive paper: a draw-filed surface is already fine enough that emery cloth has almost nothing left to do.
中級者
2 hours
手順
1
1
The grip, and why it is nothing like cross-filing
The grip, and why it is nothing like cross-filing
Hold the file across the work with a hand near each end, thumbs behind it, and move it along the length of the part. Both directions cut a little, though the push still does most of the work.
The pressure is far lighter than cross-filing — enough to keep the file in contact and no more. Leaning on a draw-file makes it chatter and dig, because the teeth are not presented at an angle that lets them clear a chip.
Keep the file flat on the work along its whole width. Tipping it puts all the load on one edge, which cuts a groove instead of a face and is the reason a first attempt often looks worse than what it started from.
必要な工具:
 やすり(手やすり)
 重量級万力
重量級万力 軟鋼バー
軟鋼バー2
2
Use a smooth file, and a wide one
Use a smooth file, and a wide one
Draw-file with a single cut smooth or second cut file, and choose one wider than the face you are finishing if you can.
A wide file bridges the whole surface, so it cannot follow a dip — it cuts the high ground until the face is level. A narrow file sinks into every hollow and faithfully reproduces whatever shape was already there, which is why a small file feels like it is polishing but never gets the part straight.
A double cut file draw-files badly: the crossing rows leave a torn surface rather than a clean one. If a double cut is all you have, follow it with emery cloth wrapped around the same file.
必要な工具:
 目の細かいやすり
 手やすり
手やすり3
3
Chalk the file and clean it constantly
Chalk the file and clean it constantly
Rub chalk along the file face before starting and again whenever it stops cutting cleanly. Chalk fills the gullets just enough that chips cannot wedge themselves in.
This matters far more in draw-filing than cross-filing, because a single pinned tooth drags a deep scratch down the entire length of the work — the exact surface you are trying to perfect. One trapped chip can undo twenty minutes.
Clear the file with a file card every few passes, brushing along the rows rather than across them. A quick look down the face against the light will show a pinned tooth as a bright point before it does any damage.
このステップの材料:
 けがき用チョーク1 個
必要な工具:
 ヤスリ清掃ブラシ目の細かいやすり
 拡大ルーペ
拡大ルーペ4
4
Finish with emery on the file, and break the edges
Finish with emery on the file, and break the edges
Wrap emery cloth around the file and repeat the same draw-filing motion. The file becomes a perfectly flat backing, which is exactly what abrasive paper needs and never has when held in the fingers.
Work up through the grades the same way the sharpening progression does — each one removing the previous scratches, changing direction slightly so you can see when they are gone. The grit rung published on Youblob covers the reasoning in full and applies unchanged here.
Finish by breaking every sharp edge with two or three light strokes of a fine file at 45 degrees. A filed edge is genuinely sharp, it cuts hands, and on a finished part a crisp tiny chamfer looks deliberate where a raw edge looks unfinished.
必要な工具:
目の細かいやすり 木綿布
木綿布 紙やすり詰め合わせ
 エメリー布
エメリー布関連ブループリント
これらのブループリントは知識を共有しています — 技術、材料、原理
CC0 パブリックドメイン
このブループリントはCC0で公開されています。許可を求めずに、自由にコピー、修正、配布、あらゆる目的で使用できます。
メイカーを応援するには、ブループリント経由で製品を購入してください。メイカーには メイカーコミッション がベンダーにより設定されています。または、このブループリントの新しいイテレーションを作成し、自分のブループリントにコネクションとして含めて収益を共有できます。