コラボレーション
アート
美容とウェルネス
工芸
文化と歴史
エンターテインメント
環境
食品と飲料
リバースエンジニアリング
科学
スポーツ
テクノロジー
ウェアラブル
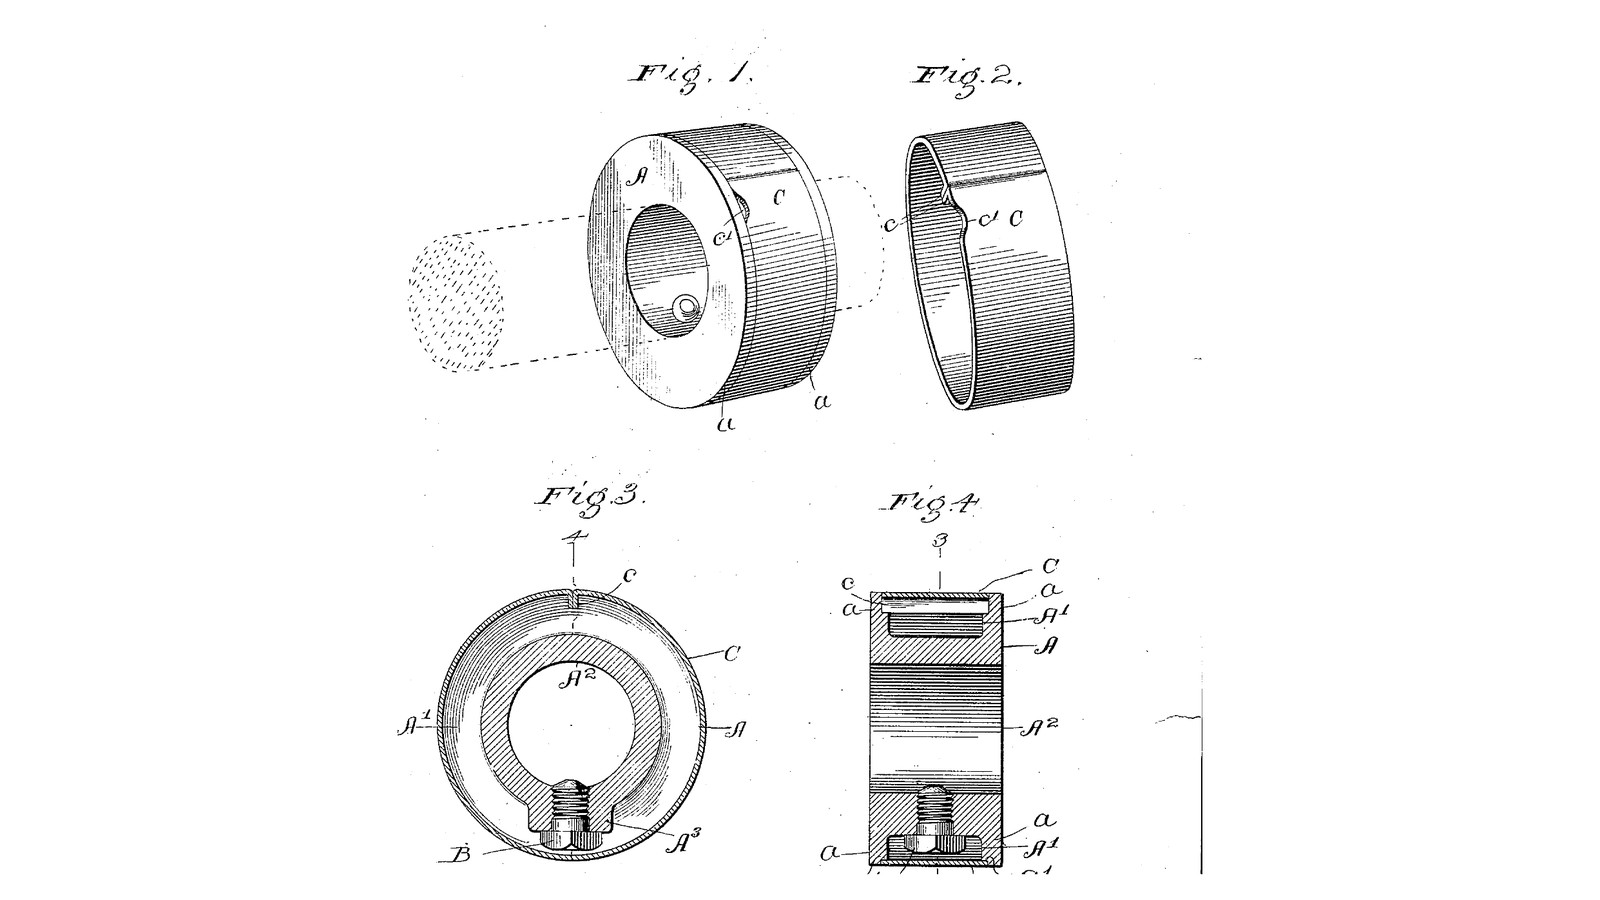


Shielded Set-Screw Shaft Collar: The Screw Head Sunk in a Groove, a Sprung Brass Band Snapped Over It (Rich, 1904)
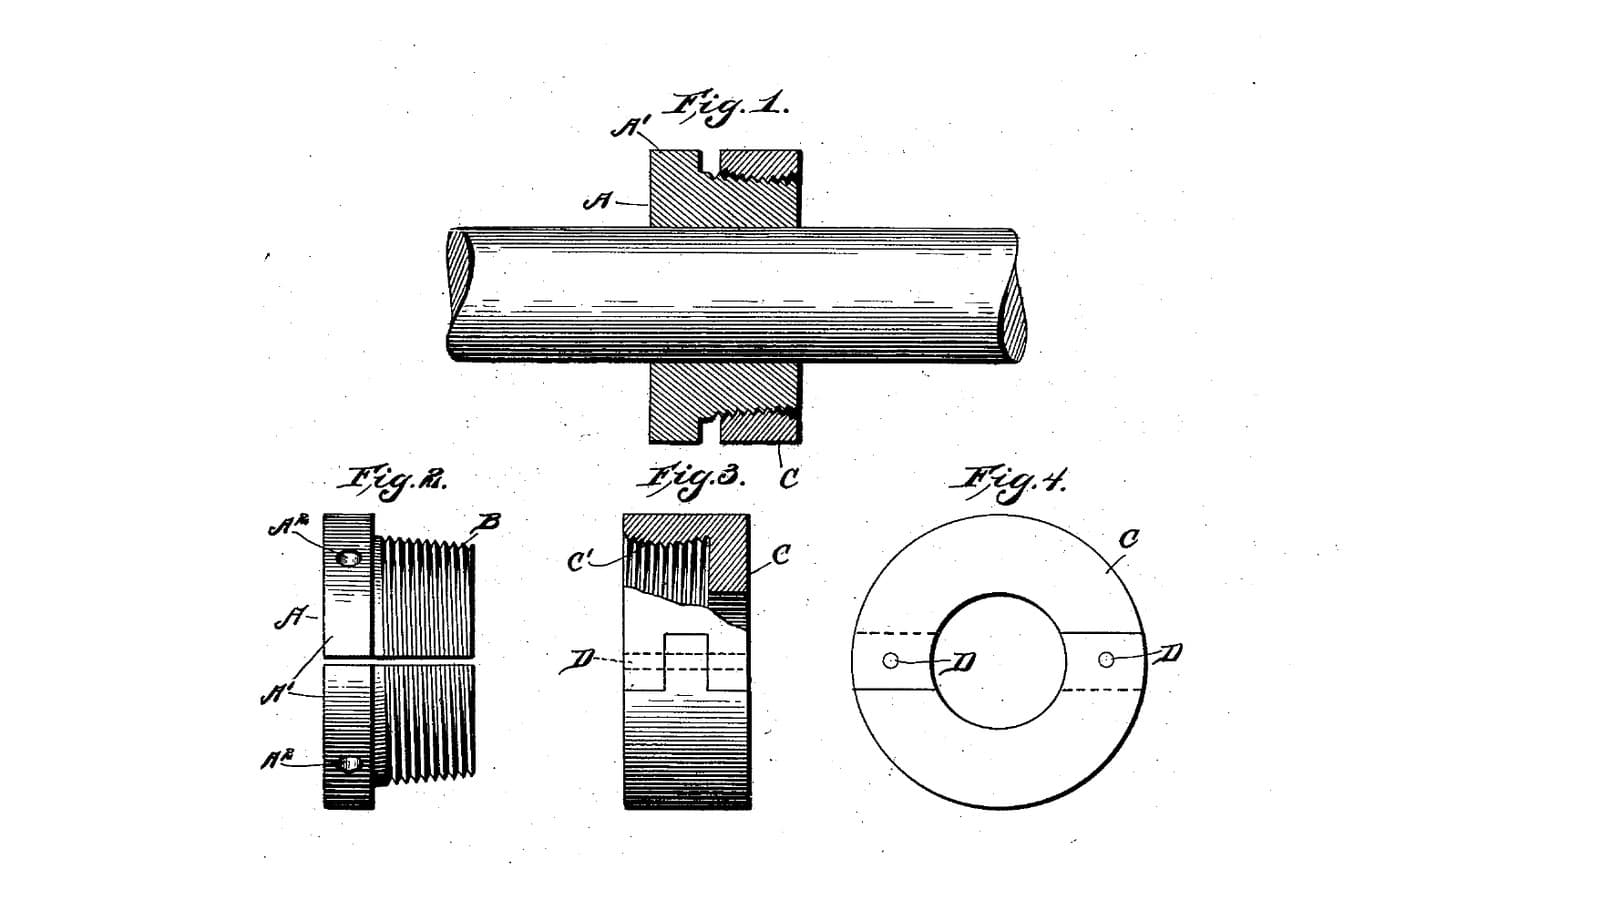
George H. and Robert C. Rich of Chicago received US 774,199, dated 8 November 1904, for making the ordinary set-screw collar safe. A groove round the collar leaves a hub between two flanges. The set screw goes through the hub and its head sits low in the groove. A band of springy sheet metal snaps over the groove into seats on the flanges, so the outside is smooth and "it is impossible for the clothing of a workman to be caught". Its turned-in ends sit in a notch, and a screwdriver in a nick at the edge springs it off.
The patent gives no sizes; every size here is ours.
中級者
About 4 hours
手順
1
1
Will the shield clear the screw?
Will the shield clear the screw?
Jupyter ノートブックを読み込み中…
2
2
Read US 774,199
Read US 774,199
"The collar is used in the ordinary way on the shaft, and when locked in place the spring-shield is snapped over it, as illustrated, and covers the projecting set-screw and furnishes a smooth outer surface, upon which it is impossible for the clothing of a workman to be caught."
3
3
Turn the body A
Turn the body A
Grip 55 mm round bar in the 3-jaw chuck. Face it, turn it to 52 mm for 30 mm, centre-drill, drill through 15 mm and ream 16 mm. With the parting tool, cut the groove A1 18 mm wide between two 4 mm flanges, down to a 30 mm hub A2. Turn a seat 2 mm wide and 0.6 mm deep on the inner rim of each flange, at the outside, for the shield. Chamfer the bore and part off 26 mm long; face the parted side.
このステップの材料:
 軟鋼丸棒1 個
 切削油1 個
必要な工具:
 金属旋盤
 三つ爪旋盤チャック
 旋盤の切削工具
 突切りバイト
 センタードリルセット
 ドリルビットセット
 リーマ
 デジタルノギス 6インチ
 保護めがね
4
4
Tap the hole for the set screw B
Tap the hole for the set screw B
Centre-punch the hub in the middle of the groove. In the machine vice on the drill press, drill through the hub into the bore with 6.8 mm and tap M8 with cutting oil. Opposite the hole, file a notch 3 mm wide through the seat and 4 mm deep in each flange, in line, for the shield's ends. Deburr the bore where the drill came through.
このステップの材料:
切削油1 個必要な工具:
 センターポンチ
 ボール盤
 マシンバイスドリルビットセット
 ねじ切りタップダイスセット
 タップハンドル
 万力(ベンチバイス)
 万力の保護口金
 精密ヤスリ(針ヤスリ)セット
 バリ取り工具
5
5
Make the spring shield C
Make the spring shield C
Cut a strip of 0.5 mm brass 22 mm wide and 169 mm long with the snips. Bend 4 mm at each end square to the strip with the pliers, the same way. Roll it by hand round the collar itself until the ends meet, the bent ends pointing in. File a small nick in one edge of the band beside the ends, for a screwdriver. Spring it open over the collar: it must snap into the seats with the ends down the notch and stay put.
このステップの材料:
 真鍮帯板1 個
必要な工具:
 金切りばさみ
 平やっとこ万力(ベンチバイス)
 ヤスリセットデジタルノギス 6インチ
6
6
The collar in 3D
The collar in 3D
FreeCAD model, our sizes: the grooved body on a 16 mm shaft, the M8 hex set screw with its head in the groove, and the 0.5 mm shield in its seats with both ends turned in down the notch.
7
7
Fit it on the shaft
Fit it on the shaft
Run an M8 x 10 hex screw into the hub until it just shows in the bore. Slide the collar along the shaft to its place, turn it so the screw is easy to reach, and tighten the screw onto the shaft with the spanner. Spring the shield over the groove with its ends into the notch. To move the collar, put a screwdriver in the nick, spring the shield off and slacken the screw.
このステップの材料:
 六角ボルト詰め合わせ1 個
必要な工具:
 モンキーレンチ
 マイナスドライバー
8
8
Troubleshooting
Troubleshooting
Shielded collar troubleshooting.
Flow
Loading...
9
9
History and honest limits
History and honest limits
**George H. Rich and Robert C. Rich** of Chicago, Illinois, US 774,199, dated 8 November 1904, filed 14 March 1904. They claimed a collar with a peripheral depression, a set screw whose head lies in it, and a cylindrical shield outside the screw in continuous contact with the collar; the flanges countersunk for it; and a single strip of spring sheet metal with its ends turned in and abutting, in notches in the flanges. Their hub has a boss A3 for the screw; a lathe cannot leave a boss in a turned groove, so our hub is thick all round. They say spring steel or brass; ours is brass. The patent gives no sizes; every size here is ours.
必要な工具
23- プレースホルダー
- プレースホルダー
- プレースホルダー
- プレースホルダー
- プレースホルダー
- プレースホルダー
- プレースホルダー
- プレースホルダー
- プレースホルダー
- プレースホルダー
- プレースホルダー
- プレースホルダー
- プレースホルダー
- プレースホルダー
- プレースホルダー
- プレースホルダー
- プレースホルダー
- プレースホルダー
- プレースホルダー
- プレースホルダー
- プレースホルダー
- プレースホルダー
- プレースホルダー
設計ファイル
1この設計図で作るもの
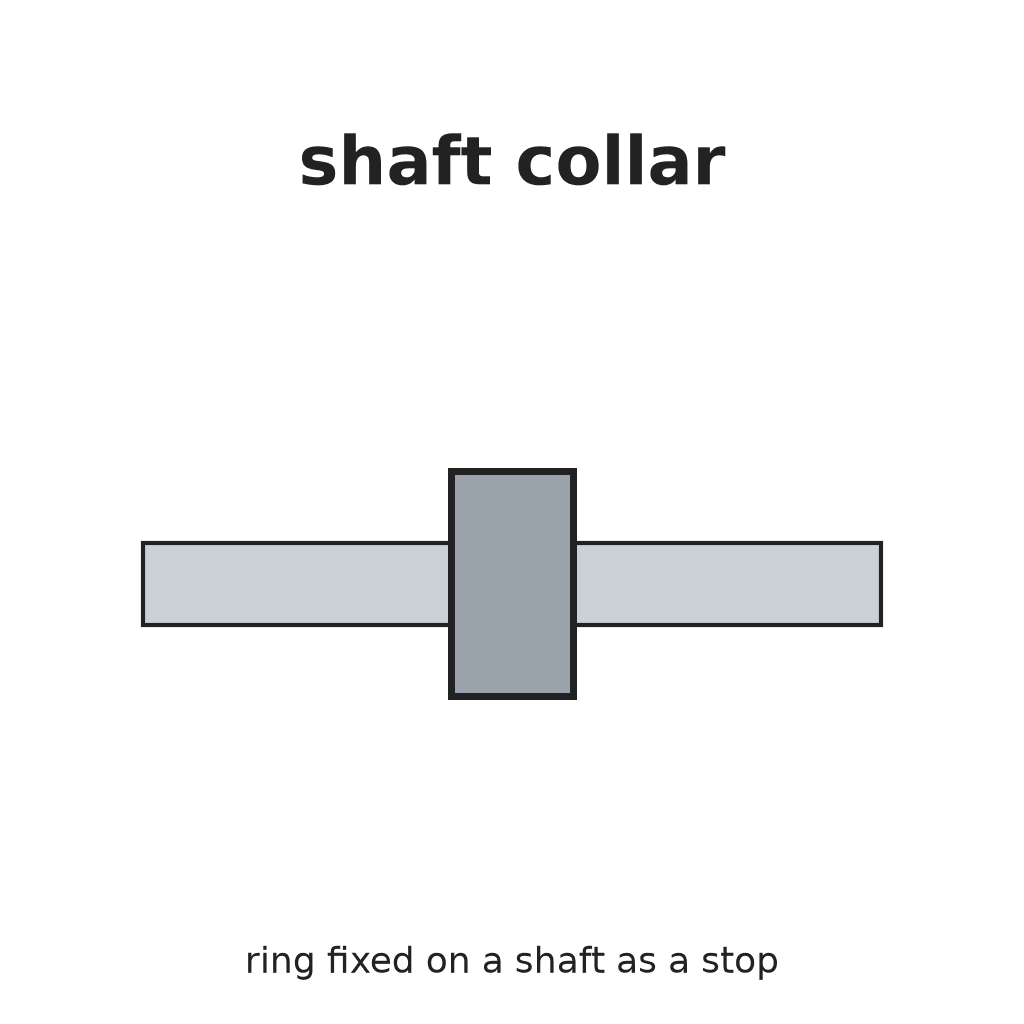
関連ブループリント
これらのブループリントは知識を共有しています — 技術、材料、原理
CC0 パブリックドメイン
このブループリントはCC0で公開されています。許可を求めずに、自由にコピー、修正、配布、あらゆる目的で使用できます。
メイカーを応援するには、ブループリント経由で製品を購入してください。メイカーには メイカーコミッション がベンダーにより設定されています。または、このブループリントの新しいイテレーションを作成し、自分のブループリントにコネクションとして含めて収益を共有できます。