

Greek Chiton Sewing — Sewing a Linen Chiton Garment
ការណែនាំ
Measure and Cut the Fabric
Measure and Cut the Fabric
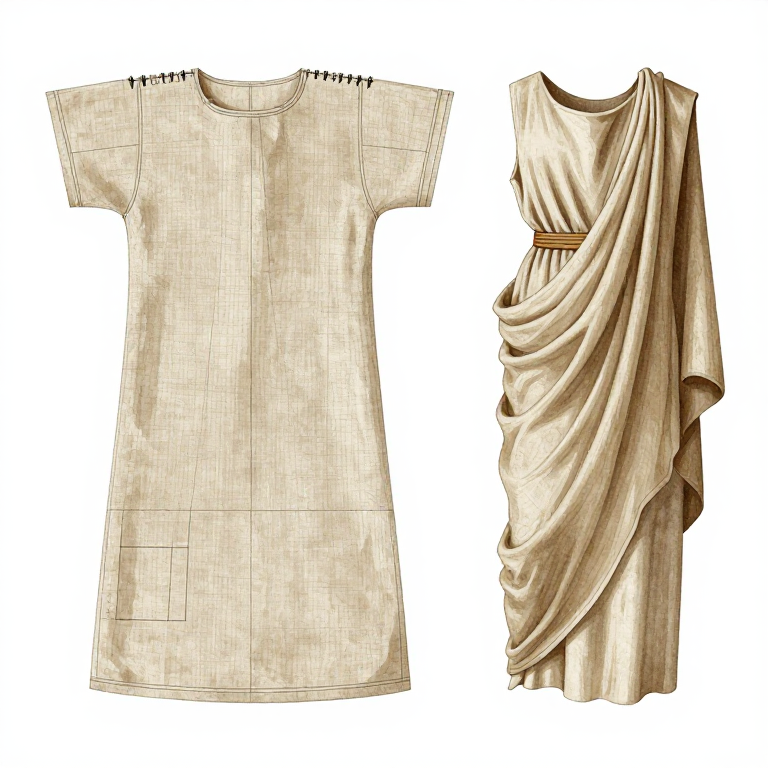
This blueprint uses the simplest construction: two equal rectangles of linen, a front and a back. For an Ionic chiton, which is pinned along the arms, make each rectangle as wide as your arm span from wrist to wrist, plus 20-30 cm for the soft folds; for a Doric chiton, which is pinned only at the shoulders, a narrower rectangle is enough, about elbow to elbow plus the same allowance. Make each rectangle as long as the distance from shoulder to the hem you want (ankle for a woman's chiton; knee or ankle for a man's), plus about 20 cm to pull up over the belt, and, for a Doric chiton with an overfold (apoptygma), plus the depth of that fold. Cut cleanly with sharp fabric shears. Ancient chitons were often woven to the needed size on the loom rather than cut from larger cloth, so the woven edges (selvages) served as finished edges that needed no hemming; keep the selvages at the top and sides where you can.
សម្ភារៈសម្រាប់ជំហាននេះ៖
 ក្រណាត់លីនិន2-3 meters (width should be armspan plus 30 cm) សម
 សំណុំដេរខោក្រណាត់លីនែនsmall amount ដុំ
 ហ្វីប៊ុលា (ម្ជុលខ្ទាស់សំពត់)2-6 pieces ដុំ
 ខ្សែពួរ1 piece, waist circumference plus 40 cm សម
ឧបករណ៍ដែលត្រូវការ៖
 ឈុតម្ជុលដេរ
 កន្ត្រៃផ្ទះបាយ
 ខ្សែវាស់
Lay Up the Panels and Pin the Top Edge
Lay Up the Panels and Pin the Top Edge
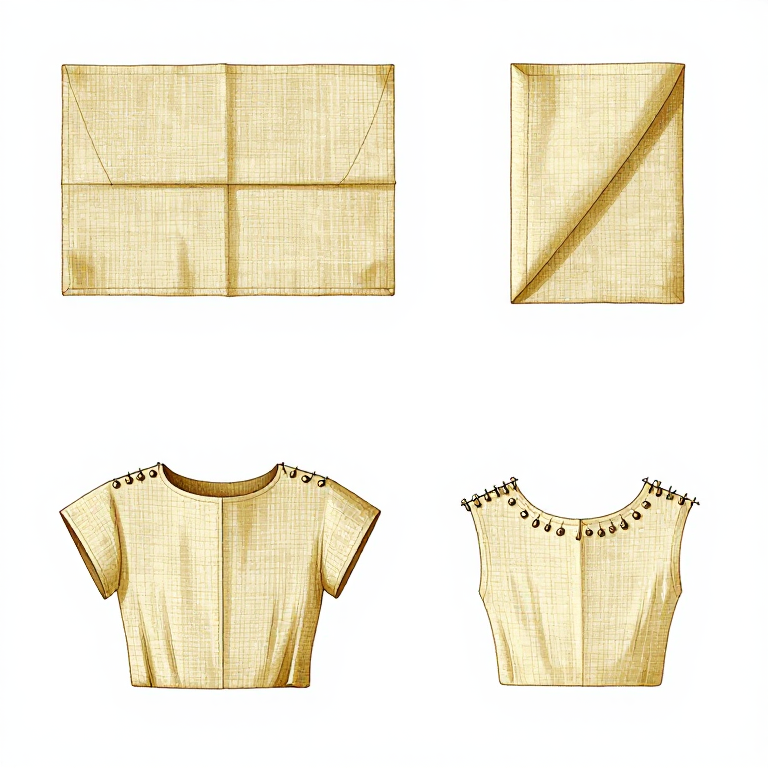
If you are making a Doric chiton with an apoptygma, first fold the top edge of each rectangle outward by the overfold depth you allowed (the overfold hangs over the chest and back and is more usual on women's garments). Lay the front rectangle on the back one, edges matching. Along the top edge, join the two layers where they will rest on the body. For a Doric chiton, pin at the two shoulder points only with fibulae (pins or brooches; the Greek pin was the perone), leaving a neck opening between them and the arms bare. For an Ionic chiton, pin, sew or button the top edge at intervals from the neck out to the wrist on each side, leaving small gaps between the fastenings; the arms pass out at the ends, and the fastened edge falls into what look like gathered sleeves. The extra width creates the characteristic soft folds of Greek dress.
Sew the Side Seams
Sew the Side Seams
With the top edge pinned, sew each side from just below the armhole down to the hem, using a running stitch or backstitch with linen thread. On a Doric chiton leave the top 20-25 cm of each side open for the arms; on an Ionic chiton the arms come out at the ends of the top edge, so leave only enough open at the top of each side for the fabric to hang freely. The seams should be neat and strong, as they carry the weight of the draped fabric in movement. Not every garment was sewn closed: the peplos of Spartan girls was left open down one side, and other Greeks mocked them as phainomerides, 'thigh-showers'. For a fully enclosed chiton, sew both sides.
Belt and Adjust the Draping
Belt and Adjust the Draping
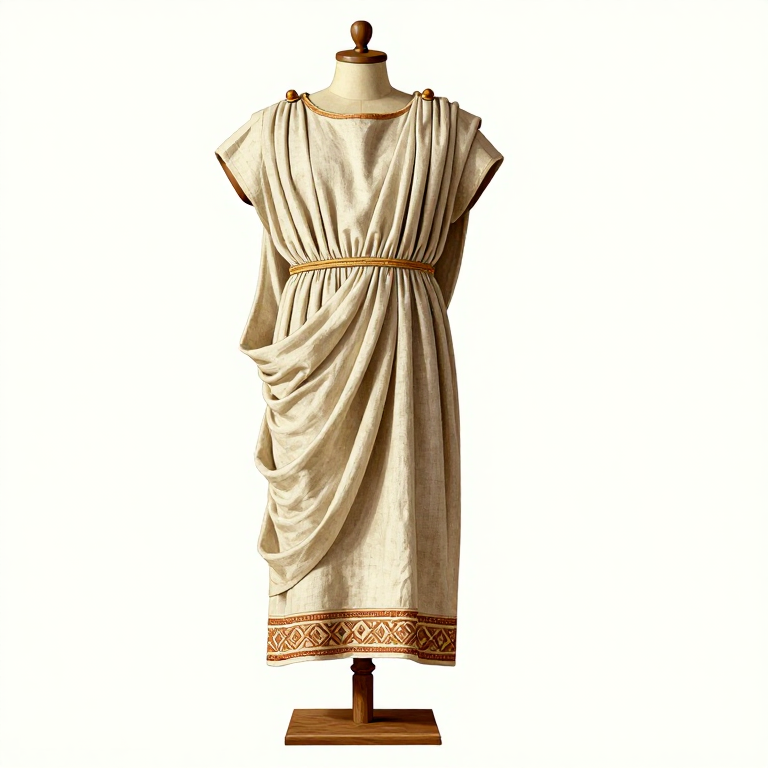
Put on the chiton and tie a belt (zoster or zone) around it. Pull the fabric up over the belt to make a bloused fold, the kolpos, which also sets the hem at the length you want. Women's chitons were worn at ankle length. Men wore the long chiton in the Archaic period and later mostly at knee length, and workers or soldiers could hitch it shorter still for freedom of movement. Where the belt sits and how much fabric is bloused over it changes the look of the garment a great deal: a belt at the waist is 'low-girdled', and a belt just under the breast is 'high-girdled'.
Finish with Hem and Decorative Border
Finish with Hem and Decorative Border
If an edge is raw (not a selvage), hem it with a narrow rolled hem in small stitches. Greek garments often had decorative borders woven in on the loom — geometric patterns, the meander (Greek key) or coloured stripes along the edges. If your fabric has no woven border, you can stitch a trim or braid along the hem and neckline. The finished chiton should hang in vertical folds when you stand. Other garments were worn over it: the himation, a large cloak, and for men the chlamys, a short cloak favoured by riders and soldiers.
សម្ភារៈ
6- 2-3 meters (width should be armspan plus 30 cm) សមកន្លែងទុក
- small amount ដុំកន្លែងទុក
- 1 piece, waist circumference plus 40 cm សមកន្លែងទុក
- 2-6 pieces ដុំកន្លែងទុក
- 1 piece, waist circumference plus 40 cm ដុំកន្លែងទុក
- 4 ដុំកន្លែងទុក
ឧបករណ៍ចាំបាច់
4- កន្លែងទុក
- កន្លែងទុក
- 1 vendor sell this, none ship to you yetកន្លែងទុក
- កន្លែងទុក
CC0 សាធារណៈ
ប្លង់នេះត្រូវបានចេញផ្សាយក្រោម CC0។ អ្នកមានសិទ្ធិចម្លង កែប្រែ ចែកចាយ និងប្រើប្រាស់ដោយមិនចាំបាច់សុំអនុញ្ញាត។
គាំទ្រអ្នកបង្កើតដោយទិញផលិតផលតាមរយៈប្លង់របស់ពួកគេ ដែលពួកគេទទួលបាន កម្រៃជើងសារអ្នកបង្កើត កំណត់ដោយអ្នកលក់ ឬបង្កើតកំណែថ្មីនៃប្លង់នេះ ហើយបញ្ចូលជាការតភ្ជាប់ក្នុងប្លង់របស់អ្នកដើម្បីចែករំលែកចំណូល។