예술
뷰티 및 웰니스
공예
문화 및 역사
엔터테인먼트
환경
음식 및 음료
그린 퓨처
역공학
과학
스포츠
기술
웨어러블
Making a Bronze Needle — Drawing and Hammering Fine Wire
Forge

작성자

Forge

26. 5월 2026NO
6
0
0
0
0

Making a Bronze Needle — Drawing and Hammering Fine Wire

The bronze needle was one of the smallest yet most transformative tools of the Bronze Age. It made possible fitted clothing, leather working, sail-making, and surgical suturing — tasks that bone needles could perform but bronze needles did faster, finer, and without breaking.

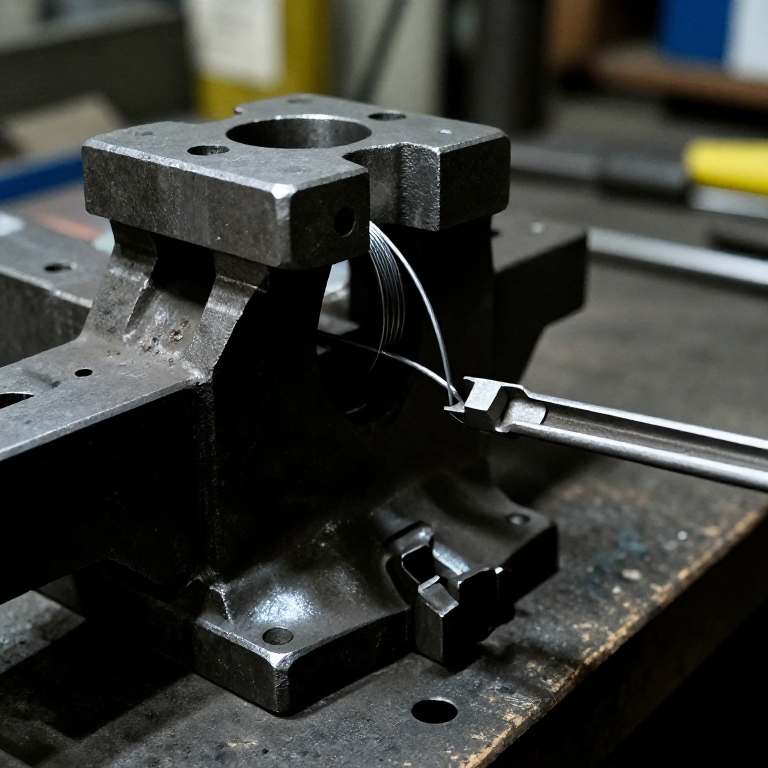
Unlike larger tools that are cast in moulds, a needle is too thin to cast directly. Instead, a short bronze rod is hammered and drawn into a taper, then the eye is punched through with a fine pointed tool. The entire process relies on repeated cycles of cold-hammering (to shape and harden) and annealing (heating to soften for further working).

A well-made bronze needle is 6-10 cm long, about 2 mm in diameter at the thickest point, tapers to a sharp point, and has an eye large enough to thread sinew or flax fibre.

중급
1-2 hours

안내

1

Cast a small bronze rod

Pour a small amount of molten bronze (about 30 g) into a narrow channel carved in a stone slab — a straight groove about 8 cm long and 5 mm wide. Alternatively, use a scrap piece of cast bronze from a previous pour. The starting piece should be roughly pencil-thickness and finger-length.

이 단계의 재료:

Copper Sheet (0.5-1mm)Copper Sheet (0.5-1mm)27 g
2

Hammer the rod to initial taper

Place the bronze rod on a flat stone anvil. Using a smooth hammerstone, hammer one end to begin forming a taper. Rotate the rod 90 degrees between strikes to keep the cross-section round rather than flat. Work from the middle toward the tip, gradually reducing the diameter. After 50-60 blows the bronze will become stiff and resistant — this is work-hardening.

필요한 도구:

HammerstoneHammerstone
Flat Stone SlabFlat Stone Slab
3

Anneal to restore workability

Hold the work-hardened rod in the edge of a charcoal fire using tongs until it glows a dull cherry red (about 500-600 °C). Remove and let it cool slowly in still air — do not quench. This annealing recrystallises the distorted grain structure, making the bronze soft and workable again. Bronze must be annealed frequently during cold-working or it cracks.

이 단계의 재료:

CharcoalCharcoal500 g
4

Continue hammering to needle dimensions

Repeat the cycle: hammer to shape, anneal when stiff, hammer again. Over 4-6 cycles, reduce the rod to approximately 2 mm diameter at the thickest point (the eye area) and taper to a sharp point. The needle should be 6-10 cm long. Keep rolling the rod between strikes to maintain a round cross-section throughout.
5

Form the eye end

Flatten the blunt end of the needle slightly by hammering it on one face only, creating an oval cross-section about 3 mm wide and 1.5 mm thick. This provides enough material to punch a hole through without splitting the needle. The flattened area should be about 5 mm long.
6

Punch the eye

Place the flattened end on a piece of lead or a thick leather pad (to support the metal without cracking it). Position a fine-pointed bronze or hardened bone awl on the centre of the flat area. Tap the awl with a small hammerstone to punch through. Turn the needle over and punch from the other side to clean the hole. The eye should be about 1-1.5 mm in diameter — large enough for sinew or flax thread.
7

Sharpen the point

Grind the needle point on a fine whetstone with water, rotating constantly to maintain a symmetrical taper. The point should be sharp enough to penetrate leather without tearing. Test by pricking the surface of a piece of hide — a good point enters cleanly with light pressure.

이 단계의 재료:

WhetstoneWhetstone1
8

Polish and final work-hardening

Rub the entire needle with fine sand on a smooth stone to remove all hammer marks and surface roughness. A rough needle drags through fabric and enlarges the holes it makes. Finally, give the shaft a few light taps with the hammerstone — just enough to work-harden the surface without bending the needle. The finished needle should be straight, smooth, and springy.

재료

3

필요 도구

2

연결된 블루프린트 재료

관련 블루프린트

이 블루프린트들은 지식을 공유합니다 — 기술, 재료 또는 원리

CC0 퍼블릭 도메인

이 블루프린트는 CC0로 공개되었습니다. 어떤 목적으로든 자유롭게 복사, 수정, 배포 및 사용할 수 있습니다.

제품 구매를 통해 메이커를 지원하세요. 판매자가 설정한 메이커 커미션 을 받거나, 이 블루프린트의 새로운 반복을 만들어 연결로 포함시킬 수 있습니다.

토론

(0)

로그인 하여 토론에 참여하세요

댓글 로딩 중...