예술
뷰티 및 웰니스
공예
문화 및 역사
엔터테인먼트
환경
음식 및 음료
역공학
과학
스포츠
기술
웨어러블
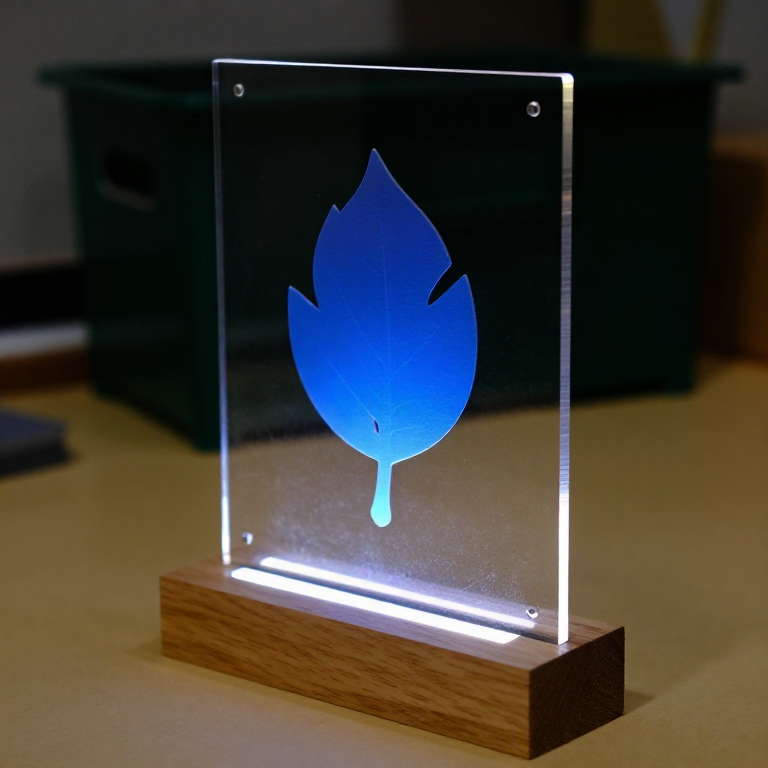


Cast Acrylic Sheet
Otto Röhm had worked on acrylic chemistry since his 1901 doctorate. His firm first used polymethacrylate as the sticky middle layer of laminated safety glass - and noticed that the polymer came away from the glass plates cleanly, leaving a clear sheet as smooth as the glass. Sold from 1933 as Plexiglas, the sheet went into aircraft canopies within the decade.
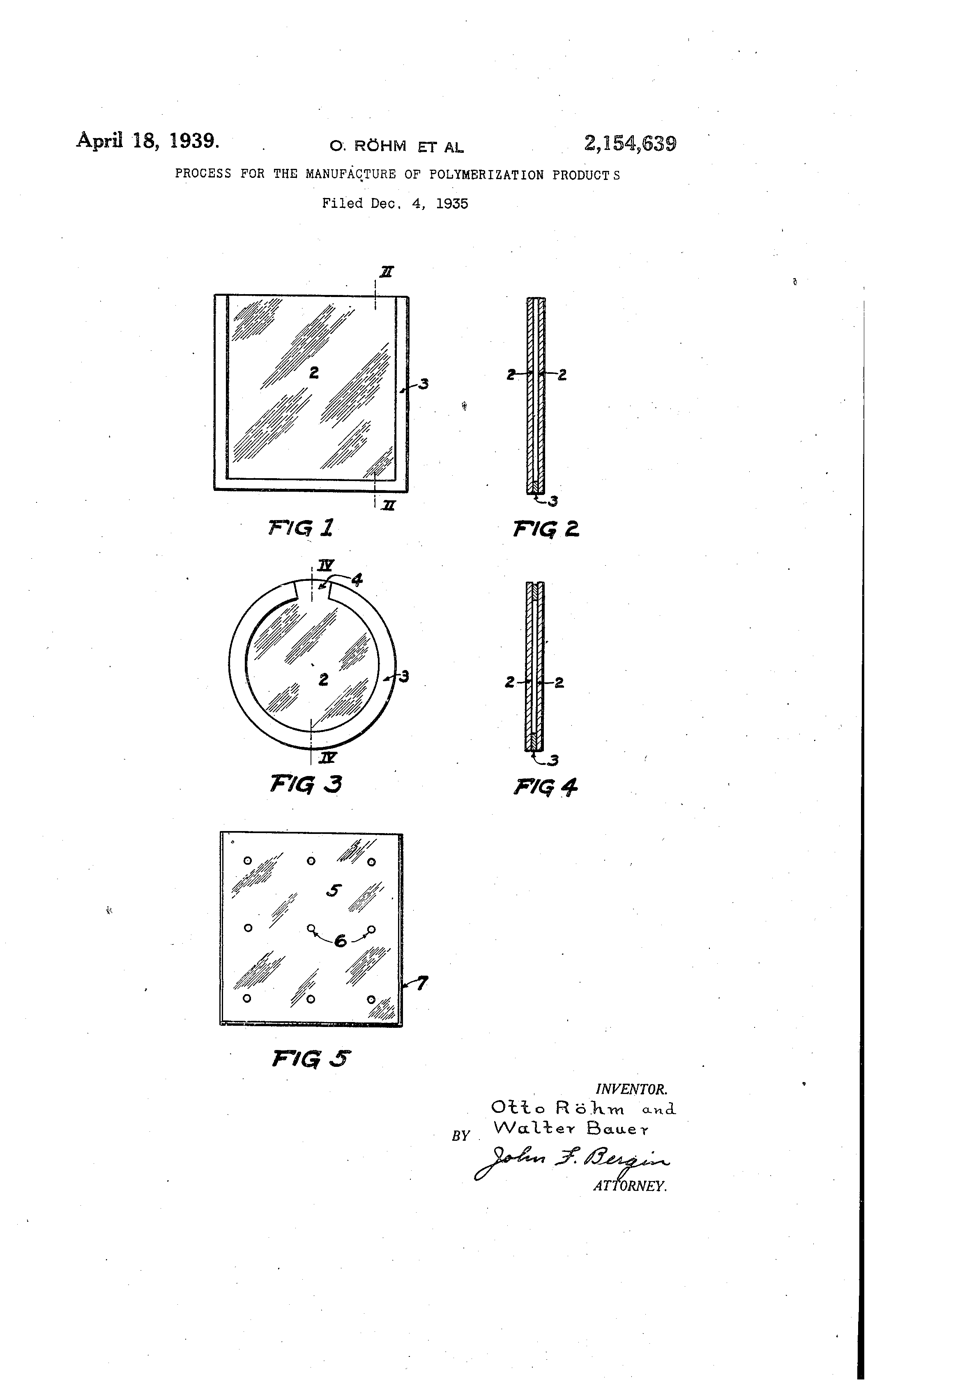
**US 2,154,639**, "Process for the manufacture of polymerization products", Röhm and Bauer, assigned to Röhm & Haas, filed 4. December 1935, granted 18. April 1939: methacrylic esters polymerised between sheets of glass and then separated from them, for "glass substitutes" whose faces are "as highly polished as the surfaces of the glass itself".
**You use that polish**: an edge-lit sign whose engraving glows while the smooth faces stay dark, and two heat-bent offcuts that show how tight a bend the light survives.
초급
3 hours
안내
1
1
Cut the panel
Cut the panel
Keep the protective film on. Score 3 mm cast acrylic 200 x 120 mm with the utility knife against a ruler, 8 to 10 passes, then snap it over the bench edge. Cut two 100 x 30 mm offcuts the same way.
이 단계의 재료:
 아크릴 판1 개
필요한 도구:
 커터칼
커터칼 자
자 투명 보안경
2
2
Polish the light edge
Polish the light edge
Sand the 120 mm bottom edge flat, then run the Micro-Mesh grits in order until it is clear. Light enters here; a frosted edge scatters it at the door.
필요한 도구:
 마이크로메시 연마 세트 (9단계)
3
3
Engrave the back
Engrave the back
Peel the back film. Draw your design on paper, tape it under the sheet, and trace it with the engraving point at medium speed, light pressure.
필요한 도구:
 회전 공구(드레멜 방식)
 조각칼 끝투명 보안경
4
4
Slot the base
Slot the base
Cut a pine block 160 x 60 x 40 mm. Saw two parallel kerfs 3.5 mm apart, 15 mm deep, along its length and chisel out between them. Chisel a channel underneath for the LED strip to shine up into the slot.
이 단계의 재료:
 소나무 판재1 개
필요한 도구:
 손톱(핸드소)
 목공 끌 세트
5
5
Light it
Light it
Strip 5V, GND and DIN to the Uno's 5V, GND and D6. Install the Adafruit NeoPixel library and upload. Stand the panel in the slot.
edge_lit_panel.inocpp
이 단계의 재료:
 Neopixel LED 스트립1 개
 Dupont 점퍼 와이어 세트 (수-암)1 세트
필요한 도구:
 Arduino Uno R3
 SparkFun Cerberus USB Cable - 1.8 meter
6
6
Bend two offcuts
Bend two offcuts
Heat an offcut along a line on the strip heater, turning it over every 30 seconds, until it flexes. Bend it 90° round a 6 mm dowel and hold until cool. Bend the second round a 20 mm dowel.
이 단계의 재료:
 나무 다월1 개
필요한 도구:
 아크릴 스트립 히터
 용접 장갑
용접 장갑7
7
Trace the beam
Trace the beam
In a dim room shine the laser pointer into the end of each bent strip, never towards anyone's eyes. See where light escapes at the bend, and compare with the notebook.
필요한 도구:
 레이저 포인터
8
8
Critical angle and bends
Critical angle and bends
Jupyter 노트북 불러오는 중…
9
9
History & Context
History & Context
**What the patent specifies:** methacrylic esters polymerised between glass sheets and separated, giving a glass substitute with glass-polished faces. **Modern build (derived):** commercial cast acrylic sheet, cut and heat-bent.
Cast sheet is still made between glass plates; cheaper extruded sheet came later and is softer and more prone to crazing. The limits: acrylic scratches, cracks if drilled carelessly, crazes when solvents or stress meet, and burns.
재료
5- 1 개플레이스홀더
- 1 개플레이스홀더
- 플레이스홀더
- 플레이스홀더
- 1 개플레이스홀더
이 블루프린트로 만드는 것

관련 블루프린트
이 블루프린트들은 지식을 공유합니다 — 기술, 재료 또는 원리

CC0 퍼블릭 도메인
이 블루프린트는 CC0로 공개되었습니다. 어떤 목적으로든 자유롭게 복사, 수정, 배포 및 사용할 수 있습니다.
제품 구매를 통해 메이커를 지원하세요. 판매자가 설정한 메이커 커미션 을 받거나, 이 블루프린트의 새로운 반복을 만들어 연결로 포함시킬 수 있습니다.