협업
예술
뷰티 및 웰니스
공예
문화 및 역사
엔터테인먼트
환경
음식 및 음료
역공학
과학
스포츠
기술
웨어러블
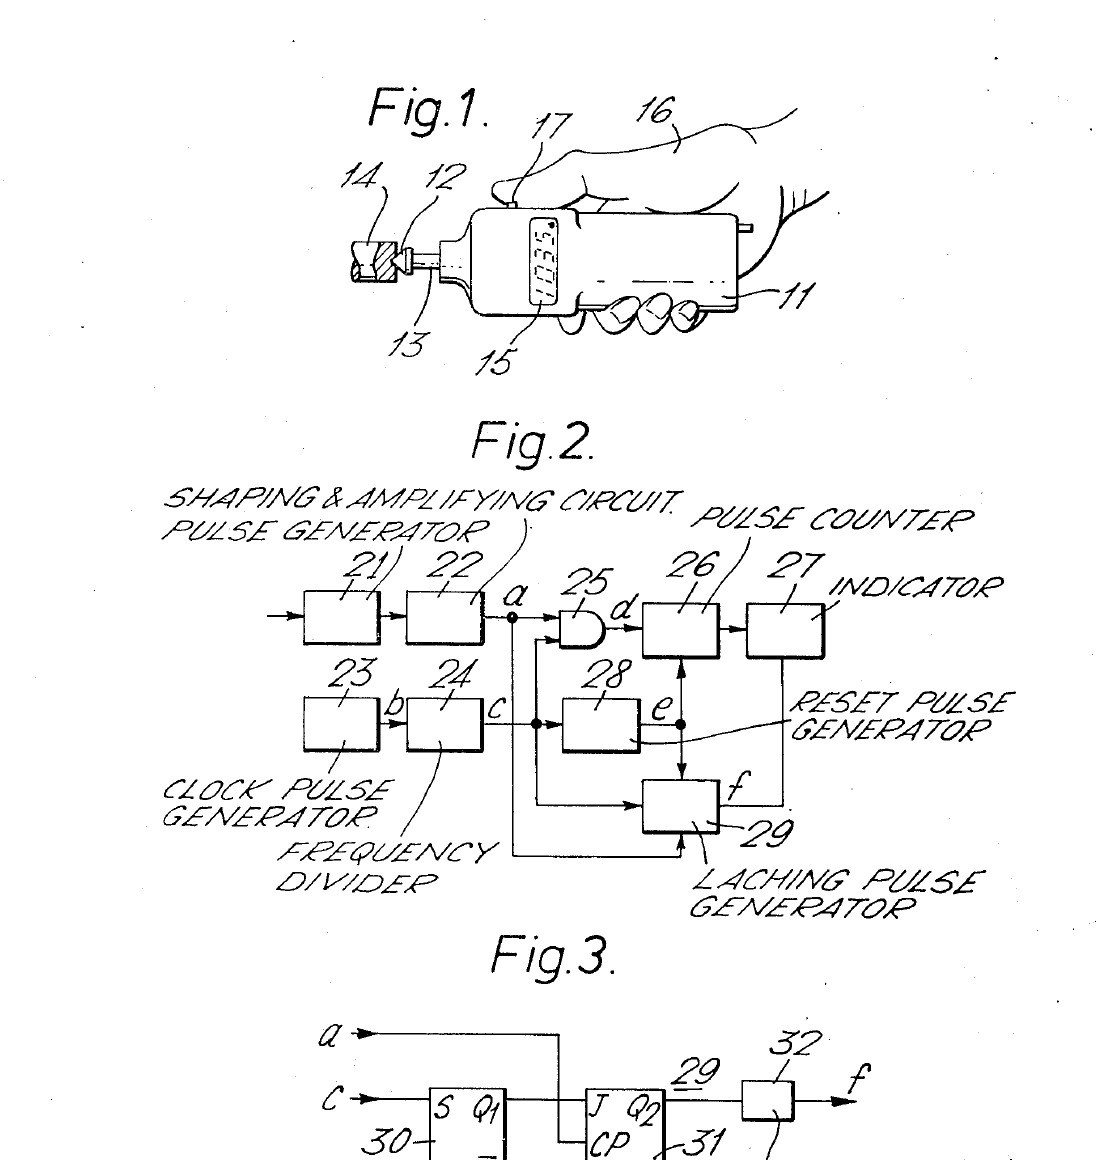


Digital Tachometer: Hand-Held Contact Type That Holds Its Reading (Sugiyama, Shimpo, US 4,000,465, 1976)
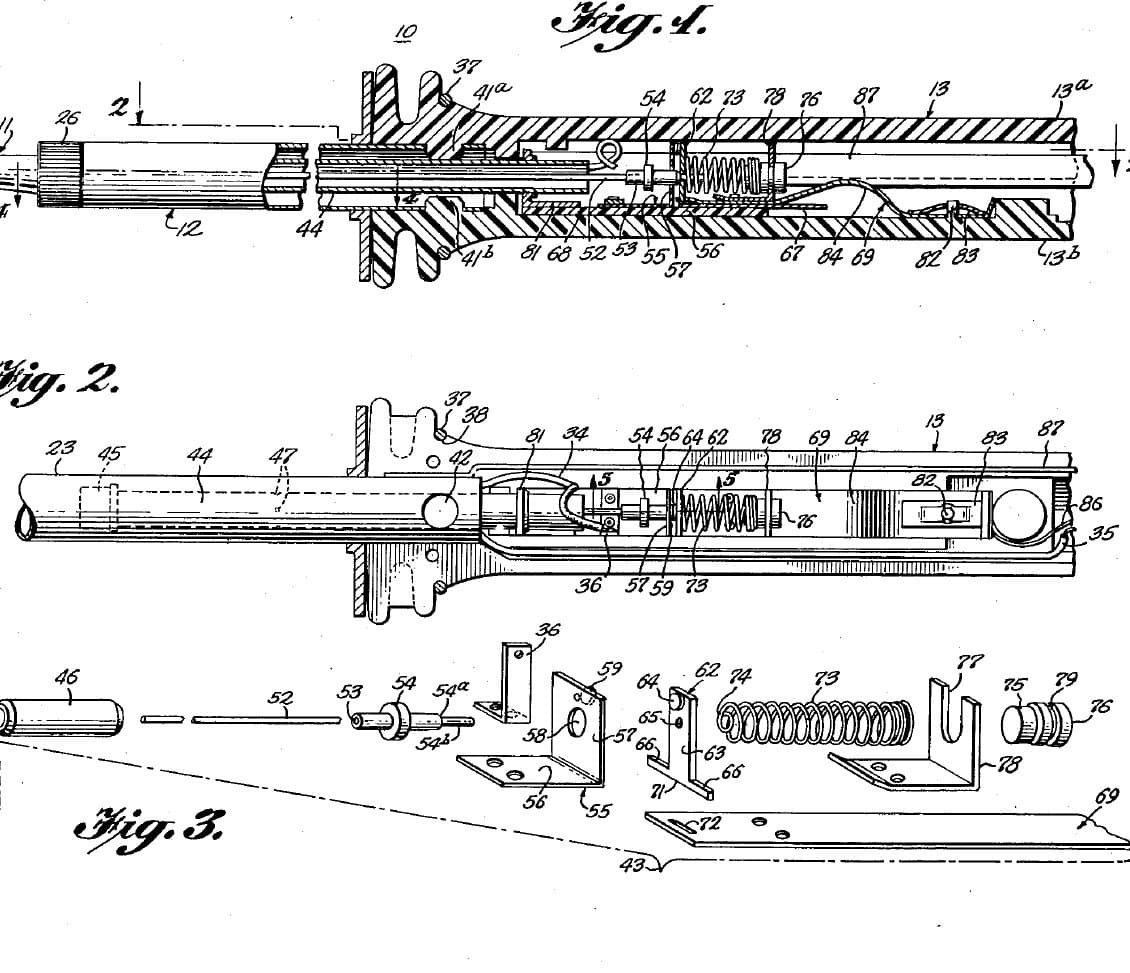
A hand-held digital tachometer. You press the contact head on its shaft against the end of a turning shaft and push the thumb button; a slotted disk inside chops a light beam into pulses, and the pulses counted in a fixed time, set by a quartz clock, appear in the window as the speed. A latch holds the reading after you take the tachometer away, so you can read it even where you could not see the window while measuring.
Result: a contact tachometer that shows revolutions per unit time and keeps the last reading.
Source: Y. Sugiyama (Shimpo Kogyo), US 4,000,465 (1976). Unknown: the number of holes, the clock, the gate time and the circuit details. Picture: the patent drawing.
고급
Unknown
안내
1
1
Make the housing and measuring shaft
Make the housing and measuring shaft
Make a cylindrical housing to hold in one hand, with a window in its side for the reading and a push button for the power switch where the thumb falls. Run a measuring shaft out of the front end in bearings and fit a contact head on its tip to press against the shaft being measured. Not given: materials, sizes. Ours: aluminium tube, a ball bearing.
이 단계의 재료:
 알루미늄 관1 housing
 알 수 없는 금속1 measuring shaft
 볼 베어링1 개
 알 수 없는 재료1 contact head
필요한 도구:
 금속 선반
 손 드릴
 알 수 없는 치수
2
2
Make the pulse generator
Make the pulse generator
Fix a disk on the measuring shaft with a ring of small holes evenly spaced near its edge. Put a light source on one side of the disk and a photodetector on the other: each hole passing makes one pulse. Shape and amplify the pulses. Not given: the number of holes. Ours: an LED and a photodiode.
이 단계의 재료:
알 수 없는 재료1 slotted disk LED 모음1 light source
 포토다이오드(BPW34)1 photodetector
 전기 저항1 세트
필요한 도구:
손 드릴3
3
Build the counting circuit
Build the counting circuit
Divide a quartz oscillator's clock down to gate pulses one unit of time long. Pass the measurement pulses through an AND gate during each gate pulse into a counter. At the start of each gate pulse a reset pulse clears the counter. After the gate pulse ends, the first measurement pulse that arrives triggers a latch pulse that loads the new count into the display. If the head has been taken off the shaft, no pulse arrives, no latch pulse is made, and the display keeps the last reading until the next measurement or until the power is switched off. Not given: the clock frequency and gate time. Ours: logic ICs and a seven-segment display.
이 단계의 재료:
 인쇄 회로 기판1 개
 수정 진동자1 개
 논리 IC 모음1 divider, AND gate, counter, latch, reset
 7세그먼트 디스플레이 드라이버1 개
 4자리 7세그먼트 디스플레이1 개
 땜납 선1 as needed
필요한 도구:
 인두
4
4
Power it and measure
Power it and measure
Fit the battery and the thumb button as the power switch. Press the contact head against the end of the turning shaft so it turns with it, push the button, and read the revolutions in the window, now or after you take the tachometer away.
이 단계의 재료:
 전지1 개
 푸시 버튼1 개
필요한 도구:
인두재료
15- 1 housing플레이스홀더
- 1 measuring shaft플레이스홀더
- 플레이스홀더
- 1 slotted disk플레이스홀더
- 1 light source플레이스홀더
- 1 photodetector플레이스홀더
- 1 세트플레이스홀더
- 1 개플레이스홀더
- 1 개플레이스홀더
- 1 divider, AND gate, counter, latch, reset플레이스홀더
- 플레이스홀더
- 플레이스홀더
- 1 as needed플레이스홀더
- 1 개플레이스홀더
- 플레이스홀더
이 블루프린트로 만드는 것
CC0 퍼블릭 도메인
이 블루프린트는 CC0로 공개되었습니다. 어떤 목적으로든 자유롭게 복사, 수정, 배포 및 사용할 수 있습니다.
제품 구매를 통해 메이커를 지원하세요. 판매자가 설정한 메이커 커미션 을 받거나, 이 블루프린트의 새로운 반복을 만들어 연결로 포함시킬 수 있습니다.