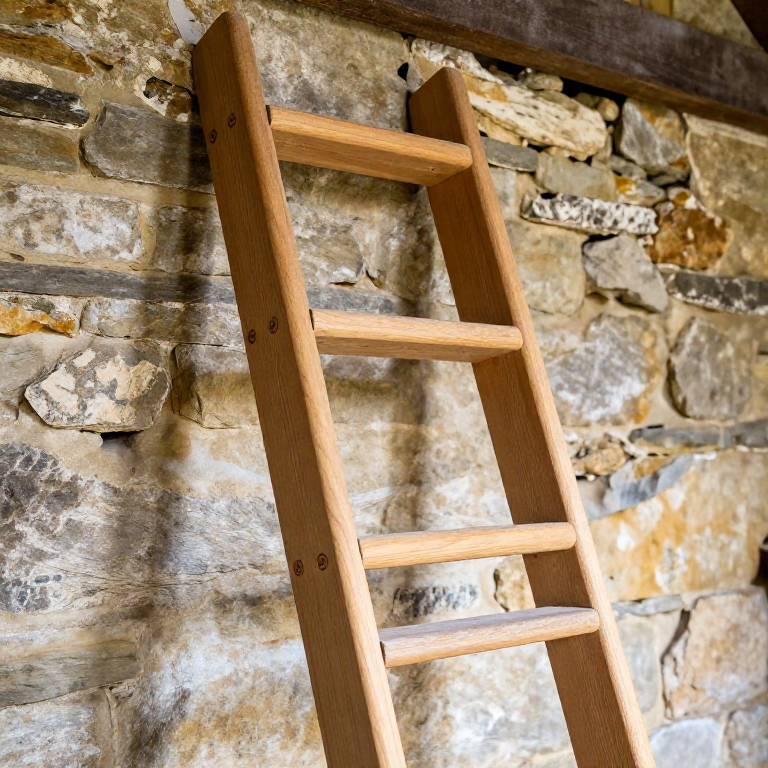
Making a Wooden Ladder — Rung Mortises and Wedged Tenons
A wooden ladder is one of the most essential structures in any building project — and one of the most dangerous if poorly made. A rung ladder consists of two long poles (the stiles) with a series of horizontal rungs mortised through them. Every rung is a structural beam carrying the full weight of the climber, and every joint must hold under dynamic loading — the shock of a foot landing on a rung is several times the climber's static weight.
The stiles must be straight-grained poles, ideally from a naturally straight tree like ash, spruce, or larch. Ash is the traditional choice — strong, flexible, and light for its strength. The rungs are short pieces of hard, dense wood — oak or beech — with tenons that pass through the stile and are wedged on the far side. The wedge locks the rung permanently and prevents the joint from working loose under repeated loading.
A well-made wooden ladder lasts for decades and has one advantage over metal: it does not conduct electricity. For this reason, wooden ladders remain in use by electricians even today. The technique described here — through-mortised, wedged rungs — is the strongest form of ladder construction and has been used unchanged since at least the Bronze Age.
안내
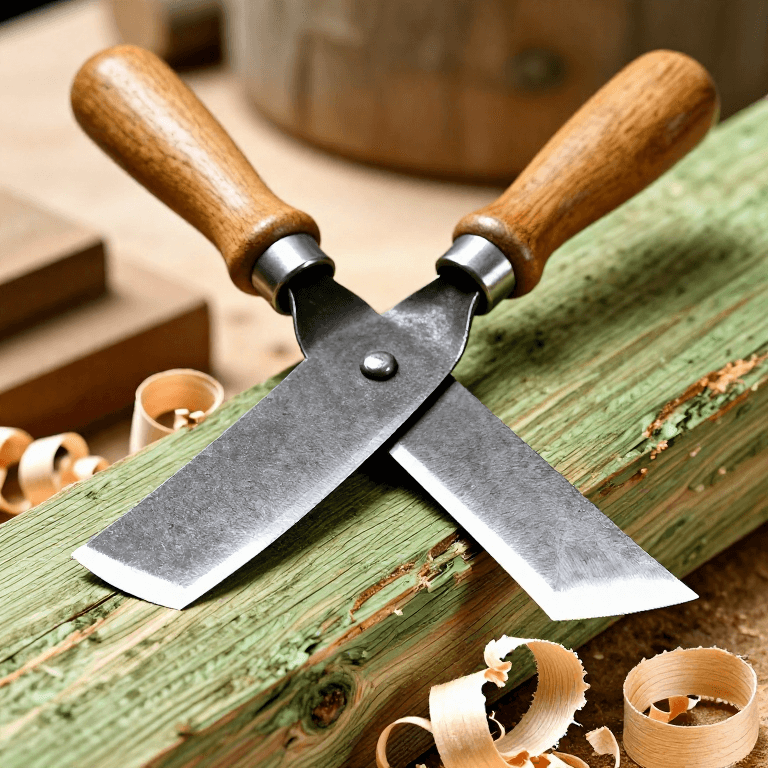
Select and prepare the stiles
Select and prepare the stiles
필요한 도구:
 Drawknife
Bore the rung mortises
Bore the rung mortises
필요한 도구:
 Hand Auger
Turn or shape the rungs
Turn or shape the rungs
Assemble the ladder
Assemble the ladder
필요한 도구:
 Wooden Mallet
Wedge the rung tenons
Wedge the rung tenons
Test and inspect every joint
Test and inspect every joint
연결된 블루프린트 재료

관련 블루프린트
이 블루프린트들은 지식을 공유합니다 — 기술, 재료 또는 원리


CC0 퍼블릭 도메인
이 블루프린트는 CC0로 공개되었습니다. 어떤 목적으로든 자유롭게 복사, 수정, 배포 및 사용할 수 있습니다.
제품 구매를 통해 메이커를 지원하세요. 판매자가 설정한 메이커 커미션 을 받거나, 이 블루프린트의 새로운 반복을 만들어 연결로 포함시킬 수 있습니다.