협업
예술
뷰티 및 웰니스
공예
문화 및 역사
엔터테인먼트
환경
음식 및 음료
역공학
과학
스포츠
기술
웨어러블
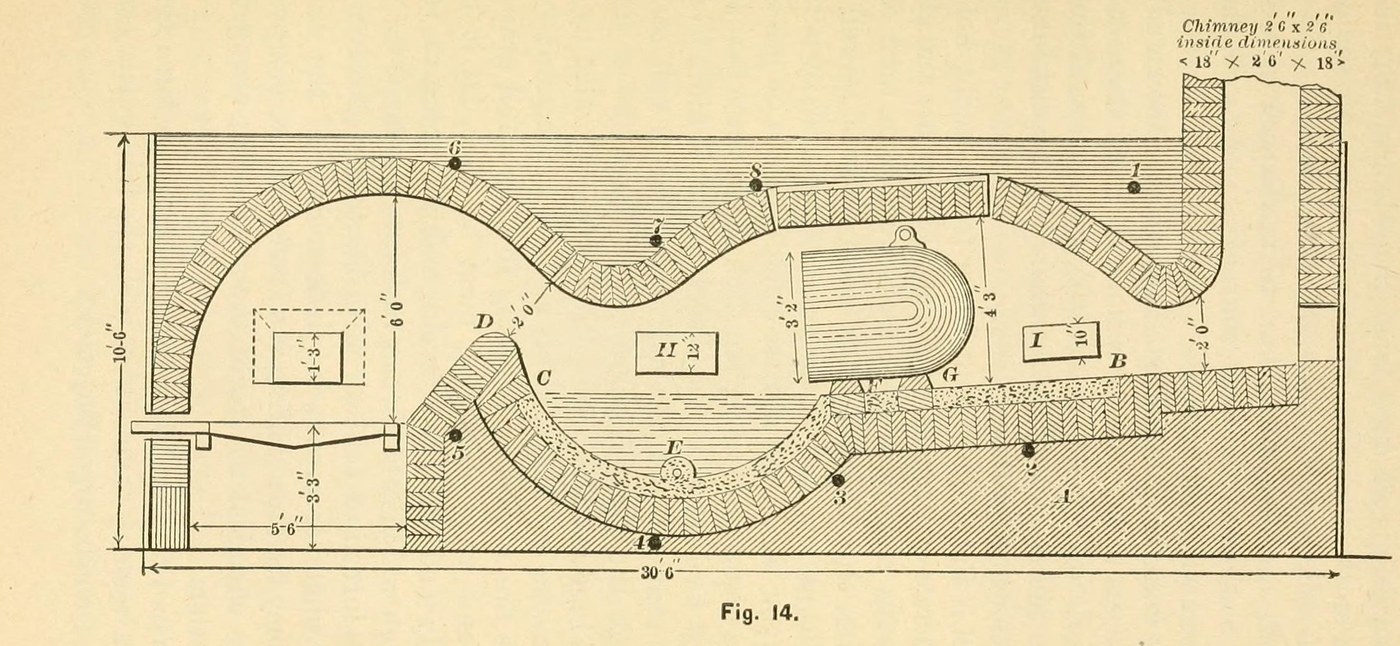


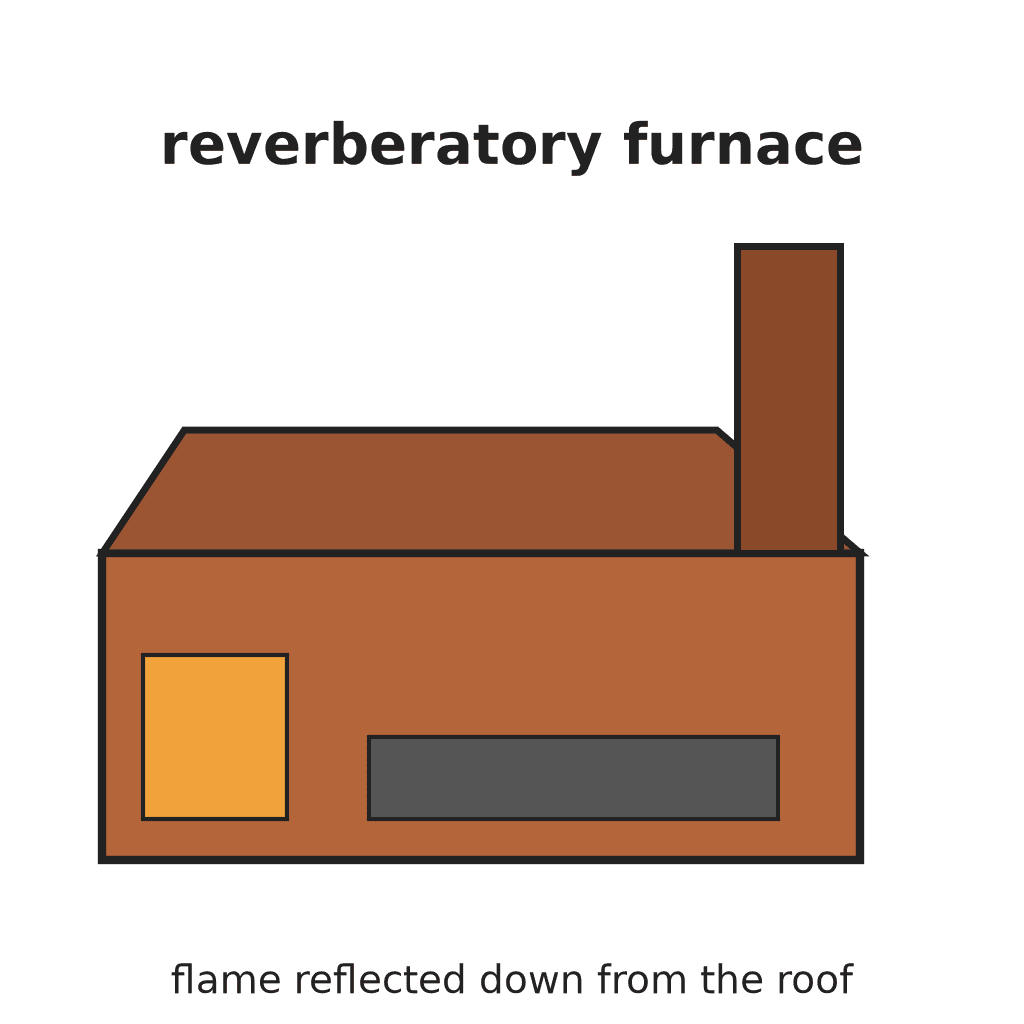
Reverberatory Furnace: the Air Furnace for Melting Cast Iron (Bolland, 1893)
An air furnace melts iron apart from the fuel: coal burns on a grate at one end, and the flame is thrown down from a low arched roof onto the iron on the bed, then leaves by a tall chimney. The iron stays cleaner than in a cupola, so founders used it for guns, rolls, heavy scrap and lumps too big for the cupola.
This furnace is 30 ft 6 in long and 7 ft wide outside, 5 ft wide inside, cased in bolted wrought-iron plates.
Source: S. Bolland, The Iron Founder Supplement (1893), pp. 55-67. Unknown: brick sizes, plate thickness. Picture: Fig. 14 of the book.
전문가
Unknown
안내
1
1
Lay the foundation
Lay the foundation
Build the foundation solid of common material up to the firebrick, shaped so the firebrick bed slopes down from the chimney end to the reservoir. Keep the bricks from B to C 6 in below the finished bottom, to leave room for the sand bed.
이 단계의 재료:
 벽돌1 foundation
필요한 도구:
 흙손
 알 수 없는 치수
2
2
Build the fireplace, bridge and roof
Build the fireplace, bridge and roof
Build the fireplace the full width of the furnace (5 ft inside, grate 5 ft long). Set the bridge wall at least 2 ft 3 in from the face of the grate bars. Build bridge, sides, roof and fireplace of the most refractory firebrick. Arch the roof the whole length, low, so it throws the flame down onto the bed; fill above the arches with common material. Leave the side charging hole (5 x 4 ft), the top hole (furnace width x 6 ft), the puddling hole over the reservoir, a sight hole and the tap hole.
이 단계의 재료:
 내화 점토 벽돌1 lining, bridge, roof
 내화 점토 모르타르1 setting벽돌1 filling above the arch
 알 수 없는 금속1 grate bars
필요한 도구:
흙손3
3
Case it in plates and bolt it
Case it in plates and bolt it
Case the whole structure in wrought-iron plates, held at the corners with angle-irons. Run eight chief anchor bolts from side to side, clear of all working parts. Join everything with bolts, not rivets, so any plate can come off for repairs. Line the charging doors with firebrick.
이 단계의 재료:
 철판1 casing, doors
 연철 환봉8 anchor bolts알 수 없는 금속1 angle-irons, door frames내화 점토 벽돌1 door linings
필요한 도구:
알 수 없는 치수4
4
Build the chimney
Build the chimney
Build the chimney square, 30 to 40 ft high, with an inside course of firebrick (Fig. 14: 2 ft 6 in square inside). Make its area a little larger than the fireplace. Put a damper on top that can be worked from the bottom: it alone sets the draught. It can stand apart on a sole plate on four columns.
이 단계의 재료:
내화 점토 벽돌1 inside course벽돌1 chimney알 수 없는 금속1 damper필요한 도구:
흙손5
5
Make the sand bottom
Make the sand bottom
Make the bottom from B round the reservoir to C with 8 parts fire-sand to 1 of clay and 1 of ground coke. Fire it well for one to two hours before the first charge; it should last ten heats. Fill the tap hole with fire-sand and a little coal dust, which will not cake when hot.
이 단계의 재료:
 모래8 parts
 점토1 part
 야금용 코크스1 part, ground
필요한 도구:
 역청탄
6
6
Charge and melt
Charge and melt
Fire with soft, non-caking bituminous coal and keep a full grate; clinker quickly and leave no holes for cold air. Charge all the iron at the start: first layer of pigs lengthwise and a little apart, next layers across, open so the flame passes. Set heavy pieces on firebricks so the flame plays all round them. Through the puddling hole, dip test pieces and skim the iron clean. To blend two grades, thrust green saplings into the melt. Close the damper before tapping. Look the furnace over after every heat.
필요한 도구:
역청탄 선철 덩이
 경목 어린나무
 구멍 뚫린 건짐 국자
재료
9- 1 chimney플레이스홀더
- 1 inside course플레이스홀더
- 1 setting플레이스홀더
- 1 damper플레이스홀더
- 1 casing, doors플레이스홀더
- 8 anchor bolts플레이스홀더
- 8 parts플레이스홀더
- 1 part플레이스홀더
- 1 part, ground플레이스홀더
연결된 블루프린트 재료



이 블루프린트로 만드는 것
CC0 퍼블릭 도메인
이 블루프린트는 CC0로 공개되었습니다. 어떤 목적으로든 자유롭게 복사, 수정, 배포 및 사용할 수 있습니다.
제품 구매를 통해 메이커를 지원하세요. 판매자가 설정한 메이커 커미션 을 받거나, 이 블루프린트의 새로운 반복을 만들어 연결로 포함시킬 수 있습니다.