예술
뷰티 및 웰니스
공예
문화 및 역사
엔터테인먼트
환경
음식 및 음료
역공학
과학
스포츠
기술
웨어러블
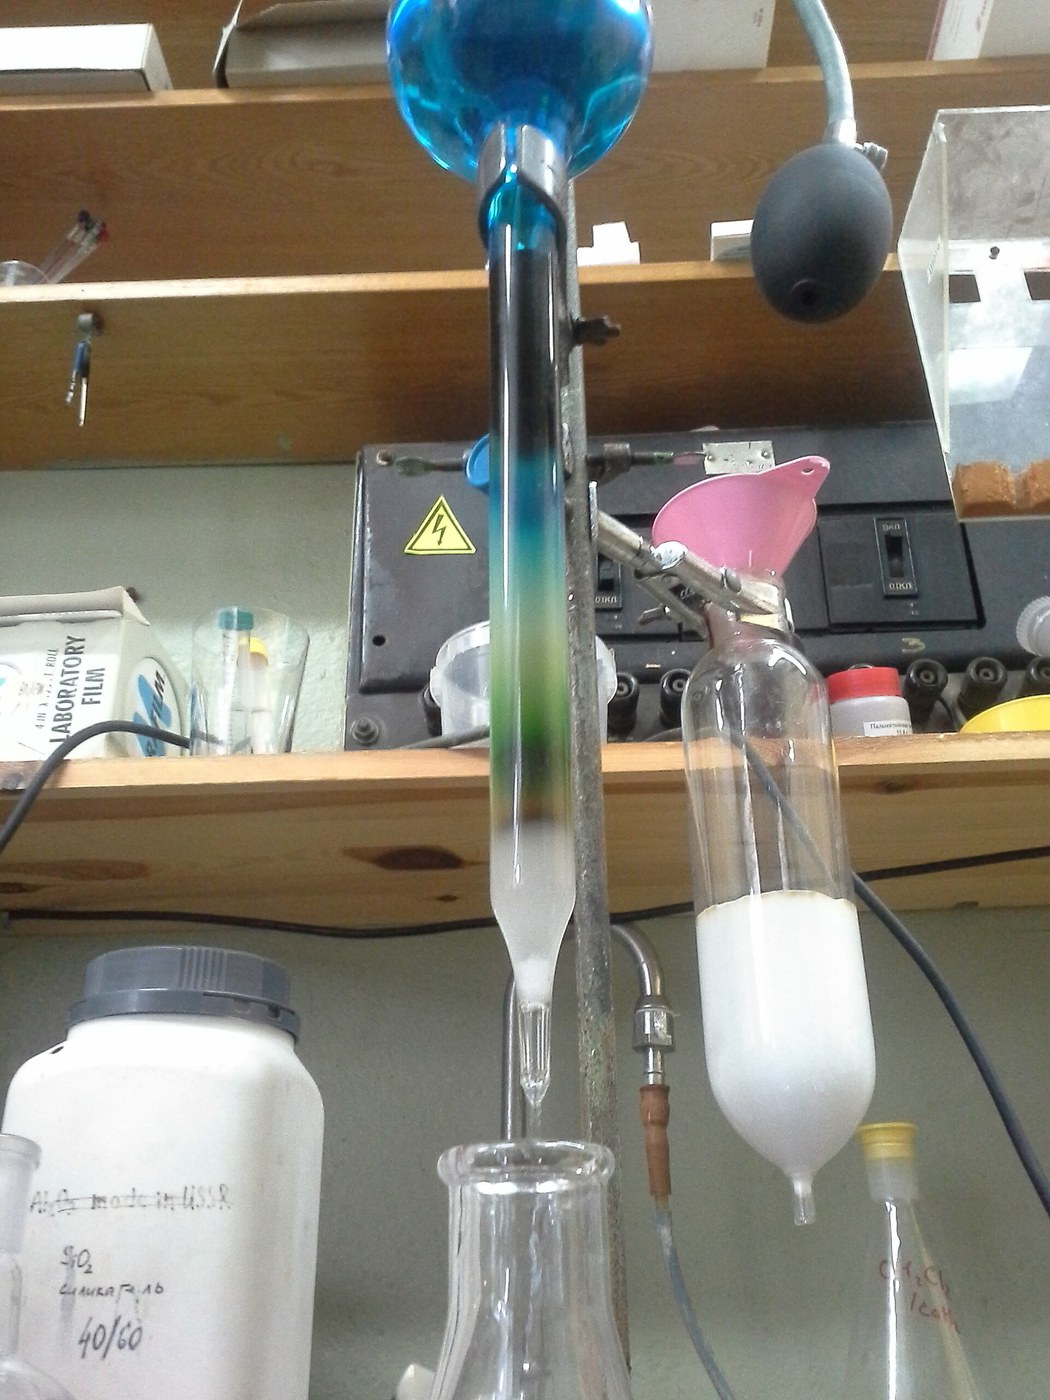


Tsvet's Column: The First Chromatogram
In 1903 a Russian-Italian botanist working in Warsaw poured an extract of green leaves into a glass tube packed with powdered chalk, washed it through with petroleum solvent, and watched the single green smear pull apart into separate coloured bands down the column.
Mikhail Tsvet called the result a *chromatogram* — a writing in colour — and it is the ancestor of every separation in this batch. His insight was that leaf green is not one substance: it is two chlorophylls and a family of yellow and orange carotenoids, and they stick to chalk with different strengths. The one that clings least travels furthest.
The technique was ignored for thirty years, partly because Tsvet published in Russian and partly because the leading plant chemist of the day insisted the bands were artefacts. You can settle that argument yourself in an afternoon with chalk and a glass tube.
중급
4 hours
안내
1
1
Get the pigments out of the leaf
Get the pigments out of the leaf
Grind a handful of fresh spinach in a mortar with a little clean sand and enough ethanol to make a slurry, then filter. You want a dark green extract, not a pale one.
The sand is doing real work: it tears the cell walls and the chloroplast membranes open so the solvent can reach pigments that are otherwise locked inside. Grinding without it gives a weak extract and a column with nothing to show. Keep the extract in the dark — chlorophyll bleaches in light, and a sunlit extract loses its top band before you have packed the tube.
이 단계의 재료:
 시금치100 g
 에탄올 - 실험실 등급, 95 %50 ml
 규사20 g
필요한 도구:
 막자사발과 막자
 자루 달린 유리 깔때기
 여과지
여과지 붕규산 비커
2
2
Pack the column evenly, or it will run crooked
Pack the column evenly, or it will run crooked
Plug the bottom of a glass tube with a small wad of cotton wool, add a centimetre of sand, then pour in powdered chalk a little at a time, tapping the side constantly, to a depth of about 15 cm. Finish with another centimetre of sand on top.
Tapping is not fussiness. Any gap or crack in the packing becomes a channel the solvent races down, and the bands come out slanted, smeared or merged. The sand layers protect the chalk surface from being cratered when you pour, which does the same damage in a different way.
이 단계의 재료:
 탄산칼슘(호분)100 g규사30 g
 탈지면1 팩
필요한 도구:
 붕규산 유리 막대
3
3
Wet the column before you load it — never let it run dry
Wet the column before you load it — never let it run dry
Run solvent through until the whole packing is wetted and a few millimetres stand above the top sand. Keep it that way for the rest of the run.
A column that runs dry cracks, and a cracked column is finished — you cannot re-wet it back into a uniform bed. This is the single rule that decides whether the afternoon works. Set the solvent reservoir up so it keeps the level topped up rather than trusting yourself to notice.
이 단계의 재료:
 아세톤100 ml
필요한 도구:
붕규산 비커4
4
Load a narrow band, and let it sink in
Load a narrow band, and let it sink in
Let the solvent drain to exactly the top of the sand, then pipette your extract gently down the inside wall so it forms a thin, level layer. Let THAT drain in before adding any solvent.
The width of the band you start with is the width you are stuck with. Every separation that follows has to pull the components further apart than this starting smear, so a 2 mm load separates where a 2 cm load never will. This is the same discipline as a narrow spot in paper chromatography, and it matters more here because the column is longer.
필요한 도구:
 눈금 피펫 (모어)
5
5
Develop, and watch the green come apart
Develop, and watch the green come apart
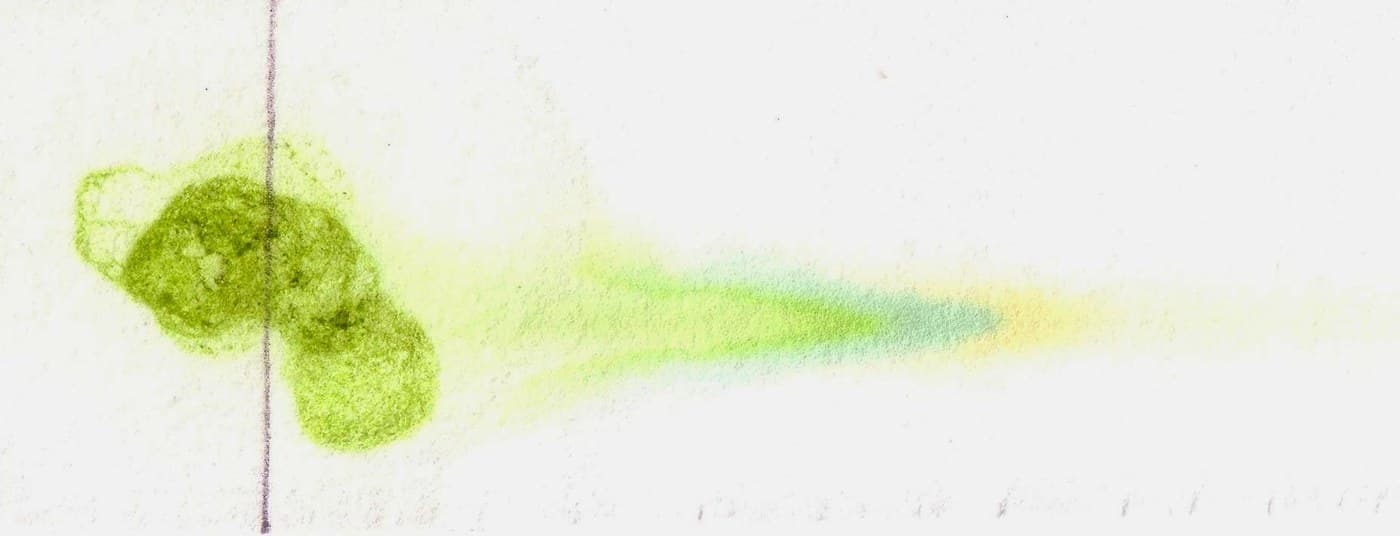
Add solvent steadily and let it run. Over twenty minutes or so the single green band stretches, then splits: a yellow-orange band running ahead, then yellow-green, then blue-green behind.
Ahead are the carotenes, which barely stick to the chalk. Behind them the xanthophylls, which carry oxygen atoms and hold on harder. Last come chlorophyll a and then chlorophyll b, the most strongly held of all. You are watching a mixture sort itself by how tightly each molecule grips a surface — and this is exactly the argument Tsvet lost for thirty years.
이 단계의 재료:
아세톤200 ml필요한 도구:
붕규산 비커6
6
Collect the bands as separate fractions
Collect the bands as separate fractions
Put a fresh test tube under the outlet as each coloured band approaches, and change tubes as it passes. Cap and label each one.
This is the step that turns a pretty demonstration into chemistry. A band you watched is a picture; a band in a tube is a purified substance you can weigh, spectroscope, or run again. Tsvet's own word for the separated bands was 'zones', and collecting them is what earned the method its place when Kuhn and Lederer rediscovered it in the 1930s.
필요한 도구:
 시험관 (붕규산유리)눈금 피펫 (모어)
7
7
Why the bands travel at different speeds
Why the bands travel at different speeds
Jupyter 노트북 불러오는 중…
필요한 도구:
 자
자8
8
Change the solvent and watch the order hold
Change the solvent and watch the order hold
Run the column again with a solvent of different polarity — swap some of the acetone for a less polar solvent, or the reverse — and note what changes.
The bands move faster or slower, sometimes dramatically, but their ORDER stays the same, because the order is set by how strongly each pigment grips the chalk relative to the others. Solvent strength is your speed control; the stationary phase decides the sequence. Understanding which knob does which is the difference between tuning a separation and guessing at one.
이 단계의 재료:
 이소프로필 알코올 99 %100 ml아세톤100 ml
필요한 도구:
붕규산 비커재료
7- 100 g플레이스홀더
- 50 ml플레이스홀더
- 30 g플레이스홀더
- 100 g플레이스홀더
- 1 팩플레이스홀더
- 400 ml플레이스홀더
- 100 ml플레이스홀더
관련 블루프린트
이 블루프린트들은 지식을 공유합니다 — 기술, 재료 또는 원리

CC0 퍼블릭 도메인
이 블루프린트는 CC0로 공개되었습니다. 어떤 목적으로든 자유롭게 복사, 수정, 배포 및 사용할 수 있습니다.
제품 구매를 통해 메이커를 지원하세요. 판매자가 설정한 메이커 커미션 을 받거나, 이 블루프린트의 새로운 반복을 만들어 연결로 포함시킬 수 있습니다.