ศิลปะ
ความงามและสุขภาพ
งานฝีมือ
วัฒนธรรมและประวัติศาสตร์
ความบันเทิง
สิ่งแวดล้อม
อาหารและเครื่องดื่ม
วิศวกรรมย้อนรอย
วิทยาศาสตร์
กีฬา
เทคโนโลยี
อุปกรณ์สวมใส่
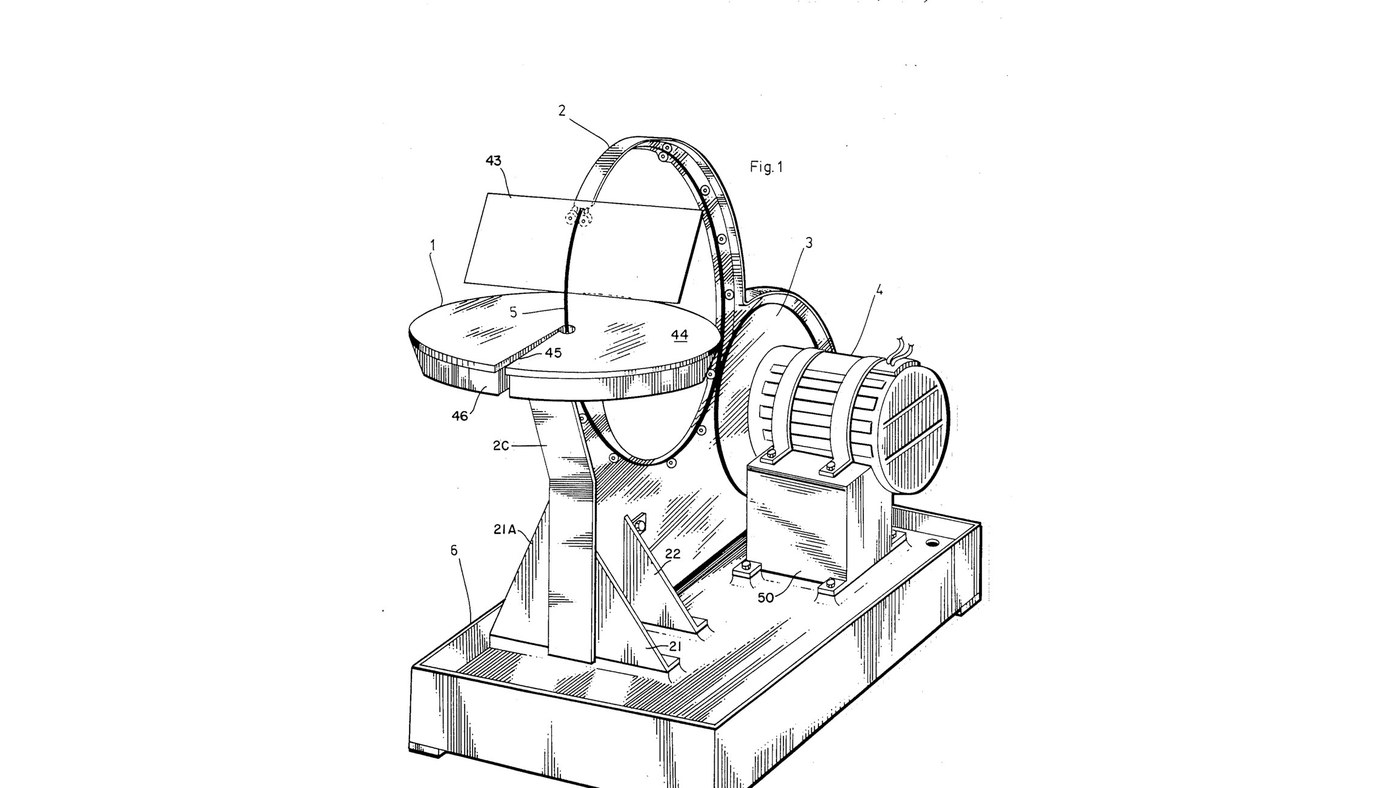


Glass Saw: Rigid Diamond Wire Ring Driven by Its Rim
Jesse Cogswell's ring saw (US 4,576,139, 1986) for glass, ceramics and stone. The blade is a rigid circle of wire coated with bonded diamond, standing upright through a cutting table. A rubber-tyred wheel on the motor drives it by friction round its own rim at 3000 ft/min or more, and twelve guide wheels on slots round an aluminium back-plate hold it true. Because it cuts with any part of its rim, the work can be turned freely for curves and inside shapes; a sponge in a water tray wets the wire.
The patent sizes the ring from the thickest work to be cut (8 in ring for 3/16 in); the notebook does the sums. The picture: the patent's Fig. 1.
ขั้นสูง
3 days
คำแนะนำ
1
1
Cut and brace the back-plate
Cut and brace the back-plate
Cut the back-plate (2A) from aluminium plate, its upper part curved as an arc to shield the saw, stiffened by an angle (2B) along the top and a flat splatter strip (2C) at the front. Bolt on two front struts (21, 21A) and two side struts (22) and bolt them to the base. Ours: drill press.
วัสดุสำหรับขั้นตอนนี้:
 แผ่นอะลูมิเนียม1 ชิ้น
 ฉากอะลูมิเนียม1 ชิ้น
 สลักเกลียวหัวหกเหลี่ยม - เกรด 8.81 ชิ้น
เครื่องมือที่ต้องใช้:
 สว่านแท่น
 ประแจเลื่อน
2
2
Cut the wheel-slider apertures
Cut the wheel-slider apertures
Cut slots (32) through the back-plate's arc at 0, 30, 60, 90, 120, 210, 240, 270, 300 and 330° round the ring's centre: two slots at 90° and 210° for the guide pairs, one at each of the others. The slots let each guide wheel slide to the ring.
เครื่องมือที่ต้องใช้:
สว่านแท่น3
3
Assemble the guide wheels
Assemble the guide wheels
For each of the twelve guide wheels, stretch two rubber O-rings (27) into the grooves of a bearing wheel (26) with sealed roller bearings, and mount it on a shoulder bolt (28) with a washer, lockwasher and nut.
วัสดุสำหรับขั้นตอนนี้:
 ลูกกลิ้งนำทาง12 ชิ้น
 โอริง24 ชิ้น
 สลักเกลียวบ่า12 ชิ้น
 แหวนรองแบน12 ชิ้น
 Spring Washer12 ชิ้น
 น็อตหกเหลี่ยม12 ชิ้น
เครื่องมือที่ต้องใช้:
ประแจเลื่อน4
4
Turn the drive wheel
Turn the drive wheel
Turn an aluminium disk with a hub, a bored axle hole and a deep groove round its rim, and seat a large rubber O-ring (23) in the groove as its driving tyre. Ours: lathe.
วัสดุสำหรับขั้นตอนนี้:
แผ่นอะลูมิเนียม1 ชิ้นโอริง1 ชิ้นเครื่องมือที่ต้องใช้:
 เครื่องกลึงโลหะ
5
5
Mount the motor and drive axle
Mount the motor and drive axle
Strap the electric motor (51) onto its pillow block (50) with fastening bands (52) and bolt the block to the base. Fix the drive wheel on the motor's axle (24) and carry the axle's end in an axle pillow block (24A, 24B).
วัสดุสำหรับขั้นตอนนี้:
 มอเตอร์ไฟฟ้า1 ชิ้น
 สายรัดยึดมอเตอร์2 ชิ้น
 ตุ๊กตาลูกปืน2 ชิ้น
 เพลาเหล็กกล้า1 ชิ้นสลักเกลียวหัวหกเหลี่ยม - เกรด 8.81 ชิ้น
เครื่องมือที่ต้องใช้:
ประแจเลื่อน6
6
Fit the ring and its guides
Fit the ring and its guides
Stand the ring saw on the drive wheel's tyre. Bolt the guide wheels through their slots: each pair with a tension spring between its two wheels, each single with a spring to the back-plate's lower rim, the one at 330° pressing the ring onto the drive wheel. Set them against the ring, then tighten the nuts. Fit two horizontal roller-guides (17) at 150°, sprung together, just before the cut.
วัสดุสำหรับขั้นตอนนี้:
 ใบเลื่อยวงแหวนเพชร1 ชิ้น
 สปริงดึง11 ชิ้นลูกกลิ้งนำทาง2 ชิ้น
เครื่องมือที่ต้องใช้:
ประแจเลื่อน7
7
Fit the table, tray and sponge
Fit the table, tray and sponge
Bolt the water tray (46) on four bracket supports (19, 20) by its four studs; put a ring-shaped sponge (47) in it and the cutting table (44) over it, the ring passing through centre holes reached by slots offset half an inch from a radius. Set the table top below the ring's centre line by the thickest work you will cut. Add water to the tray.
วัสดุสำหรับขั้นตอนนี้:
 ถาด1 ชิ้น
 ฟองน้ำ1 ชิ้นแผ่นอะลูมิเนียม1 ชิ้น
 น้ำ1 batch
เครื่องมือที่ต้องใช้:
ประแจเลื่อน8
8
Fit the face shield and drip pan
Fit the face shield and drip pan
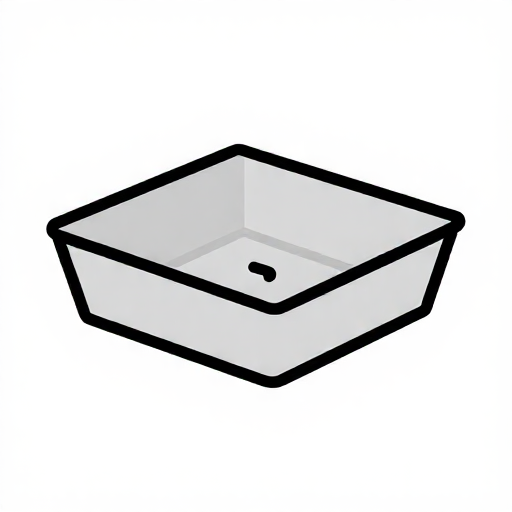
Bolt the shield arm (41) to the back-plate and pivot a clear acrylic face shield (43) in its holder (42) on a locking screw. The base is a catchment for the coolant with a drain hole in one corner.
วัสดุสำหรับขั้นตอนนี้:
 แผ่นอะคริลิก1 ชิ้นแผ่นอะลูมิเนียม1 ชิ้น
 ถาดรองหยด1 ชิ้น
เครื่องมือที่ต้องใช้:
ประแจเลื่อน9
9
Ring size and drive speed
Ring size and drive speed
กำลังโหลดสมุด Jupyter…
วัสดุ
20- 1 ชิ้นตัวยึดตำแหน่ง
- 1 ชิ้นตัวยึดตำแหน่ง
- ตัวยึดตำแหน่ง
- 12 ชิ้นตัวยึดตำแหน่ง
- 25 ชิ้นตัวยึดตำแหน่ง
- 12 ชิ้นตัวยึดตำแหน่ง
- 12 ชิ้นตัวยึดตำแหน่ง
- 12 ชิ้นตัวยึดตำแหน่ง
- 12 ชิ้นตัวยึดตำแหน่ง
- 1 ชิ้นตัวยึดตำแหน่ง
- 2 ชิ้นตัวยึดตำแหน่ง
- 2 ชิ้นตัวยึดตำแหน่ง
- 1 ชิ้นตัวยึดตำแหน่ง
- 1 ชิ้นตัวยึดตำแหน่ง
- 11 ชิ้นตัวยึดตำแหน่ง
- 1 ชิ้นตัวยึดตำแหน่ง
- 1 ชิ้นตัวยึดตำแหน่ง
- 1 batchตัวยึดตำแหน่ง
- 1 ชิ้นตัวยึดตำแหน่ง
- 1 ชิ้นตัวยึดตำแหน่ง
พิมพ์เขียวนี้สร้าง

CC0 สาธารณสมบัติ
พิมพ์เขียวนี้เผยแพร่ภายใต้ CC0 คุณสามารถคัดลอก แก้ไข แจกจ่าย และใช้งานผลงานนี้เพื่อวัตถุประสงค์ใดก็ได้ โดยไม่ต้องขออนุญาต
สนับสนุนเมกเกอร์โดยซื้อสินค้าผ่านพิมพ์เขียวของพวกเขา ซึ่งพวกเขาจะได้รับ ค่าคอมมิชชันเมกเกอร์ ที่ผู้ขายกำหนด หรือสร้างเวอร์ชันใหม่ของพิมพ์เขียวนี้และรวมเป็นการเชื่อมต่อในพิมพ์เขียวของคุณเพื่อแบ่งรายได้