ศิลปะ
ความงามและสุขภาพ
งานฝีมือ
วัฒนธรรมและประวัติศาสตร์
ความบันเทิง
สิ่งแวดล้อม
อาหารและเครื่องดื่ม
วิศวกรรมย้อนรอย
วิทยาศาสตร์
กีฬา
เทคโนโลยี
อุปกรณ์สวมใส่
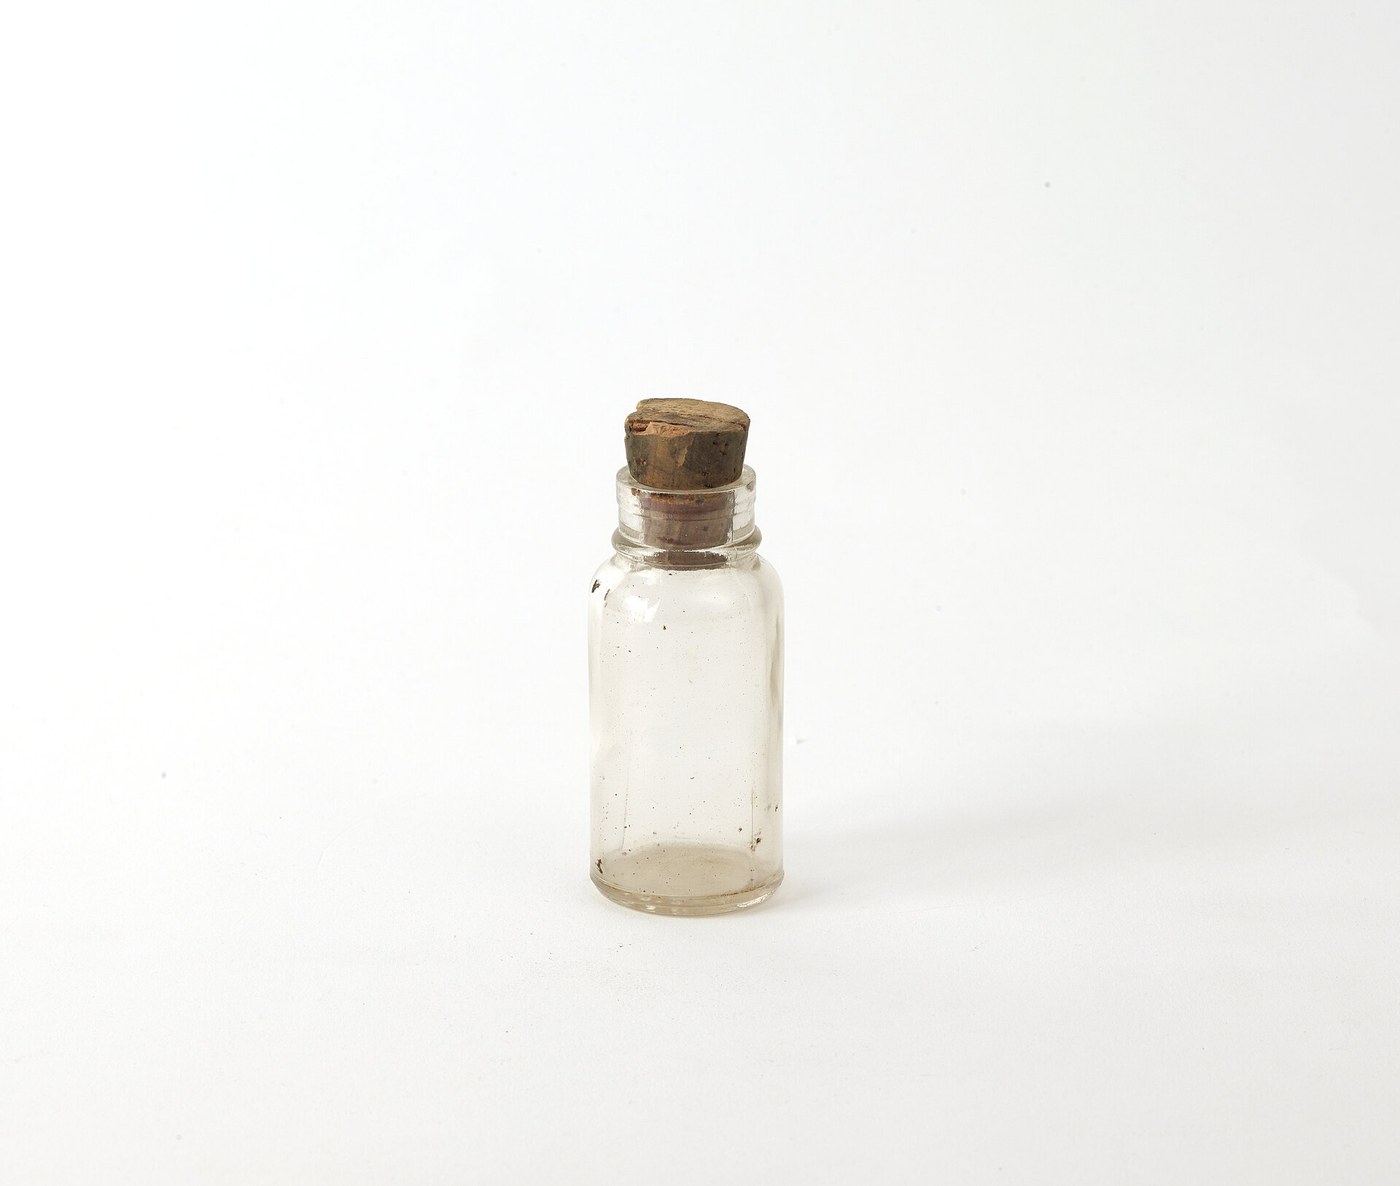


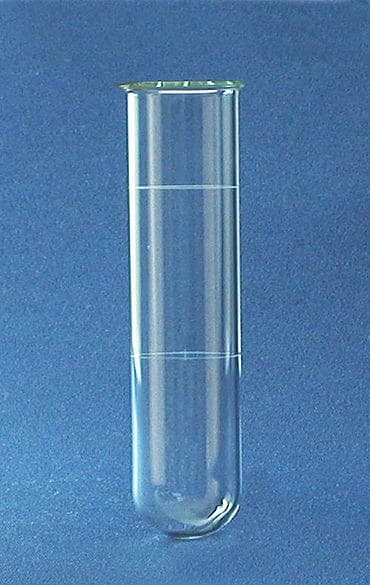
Glass Vial: a Corked Specimen Vial Closed and Flanged from Glass Tube (after Frary, 1914)
A small glass vial with a cork, for specimens, gold flakes or samples: an 18 mm glass tube closed to a round bottom, cut to length and flanged at the mouth so a cork goes in without cracking it, then annealed. The methods are from Francis Frary's Laboratory Manual of Glass-Blowing (1914). About 14 ml.
ระดับกลาง
About 30 minutes a vial, plus practice
คำแนะนำ
1
1
Watch a test tube made
Watch a test tube made
A tube closed to a round bottom at the torch (The Fusing Shop). A vial is the same, shorter, with a flanged mouth.
2
2
How much it holds
How much it holds
กำลังโหลดสมุด Jupyter…
เครื่องมือที่ต้องใช้:
 เวอร์เนียร์ดิจิทัล 6 นิ้ว
3
3
Make a flanging tool
Make a flanging tool
Frary's tool: a triangle of copper or brass about 1/16 in. (1.5 mm) thick on a handle; his Fig. 2 sizes are a = 1 in., b = 1 in. and a = 2 in., b = 1 in. Cut it from brass sheet and fit it in a slot sawn in a hardwood dowel (ours: he wraps the shank in asbestos paper, which we never use).
เครื่องมือที่ต้องใช้:
 แผ่นทองเหลือง
 เดือยไม้เนื้อแข็ง
 กรรไกรตัดแผ่นโลหะ
 ตะไบ (ตะไบมือ)
4
4
Close the end
Close the end
Heat the tube near one end, turning it all the time, and draw it off in a short cone. Draw off the tail with a fine flame passing just below it, lifting the work out when the thread gets thin, so no lump is left. Blow out the little lump slightly, shrink the whole cone a little and blow gently to a round end like a test tube, with walls as thick as the tube's.
วัสดุสำหรับขั้นตอนนี้:
 หลอดแก้ว1 piece (18 mm x 1.2 mm wall, 200 mm)
เครื่องมือที่ต้องใช้:
 หัวเป่าแก้วตั้งโต๊ะ
 แว่นนิรภัย
 ถุงมือกันความร้อน
5
5
Anneal the bottom
Anneal the bottom
Turn the flame smoky and hold the round end in it until coated with soot, then reduce the flame and cool it in the hot air above until it will not singe cotton wool. Let it cool fully.
เครื่องมือที่ต้องใช้:
หัวเป่าแก้วตั้งโต๊ะ สำลีซับถุงมือกันความร้อน
6
6
Cut to length
Cut to length
Make one scratch with the file edge 80 mm from the bottom (one stroke, no sawing), then pull the ends apart while bending very slightly to open the scratch. The end must be square.
เครื่องมือที่ต้องใช้:
ตะไบ (ตะไบมือ)เวอร์เนียร์ดิจิทัล 6 นิ้วถุงมือกันความร้อน7
7
Flange the mouth
Flange the mouth
Turning the vial, heat only the last 2-3 mm of the mouth until it softens and starts to shrink. Warm the flanging tool, touch it to the wax, put it in at an angle and press on the soft edge while turning the vial quickly. Repeat if the flange is too small. Reheat the mouth to softening and anneal it as before.
วัสดุสำหรับขั้นตอนนี้:
 ขี้ผึ้งพาราฟิน1 ก.
เครื่องมือที่ต้องใช้:
หัวเป่าแก้วตั้งโต๊ะถุงมือกันความร้อนแว่นนิรภัย8
8
Fit the cork
Fit the cork
Choose a tapered cork that starts into the mouth by about a third of its length. Twist it in; never force a cork into an unannealed vial.
วัสดุสำหรับขั้นตอนนี้:
 จุกไม้ก๊อก1 piece (tapered, about 15 to 18 mm)
9
9
Troubleshooting
Troubleshooting
Vial problems and fixes.
Flow
Loading...
10
10
History and honest limits
History and honest limits
From Francis C. Frary, Laboratory Manual of Glass-Blowing (1914): cutting (p. 7), flanging (pp. 11-12), the rounded test-tube end (Exercises 6 and 8) and annealing in the smoky flame (pp. 3-4). He used a gas blast lamp; borosilicate tube needs a hotter oxygen torch than soft glass. The picture shows a vial from the chemist Georg Bredig's laboratory (moulded, flat bottom); ours has a round blown bottom. Ours: the sizes, the cork and the wooden tool handle. Not made by us yet.
วัสดุ
3- 1 piece (18 mm x 1.2 mm wall, 200 mm)ตัวยึดตำแหน่ง
- 1 ก.ตัวยึดตำแหน่ง
- 1 piece (tapered, about 15 to 18 mm)ตัวยึดตำแหน่ง
เครื่องมือที่จำเป็น
9- ตัวยึดตำแหน่ง
- ตัวยึดตำแหน่ง
- ตัวยึดตำแหน่ง
- ตัวยึดตำแหน่ง
- ตัวยึดตำแหน่ง
- ตัวยึดตำแหน่ง
- ตัวยึดตำแหน่ง
- ตัวยึดตำแหน่ง
- ตัวยึดตำแหน่ง
วัสดุจากพิมพ์เขียวที่เชื่อมต่อ

พิมพ์เขียวนี้สร้าง

บลูพริ้นท์ที่เกี่ยวข้อง
บลูพริ้นท์เหล่านี้แบ่งปันความรู้ — เทคนิค วัสดุ หรือหลักการ
CC0 สาธารณสมบัติ
พิมพ์เขียวนี้เผยแพร่ภายใต้ CC0 คุณสามารถคัดลอก แก้ไข แจกจ่าย และใช้งานผลงานนี้เพื่อวัตถุประสงค์ใดก็ได้ โดยไม่ต้องขออนุญาต
สนับสนุนเมกเกอร์โดยซื้อสินค้าผ่านพิมพ์เขียวของพวกเขา ซึ่งพวกเขาจะได้รับ ค่าคอมมิชชันเมกเกอร์ ที่ผู้ขายกำหนด หรือสร้างเวอร์ชันใหม่ของพิมพ์เขียวนี้และรวมเป็นการเชื่อมต่อในพิมพ์เขียวของคุณเพื่อแบ่งรายได้