ศิลปะ
ความงามและสุขภาพ
งานฝีมือ
วัฒนธรรมและประวัติศาสตร์
ความบันเทิง
สิ่งแวดล้อม
อาหารและเครื่องดื่ม
วิศวกรรมย้อนรอย
วิทยาศาสตร์
กีฬา
เทคโนโลยี
อุปกรณ์สวมใส่
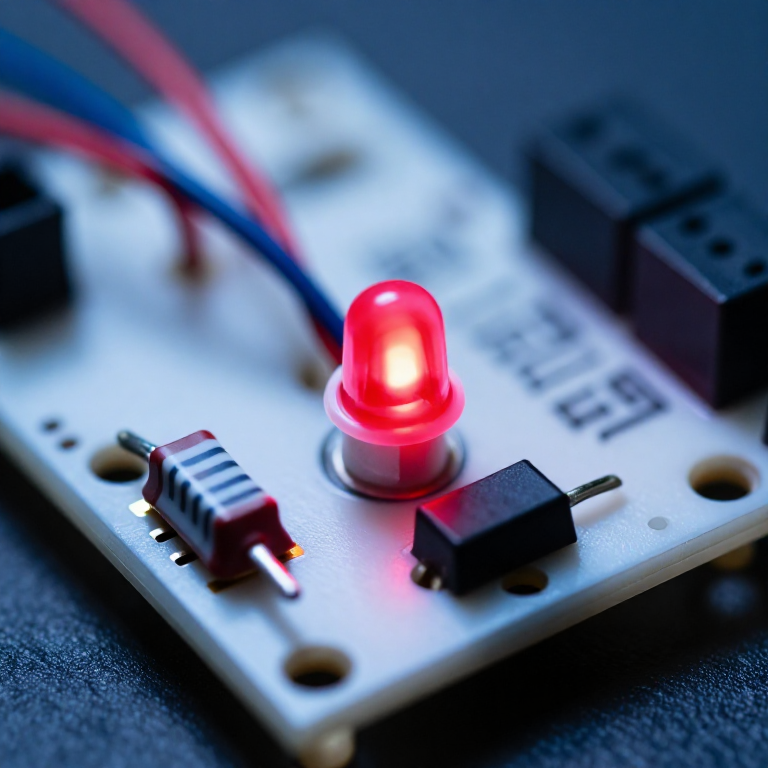


Ohm's Law at the Bench: Picking the Resistor That Saves the LED
One equation does most of the arithmetic a maker ever needs from electronics, and it is three letters long. What makes it worth a rung of its own is that the three commonest beginner disasters — the LED that dies instantly, the resistor that cooks, the divider that sags under load — are all the same equation applied carelessly.
An LED is the sharpest example. It is not a resistor: past its forward voltage the current rises almost without limit, so connecting one directly across a supply destroys it in a fraction of a second. The resistor beside it is not a formality, it is the only thing deciding the current.
Every SIK circuit published here that lights an LED has one, and this is why.
เริ่มต้น
3 hours
คำแนะนำ
1
1
Size the resistor for an LED, and see why it is not optional
Size the resistor for an LED, and see why it is not optional
กำลังโหลดสมุด Jupyter…
วัสดุสำหรับขั้นตอนนี้:
 ชุดแอลอีดี1 ชิ้น
 ชุดตัวต้านทาน1 ชิ้น
เครื่องมือที่ต้องใช้:
 เบรดบอร์ด
 เครื่องคิดเลข
 มัลติมิเตอร์
2
2
Check the resistor will survive the heat
Check the resistor will survive the heat
กำลังโหลดสมุด Jupyter…
วัสดุสำหรับขั้นตอนนี้:
ชุดตัวต้านทาน1 ชิ้นเครื่องมือที่ต้องใช้:
เครื่องคิดเลขมัลติมิเตอร์3
3
The divider that works until you connect something
The divider that works until you connect something
กำลังโหลดสมุด Jupyter…
วัสดุสำหรับขั้นตอนนี้:
ชุดตัวต้านทาน1 ชิ้นเครื่องมือที่ต้องใช้:
เบรดบอร์ดมัลติมิเตอร์เครื่องคิดเลข4
4
Measure it, and find out what your parts really are
Measure it, and find out what your parts really are
Build the LED and its resistor on a breadboard, then measure: the supply, the voltage across the LED, and the voltage across the resistor. They should add up to the supply.
Then work out the current from the resistor's voltage and its measured resistance, and compare it with what you calculated. The LED's real forward voltage will not be exactly the table value — it varies by part, by colour bin, and with current — which is why the calculation is a starting point and the measurement is the answer.
This also demonstrates Kirchhoff's voltage law without naming it: around any loop, the voltages sum to zero. Once you have seen it on a meter it stops being an abstraction and becomes a tool for finding where a missing volt went.
วัสดุสำหรับขั้นตอนนี้:
ชุดแอลอีดี1 ชิ้นชุดตัวต้านทาน1 ชิ้นเครื่องมือที่ต้องใช้:
เบรดบอร์ดมัลติมิเตอร์ แหล่งจ่ายไฟตั้งโต๊ะ
วัสดุ
2- 2 ชิ้นตัวยึดตำแหน่ง
- ตัวยึดตำแหน่ง
บลูพริ้นท์ที่เกี่ยวข้อง
บลูพริ้นท์เหล่านี้แบ่งปันความรู้ — เทคนิค วัสดุ หรือหลักการ

CC0 สาธารณสมบัติ
พิมพ์เขียวนี้เผยแพร่ภายใต้ CC0 คุณสามารถคัดลอก แก้ไข แจกจ่าย และใช้งานผลงานนี้เพื่อวัตถุประสงค์ใดก็ได้ โดยไม่ต้องขออนุญาต
สนับสนุนเมกเกอร์โดยซื้อสินค้าผ่านพิมพ์เขียวของพวกเขา ซึ่งพวกเขาจะได้รับ ค่าคอมมิชชันเมกเกอร์ ที่ผู้ขายกำหนด หรือสร้างเวอร์ชันใหม่ของพิมพ์เขียวนี้และรวมเป็นการเชื่อมต่อในพิมพ์เขียวของคุณเพื่อแบ่งรายได้