ศิลปะ
ความงามและสุขภาพ
งานฝีมือ
วัฒนธรรมและประวัติศาสตร์
ความบันเทิง
สิ่งแวดล้อม
อาหารและเครื่องดื่ม
วิศวกรรมย้อนรอย
วิทยาศาสตร์
กีฬา
เทคโนโลยี
อุปกรณ์สวมใส่


Straining Bag: a Cloth Bag on a Banded, Hooked Wire Hoop (after Milks, 1913)
A cloth straining bag for jelly, juice, wine and vinegar, with its own hanger: the bag is sewn to a band of heavy cloth with eyelets, which hangs on hooks round a wire hoop. The hoop, its arm and its wall hook are one wire. Kate Milks patented it in 1913 so the bag could be lifted off to wash and mended without the frame.
เริ่มต้น
About 3 hours
คำแนะนำ
1
1
How a jelly bag is used
How a jelly bag is used
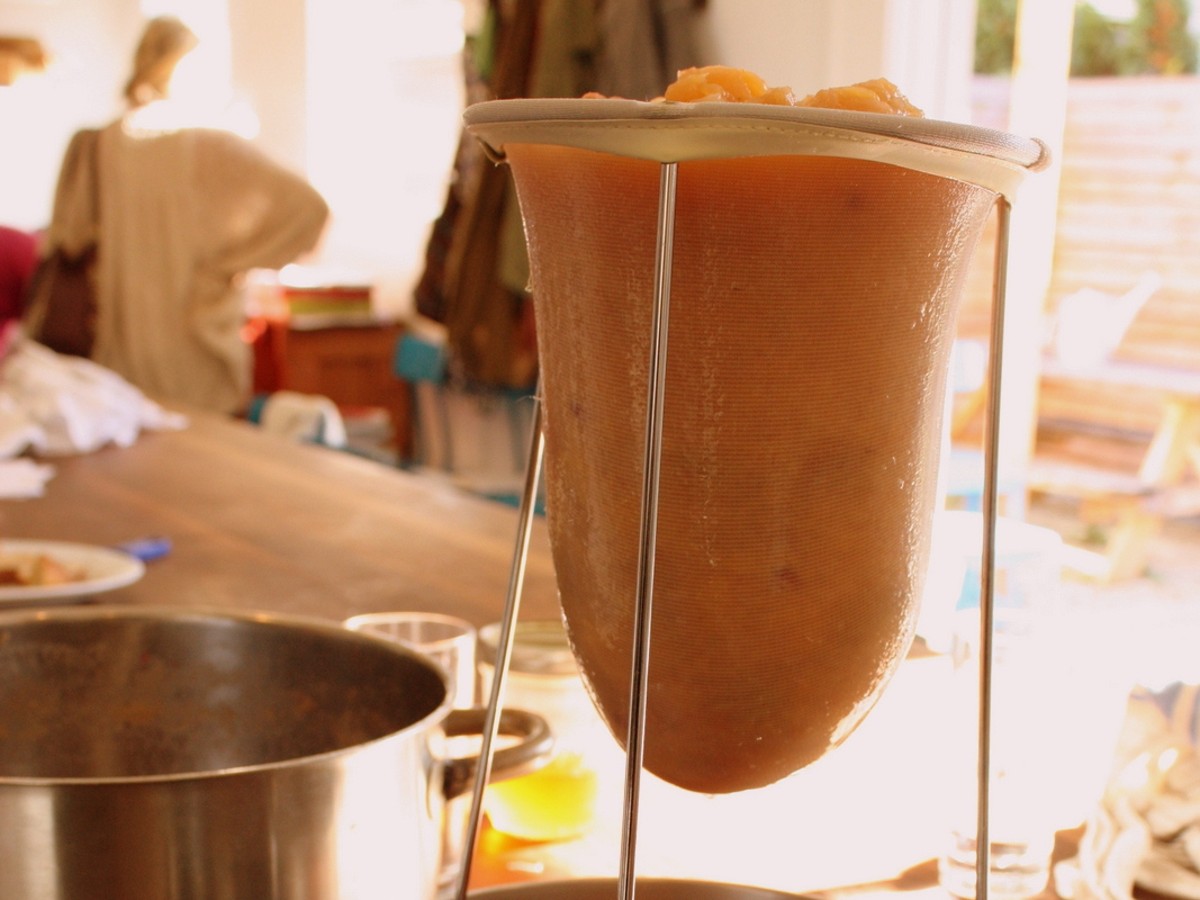
Cooked fruit poured into a jelly bag and left to drip (Homemakers101).
2
2
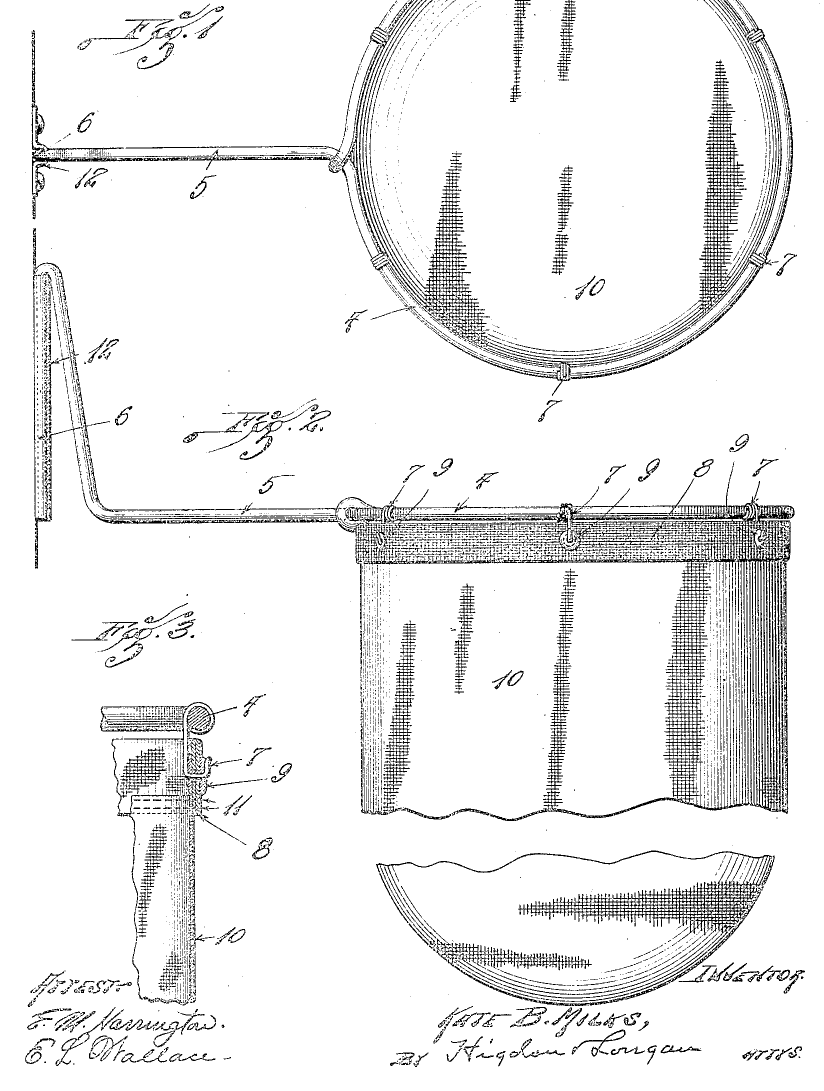
Milks's jelly strainer, 1913
Milks's jelly strainer, 1913
US 1,053,850: a hoop 4, its stem 5 and hook 6 are one piece of wire; hooks 7 hang from the hoop. A band 8 of heavy fabric with eyelets 9 hangs on the hooks, and the open bag 10 is stitched to the band, so it can be taken off to mend. A bracket 12 on the wall holds the hook.
3
3
Print the layout
Print the layout
Sizes for the bag, band, wire and bracket (not to scale).
4
4
Sew the bag
Sew the bag
Wash and iron the cloth. Cut a piece 660 x 330 mm and a circle 224 mm across. Sew the long edges into a tube, 10 mm seam, then sew the circle into one end; it hangs round when full. Sew every seam twice so no juice runs past it.
วัสดุสำหรับขั้นตอนนี้:
 ผ้ามัสลินฝ้าย0.4 m2
 ด้ายเย็บผ้า10 m
เครื่องมือที่ต้องใช้:
 กรรไกรตัดผ้า
 ตลับเมตร
 จักรเย็บผ้า
 เตารีดผ้า
5
5
Make the band
Make the band
Cut canvas 660 x 100 mm, fold it to 50 mm wide and sew the ends into a ring with 20 mm overlap. Punch six 5 mm holes 15 mm below the fold, 107 mm apart, and work each as an eyelet with close buttonhole stitches. Slip the bag's top edge into the band and stitch round twice.
วัสดุสำหรับขั้นตอนนี้:
 ผ้าใบ0.07 m2ด้ายเย็บผ้า6 m
เครื่องมือที่ต้องใช้:
กรรไกรตัดผ้า เครื่องเจาะรูกระดาษ
 เข็มเย็บผ้าจักรเย็บผ้า
6
6
Bend the hoop and hooks
Bend the hoop and hooks
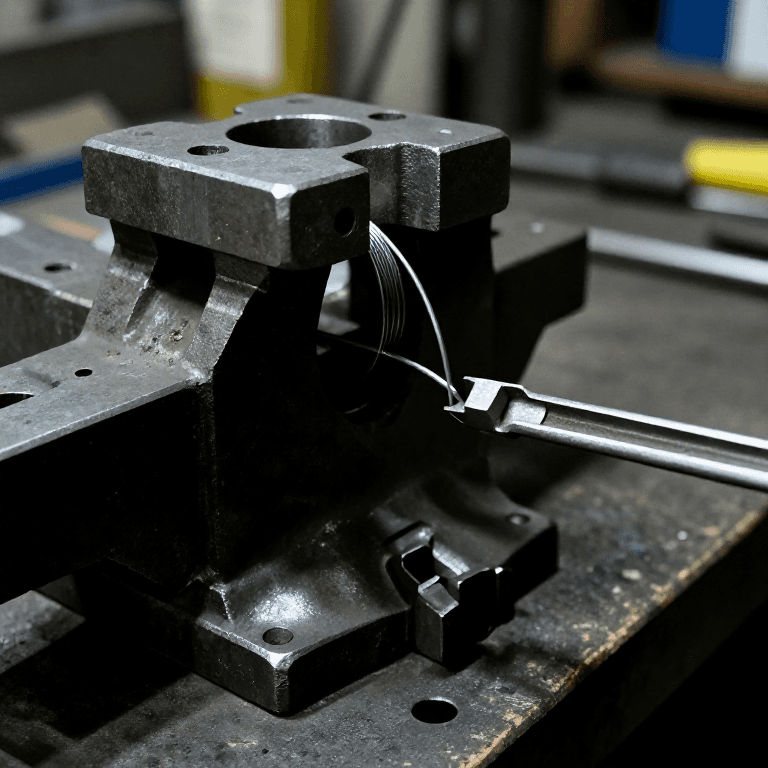
From one 1050 mm length of 3 mm stainless wire: bend the hook (60 mm down, over, 100 mm up), turn 90 degrees, run the 150 mm arm, then bend a 200 mm hoop and wrap the end twice round the arm. Cut six 60 mm pieces of 2 mm wire; wrap the top of each twice round the hoop, evenly spaced, and turn the lower 10 mm up as a hook.
วัสดุสำหรับขั้นตอนนี้:
 ลวดสเตนเลส1 piece (3 mm, 1050 mm)ลวดสเตนเลส1 piece (2 mm, 360 mm)
เครื่องมือที่ต้องใช้:
 คีมตัดลวดปากเฉียง
 คีมปากกลม
 คีมปากแบน
 ปากกาจับชิ้นงานหน้าโต๊ะ
7
7
Make the bracket
Make the bracket
Cut a 15 x 120 mm strip of 1 mm stainless sheet, file the edges, drill a screw hole 15 mm from each end and bend the middle out 5 mm. Screw it to a wall or cupboard side above where the bowl will stand.
วัสดุสำหรับขั้นตอนนี้:
 แผ่นสเตนเลส1 piece (1 mm, 15 x 120 mm)
 สกรูไม้2 ชิ้น
เครื่องมือที่ต้องใช้:
 เลื่อยตัดเหล็ก
 ตะไบโลหะ
 ชุดดอกสว่านปากกาจับชิ้นงานหน้าโต๊ะ
 ชุดไขควง
8
8
Hang and strain
Hang and strain
Slip the hook down behind the bracket, hang the band's eyelets on the six hooks and set a bowl under the bag. Wet the bag, pour in the cooked fruit or mash and let it drip. Wash the bag in hot water after use and dry it.
9
9
Troubleshooting
Troubleshooting
Strainer problems and fixes.
Flow
Loading...
10
10
History and honest limits
History and honest limits
Kate B. Milks, St. Louis, Missouri: US 1,053,850, "Jelly-Strainer", filed 10 June 1912, granted 18 February 1913. She names no cloth and gives no sizes: the cotton bag, canvas band, stainless wire and all sizes are ours. The picture shows a modern jelly bag on a wire stand (photo Leslie Seaton, CC BY 2.0, Wikimedia Commons). Not made by us yet.
วัสดุ
6- 0.4 m2ตัวยึดตำแหน่ง
- 16 mตัวยึดตำแหน่ง
- 0.07 m2ตัวยึดตำแหน่ง
- 1 piece (2 mm, 360 mm)ตัวยึดตำแหน่ง
- 1 piece (1 mm, 15 x 120 mm)ตัวยึดตำแหน่ง
- 2 ชิ้นตัวยึดตำแหน่ง
เครื่องมือที่จำเป็น
14- ตัวยึดตำแหน่ง
- 1 vendor sell this, none ship to you yetตัวยึดตำแหน่ง
- ตัวยึดตำแหน่ง
- ตัวยึดตำแหน่ง
- ตัวยึดตำแหน่ง
- ตัวยึดตำแหน่ง
- ตัวยึดตำแหน่ง
- ตัวยึดตำแหน่ง
- ตัวยึดตำแหน่ง
- ตัวยึดตำแหน่ง
- ตัวยึดตำแหน่ง
- ตัวยึดตำแหน่ง
- ตัวยึดตำแหน่ง
- ตัวยึดตำแหน่ง
ไฟล์ออกแบบ
1วัสดุจากพิมพ์เขียวที่เชื่อมต่อ

พิมพ์เขียวนี้สร้าง
บลูพริ้นท์ที่เกี่ยวข้อง
บลูพริ้นท์เหล่านี้แบ่งปันความรู้ — เทคนิค วัสดุ หรือหลักการ
CC0 สาธารณสมบัติ
พิมพ์เขียวนี้เผยแพร่ภายใต้ CC0 คุณสามารถคัดลอก แก้ไข แจกจ่าย และใช้งานผลงานนี้เพื่อวัตถุประสงค์ใดก็ได้ โดยไม่ต้องขออนุญาต
สนับสนุนเมกเกอร์โดยซื้อสินค้าผ่านพิมพ์เขียวของพวกเขา ซึ่งพวกเขาจะได้รับ ค่าคอมมิชชันเมกเกอร์ ที่ผู้ขายกำหนด หรือสร้างเวอร์ชันใหม่ของพิมพ์เขียวนี้และรวมเป็นการเชื่อมต่อในพิมพ์เขียวของคุณเพื่อแบ่งรายได้