ศิลปะ
ความงามและสุขภาพ
งานฝีมือ
วัฒนธรรมและประวัติศาสตร์
ความบันเทิง
สิ่งแวดล้อม
อาหารและเครื่องดื่ม
วิศวกรรมย้อนรอย
วิทยาศาสตร์
กีฬา
เทคโนโลยี
อุปกรณ์สวมใส่
Arthur F. Payne · Public domain (1914)


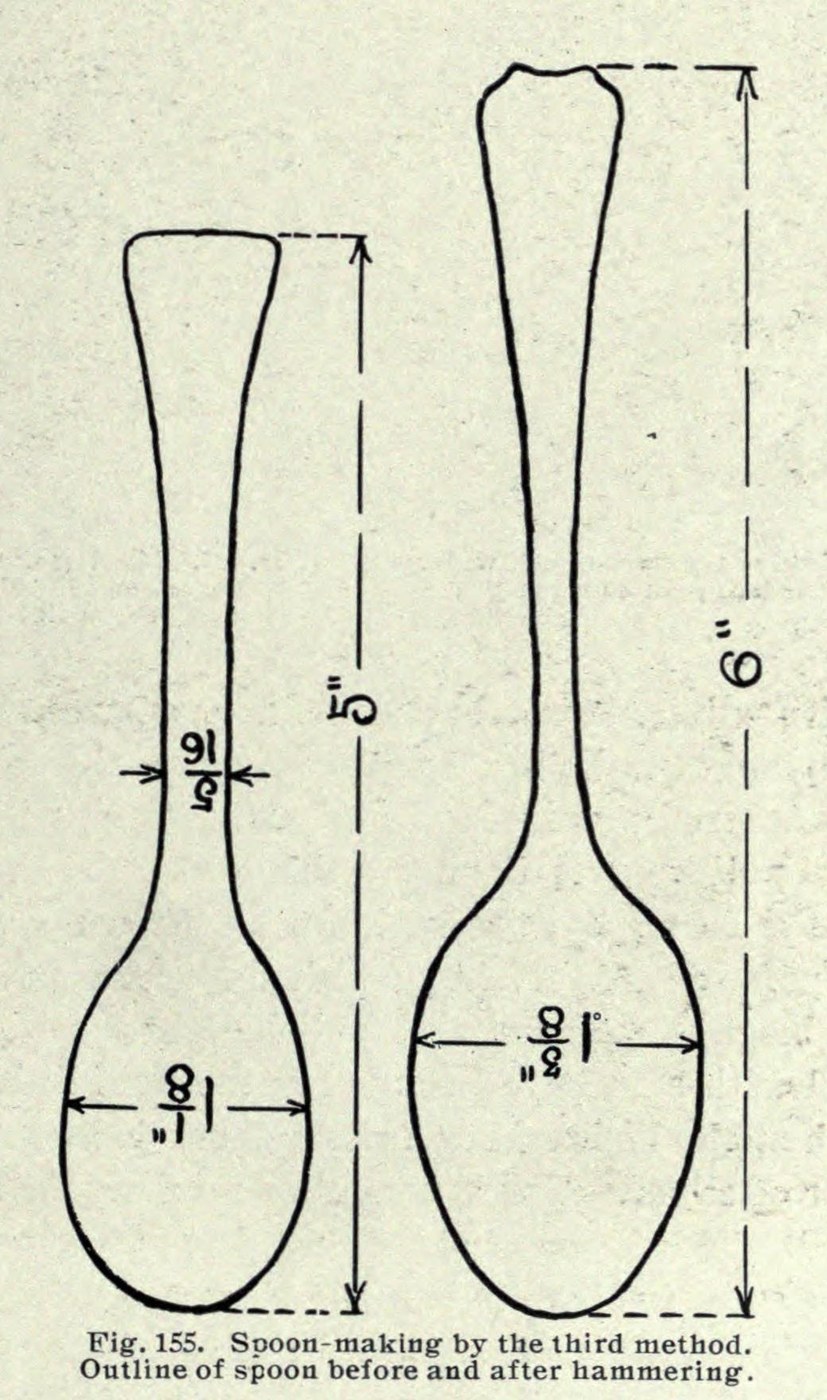
Teaspoon Sawn Short from Silver Sheet, Then Hammered Out (Payne 1914)
Saw the spoon out of flat silver smaller than it will end up: shorter, narrower in the bowl and thicker in the shank. Hammering then stretches it to full size. Arthur Payne said this method was used largely for silver teaspoons.
Source: A. F. Payne, Art Metalwork with Inexpensive Equipment (1914), pp. 180–184; annealing from his chapter XI. The millimetre figure is ours. Picture: Payne's Fig. 155, the blank and the finished spoon.
ระดับกลาง
1 day
คำแนะนำ
1
1
Saw out the short blank
Saw out the short blank
Mark out and saw the blank from 15-gauge sterling silver (about 1.45 mm; our conversion): 5 in long, the bowl 1⅛ in wide and the shank 5⁄16 in wide. The finished spoon will be 6 in long with a bowl 1⅝ in wide.
วัสดุสำหรับขั้นตอนนี้:
 เงินสเตอร์ลิงแผ่นบาง1 piece 15 gauge, enough for the 5 in blank
เครื่องมือที่ต้องใช้:
 เหล็กขีด
 เลื่อยช่างทอง
2
2
Stretch the bowl wider
Stretch the bowl wider
Hammer the bowl on a flat anvil with the ball-pein hammer, held at a slight angle towards the side you want it to grow. This makes the bowl thinner and wider.
เครื่องมือที่ต้องใช้:
 ทั่ง
 ค้อนหัวกลม
3
3
Narrow the shank with the neck hammer
Narrow the shank with the neck hammer
Hold the spoon on edge on a rounded convex stake and hammer the shank narrower with the neck hammer. This lengthens the spoon and makes the shank narrower and thicker. Widen the tip of the handle the same way as the bowl.
เครื่องมือที่ต้องใช้:
 หลัก
 ค้อนรีดคอค้อนหัวกลม
4
4
Anneal and repeat
Anneal and repeat
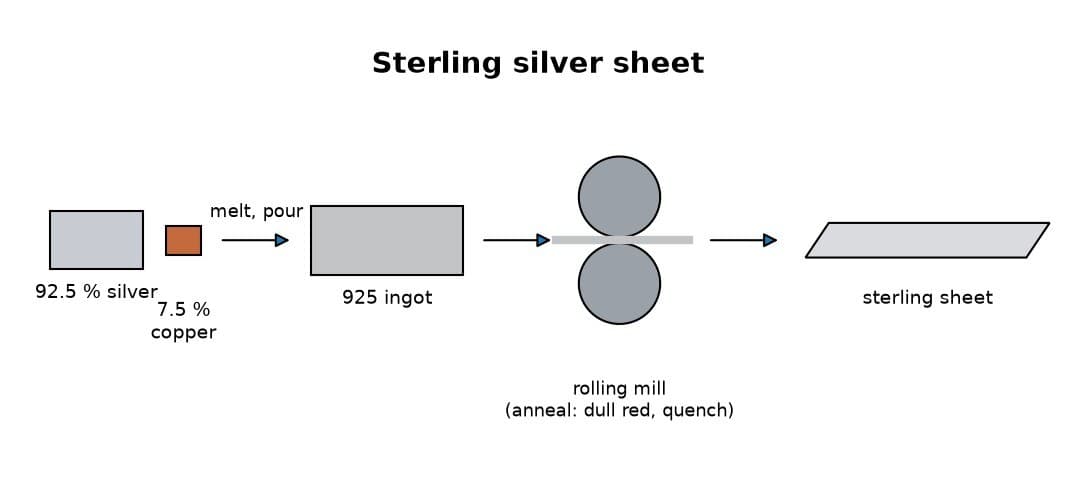
When the silver gets hard, heat it to a dull red and plunge it into water, or let it cool. Repeat the hammering and annealing until the spoon is roughly to shape.
วัสดุสำหรับขั้นตอนนี้:
 น้ำ1 as required
เครื่องมือที่ต้องใช้:
 ตะเกียงบุนเซน
 คีมคีบ
 ภาชนะแก้ว
5
5
File and planish
File and planish
File the rough edges smooth, then planish the whole spoon carefully.
เครื่องมือที่ต้องใช้:
 ตะไบ (ตะไบมือ)
 ค้อนเกลาผิวหลัก
6
6
Polish out the file marks
Polish out the file marks
Rub out all the scratches and file marks with emery cloth.
เครื่องมือที่ต้องใช้:
 ผ้าทรายอีเมอรี
7
7
Anneal to even the fire scale
Anneal to even the fire scale
Anneal the spoon thoroughly once more. Heated silver grows a thin white skin, the fire scale, and this brings it back over the spots where filing and polishing took it off, so the colour is even.
วัสดุสำหรับขั้นตอนนี้:
น้ำ1 as requiredเครื่องมือที่ต้องใช้:
ตะเกียงบุนเซนคีมคีบภาชนะแก้ว8
8
Planish with smooth hammers
Planish with smooth hammers
Planish the spoon on smooth tools with smooth, bright hammers. This makes it stiff again after the annealing.
เครื่องมือที่ต้องใช้:
ค้อนเกลาผิวทั่งหลัก9
9
Final polish with rouge
Final polish with rouge
Polish it lightly with a soft cotton flannel and a little red rouge.
เครื่องมือที่ต้องใช้:
 ผ้าขัดเครื่องประดับ
 ผงขัดแดงของช่างทอง
วัสดุ
2- 1 piece 15 gauge, enough for the 5 in blankตัวยึดตำแหน่ง
- 2 as requiredตัวยึดตำแหน่ง
เครื่องมือที่จำเป็น
14- ตัวยึดตำแหน่ง
- ตัวยึดตำแหน่ง
- ตัวยึดตำแหน่ง
- ตัวยึดตำแหน่ง
- ตัวยึดตำแหน่ง
- ตัวยึดตำแหน่ง
- ตัวยึดตำแหน่ง
- ตัวยึดตำแหน่ง
- ตัวยึดตำแหน่ง
- ตัวยึดตำแหน่ง
- ตัวยึดตำแหน่ง
- ตัวยึดตำแหน่ง
- ตัวยึดตำแหน่ง
- ตัวยึดตำแหน่ง
พิมพ์เขียวนี้สร้าง
บลูพริ้นท์ที่เกี่ยวข้อง
บลูพริ้นท์เหล่านี้แบ่งปันความรู้ — เทคนิค วัสดุ หรือหลักการ
CC0 สาธารณสมบัติ
พิมพ์เขียวนี้เผยแพร่ภายใต้ CC0 คุณสามารถคัดลอก แก้ไข แจกจ่าย และใช้งานผลงานนี้เพื่อวัตถุประสงค์ใดก็ได้ โดยไม่ต้องขออนุญาต
สนับสนุนเมกเกอร์โดยซื้อสินค้าผ่านพิมพ์เขียวของพวกเขา ซึ่งพวกเขาจะได้รับ ค่าคอมมิชชันเมกเกอร์ ที่ผู้ขายกำหนด หรือสร้างเวอร์ชันใหม่ของพิมพ์เขียวนี้และรวมเป็นการเชื่อมต่อในพิมพ์เขียวของคุณเพื่อแบ่งรายได้