ศิลปะ
ความงามและสุขภาพ
งานฝีมือ
วัฒนธรรมและประวัติศาสตร์
ความบันเทิง
สิ่งแวดล้อม
อาหารและเครื่องดื่ม
วิศวกรรมย้อนรอย
วิทยาศาสตร์
กีฬา
เทคโนโลยี
อุปกรณ์สวมใส่
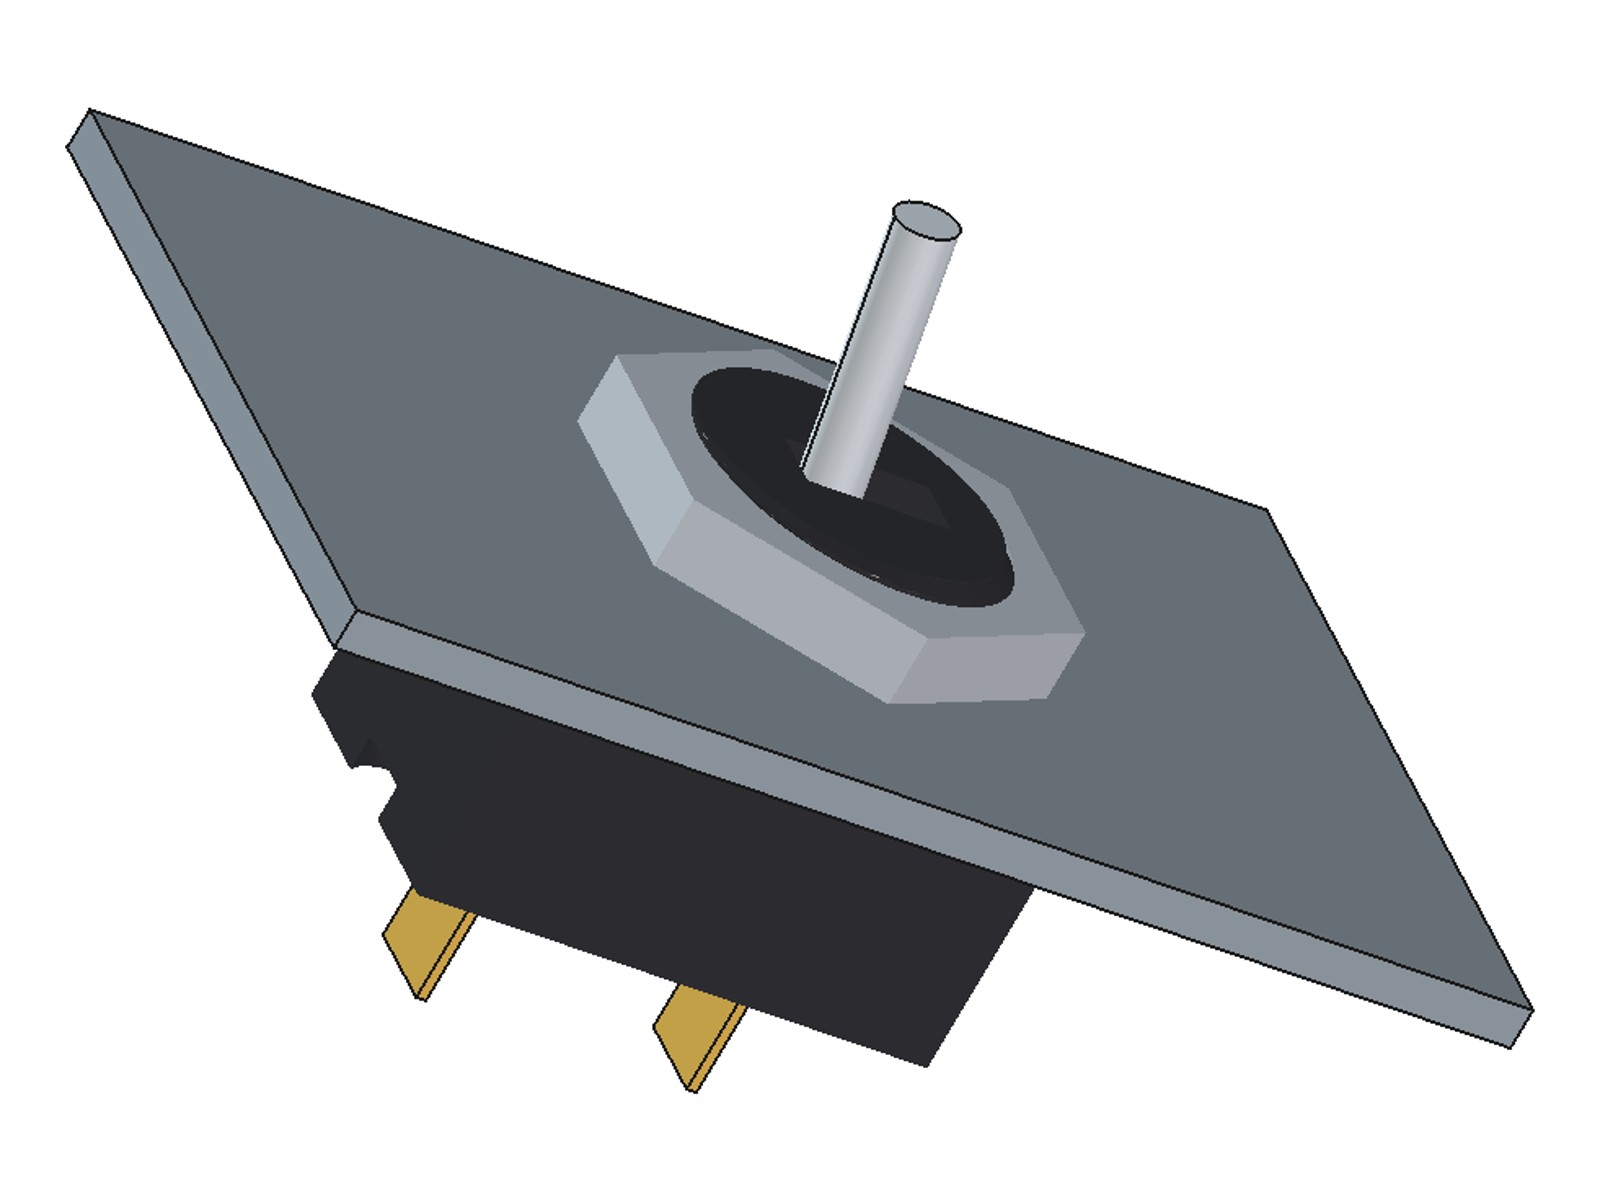


Toggle Switch for Low Voltage: a Spring-Loaded Ball Contact in a Printed Panel Body (after Batcheller, 1932)
An on-off panel toggle switch for low-voltage projects. A spring pushes a steel ball down onto two brass strips: tilt the lever one way and the ball drops into the gap between them and joins them; tilt it back and it rests in a small hole on one strip. Hugh Batcheller's 1932 design, with a printed body that bolts through a panel with a nut. Low voltage only.
ระดับกลาง
About 4 hours, mostly printing
คำแนะนำ
1
1
How a toggle switch works
How a toggle switch works
A toggle switch opened up to show its contacts (Ephraim Nowak). Ours uses a rolling steel ball as the moving contact.
2
2
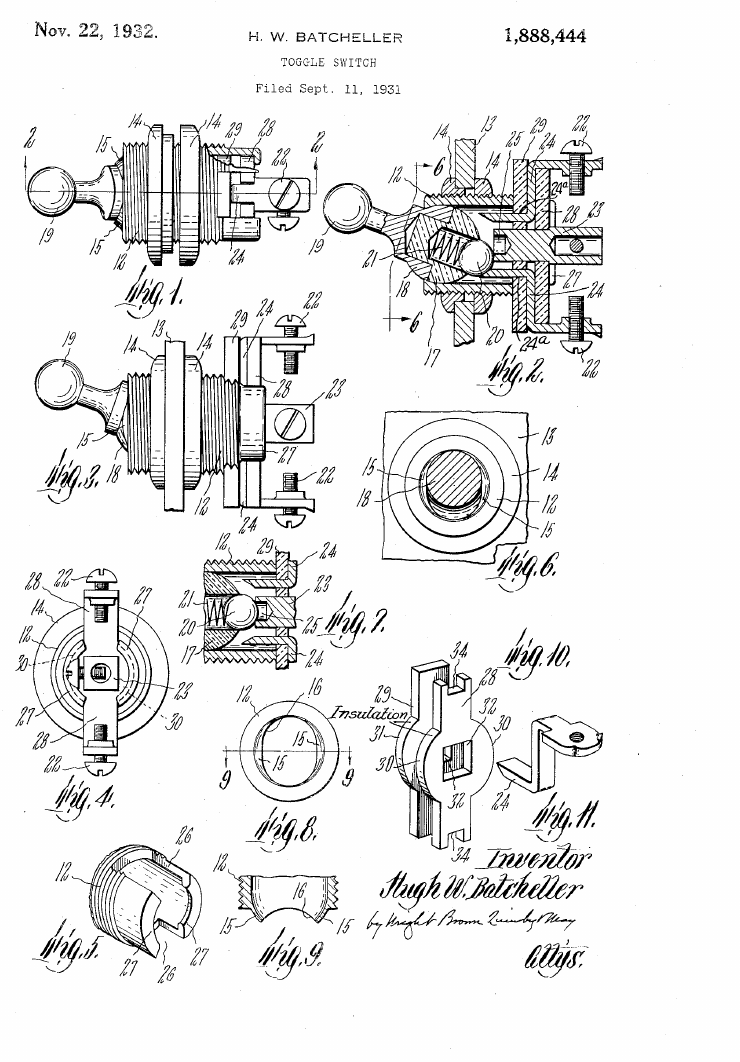
Batcheller's toggle switch, 1932
Batcheller's toggle switch, 1932
US 1,888,444: the hand piece turns on a ball seat in the threaded end of the casing, its handle in an oblong slot. A metal ball, pushed out by a spring, bridges two terminals when ON and touches only the inner one when OFF, where a detent holds it. The ball rolls as it moves, so it wears less in one spot.
3
3
Where the contact ball touches
Where the contact ball touches
กำลังโหลดสมุด Jupyter…
4
4
Print the body
Print the body
Neck up, no supports, PETG, 0.12 mm layers for the thread, 100 % infill. The ball seat is inside the neck.
วัสดุสำหรับขั้นตอนนี้:
 เส้นใย PETG6 ก.
เครื่องมือที่ต้องใช้:
 เครื่องพิมพ์สามมิติแบบเส้นใย (FDM)
5
5
Print the hand piece
Print the hand piece
Ball up, stem on the bed, 0.12 mm layers, 100 % infill.
วัสดุสำหรับขั้นตอนนี้:
เส้นใย PETG2 ก.เครื่องมือที่ต้องใช้:
เครื่องพิมพ์สามมิติแบบเส้นใย (FDM)6
6
Print the base
Print the base
Flat, pockets up. The two pockets take the brass terminals; the slots take their tails.
วัสดุสำหรับขั้นตอนนี้:
เส้นใย PETG2 ก.เครื่องมือที่ต้องใช้:
เครื่องพิมพ์สามมิติแบบเส้นใย (FDM)7
7
Print the panel nut
Print the panel nut
Flat, 0.12 mm layers. Try it on the neck: it should turn by hand.
วัสดุสำหรับขั้นตอนนี้:
เส้นใย PETG1 ก.เครื่องมือที่ต้องใช้:
เครื่องพิมพ์สามมิติแบบเส้นใย (FDM)8
8
Change the switch (optional)
Change the switch (optional)
The FreeCAD script that made the parts; change sizes and run: OUT=. freecadcmd build_all.py
build_all.pypython
เครื่องมือที่ต้องใช้:
 เวอร์เนียร์ดิจิทัล 6 นิ้ว
9
9
Print the terminal template
Print the terminal template
Print at 100 % and check the 50 x 10 mm box. Glue it to the brass sheet.
10
10
Cut the brass terminals
Cut the brass terminals
Cut the two strips from 0.5 mm brass (15.1 x 5 and 11.1 x 5 mm), file the edges smooth, drill the 2 mm detent hole in the long one and bend both tails 90 degrees on the dashed lines.
วัสดุสำหรับขั้นตอนนี้:
 แผ่นทองเหลือง1 piece (0.5 mm, 20 x 30 mm)
เครื่องมือที่ต้องใช้:
 กรรไกรตัดแผ่นโลหะ
 ตะไบโลหะ
 ชุดดอกสว่าน
 คีมปากแบน
11
11
Assemble
Assemble
Cut 22 mm of 3 mm rod and press it into the hand piece's top hole: the lever. Push the hand piece up into the body so the lever comes out of the slot. Lay each strip in the pocket it fits (the long one with the hole in the long pocket), tails through the slots. Turn the body over, drop a spring and then the 4 mm ball into the stem's bore, put the base on (it fits only one way round) and fix it with 2 x M3 x 12. Solder a wire to each tail.
วัสดุสำหรับขั้นตอนนี้:
 แท่งสเตนเลส1 piece (3 mm x 22 mm)
 ชุดสปริงกด1 piece (about 4 mm diameter, 10 mm long)
 ตลับลูกปืนเหล็ก (ชุด)1 piece (4 mm)
 สกรูหัวจมหกเหลี่ยม2 piece (M3 x 12)
 สายไฟต่อวงจร0.3 m
 ลวดตะกั่วบัดกรี1 ก.
เครื่องมือที่ต้องใช้:
 เลื่อยตัดเหล็ก
 ชุดประแจหกเหลี่ยม
 หัวแร้งบัดกรี
12
12
Fit and test it
Fit and test it
Drill a 16.5 mm hole in the panel (up to 2 mm thick), put the neck through and screw on the nut. With a multimeter: ON shows about 0 ohm between the two wires, OFF shows open.
เครื่องมือที่ต้องใช้:
ชุดดอกสว่าน มัลติมิเตอร์
13
13
Troubleshooting
Troubleshooting
Switch problems and fixes.
Flow
Loading...
14
14
History and honest limits
History and honest limits
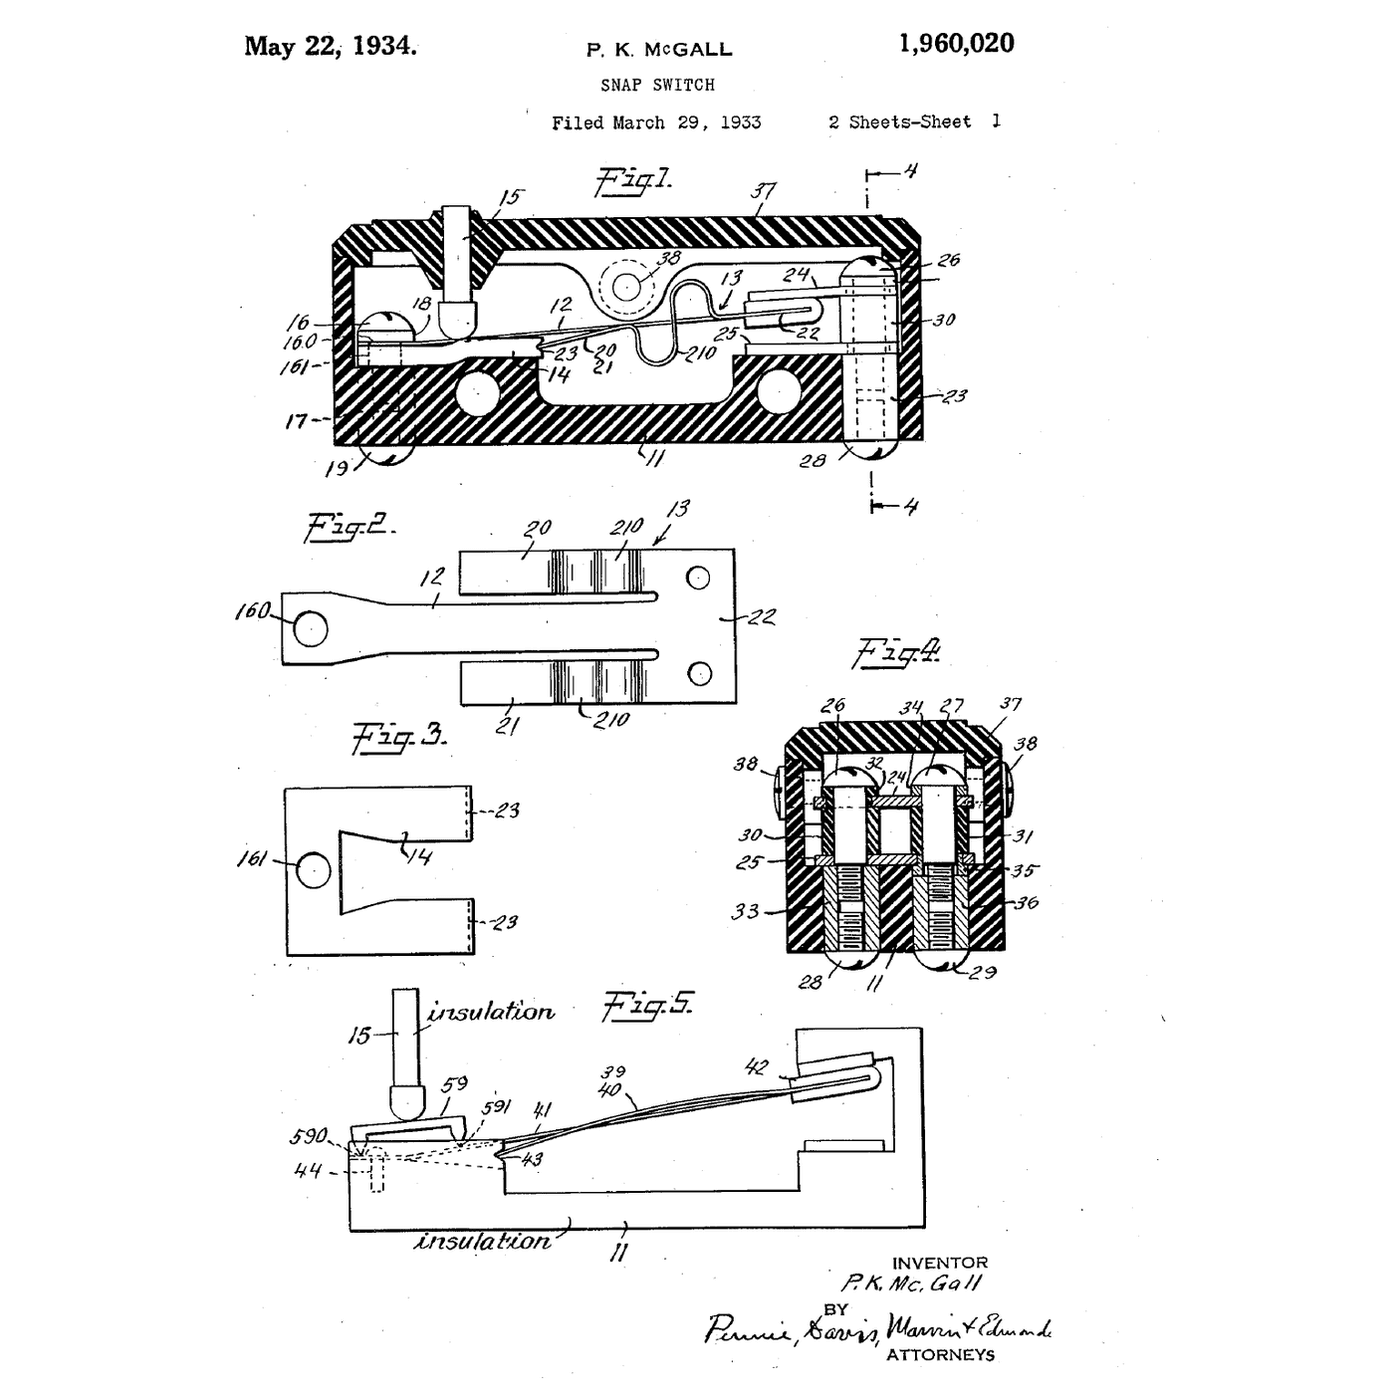
Hugh W. Batcheller, Worcester, Mass.: US 1,888,444, "Toggle Switch", filed 11 Sept 1931, granted 22 Nov 1932. His casing was a metal tube with crimped ears holding insulators; ours is printed. Ours: every size and the printed parts. Use it for low voltage only (batteries, 5-12 V supplies): never for mains. Its current rating has not been tested. Not built or tested by us yet.
วัสดุ
8- 11 ก.ตัวยึดตำแหน่ง
- 1 piece (0.5 mm, 20 x 30 mm)ตัวยึดตำแหน่ง
- 1 piece (3 mm x 22 mm)ตัวยึดตำแหน่ง
- 1 piece (about 4 mm diameter, 10 mm long)ตัวยึดตำแหน่ง
- 1 piece (4 mm)ตัวยึดตำแหน่ง
- 2 piece (M3 x 12)ตัวยึดตำแหน่ง
- 0.3 mตัวยึดตำแหน่ง
- 1 ก.ตัวยึดตำแหน่ง
เครื่องมือที่จำเป็น
10- ตัวยึดตำแหน่ง
- ตัวยึดตำแหน่ง
- ตัวยึดตำแหน่ง
- ตัวยึดตำแหน่ง
- ตัวยึดตำแหน่ง
- ตัวยึดตำแหน่ง
- ตัวยึดตำแหน่ง
- ตัวยึดตำแหน่ง
- 2 vendors sell this, none ship to you yetตัวยึดตำแหน่ง
- ตัวยึดตำแหน่ง
ไฟล์ออกแบบ
5พิมพ์เขียวนี้สร้าง

บลูพริ้นท์ที่เกี่ยวข้อง
บลูพริ้นท์เหล่านี้แบ่งปันความรู้ — เทคนิค วัสดุ หรือหลักการ

CC0 สาธารณสมบัติ
พิมพ์เขียวนี้เผยแพร่ภายใต้ CC0 คุณสามารถคัดลอก แก้ไข แจกจ่าย และใช้งานผลงานนี้เพื่อวัตถุประสงค์ใดก็ได้ โดยไม่ต้องขออนุญาต
สนับสนุนเมกเกอร์โดยซื้อสินค้าผ่านพิมพ์เขียวของพวกเขา ซึ่งพวกเขาจะได้รับ ค่าคอมมิชชันเมกเกอร์ ที่ผู้ขายกำหนด หรือสร้างเวอร์ชันใหม่ของพิมพ์เขียวนี้และรวมเป็นการเชื่อมต่อในพิมพ์เขียวของคุณเพื่อแบ่งรายได้