ศิลปะ
ความงามและสุขภาพ
งานฝีมือ
วัฒนธรรมและประวัติศาสตร์
ความบันเทิง
สิ่งแวดล้อม
อาหารและเครื่องดื่ม
วิศวกรรมย้อนรอย
วิทยาศาสตร์
กีฬา
เทคโนโลยี
อุปกรณ์สวมใส่
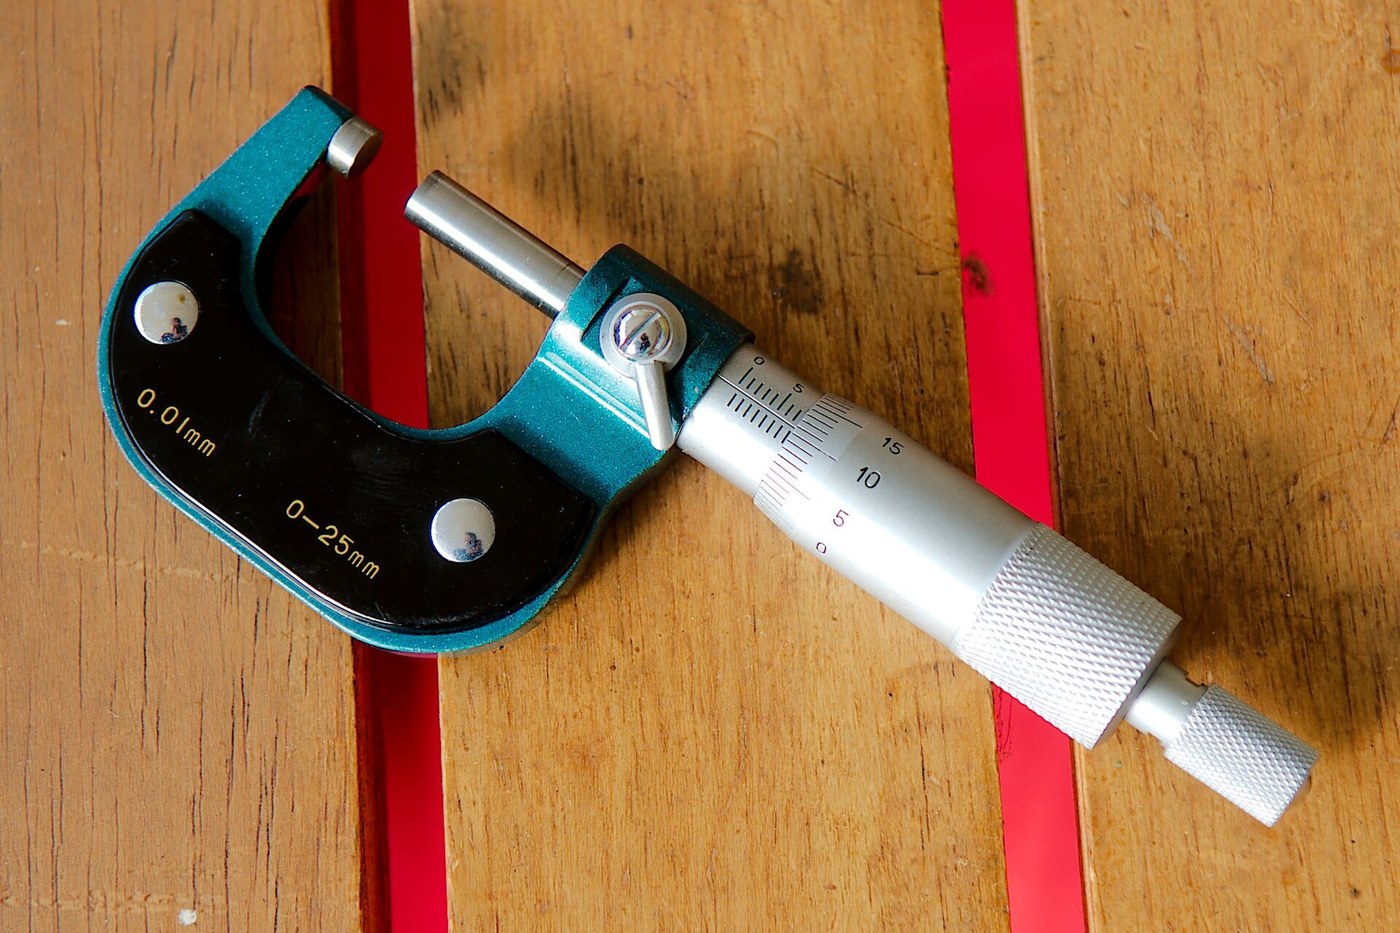


Using a Micrometer: Zero, Feel, and the Ratchet
A micrometer is a screw with a scale wrapped around it. That is the entire idea: turn a known thread through a known fraction of a turn and you have moved the spindle a known distance, magnified from an invisible axial motion into a large, readable rotation.
It resolves ten times finer than a vernier caliper, and it is ten times easier to get a wrong number out of, because the thing that decides the reading is not the scale — it is how hard you squeezed. Learning a micrometer is mostly learning a consistent FEEL, and the ratchet exists to take that decision away from your hand.
This rung assumes you can read a vernier, because the finest micrometers carry one on the sleeve.
เริ่มต้น
3 hours
คำแนะนำ
1
1
Work out what one turn is worth
Work out what one turn is worth
Close the micrometer, then open it exactly one full turn of the thimble and read how far the spindle moved on the sleeve scale.
On a standard metric micrometer the spindle thread has a pitch of 0.5 mm, so one turn is 0.5 mm and the 50 divisions around the thimble are 0.01 mm each. On an inch micrometer the thread is 40 turns per inch, so one turn is 0.025 inch and the 25 thimble divisions are 0.001 inch each.
Do this once on your own instrument rather than taking it on trust. It also explains the instrument's range: a 0-25 mm micrometer is not arbitrary, it is the length of usable thread, which is why larger sizes come as separate frames rather than a longer screw.
เครื่องมือที่ต้องใช้:
 ไมโครมิเตอร์
2
2
Read sleeve then thimble, and mind the half-millimetre
Read sleeve then thimble, and mind the half-millimetre
Read the largest whole millimetre visible on the sleeve. Check the row BELOW the line for a half-millimetre mark that is also uncovered. Then read the thimble division against the sleeve's datum line.
7 mm on top, the 0.5 mark showing beneath, and 28 on the thimble is 7 + 0.5 + 0.28 = 7.78 mm.
Missing an uncovered half-millimetre mark is the classic micrometer blunder and it is worth exactly 0.5 mm — fifty times the resolution. It happens because the thimble edge sits close to the mark when the reading is near a half. When the thimble reads near 0 or near 50, look twice at that lower row.
เครื่องมือที่ต้องใช้:
ไมโครมิเตอร์ แว่นขยาย
3
3
Use the ratchet, every time, and find out why
Use the ratchet, every time, and find out why
Measure one piece of bar three times using the thimble directly and squeezing as you think right. Then measure it three times more, closing the last part of the travel on the ratchet or friction thimble until it clicks two or three times. Compare the two sets.
The hand-tightened readings will scatter and will usually read SMALL, because a micrometer frame flexes and the part compresses under load. The ratchet applies the same modest force every time, so the error becomes a constant instead of a variable — and a constant error can be calibrated out, while scatter cannot.
This is the single biggest improvement available to a beginner with a micrometer, and it costs nothing.
วัสดุสำหรับขั้นตอนนี้:
 เหล็กกล้าแท่งดิบ1 ชิ้น
เครื่องมือที่ต้องใช้:
ไมโครมิเตอร์4
4
How much your grip is worth
How much your grip is worth
กำลังโหลดสมุด Jupyter…
วัสดุสำหรับขั้นตอนนี้:
เหล็กกล้าแท่งดิบ1 ชิ้น แผ่นแบนอะลูมิเนียม1 ชิ้น
เครื่องมือที่ต้องใช้:
ไมโครมิเตอร์ เครื่องคิดเลข
5
5
Set the zero, and check it against something real
Set the zero, and check it against something real
For a 0-25 mm micrometer, wipe the faces and close them on the ratchet; the thimble should read zero. If it does not, the sleeve is adjusted with the spanner supplied, or the thimble is released and re-indexed, depending on the instrument.
For any larger range the anvil never closes on the spindle, so you zero it against a setting standard — a length bar supplied with the micrometer, or a wrung stack of gauge blocks.
Then verify at a size in the middle of the range rather than only at zero. A micrometer can be perfect at zero and wrong at 20 mm if the thread is worn unevenly, and that is exactly the failure a zero check cannot see.
เครื่องมือที่ต้องใช้:
ไมโครมิเตอร์ ชุดเกจบล็อกเซรามิก
 ผ้าฝ้าย
6
6
Measure a round bar properly: rock it and take the largest
Measure a round bar properly: rock it and take the largest
Bring the anvils onto the bar and rock the micrometer gently across the diameter while closing the last of the travel on the ratchet. Take the LARGEST reading.
Any line across a circle that does not pass through the centre is shorter than the diameter, so every error of alignment reads small and never large. The maximum you can find is the diameter.
Then measure the bar at three places along its length and at two angles at each place. You are now measuring not just size but TAPER and OUT-OF-ROUNDNESS, and a single reading has been hiding both of them. Most stock is not as round as it looks, and the difference matters the moment it has to fit something.
วัสดุสำหรับขั้นตอนนี้:
 แท่งทองเหลือง1 ชิ้น
เครื่องมือที่ต้องใช้:
ไมโครมิเตอร์วัสดุ
3- 1 ชิ้นตัวยึดตำแหน่ง
- 1 ชิ้นตัวยึดตำแหน่ง
- 1 ชิ้นตัวยึดตำแหน่ง
บลูพริ้นท์ที่เกี่ยวข้อง
บลูพริ้นท์เหล่านี้แบ่งปันความรู้ — เทคนิค วัสดุ หรือหลักการ

CC0 สาธารณสมบัติ
พิมพ์เขียวนี้เผยแพร่ภายใต้ CC0 คุณสามารถคัดลอก แก้ไข แจกจ่าย และใช้งานผลงานนี้เพื่อวัตถุประสงค์ใดก็ได้ โดยไม่ต้องขออนุญาต
สนับสนุนเมกเกอร์โดยซื้อสินค้าผ่านพิมพ์เขียวของพวกเขา ซึ่งพวกเขาจะได้รับ ค่าคอมมิชชันเมกเกอร์ ที่ผู้ขายกำหนด หรือสร้างเวอร์ชันใหม่ของพิมพ์เขียวนี้และรวมเป็นการเชื่อมต่อในพิมพ์เขียวของคุณเพื่อแบ่งรายได้