ARTE
BELLEZA Y BIENESTAR
ARTESANÍA
CULTURA E HISTORIA
ENTRETENIMIENTO
MEDIO AMBIENTE
COMIDA Y BEBIDAS
INGENIERÍA INVERSA
CIENCIAS
DEPORTES
TECNOLOGÍA
TECNOLOGÍA VESTIBLE
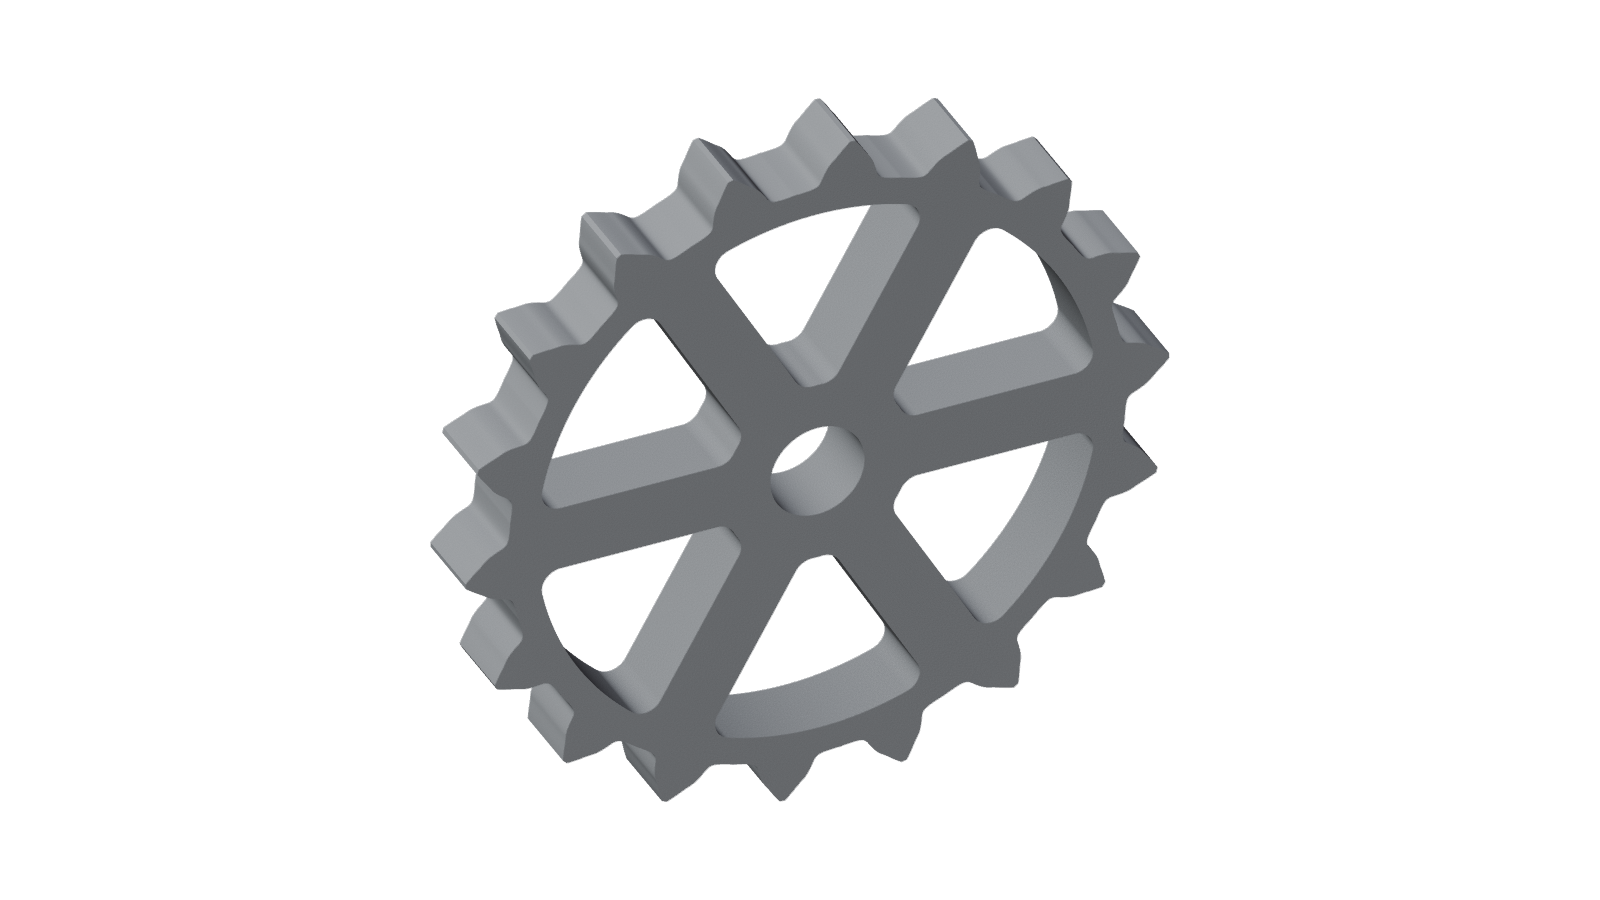


A Sprocket Wheel Cut by the Fellows Cutter: Fig. 20 Rolled Out in Full
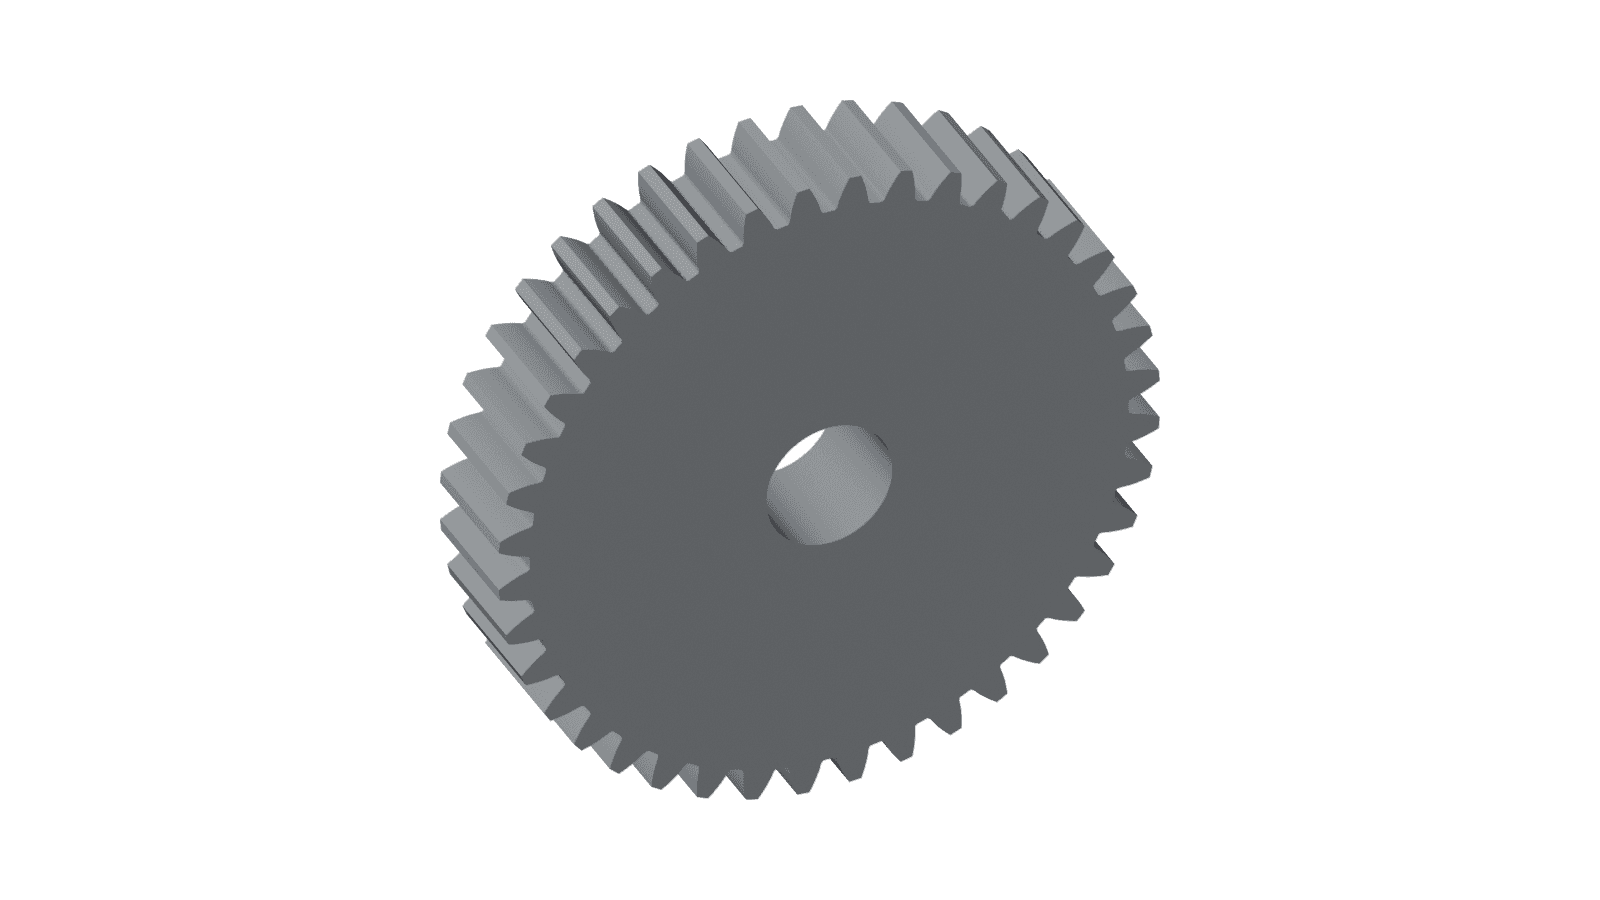
The sprocket wheel that Edwin R. Fellows's cutter c3 is cutting in Fig. 20 of US 579,708 (1897), completed all the way round. The traced cutter was rolled against the blank as his machine rolls them, and every position was cut away. Its tooth count, centre distance and rim come from measurements on the drawing.
Overlaid on the patent drawing, the generated teeth land on Fellows's own drawn teeth. The drawing shows the rim and one broken-off arm, so the arm count, hub, bore and thickness are stated choices.
Principiante
Several hours of printing; the slicer reports the exact time
Instrucciones
1
1
What Fig. 20 shows, and what was measured
What Fig. 20 shows, and what was measured
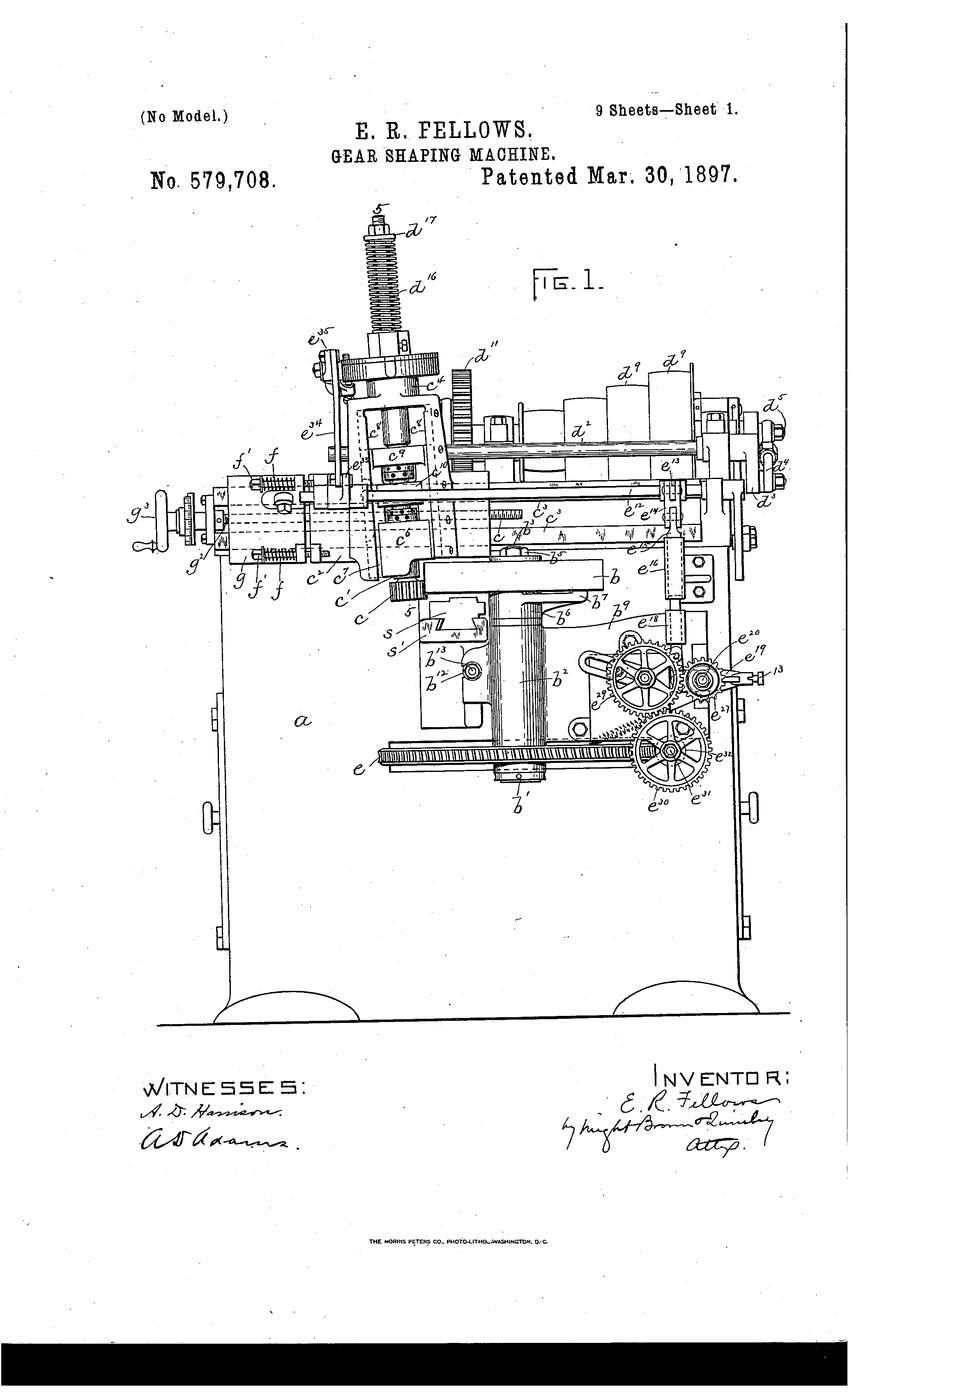
Fig. 20 shows cutter c3 rolling against a sprocket rim on an arm. One tooth of the rim is finished, one sits in a recess of the cutter, and a dashed line marks the next before it is cut. Measured on the 300 dpi scan at the cutter's scale: two adjacent drawn teeth are 20.5 to 21.0 degrees apart about the rim's centre, depending on how each tooth's centre is taken, which gives 17.2 to 17.6 teeth. Both 17 and 18 were generated and fitted to the drawn teeth. The 18-tooth wheel lies closer: its median distance to the drawing is 1.0 mm, against 1.4 mm for 17. The cutter's centre is 119.4 mm from the wheel's. The uncut rim surface is at a 93.6 mm radius. With those numbers, rolling the cutter cut a root at 81.95 mm, against the drawn root line at 82.26 mm.
2
2
The model in 3D
The model in 3D
Spin the wheel in the viewer. Its eighteen teeth were cut by rolling the Fig. 20 cutter against the rim, not drawn. Overlaid on Fellows's drawing, they sit on his finished tooth, on the tooth in the cutter's recess and on his dashed outline. It was built in FreeCAD and saved as one joined .blend mesh, editable in free Blender.
Herramientas necesarias:
 Ordenador de sobremesa
3
3
Print it
Print it
Lay it flat on one face. It needs no supports, but the bed must be at least 187 mm across. PLA is fine for a display model.
Materiales para este paso:
 Filamento de PLA - negro1 kit
Herramientas necesarias:
 Impresora 3D
Materiales
1- Marcador de posición
Herramientas requeridas
2- Marcador de posición
- Marcador de posición
Materiales de Blueprints conectados

Blueprints relacionados
Estos blueprints comparten conocimiento — técnicas, materiales o principios

CC0 Dominio público
Este Blueprint se publica bajo CC0. Eres libre de copiar, modificar, distribuir y usar este trabajo para cualquier propósito, sin pedir permiso.
Apoya al Maker comprando productos a través de su Blueprint, donde gana una Comisión del Maker establecida por los vendedores, o crea una nueva iteración de este Blueprint e inclúyela como conexión en tu propio Blueprint para compartir ingresos.