SENI
KECANTIKAN & KESEJAHTERAAN
KRAFTANGAN
BUDAYA & SEJARAH
HIBURAN
ALAM SEKITAR
MAKANAN & MINUMAN
KEJURUTERAAN TERBALIK
SAINS
SUKAN
TEKNOLOGI
BOLEH PAKAI
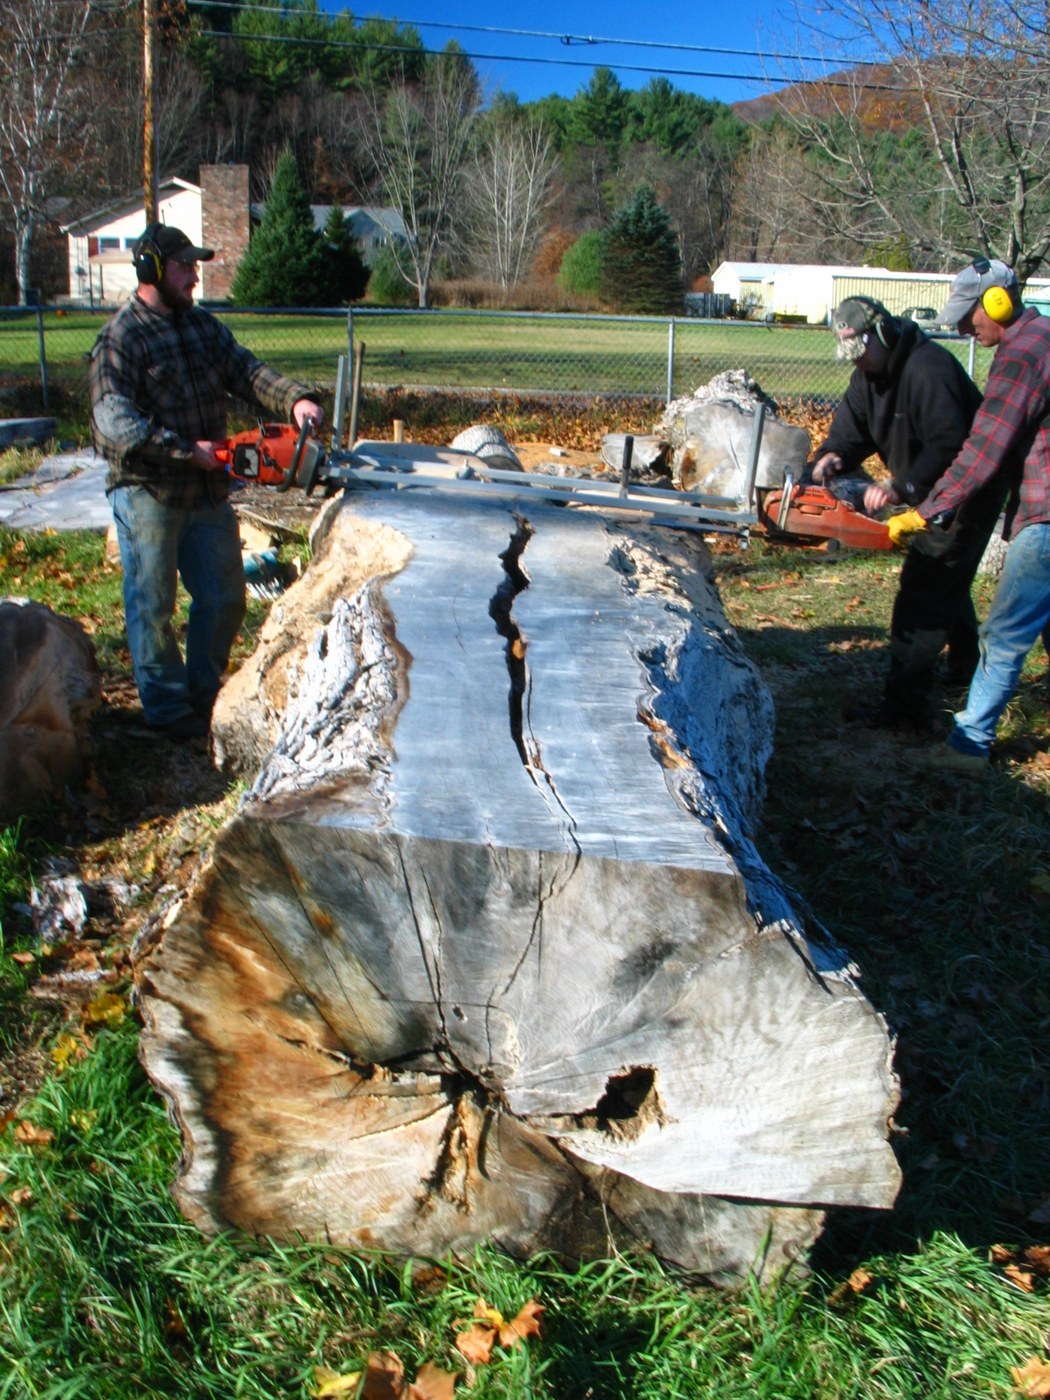


Pine Boards with a Chainsaw Mill
A chainsaw mill is a frame that holds the saw's bar flat at a set height, so the chain rips a log lengthways into boards. The first cut rides on a straight board screwed to the log; every later cut rides on the flat face before it. The green boards are then stacked on stickers to air-dry.
Pine dries fast: a 25 mm board can reach about 14 % moisture in 60 to 90 days in good drying weather. Oak and other slow species take far longer.
Pertengahan
1 day milling, 2–3 months drying
Arahan
1
1
Pick and prop the log
Pick and prop the log
Choose a straight pine log, 2.5–3 m long, without large knots. Prop it on two short logs so it cannot roll and the chain will not reach the ground.
Bahan untuk langkah ini:
 Balak kayu lembut1 keping
Alatan diperlukan:
 Pita Ukur
2
2
Fit the mill
Fit the mill
Bolt the mill to the chainsaw bar following its maker's instructions. A ripping chain cuts along the grain faster and smoother than a crosscut chain.
Alatan diperlukan:
 Gergaji mesin (gred perhutanan profesional)
 Rangka belah gergaji mesin
3
3
Screw on the guide board
Screw on the guide board
Screw a straight board along the top of the log, level from end to end, as the rail for the first cut. Check it with the straightedge and level.
Bahan untuk langkah ini:
 Skru kayu6 keping
Alatan diperlukan:
 Papan pain
 Gerudi Tanpa Wayar
 Pembaris lurus
 Aras Cecair
4
4
First cut
First cut
Wearing helmet with visor, ear protection, gloves and boots, run the mill along the guide board and take off the top slab. Remove the guide board.
Alatan diperlukan:
Gergaji mesin (gred perhutanan profesional)Rangka belah gergaji mesin Topi keledar keselamatan
 Penutup telinga pelindung
 Sarung Tangan Kerja Kulit
 But keselamatan berhujung keluli
5
5
Cut the boards
Cut the boards
Set the mill a few millimetres thicker than the finished board, to allow for shrinking and planing. Run each cut on the flat face left by the one before.
Alatan diperlukan:
Gergaji mesin (gred perhutanan profesional)Rangka belah gergaji mesinPita Ukur6
6
Seal the ends
Seal the ends
Paint both ends of every board with end sealer the same day, to stop them splitting as they dry.
Bahan untuk langkah ini:
 Pengedap hujung (lilin parafin)0.5 liter
7
7
Sticker the stack
Sticker the stack
On a level base at least 30 cm off the ground, lay the boards in layers with a gap between them, each layer on stickers every 40–60 cm, the stickers one above the other.
Bahan untuk langkah ini:
 Sesendal kayu (penyendal pengeringan)30 keping
Alatan diperlukan:
 Palet kayuAras Cecair
8
8
Cover and weight
Cover and weight
Cover the top of the stack against rain and lay weight on it to keep the top boards flat; leave the sides open to the air.
Alatan diperlukan:
 Terpal
9
9
Measure the moisture
Measure the moisture
After 2 months, read a board from the middle of the stack. Air-dry outdoors reaches about 12–15 %; bring boards for furniture indoors to settle at 6–8 % before working them.
Alatan diperlukan:
 Meter lembapan
10
10
Troubleshooting
Troubleshooting
Chainsaw milling troubleshooting.
Flow
Loading...
Bahan
4- 1 kepingPemegang Tempat
- 6 kepingPemegang Tempat
- 0.5 literPemegang Tempat
- Pemegang Tempat
Alatan Diperlukan
14- 1 vendor sell this, none ship to you yetPemegang Tempat
- Pemegang Tempat
- Pemegang Tempat
- Pemegang Tempat
- 1 vendor sell this, none ship to you yetPemegang Tempat
- Pemegang Tempat
- Pemegang Tempat
- Pemegang Tempat
- Pemegang Tempat
- Pemegang Tempat
- Pemegang Tempat
- Pemegang Tempat
- Pemegang Tempat
- Pemegang Tempat
Blueprint ini membuat



Blueprint berkaitan
Blueprint ini berkongsi pengetahuan — teknik, bahan atau prinsip
CC0 Domain Awam
Blueprint ini dikeluarkan di bawah CC0. Anda bebas menyalin, mengubah, mengedar, dan menggunakan karya ini untuk sebarang tujuan, tanpa meminta kebenaran.
Sokong Pembuat dengan membeli produk melalui Blueprint mereka di mana mereka memperoleh Komisen Pembuat ditetapkan oleh Penjual, atau cipta iterasi baru Blueprint ini dan sertakan ia sebagai sambungan dalam Blueprint anda sendiri untuk berkongsi hasil.