Kerjasama
SENI
KECANTIKAN & KESEJAHTERAAN
KRAFTANGAN
BUDAYA & SEJARAH
HIBURAN
ALAM SEKITAR
MAKANAN & MINUMAN
KEJURUTERAAN TERBALIK
SAINS
SUKAN
TEKNOLOGI
BOLEH PAKAI
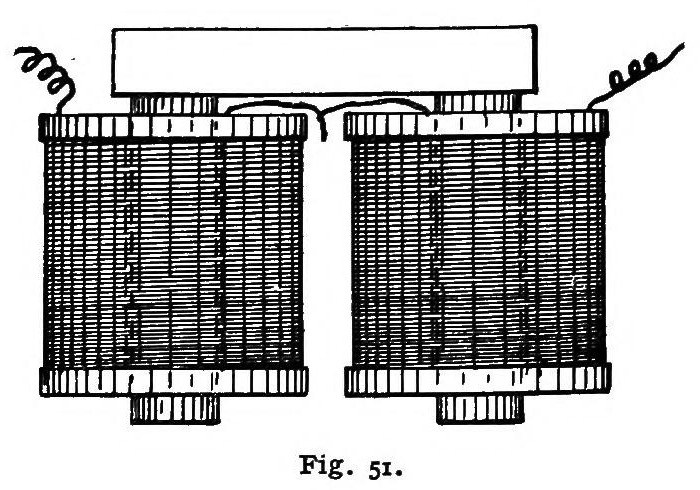

Electromagnet: Horseshoe Holding Magnet Sized by Its Pull (Underhill, 1903)
A holding electromagnet in its practical horseshoe form: two iron cores, each wound with wire, fastened to an iron yoke, and an iron armature across the poles. You size it from the pull you need: the pull sets the pole area, and the supply voltage sets the wire.
Variable: the pull. Each pound needs a set area of pole, depending on the iron.
Source: C. R. Underhill, The Electromagnet (1903), pp. 92, 106-118, 150. Unknown: sizes and the ampere-turns. Picture: Fig. 51 of the book.
Pertengahan
Unknown
Arahan
1
1
Size the poles from the pull
Size the poles from the pull
Pull P (pounds) = B² × A / 72,134,000, where B is the flux density in lines per square inch and A the pole area in square inches. Working densities: wrought iron 90,000, cast steel 85,000, Mitis iron 80,000, ordinary cast iron 50,000, which give 112.3, 100.1, 88.72 and 34.66 lb per square inch of pole. Divide the pull you need by that figure to get the pole area. Underhill's example, for cast steel taken at 90,000: 10 lb needs 0.089 square inch, a core 0.336 inch across. A two-pole magnet holds twice the weight of a single pole at the same induction.
Alatan diperlukan:
 Dimensi tidak diketahui
2
2
Make the cores, yoke and armature
Make the cores, yoke and armature
Make the practical horseshoe magnet in three pieces besides the armature: two round cores and a yoke (back iron) to join them. Make an armature to lie across the two pole ends. Face the poles and the armature accurately; an uneven contact spreads the lines unevenly and weakens the pull. Ours: wrought iron. Not given: sizes, how the cores are fastened.
Bahan untuk langkah ini:
 Bar besi tempa1 two cores, yoke, armature
Alatan diperlukan:
 Mesin Pelarik LogamDimensi tidak diketahui
3
3
Choose the wire for the supply
Choose the wire for the supply
Design the coil to stand the full supply voltage without overheating; never put a resistor in series with the magnet, as that wastes power and makes the magnet weaker. Pick the wire size that makes the coil's resistance equal to that of the line and the source, then try the next larger size, and keep the one giving more ampere-turns. A coil rises about 100 °F at about 0.9 watt per square inch of surface for a thin telephone-ringer coil, or 0.33 for a thick one (4 1/8 in across, 7 in long, 1 7/16 in thick), and the rise grows in proportion to the watts. Ours: the supply, e.g. 12 V.
Alatan diperlukan:
 Unit kuasa arus terusDimensi tidak diketahui
4
4
Wind the cores and fasten them to the yoke
Wind the cores and fasten them to the yoke
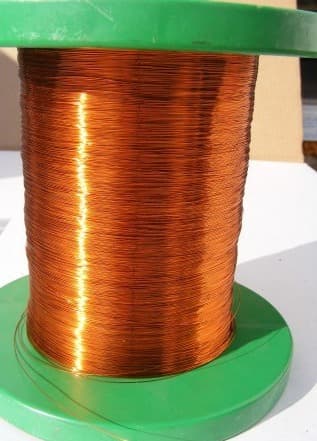
Wind the wire directly onto each core between insulating end heads, and fasten the wound cores to the yoke. The joints between cores and yoke lose a little pull. Ours: enamelled copper wire. Not given: the winding method, the insulation.
Bahan untuk langkah ini:
 Dawai Kuprum Bersalut Enamel1 two coils
 Bahan penebat tidak diketahui1 end heads and core insulation
 Logam tidak diketahui1 core fastenings
Alatan diperlukan:
 Kaedah lilitan tidak diketahuiMesin Pelarik Logam
5
5
Switch on and hold
Switch on and hold
Connect the coils to the supply and put the armature against the faced poles: the magnet holds it with the pull it was sized for. When the armature touches the poles there is practically no leakage between them.
Alatan diperlukan:
Unit kuasa arus terusBahan
4- 1 two cores, yoke, armaturePemegang Tempat
- 1 two coilsPemegang Tempat
- 1 end heads and core insulationPemegang Tempat
- 1 core fasteningsPemegang Tempat
Alatan Diperlukan
4- Pemegang Tempat
- Pemegang Tempat
- Pemegang Tempat
- Pemegang Tempat
Bahan Blueprint Bersambung


Blueprint ini membuat

CC0 Domain Awam
Blueprint ini dikeluarkan di bawah CC0. Anda bebas menyalin, mengubah, mengedar, dan menggunakan karya ini untuk sebarang tujuan, tanpa meminta kebenaran.
Sokong Pembuat dengan membeli produk melalui Blueprint mereka di mana mereka memperoleh Komisen Pembuat ditetapkan oleh Penjual, atau cipta iterasi baru Blueprint ini dan sertakan ia sebagai sambungan dalam Blueprint anda sendiri untuk berkongsi hasil.