SENI
KECANTIKAN & KESEJAHTERAAN
KRAFTANGAN
BUDAYA & SEJARAH
HIBURAN
ALAM SEKITAR
MAKANAN & MINUMAN
KEJURUTERAAN TERBALIK
SAINS
SUKAN
TEKNOLOGI
BOLEH PAKAI
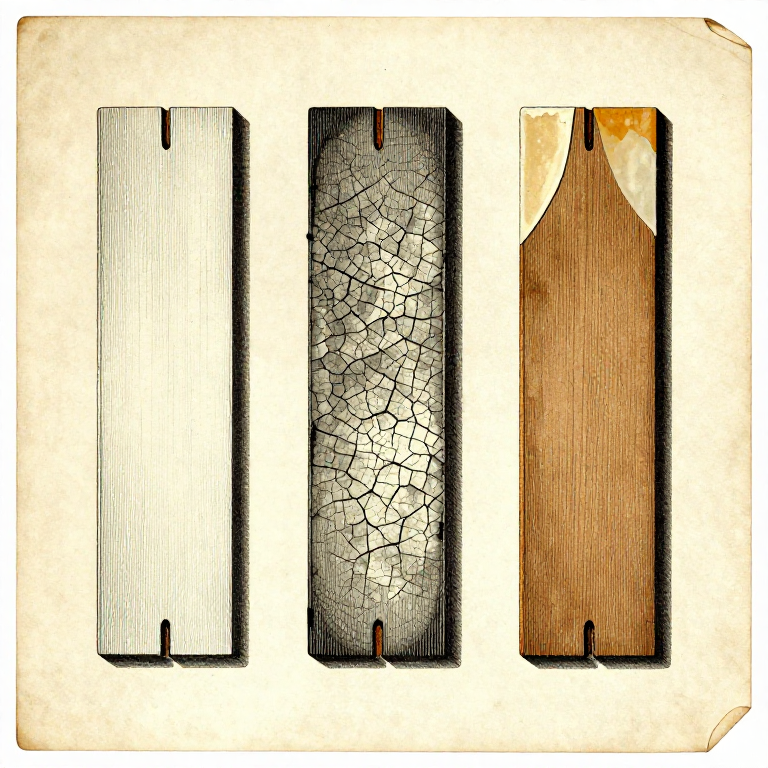


Squeeze-Out, Starvation and Reading a Joint That Failed
A broken joint is evidence. The two faces record exactly what went wrong, and reading them takes a minute and tells you what to change.
Most makers throw the pieces away and try again with more glue and more pressure — which is the wrong response to three of the four common failures, and makes one of them considerably worse.
This rung is the diagnostic table. It pairs with the fault-finding approach used elsewhere on Youblob: look at what the failure actually shows before deciding what to do about it.
Pertengahan
2 hours
Arahan
1
1
Bare wood on both faces: it never bonded
Bare wood on both faces: it never bonded
Two clean surfaces, little or no glue visible, and the parts separated with much less force than they should have needed.
This is an ADHESION failure and the cause is almost always contamination or a sealed surface: oil, old finish, silicone polish, release agent, or an oily timber like teak that was not wiped with solvent. Occasionally it is an adhesive that simply does not bond that material — PVA on metal or on most plastics will do exactly this.
The fix is in the preparation rung, not in the glue bottle. Clean, abrade, and check that the adhesive is rated for both materials.
Bahan untuk langkah ini:
 Papan Kayu Lembut Kering2 keping
Alatan diperlukan:
 Kanta Pembesar Tukang Emas
 Alkohol ternyahasli
2
2
A thick brittle line: too much glue, or it cured wrong
A thick brittle line: too much glue, or it cured wrong
A visible glue line, glue on both faces, and the break running through the adhesive itself. That is a COHESIVE failure.
For PVA it usually means the film was too thick — it shrank as it dried and cracked internally — or it cured too cold and chalked instead of forming a proper film. Chalky white crumbs along the line are the signature of cold curing, and no amount of extra time fixes it.
For epoxy it means the mix was wrong. Two-part epoxy needs its stated ratio measured, not estimated, and thorough mixing including the sides of the pot. An under-mixed epoxy stays tacky or rubbery and never reaches strength.
Bahan untuk langkah ini:
 Epoksi dua komponen1 keping
 Gam Kayu PVA1 keping
Alatan diperlukan:
Kanta Pembesar Tukang Emas3
3
Dry patches in a glued area: starvation
Dry patches in a glued area: starvation
Glue around the edges of the joint and dry, unglued wood in the middle. The joint was STARVED — squeezed so hard that the adhesive was driven out before it cured.
This is the failure that punishes the instinct to clamp harder. It also happens with too little glue, with a joint left unclamped so long that the glue skinned before contact, and on end grain that drank the glue away — which the first rung covers.
The fix is more glue and LESS pressure, which is counter-intuitive enough that people rarely try it. A continuous fine bead of squeeze-out along the whole joint is the target; streams of it running down the work mean you have gone past.
Bahan untuk langkah ini:
Gam Kayu PVA1 keping Papan Kayu Keras2 keping
Alatan diperlukan:
 Berus gam
 Pengapit CKanta Pembesar Tukang Emas
4
4
Cleaning squeeze-out: wet, leathery, or cured
Cleaning squeeze-out: wet, leathery, or cured
There are three moments to deal with squeeze-out and they call for three different methods.
WET: wipe with a barely damp cloth. Tempting, and the trap is that water spreads thinned glue into the surrounding grain where it seals the wood invisibly — and shows up as a pale patch under the finish. Use as little water as possible, or skip this stage.
LEATHERY, after twenty minutes or so: the best moment. The bead has set enough to lift off in one rubbery piece with a chisel or a scraper, and it takes nothing with it. CURED: it has to be pared or scraped off, and you risk digging into the surface. Masking tape applied before assembly avoids the whole question.
Alatan diperlukan:
 Kain KapasKanta Pembesar Tukang Emas
 Pelbagai kertas pasir
 Pita pelekat kertas
Bahan
4- 2 kepingPemegang Tempat
- 1 kepingPemegang Tempat
- 2 kepingPemegang Tempat
- 2 kepingPemegang Tempat
Alatan Diperlukan
7- Pemegang Tempat
- Pemegang Tempat
- Pemegang Tempat
- Pemegang Tempat
- Pemegang Tempat
- Pemegang Tempat
- Pemegang Tempat
Blueprint berkaitan
Blueprint ini berkongsi pengetahuan — teknik, bahan atau prinsip



CC0 Domain Awam
Blueprint ini dikeluarkan di bawah CC0. Anda bebas menyalin, mengubah, mengedar, dan menggunakan karya ini untuk sebarang tujuan, tanpa meminta kebenaran.
Sokong Pembuat dengan membeli produk melalui Blueprint mereka di mana mereka memperoleh Komisen Pembuat ditetapkan oleh Penjual, atau cipta iterasi baru Blueprint ini dan sertakan ia sebagai sambungan dalam Blueprint anda sendiri untuk berkongsi hasil.