

Quilling Paper Filigree
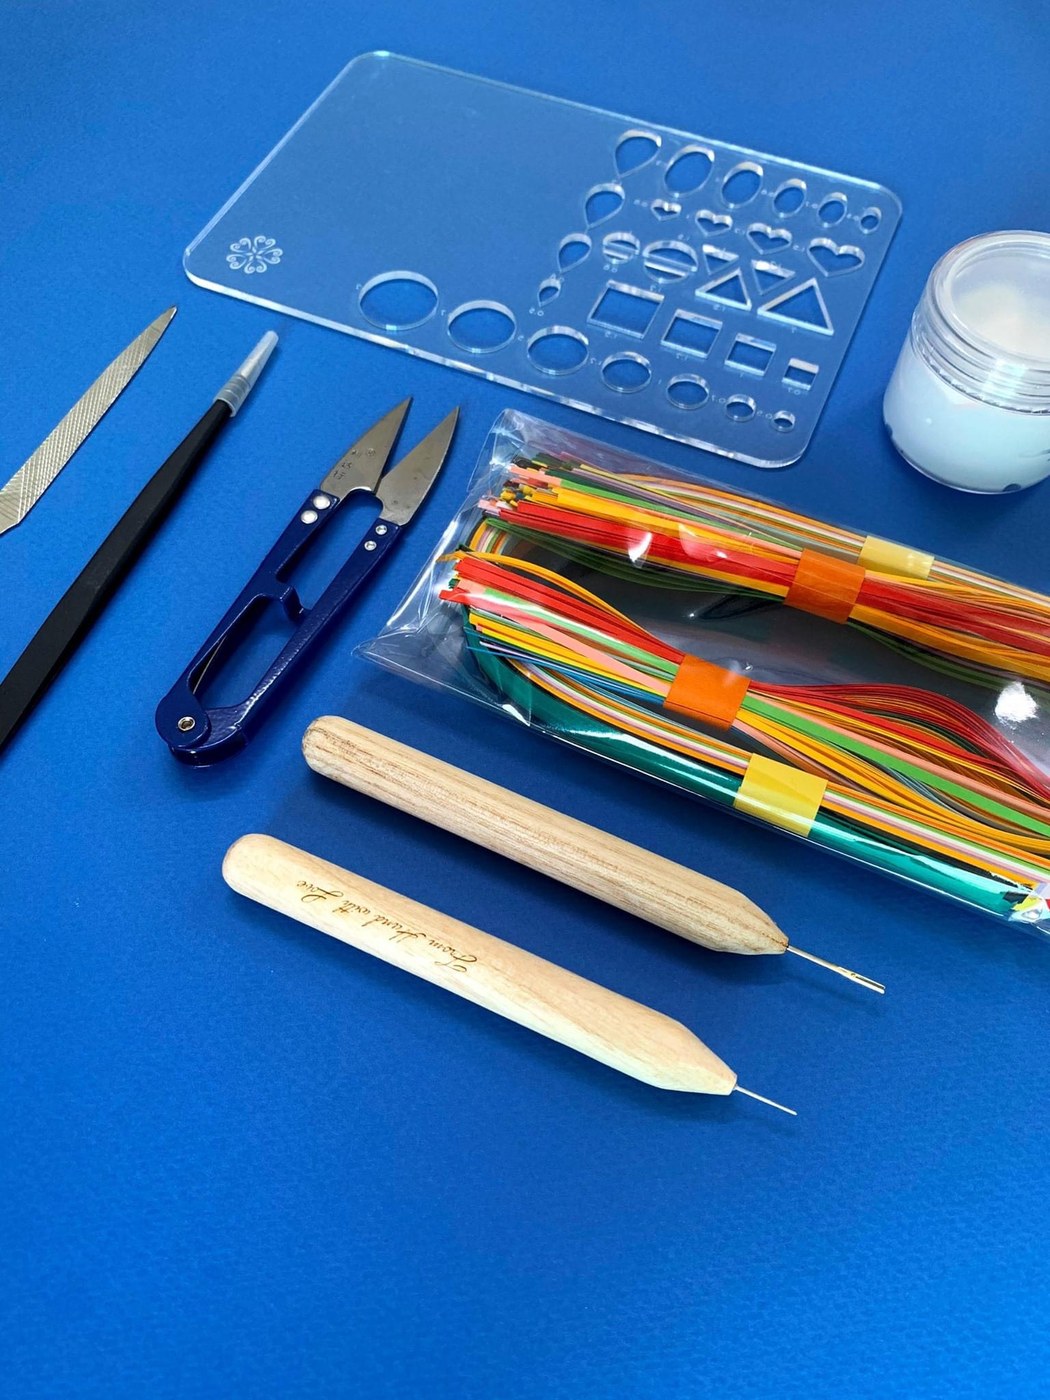
Quilling is metalwork done in paper. Narrow strips are coiled, pinched into shapes and glued on edge to build openwork patterns that deliberately imitate gold and silver filigree — at a tiny fraction of the cost.
The origin is a good story and a frugal one. Nuns and monks in French and Italian religious houses took the gilded edges of worn-out bibles, cut them into strips, and wound them around a goose quill — which is where the name comes from. Trimmed gilding on the edge of a coil catches light exactly like fine gold wire. They used it to decorate reliquaries and holy pictures that no house could have afforded to make in real metal.
The whole craft turns on one thing: every coil must be wound at the same tension. Loose and tight coils in the same piece read as a mistake, not as variation.
Ìlànà
Cut strips to a consistent width
Cut strips to a consistent width
Cut paper into 3 mm strips, 300 mm long. Width must be identical across the piece — the strip width becomes the depth of the finished filigree, and a varying depth looks like damage.
Àwọn ohun èlò fún ìgbésẹ̀ yìí:
 Bébà Líle1 ewé
Àwọn irinṣẹ́ tí a nílò:
 Ọ̀bẹ Iṣẹ́ Ọwọ́
 Ìdíwọ̀n
Gild one long edge
Gild one long edge
Brush gold along one long edge of each strip and let it dry. This edge faces outward in the finished piece and is what makes paper read as metal.
Àwọn ohun èlò fún ìgbésẹ̀ yìí:
 Ewé wúrà1 ewé
Make the quilling tool
Make the quilling tool
Split the end of a quill or a wooden dowel to make a narrow slot. The strip end slides into the slot and the tool becomes the axle you wind around.
Àwọn ohun èlò fún ìgbésẹ̀ yìí:
 Ọ̀pá igi líle 1/4"1 àkópọ̀
Wind a tight coil
Wind a tight coil
Slot in a strip and wind, keeping even tension all the way. Turn the tool, not the paper — turning the paper gives an oval.
Let the coil relax to a set size
Let the coil relax to a set size
Slide the coil off and let it open on its own. It will expand and stop. Coils that relax inside a consistent former all end up the same diameter — that is how a set is matched.
Glue the tail down
Glue the tail down
Put a trace of glue on the strip end and press it to the coil. Use the least glue that holds — excess wicks between the turns and stiffens the coil into a solid disc.
Àwọn ohun èlò fún ìgbésẹ̀ yìí:
 Ìlẹ̀mọ́ awọ ẹranko30 ml
Pinch the basic shapes
Pinch the basic shapes
Pinch a relaxed coil at one point for a teardrop, at two opposite points for an eye, at three for a triangle. Every classical quilling motif is built from these few shapes.
Make a scroll
Make a scroll
Wind each end of a strip inward in opposite directions to make an S-scroll. Scrolls fill space between coils and are what makes a panel read as continuous filigree rather than scattered discs.
Lay the design out dry
Lay the design out dry
Arrange all the elements on the backing board without glue and adjust until the spacing is even. Once glued, nothing moves.
Glue on edge, not on the face
Glue on edge, not on the face
Apply glue to the bottom edge of each element and set it down. Quilling is built on edge — that is why it has depth and casts shadows, and why the gilded edge shows.
Glue neighbouring elements to each other
Glue neighbouring elements to each other
Touch a little glue where elements meet. The finished panel should hold together as a fabric, not as separate pieces stuck to a board.
Dry flat under light weight
Dry flat under light weight
Weight the panel lightly while it dries so nothing lifts. Heavy weight crushes the coils flat and destroys the depth you built.
History & Context
History & Context
Made from what was thrown away. Quilling — also called paper filigree — was developed by nuns and monks in French and Italian religious houses. There are records of them using the torn gilt edges of worn-out holy books, roughly between the 1200s and 1600s, wound around goose quills to make coiled shapes for decorating reliquaries and holy pictures. The material was literally salvage from books too damaged to keep.
Imitation as the point. The craft was understood as a cheaper alternative to ornamental gold and silver. That is not a criticism — it is the design brief. A religious house that could not commission metal filigree could produce something that read the same way from a few feet, and the gilded edge is the specific detail that makes the illusion work.
The name. "Quilling" comes from the goose quill used as the winding tool. Splitting the end of a quill gives a slot that grips the paper — a ready-made tool sitting on every writing desk in a monastery.
Why it is built on edge. A coil glued on its face is a flat disc; a coil glued on its edge is a small tube standing proud of the surface, catching light on its rim and casting a shadow. Filigree's whole visual character comes from that relief, which is why step 10 is the one that decides whether a piece looks like real filigree or like glued-down paper.
Later life. Quilling later became a fashionable pastime in England and colonial America, used to decorate tea caddies, screens and cabinets — sometimes combined with real metal wire and mica. It went out of fashion and has come back repeatedly since. The reason it survives is the reason it started: the materials cost almost nothing and the results look expensive.
Àwọn ohun-èlò
4- 1 ewéÀyè
- 1 ewéÀyè
- 1 àkópọ̀Àyè
- 30 mlÀyè
CC0 Àgbègbè Gbogbogbò
Blueprint yìí ti jáde lábẹ́ CC0. O lè ṣe àdàkọ, yí padà, pín, àti lò láìsí ìyọ̀ǹda.
Ṣàtìlẹ́yìn Olùṣẹ́dá nípa rírà àwọn ọjà nipasẹ̀ Blueprint wọn Ẹ̀san Olùṣẹ́dá tí àwọn Olùtajà gbé kalẹ̀, tàbí ṣẹ̀dá àtúnṣe tuntun ti Blueprint yìí kí o sì fi sínú Blueprint rẹ gẹ́gẹ́ bí ìsopọ̀ láti pín owó-wíwọlé.