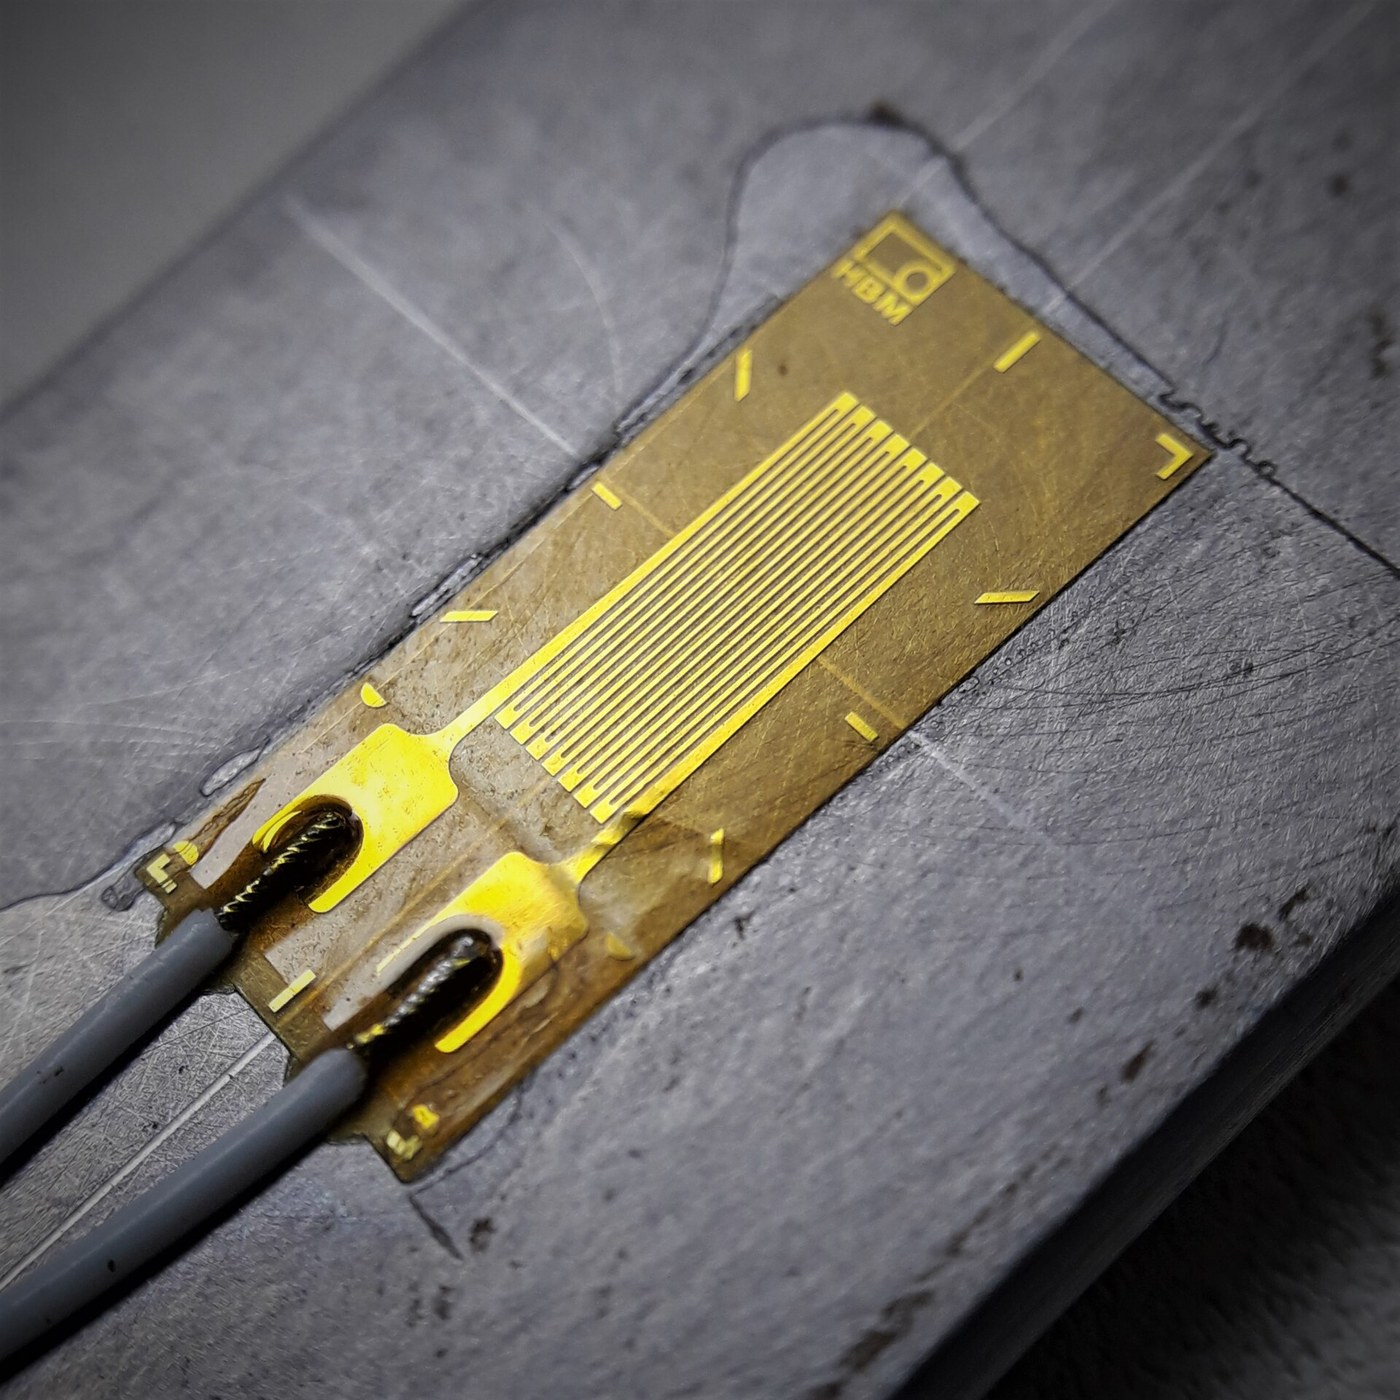


Bonded Strain Gauge
निर्देशनहरू
Make a gauge with a long folded grid
Make a gauge with a long folded grid
Maximum wire length in minimum area, all of it aligned one way.
- On a thin paper or plastic backing, lay out fine wire in a zig-zag: many long parallel runs joined by tight turns at each end.
- Keep every long run parallel to what will be the measuring direction.
- Make the end turns as short and tight as possible.
- Fix the wire to the backing with a thin, hard adhesive.
- Bring two leads out from the ends.
The grid pattern maximises sensitivity in one direction and minimises it in the other. Only the long runs contribute usefully; the end turns lie crosswise and respond to strain at right angles, which is unwanted. Commercial gauges make those turns wide and thick so their resistance is negligible — a small detail that makes the gauge directional, which is exactly what you want when measuring stress in a structure.
The adhesive must be hard and thin. A soft or thick glue line lets the gauge slip relative to the surface, so it reads less strain than is really there — creep, and it is the classic bonded gauge failure.यस चरणका सामग्री:
 इनामेल लगाइएको तामाको तार1 रोल
 रङ्गीन बाक्लो कागजको सेट1 प्याक
 पारदर्शी टाँस्ने टेप1 रोल
चाहिने औजार:
 प्रयोगशाला स्तरको डिजिटल बहुमापक
 डिजिटल क्यालिपर ६ इन्च
 रेतीहरूको सेट
Bond it to a cantilever beam
Bond it to a cantilever beam
Surface preparation decides whether the gauge measures the beam or measures the glue.
- Cut a cantilever from aluminium flat bar and clamp one end in the vise.
- Abrade the top surface where the gauge will sit, then clean it thoroughly.
- Bond the gauge with its grid running ALONG the beam, near the clamped end where bending stress is highest.
- Press it down firmly and let the adhesive cure fully.
- Measure its resistance unloaded.
Position matters as much as bonding. A cantilever's bending stress is greatest at the clamped root and zero at the free end, so a gauge near the tip reads almost nothing. Knowing where the strain is before you place the gauge is half of experimental stress analysis.
Cure fully before loading. A partly cured bond creeps under the first load and the gauge never reads the same again.यस चरणका सामग्री:
 एल्युमिनियमको चेप्टो पाटो1 टुक्रा
चाहिने औजार:
 बेन्चको भाइसरेतीहरूको सेटप्रयोगशाला स्तरको डिजिटल बहुमापकडिजिटल क्यालिपर ६ इन्च
 संयुक्त गुनिया
Read it with a bridge and find the gauge factor
Read it with a bridge and find the gauge factor
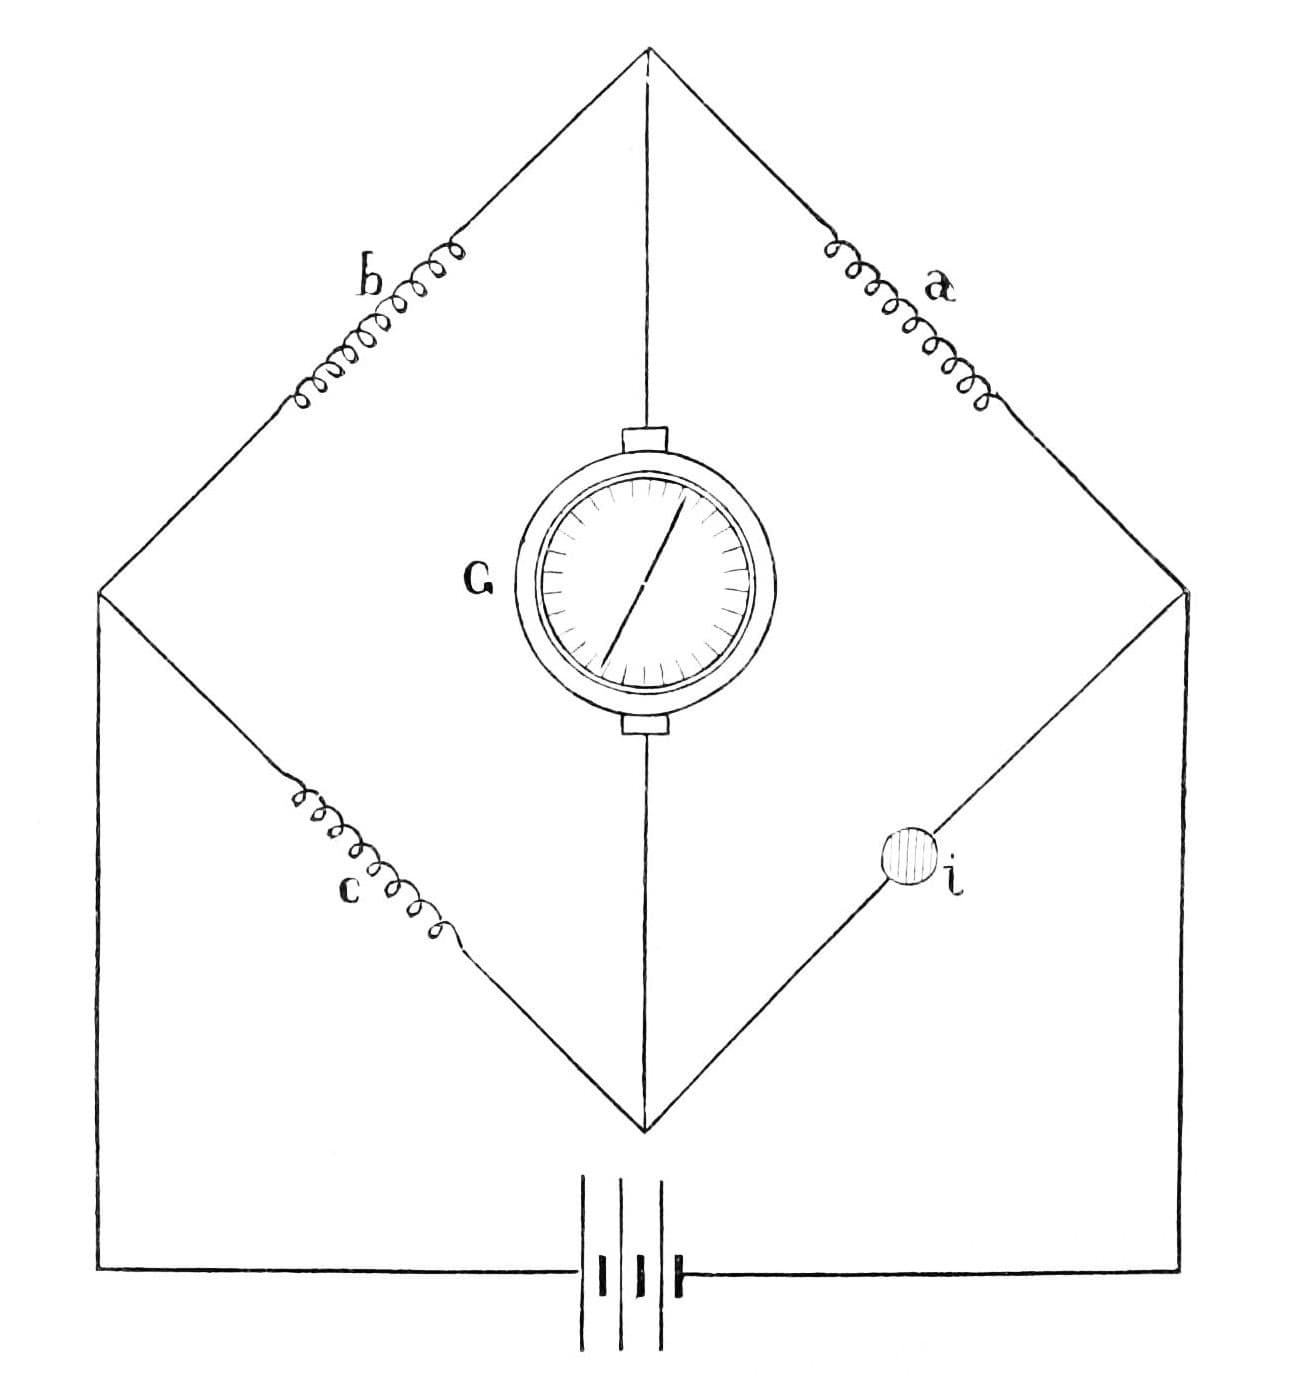
The change is far too small for a meter, so null it out.
- Put the gauge in one arm of a Wheatstone bridge with three fixed resistors.
- Balance the bridge with the beam unloaded.
- Hang a known weight on the beam's free end and record the bridge output.
- Measure the beam's tip deflection with the caliper and compute the strain at the gauge.
- Divide the fractional resistance change by the strain — that ratio is the gauge factor.
यस चरणका सामग्री:
 १/४ वाटको प्रतिरोधक सेट1 किट
 मिलाउन सकिने टेबुल विद्युत् आपूर्ति1 टुक्रा
 रेखाचित्र कागज1 pad
चाहिने औजार:
प्रयोगशाला स्तरको डिजिटल बहुमापकडिजिटल क्यालिपर ६ इन्च डिजिटल भान्साको तराजु
Defeat the temperature problem with a second gauge
Defeat the temperature problem with a second gauge
The gauge cannot tell strain from warmth — unless you give it a companion.
- With the beam unloaded, warm the gauge gently with a hair dryer and watch the bridge output drift.
- Now bond an identical second gauge to the UNDERSIDE of the beam, or to an unstressed offcut of the same material.
- Put it in the adjacent bridge arm.
- Warm both together and observe the output.
- Load the beam again and confirm it still reads strain.
यस चरणका सामग्री:
इनामेल लगाइएको तामाको तार1 रोलरङ्गीन बाक्लो कागजको सेट1 प्याकचाहिने औजार:
प्रयोगशाला स्तरको डिजिटल बहुमापकडिजिटल क्यालिपर ६ इन्च रोकघडी
Seeing stress inside a structure, and history
Seeing stress inside a structure, and history
Edward E. Simmons at Caltech and Arthur C. Ruge at MIT developed the bonded wire strain gauge independently in 1938. Ruge was studying how model structures behaved on a shaking table and needed to measure strain in small members; Simmons was working on impact testing. Both realised that a wire glued to the surface is forced to share its strain, and both institutions ended up sharing the patent rights.
It made stress visible for the first time. Before it, engineers calculated stresses and hoped, or used brittle lacquers and photoelastic models that only worked on transparent replicas. The bonded gauge measures the real structure, in service, at whatever point you choose — aircraft wings in flight, bridge girders under traffic, engine mounts running. Experimental stress analysis as a discipline begins here.
Its most familiar descendant is the load cell. Take a metal element designed to deflect predictably, bond four gauges to it in a full bridge, and the output is proportional to force. Every electronic scale, from a kitchen worktop to a weighbridge, works exactly this way — and the four-gauge arrangement cancels temperature while quadrupling the signal, which is the step-4 trick taken to its conclusion.
How it closes this batch: the Wheatstone bridge has now appeared three times — measuring temperature in the resistance thermometer, airflow in the hot wire, and force here. One circuit, three physical quantities, because each sensor converts its quantity into a resistance change. That convergence is the deep lesson of instrumentation: find a way to turn what you cannot measure into something you can, and a small number of well-understood circuits will read almost anything.
सामग्री
7- प्लेसहोल्डर
- 1 प्याकप्लेसहोल्डर
- 1 रोलप्लेसहोल्डर
- 1 टुक्राप्लेसहोल्डर
- प्लेसहोल्डर
- प्लेसहोल्डर
- 1 padप्लेसहोल्डर
सम्बन्धित ब्लुप्रिन्ट
यी ब्लुप्रिन्टहरूले ज्ञान साझा गर्छन् — प्रविधि, सामग्री वा सिद्धान्त
CC0 सार्वजनिक डोमेन
यो ब्लुप्रिन्ट CC0 अन्तर्गत जारी गरिएको छ। तपाईं अनुमति नसोधी प्रतिलिपि, परिमार्जन, वितरण र प्रयोग गर्न सक्नुहुन्छ।
ब्लुप्रिन्ट मार्फत उत्पादनहरू किनेर सिर्जनाकर्तालाई सहयोग गर्नुहोस् सिर्जनाकर्ता कमिसन विक्रेताले तोकेको, वा यो ब्लुप्रिन्टको नयाँ संस्करण बनाउनुहोस् र आम्दानी बाँड्न आफ्नो ब्लुप्रिन्टमा जडानको रूपमा समावेश गर्नुहोस्।