कला
सुन्दरता र कल्याण
हस्तकला
संस्कृति र इतिहास
मनोरञ्जन
वातावरण
खाना र पेय
रिभर्स इन्जिनियरिङ
विज्ञान
खेलकुद
प्रविधि
पहिर्न मिल्ने
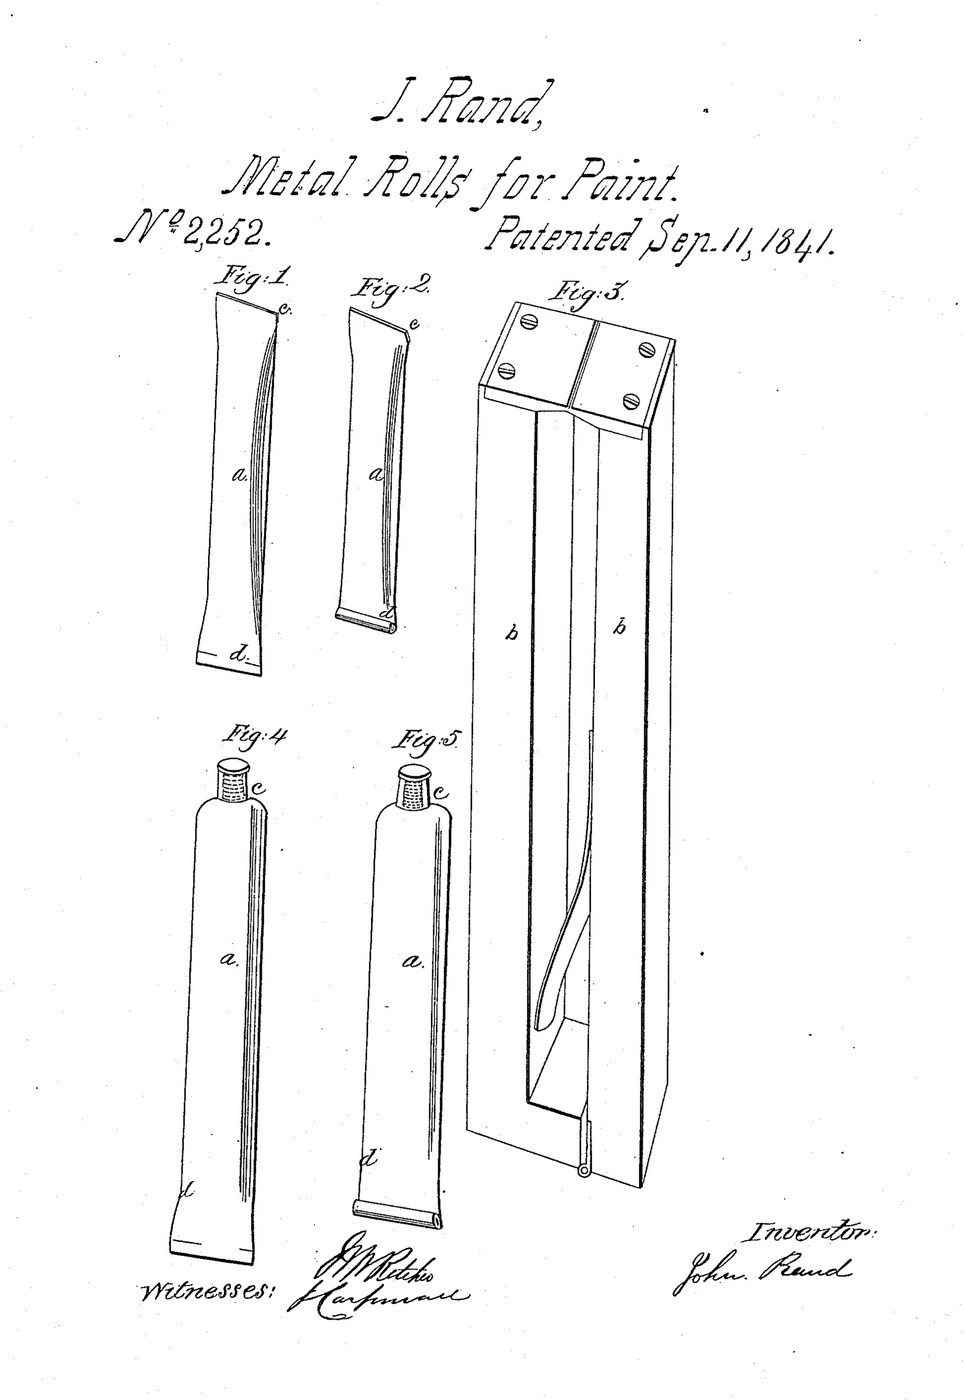


Empty Paint Tube: Soldered Sheet Lead, Rand 1841
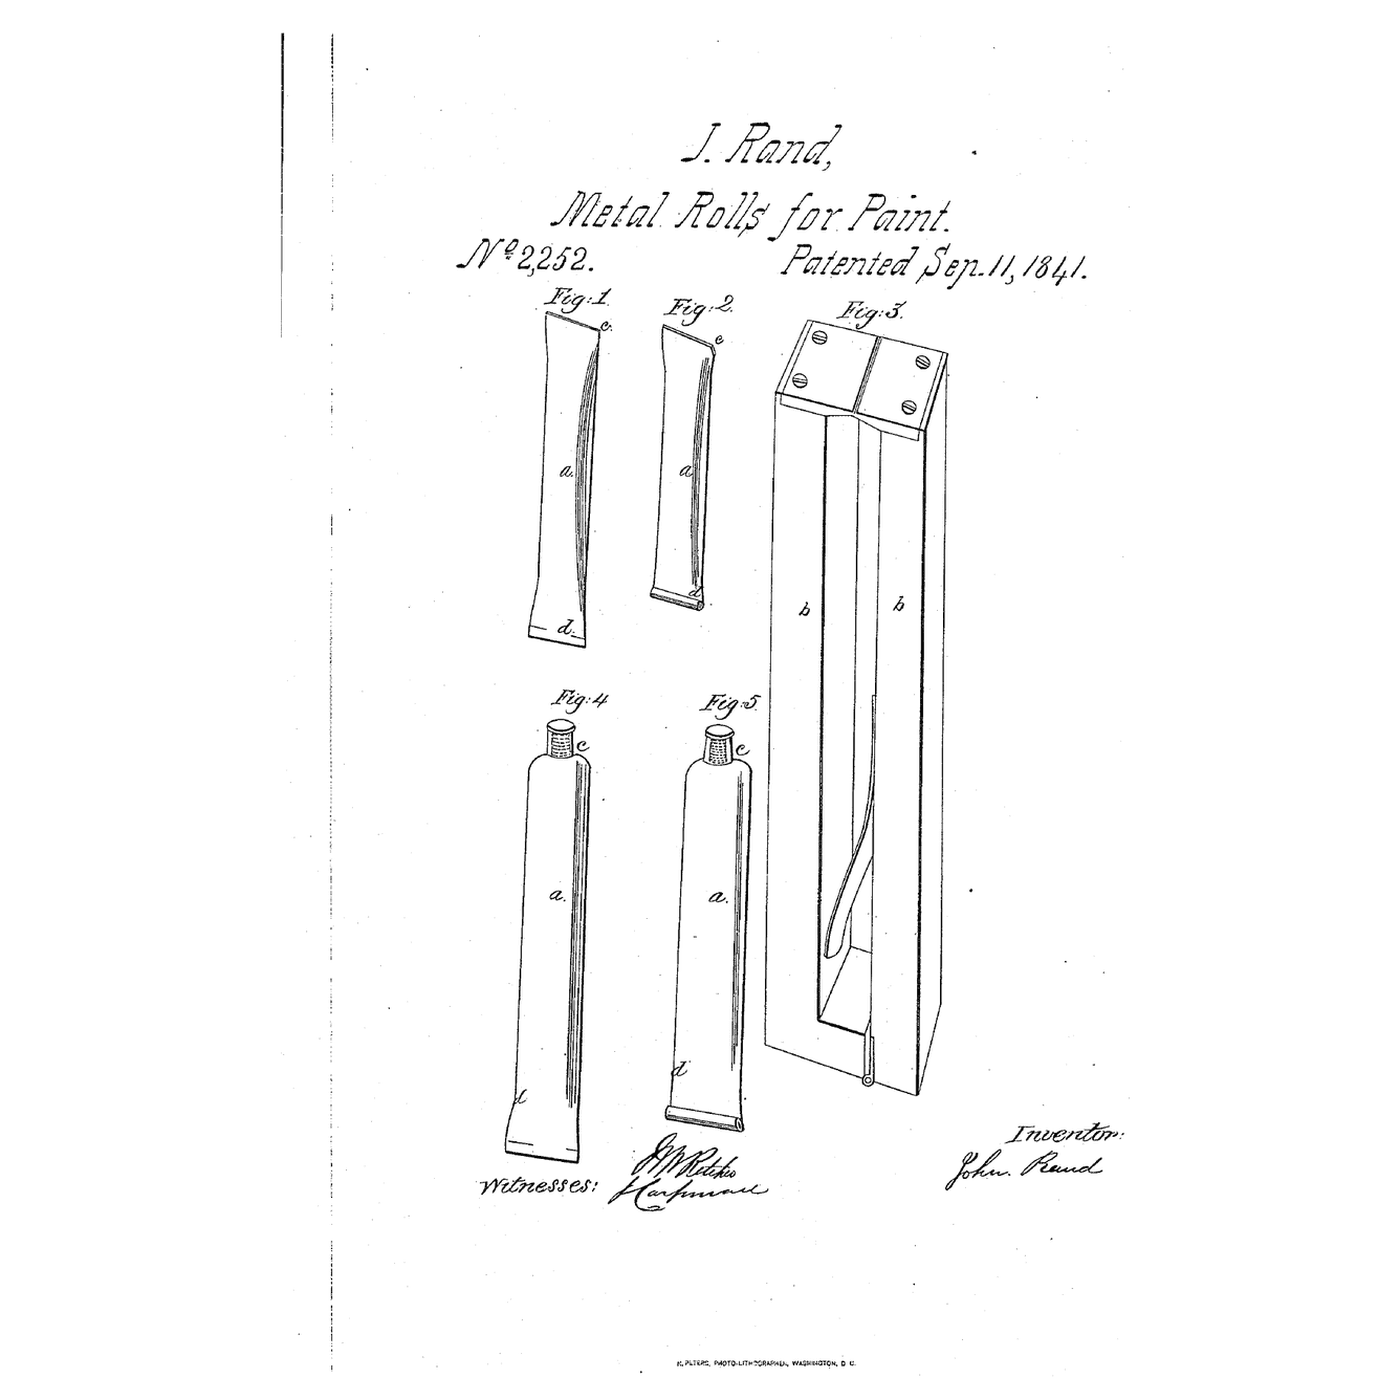
John Rand's 1841 patent names grain-tin, lead and pewter for paint tubes. The metal only has to be thin enough to yield to pressure and stay collapsed. His own tube was drawn tin about 1/75 inch thick, but he writes that a tube of sheet metal with a soldered seam works as well. This is that route in lead: roll a strip round a former, solder the seam, close one end, and leave the other open for filling.
Source: J. Rand, US 2,252 (1841). The sheet thickness, former, flux, size and tools are ours. The picture is the patent's drawing sheet.
मध्यम
1 hour
निर्देशनहरू
1
1
Cut the strip
Cut the strip
Cut a strip of thin lead sheet as long as the tube and wide enough to go once round the former with a narrow overlap. Rand asks only for metal thin enough to yield to pressure and stay collapsed; ours is Ure's thinner cast sheet, 1/48 in (0.5 mm). Longer tubes need somewhat thicker metal.
यस चरणका सामग्री:
 सिसा धातुको पाता1 as required
चाहिने औजार:
 पाता काट्ने कैँची
 रुलर
2
2
Roll it round a former
Roll it round a former
Roll the strip round a round wooden dowel so the edges overlap, and press the seam flat. The dowel and the overlap are ours.
चाहिने औजार:
 काठको किल्ला
3
3
Solder the seam
Solder the seam
Join the edges by soldering, one of the two ways Rand gives (the other is melting the edges together). Ours: a little rosin flux and tin-lead solder run along the seam with a hot iron, on the dowel. Slide the tube off.
यस चरणका सामग्री:
 टिन-सिसाको टाँका1 as required
 टाँकाको फ्लक्स लेप (रोजिनमा आधारित)1 as required
चाहिने औजार:
 टाँका लगाउने डन्डीकाठको किल्ला
4
4
Close one end
Close one end
Press the edges of one end together with flat pliers (Rand used forceps that leave a groove along the end). Close it by adding a little solder with a hot iron. Leave the other end open: the tube is filled from there and then closed the same way.
यस चरणका सामग्री:
टिन-सिसाको टाँका1 as requiredचाहिने औजार:
 चेप्टो मुखको प्लासटाँका लगाउने डन्डी
सामग्री
3- 1 as requiredप्लेसहोल्डर
- 2 as requiredप्लेसहोल्डर
- 1 as requiredप्लेसहोल्डर
आवश्यक उपकरणहरू
5- प्लेसहोल्डर
- प्लेसहोल्डर
- प्लेसहोल्डर
- 2 vendors sell this, none ship to you yetप्लेसहोल्डर
- प्लेसहोल्डर
यो खाकाले बनाउँछ

सम्बन्धित ब्लुप्रिन्ट
यी ब्लुप्रिन्टहरूले ज्ञान साझा गर्छन् — प्रविधि, सामग्री वा सिद्धान्त

CC0 सार्वजनिक डोमेन
यो ब्लुप्रिन्ट CC0 अन्तर्गत जारी गरिएको छ। तपाईं अनुमति नसोधी प्रतिलिपि, परिमार्जन, वितरण र प्रयोग गर्न सक्नुहुन्छ।
ब्लुप्रिन्ट मार्फत उत्पादनहरू किनेर सिर्जनाकर्तालाई सहयोग गर्नुहोस् सिर्जनाकर्ता कमिसन विक्रेताले तोकेको, वा यो ब्लुप्रिन्टको नयाँ संस्करण बनाउनुहोस् र आम्दानी बाँड्न आफ्नो ब्लुप्रिन्टमा जडानको रूपमा समावेश गर्नुहोस्।