Greek Black-Figure Pottery — Painting Black-Figure Pottery with Iron Slip
निर्देशनहरू
Prepare the Iron-Rich Slip
Prepare the Iron-Rich Slip
The key to black-figure technique is a refined clay slip with very high iron content and extremely fine particle size. Take iron-rich clay (ideally Attic-type illite clay with 8-12% iron oxide content), mix it with water, and let it settle. Decant the top layer of fine suspended particles, which are colloidally fine (less than 1 micron). This ultra-fine fraction is the painting slip. Its small particle size allows it to sinter (fuse into a glassy surface) at lower temperatures than the coarser body clay, which is why it becomes glossy and impervious during firing while the body remains matte and porous. Add a small amount of wood ash as flux to lower the sintering temperature further. The slip should be the consistency of thick cream.
Materials for this step:
Tools needed:
 Compass
Paint the Figures in Silhouette
Paint the Figures in Silhouette
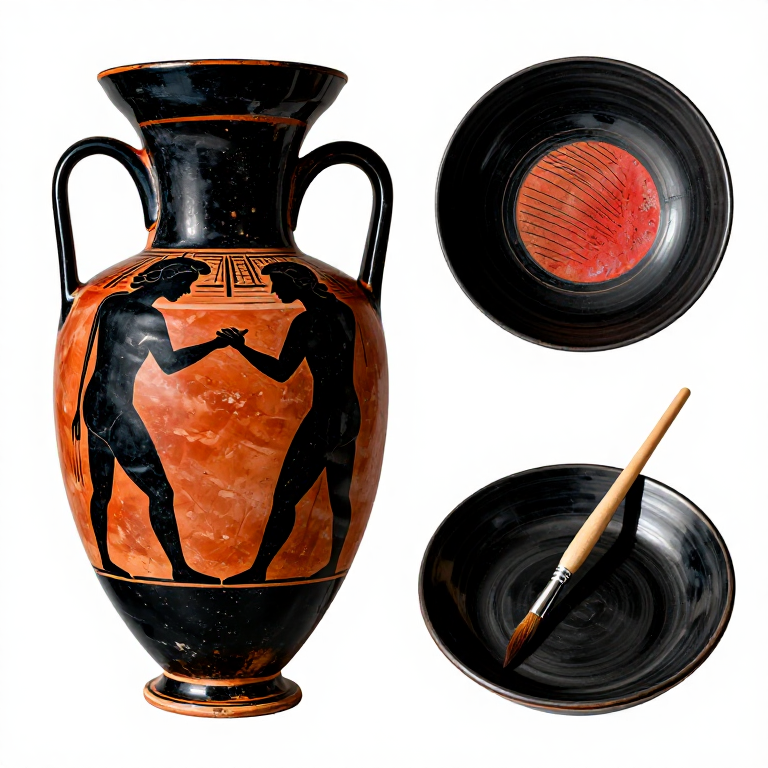
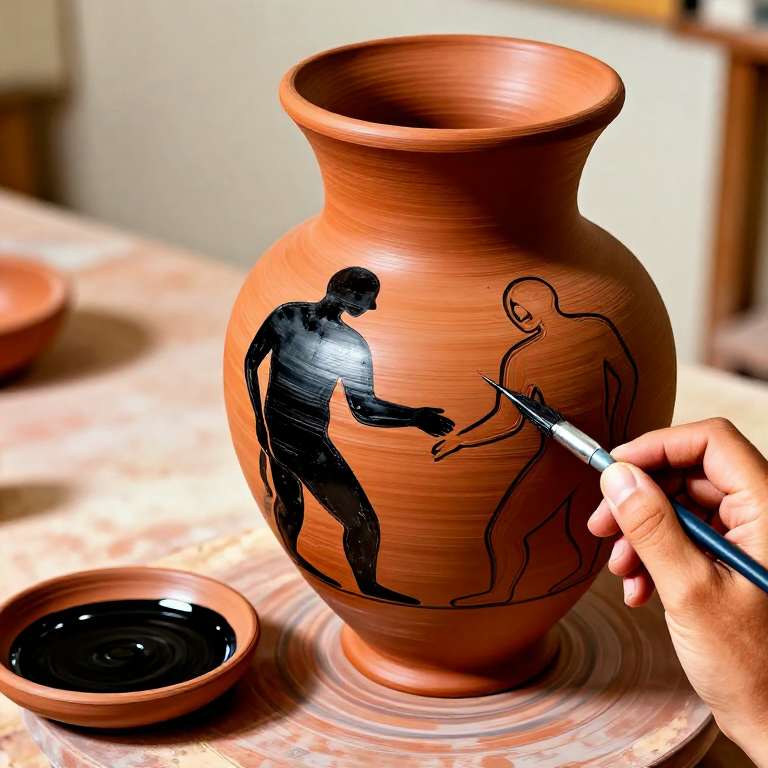
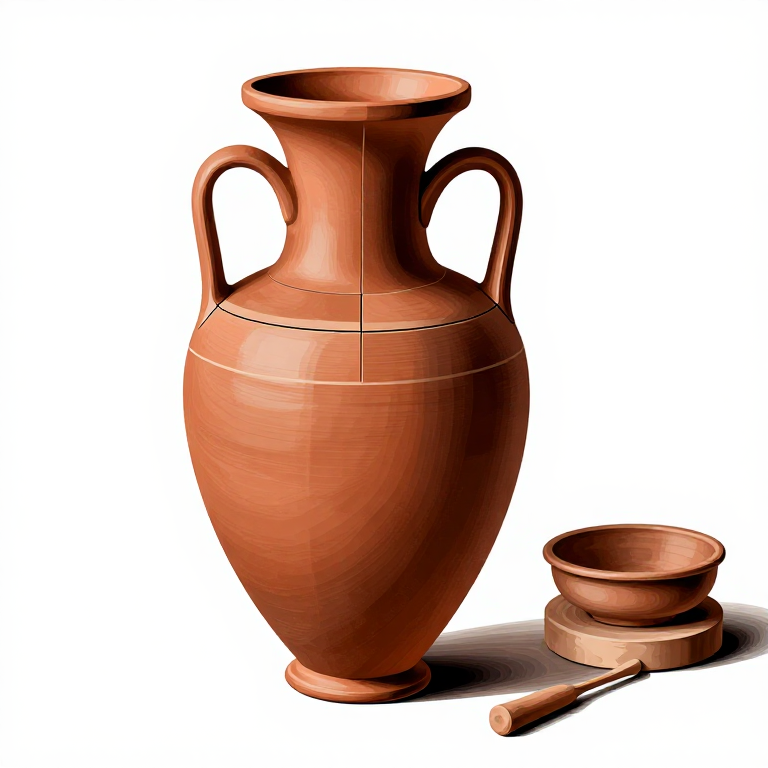
Using fine brushes, paint the figural scenes onto the leather-hard clay vessel in solid silhouette using the refined slip. Work confidently with steady strokes — the slip cannot be easily corrected once applied. Greek vase painters used a remarkable range of line widths, from bold filled areas to hairline details, all with the same slip at different dilutions. Outline the figures first with a thin line, then fill in the silhouettes with thicker slip. Reserve (leave unpainted) the areas that will remain the natural red color of the fired clay — these form the background. Common black-figure subjects included mythological scenes, athletic contests, and daily life activities. Apply slip evenly, approximately 0.1-0.3 mm thick.
Incise Details into the Slip
Incise Details into the Slip
Once the slip has dried to a firm consistency but before firing, use a sharp pointed tool (burin or stylus) to incise fine lines through the black slip, revealing the red clay body beneath. These incised lines define the internal details of the figures — muscle lines, drapery folds, facial features, hair, and armor details. This incision technique is what distinguishes black-figure from earlier silhouette styles and gives the figures their characteristic sharp, linear detail. The quality of incised line work varied enormously among painters — the finest, like Exekias and the Amasis Painter, achieved extraordinary precision and expressiveness. Apply added colors: white slip for female skin and details, red ochre for hair, beards, and decorative borders.
Fire in a Three-Phase Kiln Cycle
Fire in a Three-Phase Kiln Cycle
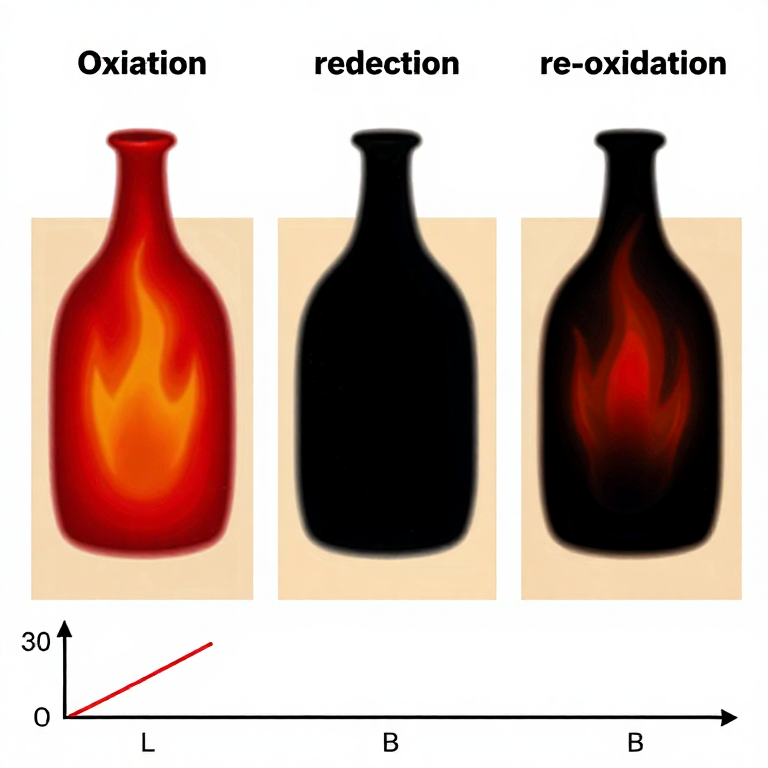
The critical step is the three-phase firing that produces the color contrast. Phase 1 (Oxidation): Fire to approximately 800 degrees Celsius with plenty of air — both slip and body turn red from oxidized iron (Fe2O3). Phase 2 (Reduction): Close the kiln vents and introduce green wood or damp fuel to create smoke. The oxygen-poor atmosphere reduces iron oxide to black magnetite (Fe3O4) and wustite (FeO) at approximately 950 degrees Celsius — everything turns black. Phase 3 (Re-oxidation): Open the vents and reduce temperature. The porous body clay re-oxidizes back to red, but the sintered slip, having fused into an impervious glassy surface during the reduction phase, cannot re-oxidize and remains permanently black. This elegant chemistry creates black figures on a red ground from a single firing.
Cool and Inspect the Finished Vessel
Cool and Inspect the Finished Vessel
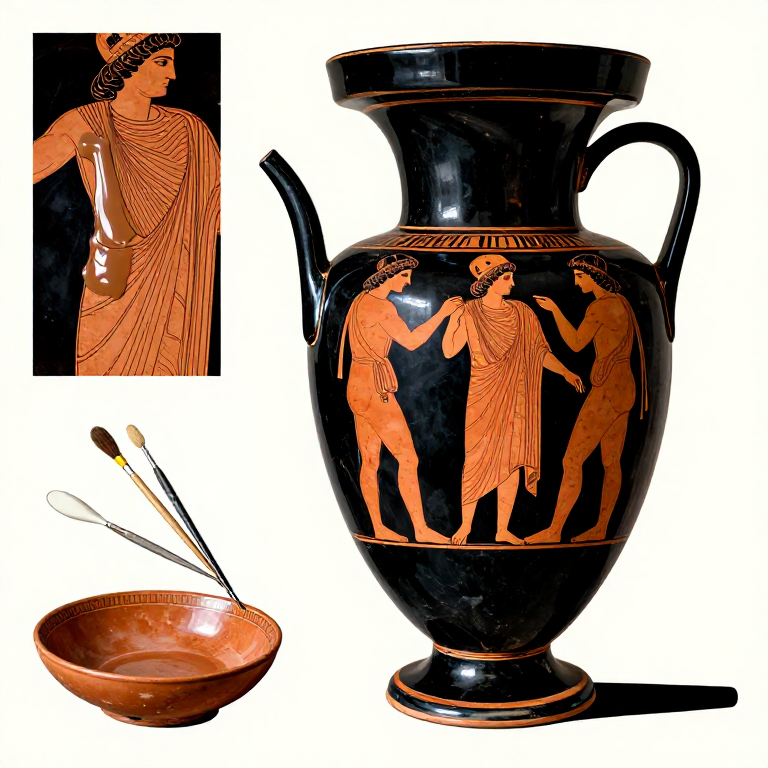
Allow the kiln to cool slowly over 12-24 hours before opening. Rapid cooling causes thermal shock cracking in the ceramic body. The finished vessel should display glossy black figures with fine incised red details against a warm orange-red background. The black slip areas should have a slight metallic sheen when viewed at an angle, indicating proper sintering. If the black areas appear matte or brownish, the reduction phase was insufficient; if the red background areas are grey or black, the re-oxidation phase was too short. The black-figure technique dominated Athenian pottery from approximately 630 to 480 BCE, when it was gradually superseded by the red-figure technique, which reversed the color scheme for greater artistic flexibility.
सामग्री
4- 1 vessel टुक्राप्लेसहोल्डर
- 100-200 ml टुक्राप्लेसहोल्डर
- small amount टुक्राप्लेसहोल्डर
- small amount टुक्राप्लेसहोल्डर
आवश्यक उपकरणहरू
4- प्लेसहोल्डर
- प्लेसहोल्डर
- प्लेसहोल्डर
- प्लेसहोल्डर
सम्बन्धित ब्लुप्रिन्ट
यी ब्लुप्रिन्टहरूले ज्ञान साझा गर्छन् — प्रविधि, सामग्री वा सिद्धान्त
Related blueprints
Other builds that share materials, tools, or techniques with this one.
CC0 सार्वजनिक डोमेन
यो ब्लुप्रिन्ट CC0 अन्तर्गत जारी गरिएको छ। तपाईं अनुमति नसोधी प्रतिलिपि, परिमार्जन, वितरण र प्रयोग गर्न सक्नुहुन्छ।
ब्लुप्रिन्ट मार्फत उत्पादनहरू किनेर सिर्जनाकर्तालाई सहयोग गर्नुहोस् सिर्जनाकर्ता कमिसन विक्रेताले तोकेको, वा यो ब्लुप्रिन्टको नयाँ संस्करण बनाउनुहोस् र आम्दानी बाँड्न आफ्नो ब्लुप्रिन्टमा जडानको रूपमा समावेश गर्नुहोस्।