सहयोग
कला
सुन्दरता र कल्याण
हस्तकला
संस्कृति र इतिहास
मनोरञ्जन
वातावरण
खाना र पेय
रिभर्स इन्जिनियरिङ
विज्ञान
खेलकुद
प्रविधि
पहिर्न मिल्ने
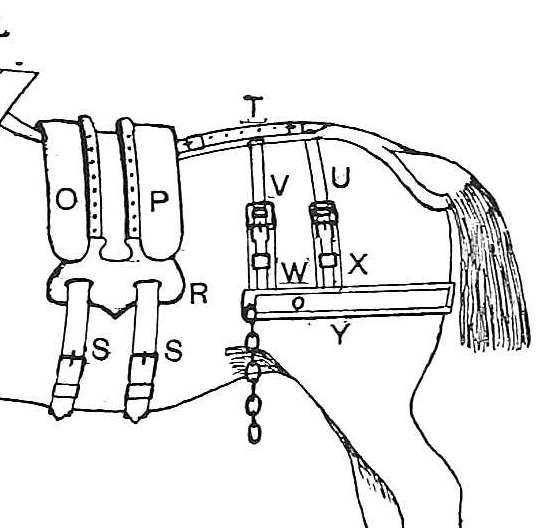


Cart Crupper, Breeching, Belly-Band and Straps (Hasluck, Harness Making, 1904)
The rest of a cart harness, from Paul N. Hasluck's Harness Making (1904): the crupper that runs from the saddle under the tail, the breeching round the hindquarters with its tugs and loin straps, the belly-band, hame straps and a leading rein. All sizes are his.
With the bridle, collar and cart saddle it completes the set.
उन्नत
About 3 days
निर्देशनहरू
1
1
Cutting list
Cutting list
Jupyter नोटबुक लोड हुँदैछ…
2
2
Read Harness Making, ch. VII
Read Harness Making, ch. VII
"To make the breeching, cut the body, if possible, 7 ft. 4 in. long and about 4 in. wide. Turn it down to 4 ft. 10 in. long, the strong end less than the weak."
3
3
Cut the crupper body and dock
Cut the crupper body and dock
Cut the body 2 ft 6 in or 2 ft 8 in long and 3½ to 4 in wide; cut a semicircle in the centre from the weak end, leaving a point about ¾ in wide each side, and cut an 8 in piece to line this end. Cut a piece ⅞ in wide and 8½ in long, shave its ends, and stitch it edge to edge into a round to within 1½ in of each end, with a cord or strip of leather inside; rub it round, blacken it and flatten both ends with a hammer.
यस चरणका सामग्री:
 हार्नेसको छाला1 टुक्रा
 भाङको डोरी1 टुक्रा
 छालाको धागो1 टुक्रा
 छालाको रङ1 टुक्रा
चाहिने औजार:
 छाला काट्ने छुरी
 दुई काठी सिलाउने सियो
 आर (छेड्ने सियो)
 पन्जा भएको घन
4
4
Finish the crupper body
Finish the crupper body
Point the square end, reducing it to about 2 in. Race it along the sides and ends, edge and black it, and run a hot iron over the creases. Prick it about nine per inch as far as the lining reaches from the semicircle. Put the ends of the round piece under the points, one each side, the lining under them, and stitch all round and across the points with three-cord black-wax thread; trim, black and rub the edges.
यस चरणका सामग्री:
छालाको धागो1 टुक्राछालाको रङ1 टुक्राचाहिने औजार:
छाला काट्ने छुरी रेस कम्पास
 किनारा च्याम्फर गर्ने औजार
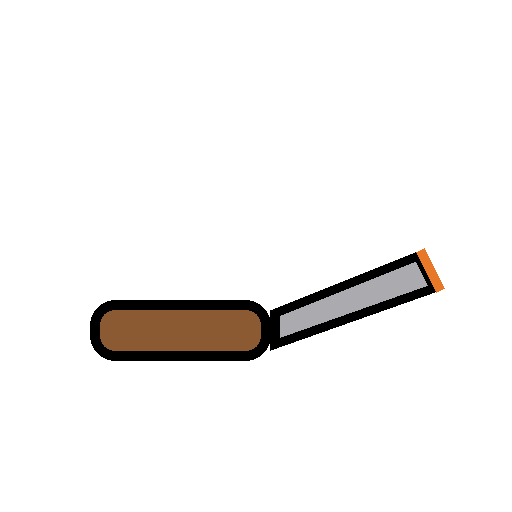 काठी बनाउनेको बेभलर
 प्रोपेन टर्च
 छालाको सिलाई छिनोआर (छेड्ने सियो)दुई काठी सिलाउने सियो
 छाला सिलाइ च्याप्ने काठ
5
5
Make the crupper lay
Make the crupper lay
Cut the lay 1 in narrower than the body and 3 ft long; turn in 10 in at the strong end and beat it flat. Turn the other end down 2 in and cut it slanting to 1½ in for a buckle, with a buckle hole. Mark cross lines 2 in from the broad point, ¼ in from the end of the bend underneath, and 2½ in from that toward the buckle. Edge the top only, crease two lines and hot-iron them, with inner lines about ¼ in in. Leave two openings for the hip straps, one in the bend and one in the middle; black and prick the stitched parts. Fix the buckle, lay it on the centre of the body with the broad end reaching the edge of the semicircle, tack and stitch, spotting the three cross lines.
यस चरणका सामग्री:
हार्नेसको छाला1 टुक्रा जिब्रो भएको फलामे बकल1 टुक्राछालाको धागो1 टुक्राछालाको रङ1 टुक्रा
चाहिने औजार:
छाला काट्ने छुरीकिनारा च्याम्फर गर्ने औजार खोप पार्ने औजारकाठी बनाउनेको बेभलर
 छालामा प्वाल पार्ने पन्चछालाको सिलाई छिनोआर (छेड्ने सियो)दुई काठी सिलाउने सियो
6
6
Pad the crupper and fit its strap
Pad the crupper and fit its strap
Cut thick felt as wide as the body, from the point of the semicircle to 2 in beyond the cross line near the buckle; cover it with basil, coarse-stitch it along the centre, turn the ends over and fasten them, and stitch it in place next the body with four or five stitches here and there, well secured at each corner. Cut a hole through the body opposite the buckle, 1½ in wide. Make a strap 9 in long, pointed one end and shaved the other, crease, black and stitch its shaved end to the narrow end of the body; it goes round the saddle's dock and up through the hole to the buckle on the lay.
यस चरणका सामग्री:
 ऊनी नाम्दा1 टुक्रा
 बेसिल छाला (भेडाको छाला)1 टुक्राहार्नेसको छाला1 टुक्राछालाको धागो1 टुक्राछालाको रङ1 टुक्रा
चाहिने औजार:
छाला काट्ने छुरीछालामा प्वाल पार्ने पन्चआर (छेड्ने सियो)दुई काठी सिलाउने सियो7
7
Make the breeching body
Make the breeching body
Cut the body 7 ft 4 in x about 4 in and turn it down to 4 ft 10 in, the strong end less than the weak; edge, black and crease two rows along the edges. Mark a cross line about 1½ in from the centre of the bend each side, and at each end. Line the bend with 1 ft pieces bent flesh outward, one end about 1 in shorter; prick, tack and stitch row to row to make the eye for the bridgeband pin. Trim, blacken and rub the bend with tallow and bone; beat it with a wooden mallet if hard, and stitch the double part along ends and sides.
यस चरणका सामग्री:
हार्नेसको छाला1 टुक्राछालाको धागो1 टुक्राछालाको रङ1 टुक्रा बोसो1 टुक्रा
चाहिने औजार:
छाला काट्ने छुरीकिनारा च्याम्फर गर्ने औजारखोप पार्ने औजारछालाको सिलाई छिनोआर (छेड्ने सियो)दुई काठी सिलाउने सियो हाडको पट्याउने औजार
 काठको मुङ्ग्रो
8
8
Put on the breeching lay
Put on the breeching lay
Cut the lay the same length and 1 in narrower; edge, crease and black it, run another line ¼ in inside the crease, prick the two inner lines nine to the inch and turn it down at both ends as the body. Tack it on the centre of the body, light end against heavy end, and stitch end to end to the cross lines, bulging the cross stitching inward about 1 in at the middle. Punch a large hole where the stitches bulge and cut straight out each side for the chain to catch the pin. Cut a slot for the 1½ in tug 1 ft 4 in from each end.
यस चरणका सामग्री:
हार्नेसको छाला1 टुक्राछालाको धागो1 टुक्राछालाको रङ1 टुक्राचाहिने औजार:
छाला काट्ने छुरीकिनारा च्याम्फर गर्ने औजारखोप पार्ने औजारछालाको सिलाई छिनोछालामा प्वाल पार्ने पन्चआर (छेड्ने सियो)दुई काठी सिलाउने सियो9
9
Make the tugs and safes
Make the tugs and safes
Two hind tugs 1 ft 8 in long, 6 in turned down each end to meet; buckle hole in the weak end; black, crease, rub and prick them. Put the strong end up through the slot from underneath, joint in front under the loop, buckle on the other end; make a loop about 2½ in long round both thicknesses and pull it over the joint. Cut a safe for each from the breeching to an inch beyond the buckle and ½ in wider each side, narrowed and shaved at the bottom, rounded at the top with a loop; finish it on the 1½ in loop-stick, beat it flat and square, nail it from underneath with about five nails each side clinched on the loop-stick, and crease it again with a hot iron. Stitch the safes along the tugs. Make the front tugs for the bridgeband pins the same but shorter, so their length from the breeching equals the hind tugs; fit the pins with their nut and washer.
यस चरणका सामग्री:
हार्नेसको छाला1 टुक्राजिब्रो भएको फलामे बकल4 टुक्रा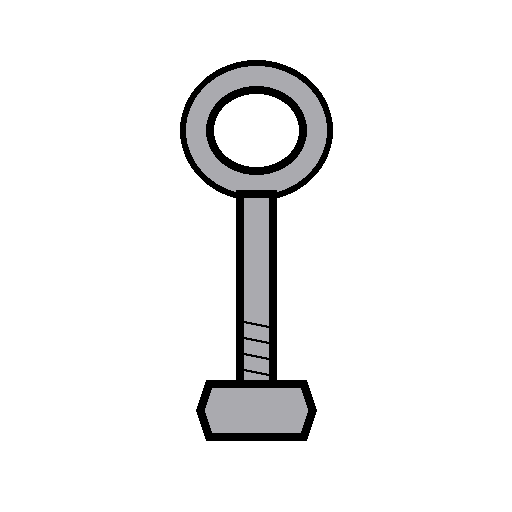 ब्रीचिङ पिन2 टुक्रा
 काँटी1 टुक्राछालाको धागो1 टुक्राछालाको रङ1 टुक्रा
चाहिने औजार:
छाला काट्ने छुरीछालामा प्वाल पार्ने पन्च लुप स्टिकपन्जा भएको घनकाठी बनाउनेको बेभलरप्रोपेन टर्चखोप पार्ने औजारछालाको सिलाई छिनोआर (छेड्ने सियो)दुई काठी सिलाउने सियो
 मिलाउन मिल्ने पाना
10
10
Make the loin straps
Make the loin straps
Cut two loin straps 3 ft 8 in x 1½ in to fasten to the tugs and pass through the openings in the crupper; point each end, crease double each side, edge, black, hot-iron the creases and make six or seven holes in each end.
यस चरणका सामग्री:
हार्नेसको छाला1 टुक्राछालाको रङ1 टुक्राचाहिने औजार:
छाला काट्ने छुरीकिनारा च्याम्फर गर्ने औजारखोप पार्ने औजारकाठी बनाउनेको बेभलरप्रोपेन टर्चछालामा प्वाल पार्ने पन्च11
11
Make the leading rein and hame straps
Make the leading rein and hame straps
Leading rein: a 1 in strap about 8 ft 6 in long in all, with a buckle and a billet 1 ft long at one end and a chain with a spring hook at the other; black and crease it and stitch on buckle, billet and chain. The chain goes through the near bit ring and hooks to the other ring; the billet fastens to the crupper. Hame straps: 1¼ in, about 1 ft 8 in long, buckle and loop at one end, the other pointed with holes.
यस चरणका सामग्री:
हार्नेसको छाला1 टुक्राजिब्रो भएको फलामे बकल3 टुक्रा फलामको सिक्री1 टुक्रा
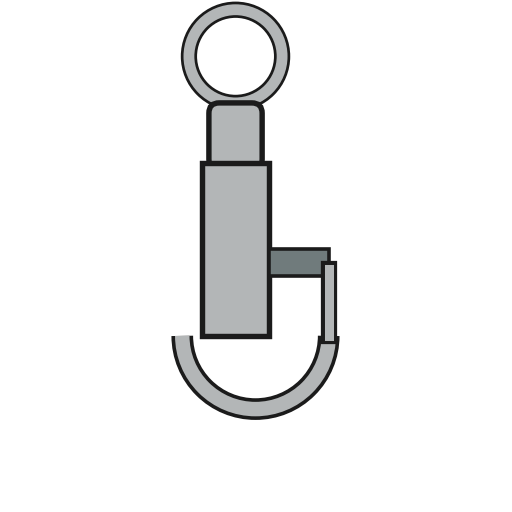 स्प्रिङ हुक1 टुक्राछालाको धागो1 टुक्राछालाको रङ1 टुक्रा
चाहिने औजार:
छाला काट्ने छुरीखोप पार्ने औजारछालामा प्वाल पार्ने पन्चआर (छेड्ने सियो)दुई काठी सिलाउने सियो12
12
Make the belly-band
Make the belly-band
Cut it 3 in wide and 3 ft 8 in long, narrowed to 2 in for 6 in at both ends, with a buckle hole about 3 in from the point. Make two billets 2 ft 2 in x 2 in and two loops about 1¾ in wide; edge, crease and black everything. Prick the billets six per inch for about 6 in from the shaved end, set the buckle with the billet lapping 3 in over it and the loop about 1 in from the buckle, tack and stitch with six-cord black-wax thread, twice waxed, with two or three stitches in the centre of each end. Open and crease the loops and make four holes in the billets.
यस चरणका सामग्री:
हार्नेसको छाला1 टुक्राजिब्रो भएको फलामे बकल2 टुक्राछालाको धागो1 टुक्राछालाको रङ1 टुक्राचाहिने औजार:
छाला काट्ने छुरीकिनारा च्याम्फर गर्ने औजारखोप पार्ने औजारछालाको सिलाई छिनोछालामा प्वाल पार्ने पन्चआर (छेड्ने सियो)दुई काठी सिलाउने सियोछाला सिलाइ च्याप्ने काठ13
13
Troubleshooting
Troubleshooting
Crupper and breeching troubleshooting.
Flow
Loading...
14
14
History and honest limits
History and honest limits
From **Harness Making**, edited by Paul N. Hasluck, Cassell and Company, 1904, chapter VII, "Cart Saddles, Reins, etc." (Project Gutenberg #70169). All sizes are his. Not made here: the iron-dee crupper he gives as a matter of taste, the ornamental breast-plate, the maker's-name stamp, and the final coat of "Harris's liquid or composition", a trade dressing. The heat source for the iron and the metric figures are ours.
सामग्री
12- 9 टुक्राप्लेसहोल्डर
- 1 टुक्राप्लेसहोल्डर
- 9 टुक्राप्लेसहोल्डर
- 10 टुक्राप्लेसहोल्डर
- 4 टुक्राप्लेसहोल्डर
- 1 टुक्राप्लेसहोल्डर
- 1 टुक्राप्लेसहोल्डर
- 1 टुक्राप्लेसहोल्डर
- 2 टुक्राप्लेसहोल्डर
- 1 टुक्राप्लेसहोल्डर
- 1 टुक्राप्लेसहोल्डर
- 1 टुक्राप्लेसहोल्डर
आवश्यक उपकरणहरू
16- प्लेसहोल्डर
- प्लेसहोल्डर
- प्लेसहोल्डर
- प्लेसहोल्डर
- प्लेसहोल्डर
- प्लेसहोल्डर
- प्लेसहोल्डर
- प्लेसहोल्डर
- प्लेसहोल्डर
- प्लेसहोल्डर
- प्लेसहोल्डर
- प्लेसहोल्डर
- प्लेसहोल्डर
- प्लेसहोल्डर
- प्लेसहोल्डर
- प्लेसहोल्डर
सम्बन्धित ब्लुप्रिन्ट
यी ब्लुप्रिन्टहरूले ज्ञान साझा गर्छन् — प्रविधि, सामग्री वा सिद्धान्त
CC0 सार्वजनिक डोमेन
यो ब्लुप्रिन्ट CC0 अन्तर्गत जारी गरिएको छ। तपाईं अनुमति नसोधी प्रतिलिपि, परिमार्जन, वितरण र प्रयोग गर्न सक्नुहुन्छ।
ब्लुप्रिन्ट मार्फत उत्पादनहरू किनेर सिर्जनाकर्तालाई सहयोग गर्नुहोस् सिर्जनाकर्ता कमिसन विक्रेताले तोकेको, वा यो ब्लुप्रिन्टको नयाँ संस्करण बनाउनुहोस् र आम्दानी बाँड्न आफ्नो ब्लुप्रिन्टमा जडानको रूपमा समावेश गर्नुहोस्।