कला
सुन्दरता र कल्याण
हस्तकला
संस्कृति र इतिहास
मनोरञ्जन
वातावरण
खाना र पेय
रिभर्स इन्जिनियरिङ
विज्ञान
खेलकुद
प्रविधि
पहिर्न मिल्ने
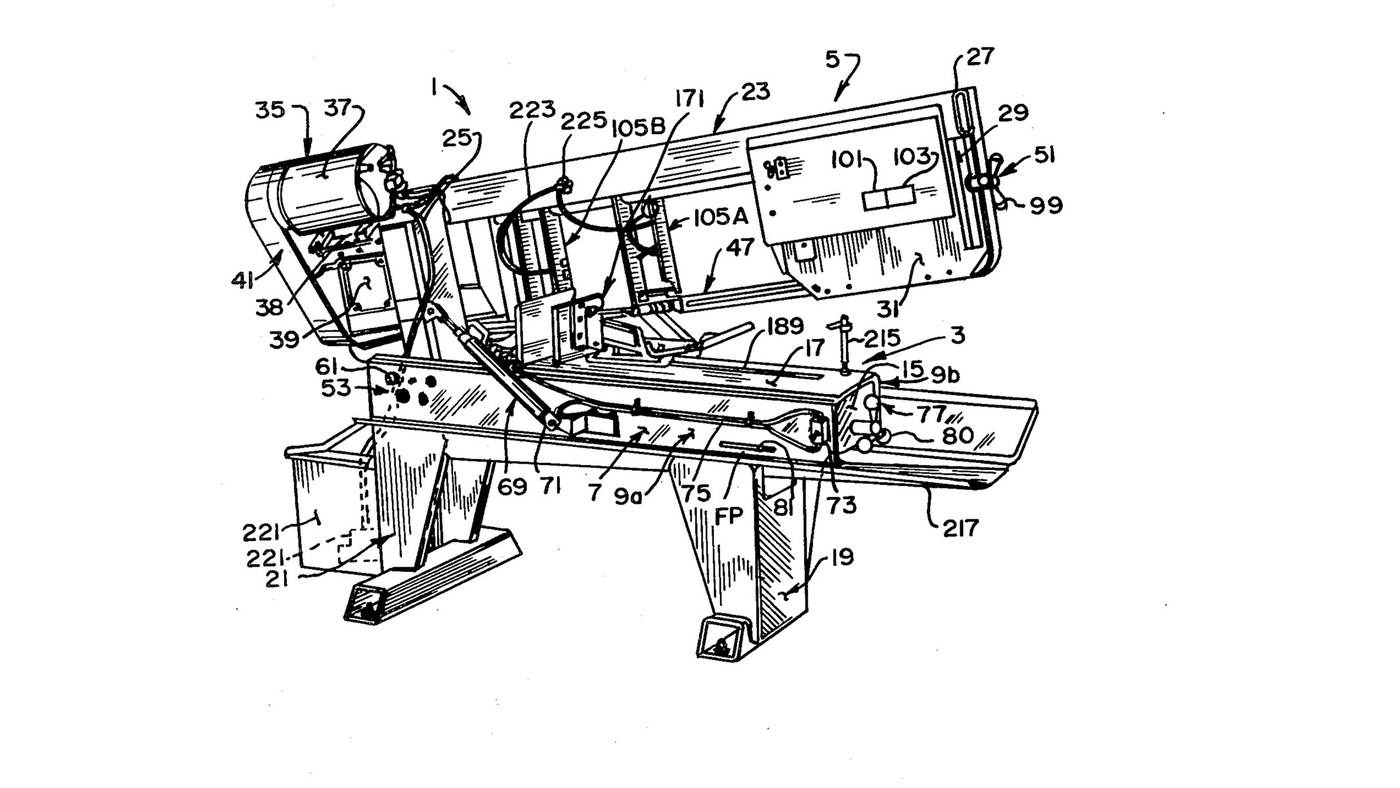


Metal Band Saw: Horizontal Saw on a Welded Steel Frame
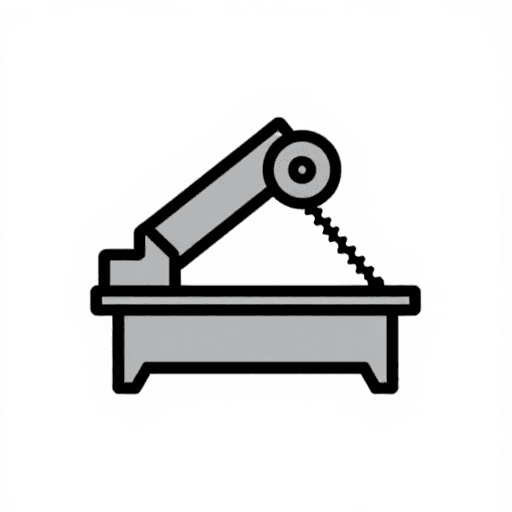
Curtis Eccardt's horizontal power band saw (Emerson Electric, US 4,364,294, 1982), built from welded steel channel and tube instead of iron castings to cut its cost. The saw head swings down on trunnions over the bed; a hydraulic cylinder with a valve sets how fast it feeds, a spring counterbalances it, and a spring tensioner shows the blade tension on a scale. Two guides with rollers twist the blade's lower run 90° so its teeth face down into the work, and carbide inserts hold it there.
The patent gives no sizes, speeds or ratings; the welder and wrenches are ours. The picture: the patent's Fig. 1.
उन्नत
4 days
निर्देशनहरू
1
1
Weld the bed
Weld the bed
Stand two steel channels (9a, 9b) parallel, webs upright and flanges facing in, and weld gussets (15) between their webs. Bolt a bed plate (17) across the top flanges as the work surface. Ours: MIG welder, drill press for the bolt holes.
यस चरणका सामग्री:
 इस्पातको U खण्ड2 टुक्रा
 नरम स्टिलको प्लेट1 टुक्रा
 छ कुने टाउकोको बोल्ट - स्तर 8.81 टुक्रा
चाहिने औजार:
 MIG वेल्डिङ मेसिन
 खम्बा भएको ड्रिल
 मिलाउन मिल्ने पाना
2
2
Weld and bolt on the legs
Weld and bolt on the legs
Weld formed sheet-steel legs onto horizontal floor members to make front and rear leg weldments (19, 21), and bolt them under the bed.
यस चरणका सामग्री:
 इस्पातको पाता1 टुक्रा
 इस्पात नली1 टुक्राछ कुने टाउकोको बोल्ट - स्तर 8.81 टुक्रा
चाहिने औजार:
MIG वेल्डिङ मेसिनमिलाउन मिल्ने पाना3
3
Weld the head
Weld the head
Weld a head post (25) of square or rectangular steel tube square to a head beam (27) of rectangular tube. Weld a bracket leg (29) down from the beam's outer end, and fix support plates at both ends (31, 33).
यस चरणका सामग्री:
इस्पात नली1 टुक्रानरम स्टिलको प्लेट1 टुक्राचाहिने औजार:
MIG वेल्डिङ मेसिन4
4
Fit the trunnions and align the pivot
Fit the trunnions and align the pivot
Fix a shaft through the head post with its ends out as trunnions (55a, 55b), in bushings in two bearing blocks (59a, 59b) bolted inside the channel webs. Each block has one close-fit bolt hole and three oversize ones: shift the blocks until the pivot is parallel to the bed plate, then torque the bolts. A set screw (67) takes out end play.
यस चरणका सामग्री:
 स्टिल शाफ्ट1 टुक्रा
 धातुको बुसिङ2 टुक्रा
 बेयरिङ ब्लक2 टुक्राछ कुने टाउकोको बोल्ट - स्तर 8.88 टुक्रा
 कचौराजस्तो टुप्पो भएको सेट स्क्रू1 टुक्रा
चाहिने औजार:
खम्बा भएको ड्रिल टर्क रेन्च
5
5
Mount motor, belt drive and gearbox
Mount motor, belt drive and gearbox
Mount the electric motor (37) on a plate (38) pivoted on the head beam, and couple it by a multi-speed belt and pulleys (41) to a gearbox (39). Fit the drive wheel (43) on the gearbox output shaft.
यस चरणका सामग्री:
 विद्युत मोटर1 टुक्रानरम स्टिलको प्लेट1 टुक्रा
 ड्राइभ बेल्ट1 टुक्रा
 घिर्नी1 टुक्रा
 गियरबक्स1 टुक्रा
 ब्यान्ड आराको पाङ्ग्रा1 टुक्रा
चाहिने औजार:
मिलाउन मिल्ने पाना6
6
Build the idler tensioner
Build the idler tensioner
Weld an idler yoke (87) of rolled steel plate, pivot it on the head beam with a pin (89), and cantilever the idler axle from it with the idler wheel (45) on bearings (85). A threaded rod (91) pulls the yoke through a coil spring (93) held between compression plates and a U-bolt (97); a knob (99) turns the rod. An indicator (101) on the spring reads the tension on a scale (103).
यस चरणका सामग्री:
नरम स्टिलको प्लेट1 टुक्रा स्टिलको पिन1 टुक्रास्टिल शाफ्ट1 टुक्राब्यान्ड आराको पाङ्ग्रा1 टुक्रा
 बल बेयरिङ1 टुक्रा
 धाँजे डन्डा1 टुक्रा
 Coil Spring1 टुक्रा
 U आकारको किला1 टुक्रा
 नियन्त्रण नब1 टुक्रा
चाहिने औजार:
MIG वेल्डिङ मेसिनमिलाउन मिल्ने पाना7
7
Build the two blade guides
Build the two blade guides
In each guide channel (111) mount two guide rollers (115a, 115b) on ball bearings on eccentric bushings, one fixed and one adjusted to the blade thickness. Add a carbide thrust insert (133) on the blade's back edge and two carbide side inserts (137a fixed, 137b on a sprung swing bracket set by a bolt and knob). Clamp the guides on two bar tracks (107).
यस चरणका सामग्री:
 गाइड रोलर4 टुक्राबल बेयरिङ4 टुक्रा
 केन्द्रबाहिरी बुश4 टुक्रा
 कार्बाइड इन्सर्ट6 टुक्राCoil Spring2 टुक्रानियन्त्रण नब2 टुक्राइस्पात नली1 टुक्रा
चाहिने औजार:
मिलाउन मिल्ने पाना8
8
Fit the blade and set the tension
Fit the blade and set the tension
By hand, run the endless blade (47) round the drive and idler wheels and through both guides; the rollers twist its lower run about 90° so the teeth face down. Turn the tension knob until the scale shows the tension you want.
यस चरणका सामग्री:
 ब्यान्ड आराको पाता1 टुक्रा
9
9
Fit the feed cylinder and counterbalance
Fit the feed cylinder and counterbalance
Connect a hydraulic cylinder (71) between bed channel and head post above the trunnions, filled with oil and piped through tubing (75) to a control valve (73): the valve sets the feed rate and, closed, holds the head. Fit a coil spring (78) on a threaded linkage (79) between an end gusset and the head post below the trunnions, adjusted by a knob (80), to counterbalance the head.
यस चरणका सामग्री:
 जलचालित सिलिन्डर1 टुक्रा
 हाइड्रोलिक तेल1 batch
 हाइड्रोलिक नली1 टुक्रा
 प्रवाह नियन्त्रण भल्भ1 टुक्राCoil Spring1 टुक्राधाँजे डन्डा1 टुक्रानियन्त्रण नब1 टुक्रा
चाहिने औजार:
मिलाउन मिल्ने पाना10
10
Bolt on the vice
Bolt on the vice
Bolt the quick-acting vice to the bed plate to clamp the work square under the blade.
यस चरणका सामग्री:
 मेसिन भाइस1 टुक्राछ कुने टाउकोको बोल्ट - स्तर 8.81 टुक्रा
चाहिने औजार:
मिलाउन मिल्ने पानासामग्री
29- 2 टुक्राप्लेसहोल्डर
- 1 टुक्राप्लेसहोल्डर
- 11 टुक्राप्लेसहोल्डर
- 1 टुक्राप्लेसहोल्डर
- 1 टुक्राप्लेसहोल्डर
- 1 टुक्राप्लेसहोल्डर
- 2 टुक्राप्लेसहोल्डर
- 2 टुक्राप्लेसहोल्डर
- प्लेसहोल्डर
- 1 टुक्राप्लेसहोल्डर
- 1 टुक्राप्लेसहोल्डर
- 1 टुक्राप्लेसहोल्डर
- 1 टुक्राप्लेसहोल्डर
- 1 टुक्राप्लेसहोल्डर
- 1 टुक्राप्लेसहोल्डर
- प्लेसहोल्डर
- 1 टुक्राप्लेसहोल्डर
- 4 टुक्राप्लेसहोल्डर
- 1 टुक्राप्लेसहोल्डर
- प्लेसहोल्डर
- 4 टुक्राप्लेसहोल्डर
- 4 टुक्राप्लेसहोल्डर
- 6 टुक्राप्लेसहोल्डर
- 1 टुक्राप्लेसहोल्डर
- 1 टुक्राप्लेसहोल्डर
- 1 batchप्लेसहोल्डर
- 1 टुक्राप्लेसहोल्डर
- 1 टुक्राप्लेसहोल्डर
- 1 टुक्राप्लेसहोल्डर
यो खाकाले बनाउँछ
CC0 सार्वजनिक डोमेन
यो ब्लुप्रिन्ट CC0 अन्तर्गत जारी गरिएको छ। तपाईं अनुमति नसोधी प्रतिलिपि, परिमार्जन, वितरण र प्रयोग गर्न सक्नुहुन्छ।
ब्लुप्रिन्ट मार्फत उत्पादनहरू किनेर सिर्जनाकर्तालाई सहयोग गर्नुहोस् सिर्जनाकर्ता कमिसन विक्रेताले तोकेको, वा यो ब्लुप्रिन्टको नयाँ संस्करण बनाउनुहोस् र आम्दानी बाँड्न आफ्नो ब्लुप्रिन्टमा जडानको रूपमा समावेश गर्नुहोस्।