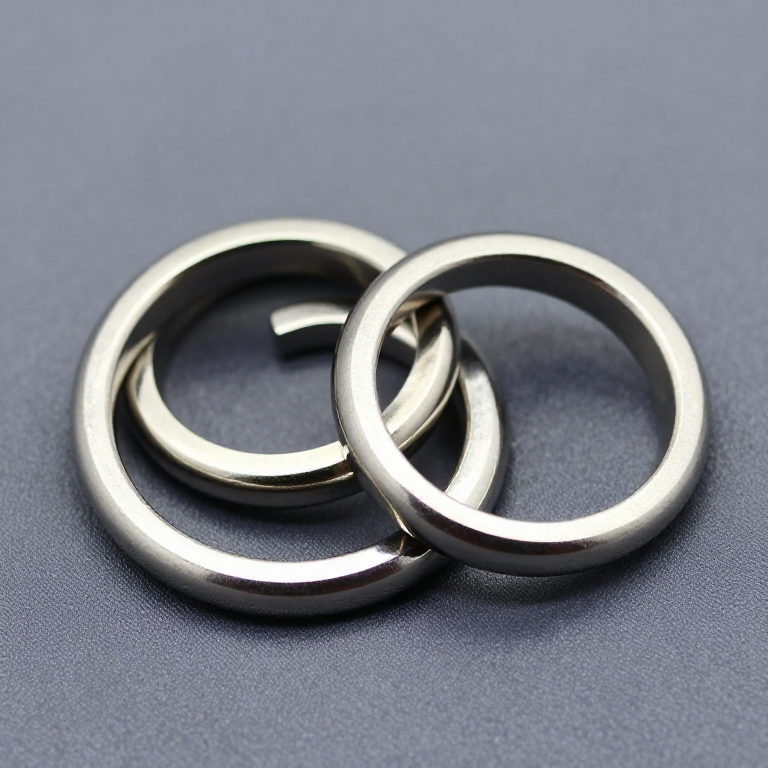


The Linking Rings
Two solid metal rings pass through each other. They cannot. Everyone in the room knows they cannot, which is precisely why the effect works — it is a violation of something the audience already believes with their whole body, not a puzzle they need explained.
The secret is one ring with a gap in it, slightly narrower than the ring's own bar thickness so a second ring must be squeezed past. That is the whole gimmick. Everything else — and there is a great deal of everything else — is the work of making a gapped ring behave, sound and photograph like a solid one.
Which means the real craft here is not deception, it is tolerance. Too wide a gap and it is visible and rings pass through by accident. Too narrow and it will not link at all, or it grabs and squeals. The gap must be a few tenths of a millimetre under the bar diameter, and it must be dressed so the two ends meet cleanly with no step you can feel with a fingernail.
The other half is sound. Solid rings ring. A gapped ring buzzes, and an audience hears the difference long before they see it, so the mass, the alloy and the way the gap closes all matter.
Make a set, measure the gap, and find out how tight it has to be.
निर्देशनहरू
Form the rings from one length of rod
Form the rings from one length of rod
Bend three or four rings of identical diameter from a single length of steel or brass rod, 6 mm stock and about 250 mm across.
Cut each so the ends butt together exactly.
Identical diameter is not cosmetic. An audience compares rings against each other constantly, and a set that is not uniform reads as a set in which one ring is different — which is exactly the conclusion you do not want.
यस चरणका सामग्री:
 नरम फलामको गोलो डण्डी3 मिटर
चाहिने औजार:
 फलाम काट्ने आरा
 बार क्ल्याम्प
Close and dress the solid rings
Close and dress the solid rings
Join the butted ends of all but one ring — braze, weld or pin them — then file and abrasive-finish the join until you cannot find it by touch with your eyes shut.
Check by ear: suspend each ring and tap it.
Expect a clear sustained ring. A dull thud means the join is not sound, and a join that is not sound will fail exactly when the ring is thrown.
चाहिने औजार:
 सियो-रेतीको सेट
 तातो हावाको बन्दुक
Cut the key ring's gap, deliberately undersize
Cut the key ring's gap, deliberately undersize
On the remaining ring, cut a gap and file it back in small steps. Aim for a gap a few tenths of a millimetre narrower than the rod diameter — for 6 mm stock, start at about 5.6 mm.
Radius and polish both ends.
Undersize is the whole point. The next ring must be forced through with a definite squeeze, because a gap it slips through freely is a gap the audience will find.
चाहिने औजार:
 डिजिटल क्यालिपर ६ इन्चसियो-रेतीको सेट
Measure the link-through force
Measure the link-through force
Hook a spring scale to a solid ring and pull it through the gap. Record the force. File the gap wider by 0.1 mm and repeat, four or five times, plotting force against gap.
Expect the force to fall steeply as the gap approaches the rod diameter, then drop to almost nothing.
Choose the point where it still takes a firm, deliberate squeeze. You have just turned a piece of stagecraft into a measured specification.
चाहिने औजार:
 बलमापक (स्प्रिङ तराजु)
 रेखाचित्र कागज
Test it by sound and by touch, not by eye
Test it by sound and by touch, not by eye
Have someone else handle the set and try to find the key ring — first by looking, then by feel, then by tapping each one.
Expect sound to give it away first.
Fix it by adding mass near the gap, by closing the gap more precisely, or by choosing a heavier alloy.
Audiences examine props with their hands and ears, and a prop that only survives a visual inspection is only half made.
Work out the handling that hides the gap
Work out the handling that hides the gap
Practise so the key ring is always held with the gap under a finger, and so every link and unlink happens at a moment of motion or misdirection rather than in a static display.
Film yourself and watch it back at half speed.
Expect to find the gap visible for far longer than you thought.
The gimmick sets what is possible; the handling is what makes it invisible, and the camera is a more honest audience than any person.
History & Context
History & Context
The origin is usually given as ancient China, and that attribution deserves more caution than it normally gets. The linking rings are frequently described as a Chinese effect of great antiquity, and they are certainly long associated with Chinese performers — the classic large-ring routines were popularised in the West in the nineteenth century by Chinese troupes and by Western performers working in a Chinese style. But firm documentary evidence for a specific ancient date is thin, and the confident "first century" claims repeated in magic literature trace back to secondary sources rather than to primary ones. The honest statement is that it is very old, that the Chinese association is real, and that a precise origin is not established.
What makes it durable is that the method is almost insultingly simple. Magic effects usually fail over time because the audience learns the method. The linking rings survive because knowing there is a gap tells you almost nothing about how to hide it — the entire difficulty is in the handling, and that is a skill rather than a secret. It is one of the few classic effects that is regularly performed for magicians, who know exactly how it works and watch it anyway.
Set sizes carry different traditions. Large-scale routines historically used eight or more rings for chains and patterns; the twentieth century saw a shift towards small sets of three or four for close-up work, where the audience is close enough to demand handling and inspection. Fewer rings means more scrutiny, which means the tolerances in step 3 matter more, not less.
The engineering point worth taking away. This is a clearance fit chosen deliberately on the wrong side — an interference that must be overcome by elastic deformation of both parts. That is exactly the same reasoning as a press fit in a bearing housing or the snap fit on a plastic battery cover: you specify a dimension that does not quite fit, and let the material's springiness do the work. The difference is only that here the specification is set by what an audience can see rather than by a load.
Safe practice. Brazing and welding mean heat, sparks and fumes — eye protection, ventilation, and a clear bench. Steel rod under a bending force stores real energy and will spring if it slips; clamp it properly. Dress every edge: a ring that is thrown and caught in performance will find any burr you left, and it will find it on somebody's hand.
सामग्री
1- 3 मिटरप्लेसहोल्डर
आवश्यक उपकरणहरू
7- प्लेसहोल्डर
- प्लेसहोल्डर
- प्लेसहोल्डर
- 1 vendor sell this, none ship to you yetप्लेसहोल्डर
- प्लेसहोल्डर
- प्लेसहोल्डर
- प्लेसहोल्डर
जोडिएका खाकाका सामग्री

सम्बन्धित ब्लुप्रिन्ट
यी ब्लुप्रिन्टहरूले ज्ञान साझा गर्छन् — प्रविधि, सामग्री वा सिद्धान्त

CC0 सार्वजनिक डोमेन
यो ब्लुप्रिन्ट CC0 अन्तर्गत जारी गरिएको छ। तपाईं अनुमति नसोधी प्रतिलिपि, परिमार्जन, वितरण र प्रयोग गर्न सक्नुहुन्छ।
ब्लुप्रिन्ट मार्फत उत्पादनहरू किनेर सिर्जनाकर्तालाई सहयोग गर्नुहोस् सिर्जनाकर्ता कमिसन विक्रेताले तोकेको, वा यो ब्लुप्रिन्टको नयाँ संस्करण बनाउनुहोस् र आम्दानी बाँड्न आफ्नो ब्लुप्रिन्टमा जडानको रूपमा समावेश गर्नुहोस्।